成功要選人少的路走,套件要選人多的來用
雖然眾多的套件都能實現這個目標,但還是把套件做個簡單的區分:
原則上選擇使用人數眾多且持續更新的套件最安全,因為古老的套件通常文件不齊全且無人維護,如果某一天宣告廢棄你的專案就要大量改寫了
本專案採用
axios來實現這個需求,如果你有興趣你也能嘗試不同的套件來完成今天的功能
1.1 安裝 / GET / POST 基礎用法
1.2 請求配置說明
npm install axios
yarn add axios
const axios = require('axios'); // 引入套件
axios.get('url/users', { // 填入 api 網址
    params: { // 傳入 params 物件
        ID: 12345
    }
})
.then(function (response) {
    // 處理成功後要做的事
    console.log(response);
})
.catch(function (error) {
    // 發生意外地處理
    console.log(error);
})
axios.post('url/users', { // 要傳送的資料由後方物件帶入
    firstName: 'Fred',
    lastName: 'Flintstone'
})
.then(function (response) {
    console.log(response);
})
.catch(function (error) {
    console.log(error);
});
axios.(config 物件)
.then(function (response) {})
.catch(function (error) {});
config 物件:發出 Request 的配置選項,其中只有 url 為必填
{
    // url 為必填
    url: '/users',

    // method 是發出 Request 時使用的方法
    method: 'get', // 默認為 get

    // baseURL 如果填寫就會被添加到 url 前面,除非 url 為絕對路徑
    baseURL: 'https://some-domain.com/api/',

    // 你可以在這個地方定義自己的 headers
    // 通常會拿來設定 Authorization、Content-Type
    headers: {'Content-Type': 'application/json'},

    // params 通常跟著 GET method 一起使用
    // 這裡填寫的參數會帶入 url 後面,ex : .../user?ID=123
    params: {
        ID: 123
    },

    // data 只適用於 POST、PUT、PATCH 這幾個 method
    // 主要作為 Request 傳送的資料
    data: {
        firstName: 'Fred'
    },

    // Request 時間超過 1000毫秒(1秒)後會被中止
    timeout: 1000,

    // 選項: 'arraybuffer', 'document', 'json', 'text', 'stream'
    // 瀏覽器才有 'blob'
    responseType: 'json', // 默認為 json

     // 限制 http 回應時的內容大小
    maxContentLength: 2000,
}
這裡只列出常用的配置選項,如果你有興趣深入研究請參考官方文件
axios.get('/users/123')
.then(function(response) {
    console.log(response.data); // api 回傳的資料會在這裡
    console.log(response.status); // 這個是 HTTP狀態碼
    console.log(response.config); // 這個 Request 的 config
});
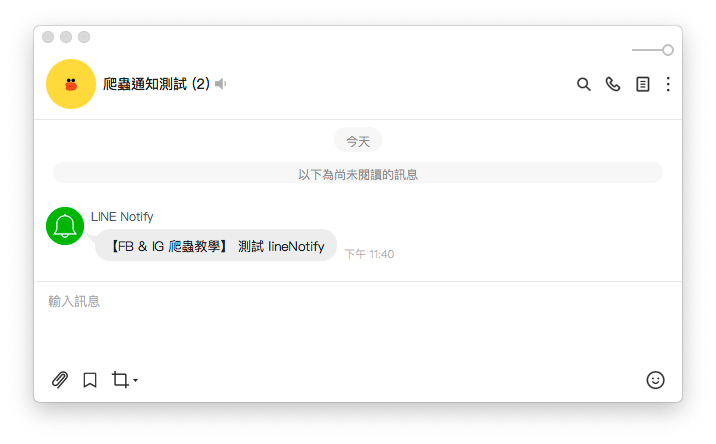
在對 axios 有基礎了解後我們就把昨日在 POSTMAN 設定 Request 的參數搬移到專案程式吧。在專案 tools 資料夾內新增 lineNotify.js,今天我們要用這隻程式發出 LINE 通知
yarn add form-data 安裝套件喔const axios = require('axios')
var FormData = require('form-data');
require('dotenv').config();
function lineNotify () {
const token = process.env.LINE_TOKEN;
// 使用 form-data 傳遞資料
const form_data = new FormData();
form_data.append("message", '測試 lineNotify');
// 設定 LINE Notify 的 權杖 & form-data
const headers = Object.assign({
'Authorization': `Bearer ${token}`
}, form_data.getHeaders());
axios({
method: 'post',
url: 'https://notify-api.line.me/api/notify',
data: form_data,
headers: headers
}).then(function (response) {
// HTTP狀態碼 200 代表成功
console.log("HTTP狀態碼:" + response.status);
// 觀察回傳的資料是否與 POSTMAN 測試一致
console.log(response.data);
}).catch(function (error) {
console.error("LINE通知發送失敗");
if (error.response) { // 顯示錯誤原因
console.error("HTTP狀態碼:" + error.response.status);
console.error(error.response.data);
} else {
console.error(error);
}
});
}
lineNotify()
node tools/lineNotify.js


我在 Medium 平台 也分享了許多技術文章
❝ 主題涵蓋「MIS & DEVOPS、資料庫、前端、後端、MICROSFT 365、GOOGLE 雲端應用、自我修煉」希望可以幫助遇到相同問題、想自我成長的人。❞
在許多人的幫助下,本系列文章已出版成書,並添加了新的篇章與細節補充:
- 加入更多實務經驗,用完整的開發流程讓讀者了解專案每個階段要注意的事項
- 將爬蟲的步驟與技巧做更詳細的說明,讓讀者可以輕鬆入門
- 調整專案架構
- 優化爬蟲程式,以更廣的視角來擷取網頁資訊
- 增加資料驗證、錯誤通知等功能,讓爬蟲執行遇到問題時可以第一時間通知使用者
- 排程部分改用 node-schedule & pm2 的組合,讓讀者可以輕鬆管理專案程序並獲得更精確的 log 資訊
有興趣的朋友可以到天瓏書局選購,感謝大家的支持。
購書連結:https://www.tenlong.com.tw/products/9789864348008
