今天帶大家整合目前開發的Line Chatbot與昨天建置的Custom Vision模型整合。
首先我們先處理使用者在官方帳號輸入照片的Image Webhook Event其資料格式如下:
{
  "destination": "xxxxxxxxxx",
  "events": [
    {
      "replyToken": "nHuyWiB7yP5Zw52FIkcQobQuGDXCTA",
      "type": "message",
      "mode": "active",
      "timestamp": 1462629479859,
      "source": {
        "type": "user",
        "userId": "U4af4980629..."
      },
      "message": {
        "id": "325708",
        "type": "image",
        "contentProvider": {
          "type": "line"
        }
      }
    }
  ]
}
可以看到Image Webhook Event的資料中並無任何關於照片的資料,是因為Webhook並不會真的把照片的資料拿來傳送,實際上照片是儲存在Line Platform,我們收到的Webhook Event只是告訴我們官方帳號收到照片的事件,那如果想要取得該照片該怎麼做呢?
Line有提供Get content by users API,可參考Line Messaging API-Get content sent by users
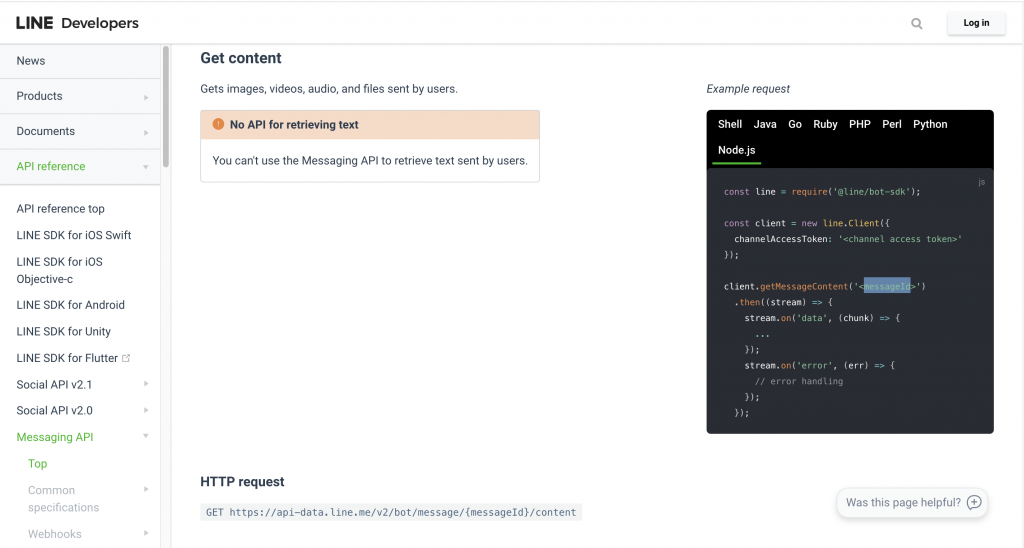
Get content API透過用戶輸入訊息的messageId取得該訊息的images, videos, audio,files等檔案資料,messageId可由上方Image Webhook Event資料中取得。
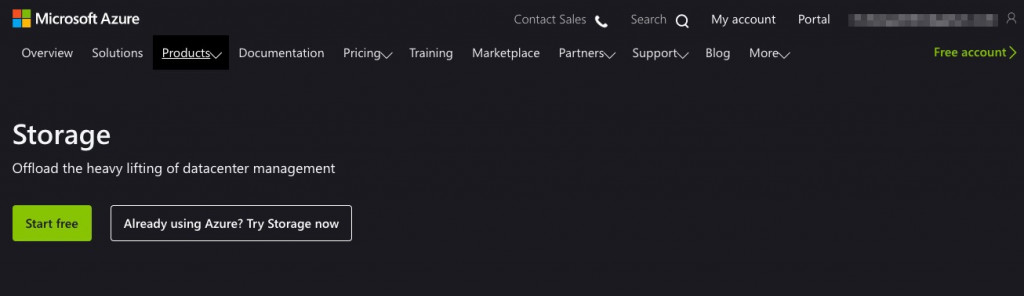
當應用需求會需要儲存用戶輸入的圖片,這時候可以使用Azure Storage,其Node.js SDK如何操作可參Microsoft Azure Storage SDK for Node.js
我們修改Dispatcher.ts程式,新增處理Image Webhook Event的邏輯
const messageDispatcher = async(message: EventMessage, replyToken: string, userId: string) => {
    switch (message.type) {
        case "text":
            const phrase = message.text
            await workflow.textUnderstanding(phrase, replyToken)
            break

        case "location":

            const GPS = {
                lat: message.latitude,
                lon: message.longitude
            }
            await workflow.findMaskStore(GPS, userId)
            break

        case "image":
            const messageId = message.id
            let imageBuffer = await workflow.getImageContent(messageId)
            console.log(imageBuffer)

            await workflow.predictionImage(imageBuffer, replyToken)
            break

        default:
            break
    }
}
再來在Workflow.ts中新增一支 getImageContent( ) function 取得用戶輸入的Image
export const getImageContent = async (messageId: string): Promise<any> => {
    let chunks = [] as Array<any>
    let imageBuffer: any

    const lineClient = new Client(LINE)

    await lineClient.getMessageContent(messageId).then(stream => {
        return new Promise((resolve, reject) => {
            stream.on('data', (chunk) => {
                chunks.push(chunk)
            });
            stream.on('end', () => {
                imageBuffer = Buffer.concat(chunks)
                resolve()
            });
            stream.on('error', () => {
                reject()
            });
        })
    }).catch(err => console.log(err))

    console.log(imageBuffer)
    return imageBuffer
}
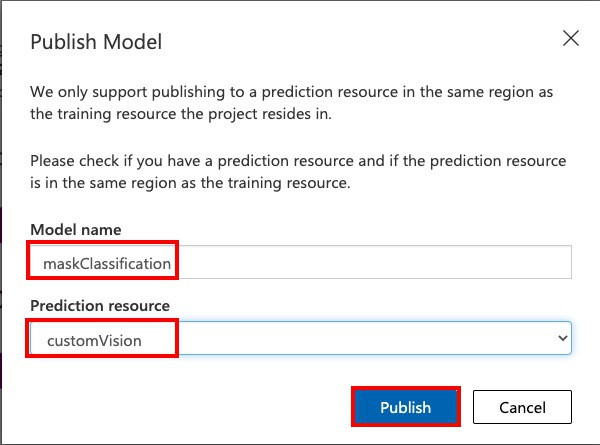
Day [28] Azure 認知服務-Custom Vision 建置我們已經訓練完成Model,若要將影像提交至預測 API端點以程式辨識影像,必須先發佈Iterations。選取 [Performance] 後點選[Publish]並指定發行的Model名稱。這會讓您的模型可供您自訂視覺 Azure 資源的預測 API 存取。
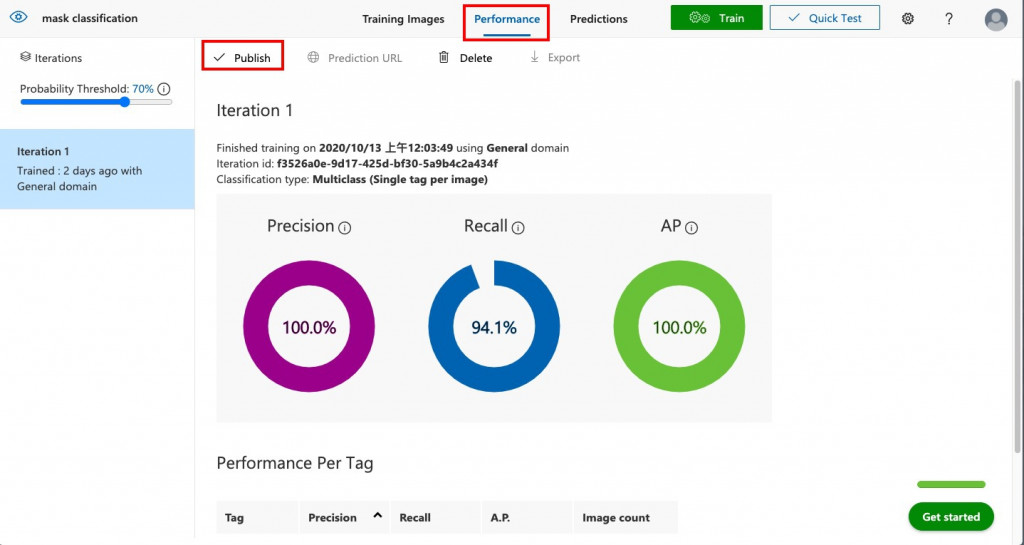
成功發佈Model之後,您會看到左側欄位中的Iterations旁出現「PUBLISHED」標籤。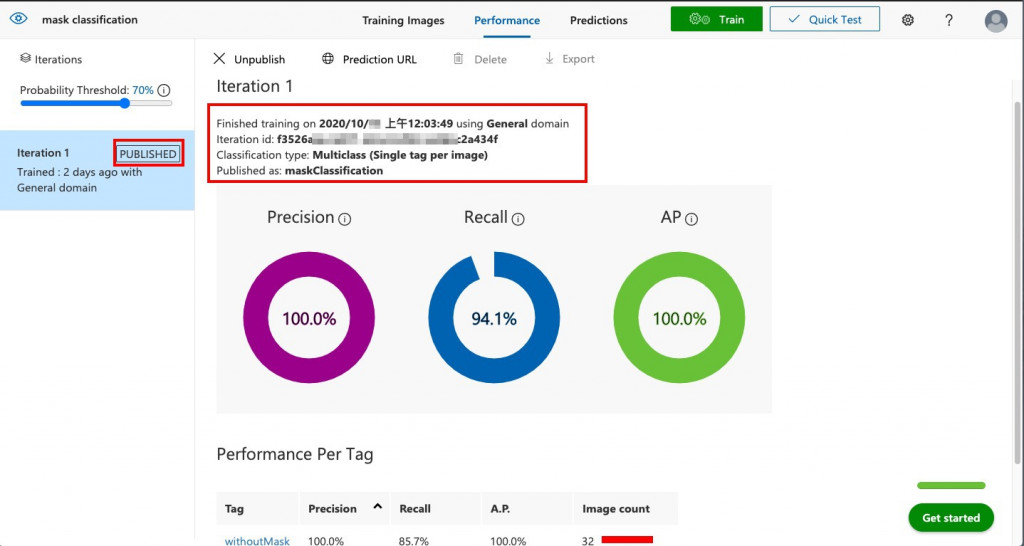
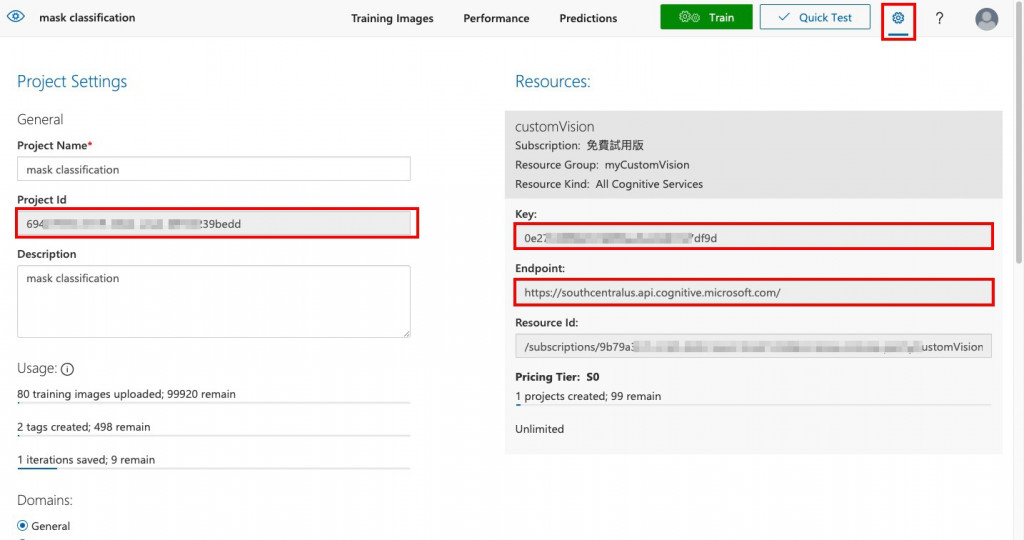
應用程式要使用Custon Vision SDK來辨識影像,我們需要Custon Vision專案的Project Id, Key, Endpoint 才能與服務互動。前往Custom Vision入口網站選取右上方的「齒輪圖示」。 在清單中可以取得金鑰等資訊如下圖:
在Day [15]時我們將Chatbot會使用到的重要設定參數交由config.ts程式管理,現在我們把LUIS的金鑰等重要資訊新增至config.ts:
export const CUSTOMVISION  = {
    projectId: "<REPLACE-WITH-YOUR-CUSTOMVISION-PROJECTID>",
    key: "<REPLACE-WITH-YOUR-PREDICTIONKEY>",
    endpoint: "<REPLACE-WITH-YOUR-CUSTOMVISION-ENDPOINT>"
}
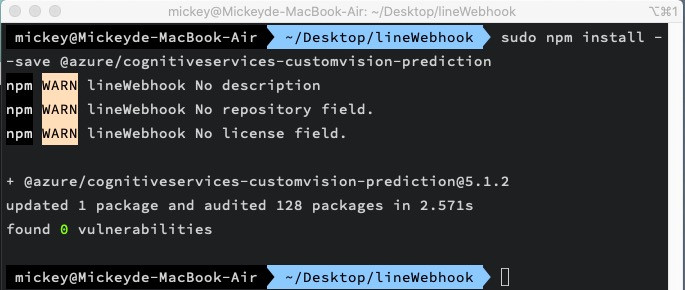
現在要我們使用Azure Custom Vision辨識圖片,首先需要在Azure Functions Webhook 專案中安裝Azure Custom Vision Node.js moudule,其library完整說明可參考官方文件@azure/cognitiveservices-customvision-prediction package在終端機輸入npm install --save @azure/cognitiveservices-customvision-prediction
$ npm install --save @azure/cognitiveservices-customvision-prediction
完成config.ts基本設置後,明天我們將繼續完成Workflow.ts中的predictionImage( ) Function,在Azure Functions中使用上面安裝的Nods.js @azure/cognitiveservices-customvision-prediction Module 辨識圖片以完成Chatbot的影像辨識服務!