昨天我們已經安裝好Azure Custom Vision Node.js moudule且設定Custom Vision 金鑰,預測節點等參數,現在我們來撰寫
在Azure Functions Webhook專案中新增CustomVision.ts程式如下:
import * as msRest from "@azure/ms-rest-js"
import * as PredictionApi from "@azure/cognitiveservices-customvision-prediction";
import { CUSTOMVISION } from "../config"

const predictor_credentials = new msRest.ApiKeyCredentials({ inHeader: { "Prediction-key": CUSTOMVISION.key } });
const predictor = new PredictionApi.PredictionAPIClient(predictor_credentials, CUSTOMVISION.endpoint);


export const classifyImageByCustomVision = async (imageBuffer: ArrayBuffer,): Promise<any> => {

    let tageName: String
    const projectId = CUSTOMVISION.projectId
    const publishedName = "maskClassification"
    const predictedResult = await predictor.classifyImage(projectId, publishedName, imageBuffer);


    console.log(predictedResult)
    console.log(`\t ${predictedResult.predictions[0].tagName}: ${(predictedResult.predictions[0].probability * 100.0).toFixed(2)}%`);

    tageName = predictedResult.predictions[0].tagName
    return tageName

}
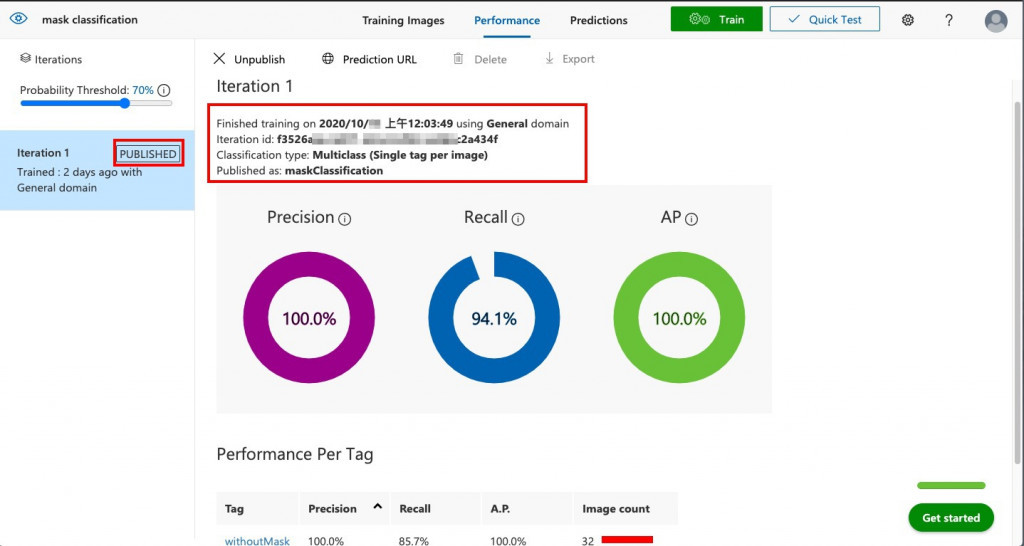
程式中的publishedName變數是我們昨天發佈的Custom Vision Model名稱:
由於我們使用 Line Get content API來取得用戶在官方帳號輸入的影像檔案,其返回的是該影像的BufferArray型態。
Custom Vison SKD分類圖片使用的是PredictionAPIClient類別的classifyImage方法,該方法的Input除了local file路徑, 影像存取uri...我們確認一下Method Details-classifyImage官方文件是否支援影像BufferArray型態如下圖:
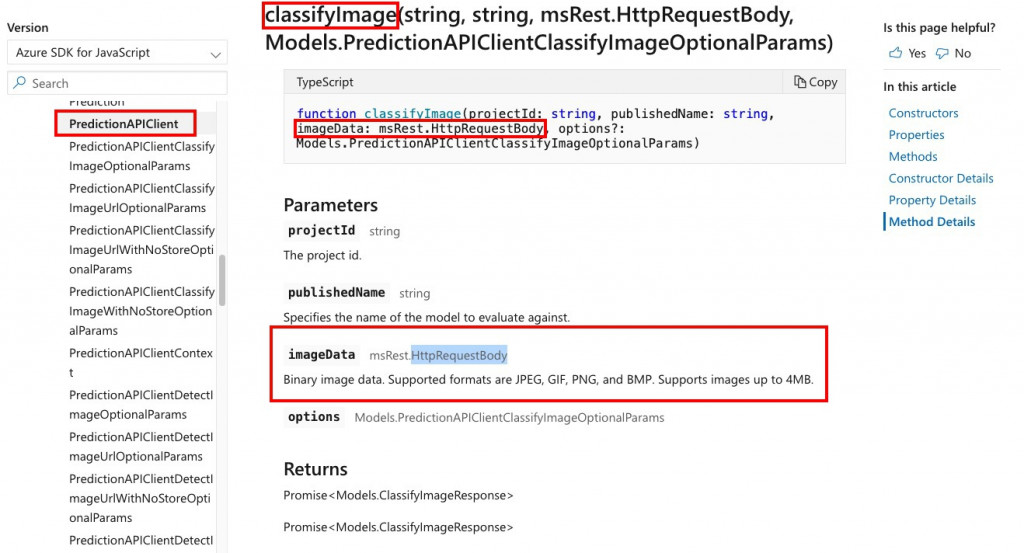
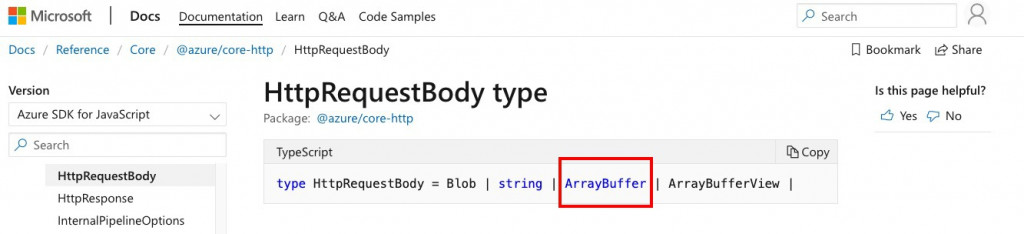
classifyImage方法的input是HTTPRequestBody支援BufferArray的型態!
測試結果classifyImage回傳的辨識結果資料格式範例如下:標籤將由高~低依序返回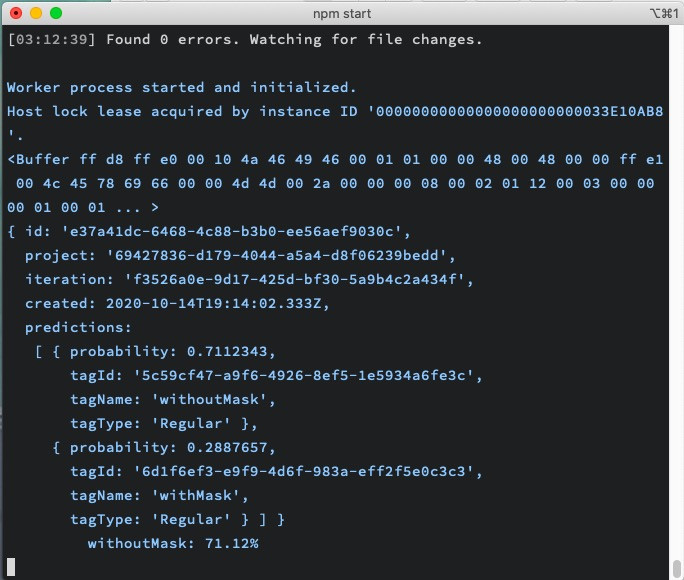
再來在Workflow.ts中新增一支 predictionImage() function 來辨識圖片,並將結果回傳給用戶
export const predictionImage = async (imageBuffer: ArrayBuffer, replyToken: string) => {

    let replyMessage: string
    const tageName = await customVision.classifyImageByCustomVision(imageBuffer)

    switch (tageName) {
        case "withMask":
            replyMessage = "影像中人物有戴口罩!"
            break;
        case "withoutMask":
            replyMessage = "影像中人物沒戴口罩!!"
            break;

        default:
            break;
    }

    lineService.replyMessage(replyMessage, replyToken)
}
程式修改完成後我們將Azure Functions專案重新部署即完成嘍!
測試Chatbot展示如下: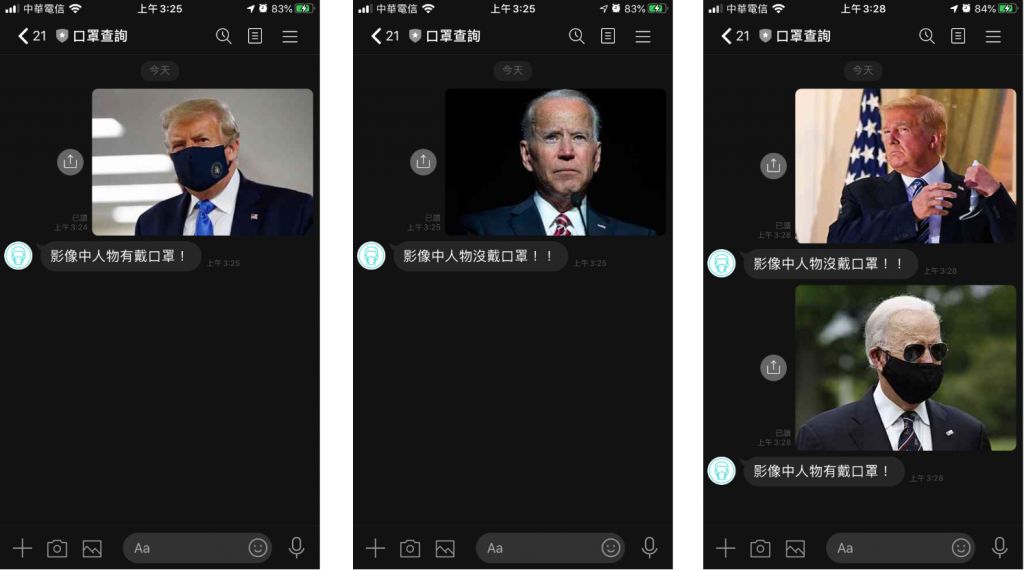
 12th鐵人賽到今天終於完賽了!!這30天記錄了一段每天利用空擋時間自學Azure,使用Azure雲服務打造聊天機器人的過程,回顧共使用了:
回到開賽第一天Day [1] 緣起-雲端運算提到善用雲端運算服務,加速開發應用程式!開發人員只需簡單地設定、租用便能使用Azure雲服務設計開發應用程式的解決方案,Azure提供的服務數以百計,希望自己在完賽後,也能持續自學使用Azure的雲端運算服務。最後感謝各位邦友收看!