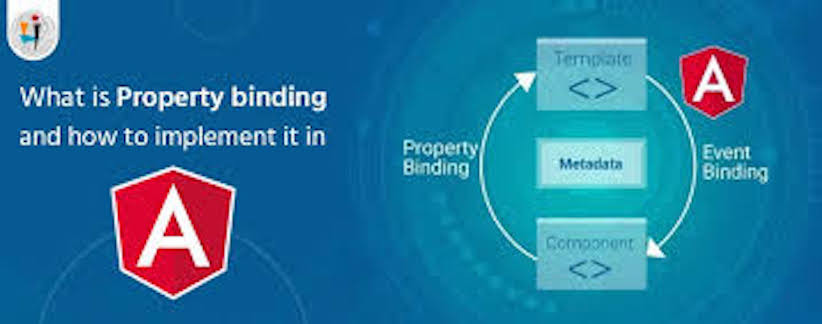
本篇中將介紹 Angular 的 property binding 與 event binding,property binding 可以讓你設置 HTML Tag 或 directive 的屬性值,可以利用 property binding 做到切換按鈕、以程式方式設置 url 路徑以及在各個 Component 之間共享數據等等。
而 Event binding 則是可以將事件綁定在 HTML 的元件上,隨時監聽使用者的操作,例如按下按鍵、滑鼠移動、點擊以及觸摸,就先從 property binding 開始介紹吧。

在 Angular 中的 property binding 會讓數據往一個方向流動,就是從 component 流向 HTML 的元件,而如果要將數據綁定到 HTML 元件請使用方括號( [ ] )將他括在其中,比如說可以將 <img>中的 src 屬性利用 property binding 綁定。
<img [src]="itemImageUrl">
在大多數形況下目標名稱就是屬性的名稱,所以以上面的例子來說,src 就是 <img> 元件的屬性名稱,而方括號會讓 Angular 將等號右邊評估為動態表達式,如果沒有括號 Angular 會將右側視為字串文字並將屬性設置為該靜態值。
以上面的例子來說,如果要將 <img> 的屬性綁定到 Component 的 property,請將 src 放在方括號中,後面加上等號與 component 的 property 名稱。
<img [src]="itemImageUrl">
這時就可以在 Component 中定義一個 property 並將他賦值,那麼這個值就會綁定到 HTML 的元件上
itemImageUrl: '../assets/phone.png'
在 <button> 這個 HTML 中有一個屬性可以控制是否可以點擊這個按鈕那就是 disabled,我們可以透過 property binding 將這個屬性綁定到 component 的 property,建立一個動態改變他狀態的功能,一樣來舉個例子吧:
在 app.component.ts 中新增一個 property 用來綁定 <button> 與一個 method 用來更改 property 的值
import { Component } from '@angular/core';

@Component({
  selector: 'app-root',
  templateUrl: './app.component.html',
})
export class AppComponent {
  isUnchanged = true;

  onButtonChange() {
    this.isUnchanged = !this.isUnchanged;
  }
}
在 app.component.html 中新增兩個 <button> 一個用來做 property binding 另一個用來改變 property 的內容
<!-- app.component.html -->

<div style="margin-bottom: 10px;">
  <button [disabled]="isUnchanged">Property binding</button>
</div>

<button (click)="onButtonChange()">Change Property value</button>

在畫面中可以看到,當我們點擊 Change Property value 時,他將 Component 中的 isUnchanged 內容更改,所以讓 Property binding 這個 <button> 可以動態被 disable 與 enable。
在前幾天介紹 @Input() 時常常在用到的 <app-child-component [item]="currentItem"></app-child-component> 其實就是 property binding,將父層 component 中的 property 綁定給子層,當父層 Component 的這個 property 發生改變時,因為綁定的關係所以會將這個改變也帶給子層,
這邊再稍微複習一下該怎麼使用 @Input() 吧![]()
先 parent.component.ts 中定義一個 property 並將他賦值
import { Component } from '@angular/core';

@Component({
  selector: 'app-parent-component',
  templateUrl: './parent.component.html'
})
export class ParentComponent {
  constructor() { }
  currentItem = 'Television';  // defind a property
}
在 parent.component.html 中使用 property binding 將父層的 currentItem property 綁定給子層
<app-child-component [item]="currentItem"></app-child-component>
在 child.component.ts 中使用 @Input( ) 裝飾器將 property 裝飾為是從父層傳下來的
import { Component, Input } from '@angular/core';

@Component({
  selector: 'app-child-component',
  templateUrl: './child.component.html'
})
export class ChildComponent {
  @Input() item = '';
  constructor() { }
}
在 child.component.html 中使用 Text interpolation 將他呈現在畫面上
<div>Today's item: {{ item }}</div>
當初在介紹 @Input() 時還有很多技巧沒有講到(property binding、test interpolation)現在在重複看一次之前的例子有沒有比較可以把前幾章的內容串起來了呢。
既然 property binding 這麼好用,那有沒有什麼問題或是缺點呢?來看看下面的例子
evilTitle = 'Template <script>alert("evil never sleeps")</script> Syntax';
當我在一個 component 中添加一個屬性,並將這個屬性裡面多加了 <script>,在這個裡面放了一些會危害到你專案的 javascript 程式,那麼會發生什麼事?
其實不會發生上面說的會危害到你專案的情況發生,因為 Angular 在 property binding 中有做一個限制,不允許帶有 <script> 標籤的 HTML 元件,也不允許帶有插值和屬性綁定,所以將上面那個 property 差值到你的 HTML file 中時,會有下面的 error message
"Template <script>alert("evil never sleeps")</script> Syntax" is the interpolated evil title.
這是 Angular 對 property binding 做的安全機制。
可能有人會問拉:property binding 與 text interpolation 都是將 component 中的 property 綁定在 HTML file 中,那們他們有什麼不一樣嗎?
其實這個問題非常好,他們兩個理論上可以達到相同的目的
<p>
	<img src="{{itemImageUrl}}"> is the <i>interpolated</i> image.
</p>
<p>
	<img [src]="itemImageUrl"> is the <i>property bound</i> image.
</p>
上面這兩個的結果會是一樣的,無論是透過 text interpolation 將 property 插進 <img> 的 src 屬性,還是利用 proprety binding 住 <img> 的 src 屬性都是可以將 component 的 property 放進我們想放的位置。
雖然兩個都可以達到目的,所以當在將數據值呈現為字串時可以使用兩種方法的其中一種,但為了可讀性更傾向於使用 text interpolation,但是當將元素屬性設置為非字串數值時,就必須使用屬性綁定,比如上面提到的 <button> 的 disabled 屬性。
介紹完 property binding 後,接著要來介紹 event binding,顧名思義他就是將 event 綁定到 HTML 的元件上用於監聽使用這的操作,event binding 的語法是將目標事件名稱放在等號左邊的括弧中和將引號的模板語句 放在右側,舉個例子吧,當畫面中的一個按鈕被點擊到時,要觸發 component 中的 onSave() method,這時就可以這樣寫
<button (click)="onSave()">Save</button>

如果你的 method 是帶有參數的,只要再等號右邊的 method 的括號中填入參數即可
<button (click)="onSave(data)">Save</button>
還記得在前幾天中介紹的 @Output() 嗎?來複習一下吧, @Output() 的用意是將子層的內容透過一個 event 往上傳遞給父層,一樣舉個子來回憶一下吧
在 child.component.ts 中加入一個 property 並將他使用 @Output() 裝飾成 EventEmitter 型態
import { Component, Output, EventEmitter } from '@angular/core';

@Component({
  selector: 'app-child-component',
  templateUrl: './child.component.html',
  styleUrls: ['./child.component.css']
})
export class ChildComponent {
  @Output() newItemEvent = new EventEmitter<boolean>();  // (2)
  constructor() { }

  parentValueChange(value: boolean) {
    this.newItemEvent.emit(value);
  }
}
在 child.component.html 中新增兩個 <button> 用來讓 user 點擊觸發 event
<!-- child.component.html  -->
<p>child component works!</p>

<div class="button">
    <button (click)="parentValueChange(true)">+</button>
    <button (click)="parentValueChange(false)">-</button>
</div>
在 parent.component.ts 中添加一個 method,用來處理當子層傳送的數據
import { Component } from '@angular/core';

@Component({
  selector: 'app-parent-component',
  templateUrl: './parent.component.html'
})
export class ParentComponent {
  constructor() { }
  counterValue = 0;

  addOrSub(event: boolean) {
    if (event) {
      this.counterValue++;
    } else {
      this.counterValue--;
    }
  }
}
在 parent.component.html 中使用 event binding 將子層傳送的事件與 parent.component.ts 的 method 綁定
<!-- parent.component.html -->
<p>parent component works!</p>
<div>parent component property counter: {{counterValue}}</div>

<hr>
<app-child-component (newItemEvent)="addOrSub($event)"></app-child-component>
在介紹完 event binding 後再回來看這個例子,有沒有更能夠了解如何使用 @Output() 與 evebt binding 了呢?
在使用 Event binding 時,Angular 會檢查 event target 的名稱是否與已知指令事件屬性匹配,比如說
<button (myClick)="clickMessage=$event" clickable>click with myClick</button>
你使用了一個自訂義的 (myClick) 作爲 event target 時,因為他不符合已知指令事件屬性,所以 Angular 會傳出 unknown directive 的錯誤訊息,所以在使用 event binding 時要記得使用正確的 event target 喔!
在本章中介紹了兩種 binding,property binding 是用於將 component 中的 property 綁定給 HTML 中的元件,常用在將父層的 property 綁定給子層、將比較複雜或是需要邏輯計算的 HTML 元件屬性放到 component 中計算後再放回等等。
而 event binding 是將 component 中的 method 綁定到 HTML 的元件上用於監聽使用者的操作,常用再處理使用者使用者操作畫面而處發的事件、將子層透過 EventEmitter 往父層傳遞數據時的綁定。
下一章將會介紹另外兩種 binding 方法,分別是 Attrubute, class, strle binding 與 Two-way binding, Attrubute, class, strle binding 顧名思義就是將 component 中的 property 綁定到 HTML 的 class 或 attrubute,而 Two-way binding 則是可以讓父子層之間只使用一個 binding 就可以同時監聽事件與更新值,不需要使用 property binding 和 event binding。
