接下來改用DM來試試看,首先一樣先透過tiup安裝DM。tiup install dm
產生拓墣的範本tiup dm template > topology.yaml
修改範本,原本為了維持高可用會設定master與worker各3個,這邊客家一點全部用一台搞定,將ip指向tiup這台機器。
# The topology template is used deploy a minimal DM cluster, which suitable
# for scenarios with only three machinescontains. The minimal cluster contains
# - 3 master nodes
# - 3 worker nodes
# You can change the hosts according your environment
---
global:
  user: "tidb"
  ssh_port: 22
  deploy_dir: "/home/tidb/dm/deploy"
  data_dir: "/home/tidb/dm/data"
  # arch: "amd64"

master_servers:
  - host: 127.0.0.1

worker_servers:
  - host: 127.0.0.1

monitoring_servers:
  - host: 127.0.0.1

grafana_servers:
  - host: 127.0.0.1

alertmanager_servers:
  - host: 127.0.0.1
接下來用修改玩的yaml作部署一個dm-test的clustertiup dm deploy dm-test v2.0.0 ./topology.yaml --user root [-p] [-i /home/root/.ssh/gcp_rsa]
接下來啟動,看到有Started cluster dm-test successfully就表示啟動完成。tiup dm start dm-test
輸入指令查看狀態tiup dm display dm-test
安裝完dm之後,接著來處理資料來源。透過dmctl來對dm下指令。
首先我們建立一個資料來源的source.yaml檔,可以從官網上面找到範本,將host,user,password改為之前新增的帳號,這邊的帳號權限必須包括SELECT,RELOAD,REPLICATION SLAVE, REPLICATION CLIENT,這部分與dumpling有點不同。
比較特殊的是dmctl可以對密碼作加密,所以在這邊我們先執行以下指令把密碼加密。
/root/.tiup/components/dmctl/v2.0.6/dmctl/dmctl -encrypt '我的密碼'
把加密好的密碼填入source.yaml。
source-id: "mysql-replica-01"

# 是否开启 GTID
enable-gtid: false


from:
  host: "10.102.1.4"
  port: 3306
  user: "tidb_rep"
  password: "vuLh68IV0YLz2p+zpV6uhkCPYYehuzdiRQ=="
  # security:                       # 上游数据库 TLS 相关配置
  # ssl-ca: "/path/to/ca.pem"
  # ssl-cert: "/path/to/cert.pem"
  # ssl-key: "/path/to/key.pem"

# purge:
#   interval: 3600
#   expires: 0
#   remain-space: 15

# checker:
#   check-enable: true
#   backoff-rollback: 5m0s
#   backoff-max: 5m0s       # backoff 的最大值,不能小于 1s
使用dmctl指令將資料來源載入tiup dmctl --master-addr='127.0.0.1:8261' operate-source create source.yaml
載入成功畫面如下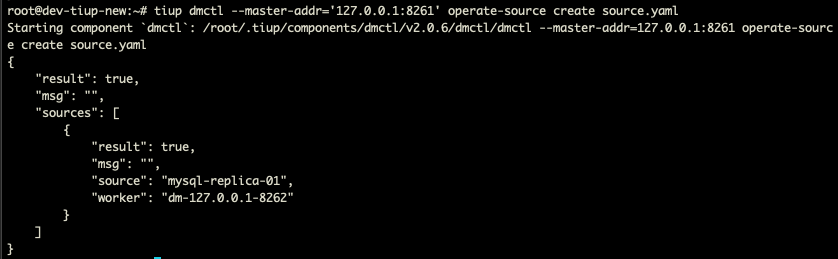
再看一次狀態此時dm-workerk的Status變成Bound


 iThome鐵人賽