今天來學最常用到也最實用的Button按鈕元件
我們經常需要點擊按鈕來做某個或多個事件
這時就需要設計按鈕的觸發事件
把點擊後希望做的動作,全部寫在按鈕觸發事件內
走起
按鈕的觸發事件也有分很多種
這邊就學比較常用到的2種事件
1.按一下事件
2.長按事件
這觸發事件就是某些動作會在點一下按鈕後執行
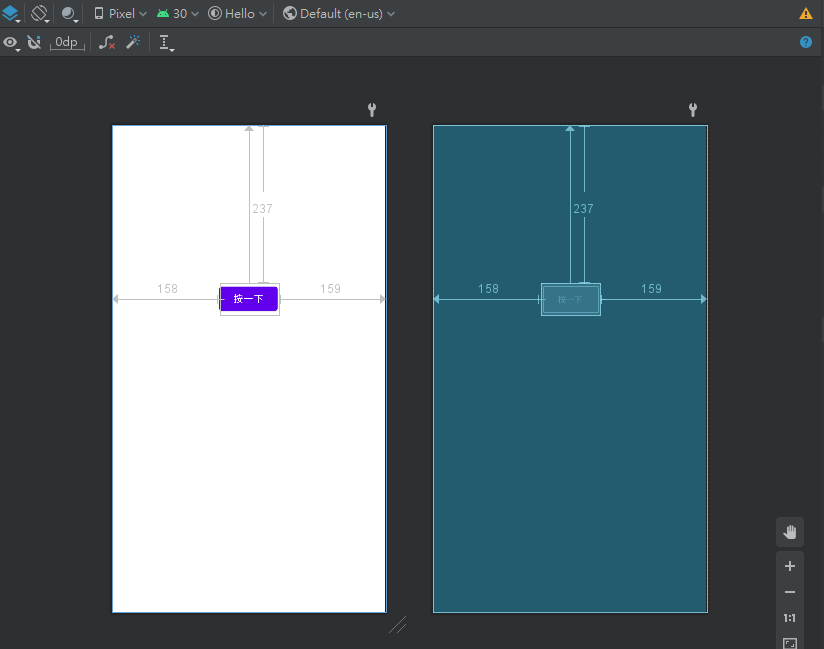
目標:點一下按鈕,在Logcat顯示"按一下"
<?xml version="1.0" encoding="utf-8"?>
<androidx.constraintlayout.widget.ConstraintLayout xmlns:android="http://schemas.android.com/apk/res/android"
    xmlns:app="http://schemas.android.com/apk/res-auto"
    xmlns:tools="http://schemas.android.com/tools"
    android:layout_width="match_parent"
    android:layout_height="match_parent"
    tools:context=".MainActivity">

    <Button
        android:id="@+id/button"
        android:layout_width="wrap_content"
        android:layout_height="wrap_content"
        android:layout_marginStart="158dp"
        android:layout_marginTop="237dp"
        android:layout_marginEnd="159dp"
        android:text="按一下"
        app:layout_constraintEnd_toEndOf="parent"
        app:layout_constraintStart_toStartOf="parent"
        app:layout_constraintTop_toTopOf="parent" />

</androidx.constraintlayout.widget.ConstraintLayout>
<?xml version="1.0" encoding="utf-8"?>
<androidx.constraintlayout.widget.ConstraintLayout xmlns:android="http://schemas.android.com/apk/res/android"
    xmlns:app="http://schemas.android.com/apk/res-auto"
    xmlns:tools="http://schemas.android.com/tools"
    android:layout_width="match_parent"
    android:layout_height="match_parent"
    tools:context=".MainActivity">

    <Button
        android:id="@+id/btn_1"
        android:layout_width="wrap_content"
        android:layout_height="wrap_content"
        android:layout_marginStart="158dp"
        android:layout_marginTop="237dp"
        android:layout_marginEnd="159dp"
        android:text="按一下"
        app:layout_constraintEnd_toEndOf="parent"
        app:layout_constraintStart_toStartOf="parent"
        app:layout_constraintTop_toTopOf="parent" />

</androidx.constraintlayout.widget.ConstraintLayout>
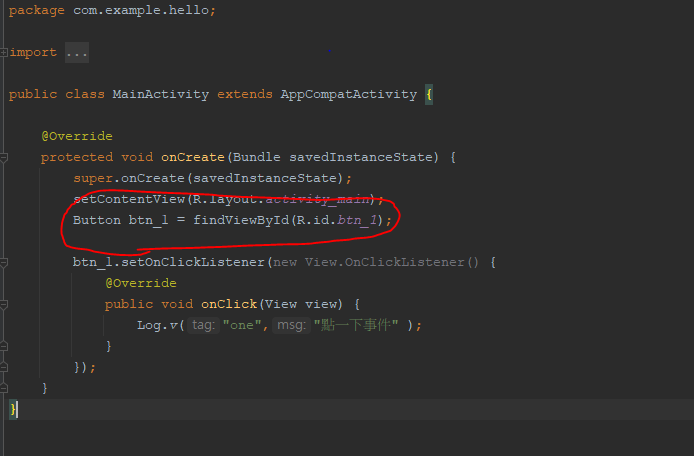
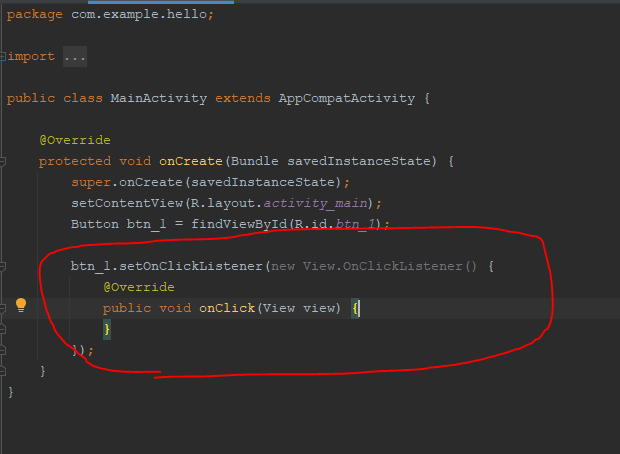
Log.v("one","點一下" );
one是Tag,等等只要在Logcat搜尋one,很快就看到了
執行結果:
點Button後,在Android Studio裡的Logcat搜尋one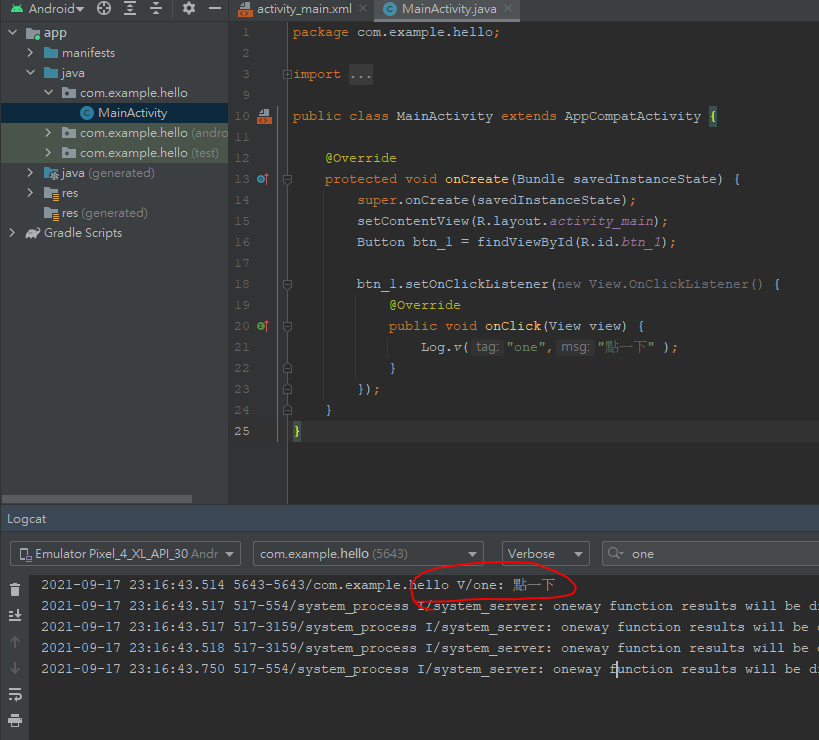
今天就到這裡拉
明天來學長按事件
各位掰掰!!!