我們都知道APP一般濤說不會只有一個頁面
通常都有按鈕可以跳到另一頁或是跳回原本那頁
Android的APP通常是由多個Activity組成
一個Activity其實可以代表一個畫面
今天就來新增一個Activity,也就是一個新的頁面
並且透過Intent來轉跳畫頁
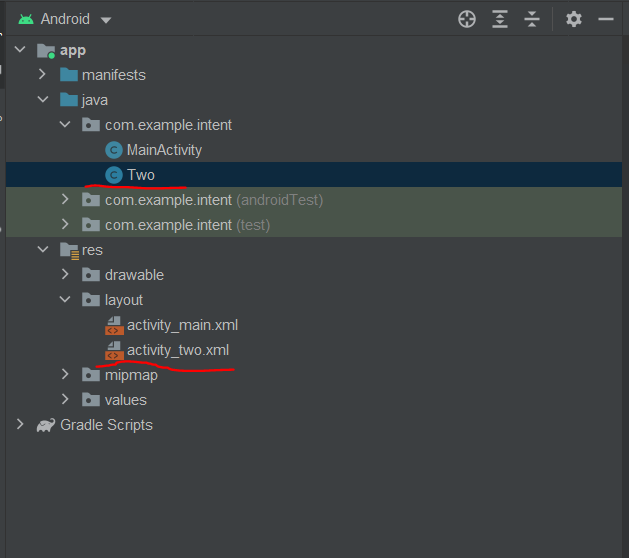
第一頁
xml檔:activity_main.xml
java檔:MainActivity.java
第二頁
xml檔:activity_two.xml
java檔:Two.java
先來新增第二個頁面八
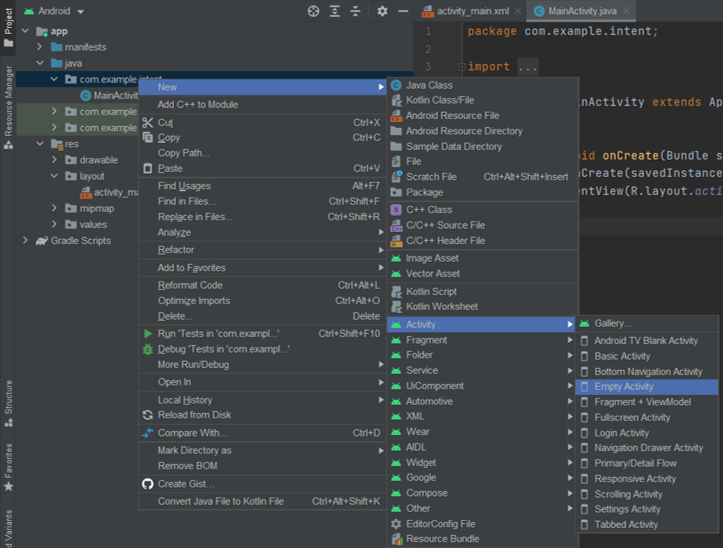

只需要拉一個按鈕來實現跳頁功能
<?xml version="1.0" encoding="utf-8"?>
<androidx.constraintlayout.widget.ConstraintLayout xmlns:android="http://schemas.android.com/apk/res/android"
xmlns:app="http://schemas.android.com/apk/res-auto"
xmlns:tools="http://schemas.android.com/tools"
android:layout_width="match_parent"
android:layout_height="match_parent"
tools:context=".MainActivity">
<Button
android:id="@+id/btn_totwo"
android:layout_width="wrap_content"
android:layout_height="wrap_content"
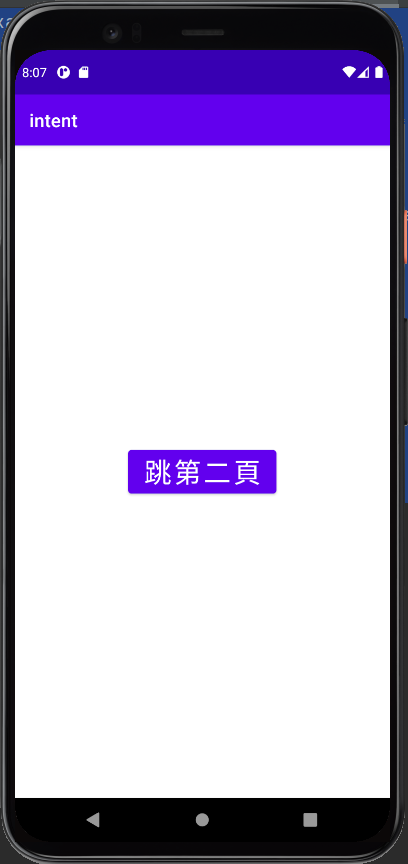
android:text="跳第二頁"
android:textSize="30dp"
app:layout_constraintBottom_toBottomOf="parent"
app:layout_constraintLeft_toLeftOf="parent"
app:layout_constraintRight_toRightOf="parent"
app:layout_constraintTop_toTopOf="parent" />
</androidx.constraintlayout.widget.ConstraintLayout>
新增Intent
Intent intent = new Intent(MainActivity.this,想要跳到的頁面)
Intent intent = new Intent(MainActivity.this,Two.class);
之後再啟動intent跳頁
startActivity(intent);
完整程式:
package com.example.intent;

import androidx.appcompat.app.AppCompatActivity;

import android.content.Intent;
import android.os.Bundle;
import android.view.View;
import android.widget.Button;

public class MainActivity extends AppCompatActivity {
    Button btn_totwo;
    @Override
    protected void onCreate(Bundle savedInstanceState) {
        super.onCreate(savedInstanceState);
        setContentView(R.layout.activity_main);
        btn_totwo = findViewById(R.id.btn_totwo);
        btn_totwo.setOnClickListener(new View.OnClickListener() {
            @Override
            public void onClick(View view) {
                Intent intent = new Intent(MainActivity.this,Two.class);
                startActivity(intent);
            }
        });
    }
}
一樣拉一個按鈕
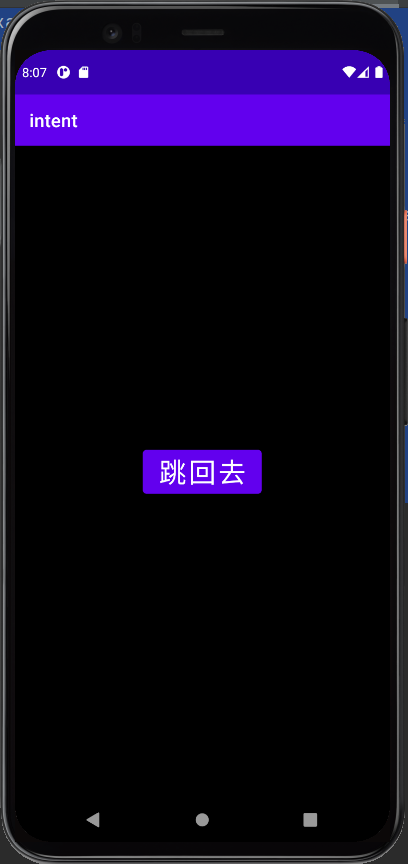
這是要跳回上一頁的按鈕
並且把頁面背景改為黑色
這樣比較好辨別
<?xml version="1.0" encoding="utf-8"?>
<androidx.constraintlayout.widget.ConstraintLayout xmlns:android="http://schemas.android.com/apk/res/android"
    xmlns:app="http://schemas.android.com/apk/res-auto"
    xmlns:tools="http://schemas.android.com/tools"
    android:layout_width="match_parent"
    android:layout_height="match_parent"
    tools:context=".Two"
    android:background="@color/black">
    <Button
        android:id="@+id/btn_back"
        android:layout_width="wrap_content"
        android:layout_height="wrap_content"
        android:text="跳回去"
        android:textSize="30dp"
        app:layout_constraintBottom_toBottomOf="parent"
        app:layout_constraintLeft_toLeftOf="parent"
        app:layout_constraintRight_toRightOf="parent"
        app:layout_constraintTop_toTopOf="parent" />
</androidx.constraintlayout.widget.ConstraintLayout>
只需要在點擊事件內加上finish()即可
finish():結束此頁面,跳回上一個頁面
完整程式:
package com.example.intent;

import androidx.appcompat.app.AppCompatActivity;

import android.os.Bundle;
import android.view.View;
import android.widget.Button;

public class Two extends AppCompatActivity {
    Button btn_back;
    @Override
    protected void onCreate(Bundle savedInstanceState) {
        super.onCreate(savedInstanceState);
        setContentView(R.layout.activity_two);
        btn_back = findViewById(R.id.btn_back);
        btn_back.setOnClickListener(new View.OnClickListener() {
            @Override
            public void onClick(View view) {
                finish();
            }
        });
    }
}
執行結果:


 iThome鐵人賽