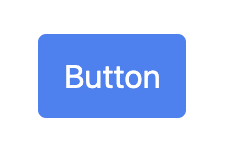
昨天威爾豬示範了按鈕的製作,很多小伙伴應該看完就崩潰了,樣式設計很彈性沒錯,但寫一個小小的按鈕 + 狀態變化要寫這麼多的 Utility Class,還讓不讓人活。所以今天威爾豬來講講,怎麼製做自己的 Components。
我們拿昨天建立的按鈕來當範例,一般情況下我們的 Tailwind 會長這樣,由很多 Utility 組成:
<button type="button" class="px-3 py-2 bg-blue-500 rounded text-white border border-blue-500 transition hover:bg-blue-600 focus:outline-none focus:bg-blue-600 focus:ring-4 focus:ring-blue-500 focus:ring-opacity-50 active:bg-blue-700">Button</button>
但像按鈕這樣的模組在很多頁面都必須重覆使用,這時我們就必須考慮做成組件,對於按鈕之類的小型組件,可以使用 Tailwind 的 @apply 指令,就可輕鬆地將通用功能模組建立到 CSS Components 中。
我們到一開始引入 Tailwind 的 style.css 裡 (檔名可能不一樣),因為我們要製作組件,所以使用 @layer components 包在最外面,然後自訂一個按鈕的 Class 名稱,威爾豬這邊就用 btn 就好。
/* style.css */

@tailwind base;
@tailwind components;
@tailwind utilities;

@layer components {
  .btn {
    @apply px-3 py-2 bg-blue-500 rounded text-white border border-blue-500 transition hover:bg-blue-600 focus:outline-none focus:bg-blue-600 focus:ring-4 focus:ring-blue-500 focus:ring-opacity-50 active:bg-blue-700;
  }
}
然後回到 HTML,只需要帶入 .btn 就好了,是不是清爽了許多:
/* index.html */

<button type="button" class="btn">Button</button>

使用 @layer 指令告訴 Tailwind 一組自定義樣式應該屬於哪個 "bucket"。可用的有
base、components和utilities。Tailwind 會將這些樣式自動移到與 @tailwind components 相同的位置,所以不必擔心在源文件中正確放置順序。
不過上面這樣的寫法還不太好,畢竟按鈕顏色這麼多,這樣根本就不能共用,所以我們還需要進行更細緻的拆分,我們可以拆出顏色、大小等,視你的專案而決定。
/* style.css */

@layer components {
  .btn {
    @apply px-3 py-2 rounded border transition focus:outline-none focus:ring-4;
  }

  .btn-sm {
    @apply px-2 py-1 text-sm rounded-sm;
  }

  .btn-lg {
    @apply px-5 py-3 text-xl rounded-md;
  }

  .btn-blue {
    @apply text-white bg-blue-500 border-blue-500 hover:bg-blue-600 focus:bg-blue-600 focus:ring-blue-500 focus:ring-opacity-50 active:bg-blue-700;
  }
}
/* index.html */

<button type="button" class="btn btn-sm btn-blue">Button</button>
<button type="button" class="btn btn-blue">Button</button>
<button type="button" class="btn btn-lg btn-blue">Button</button>

噹噹~這樣是不是清爽很多,想要更多顏色的按鈕,就可以依照上面的邏輯修改顏色即可。不過威爾豬要再次提醒,這是在必須要模組化的元件才這樣使用,不要都變成內聯樣式了,除了失去方便修改的特性,還會讓檔案變肥,增加 CSS 的負擔。
威爾豬這邊額外補充,因為 Tailwind 已將預設樣式清除,所以有時我們在使用 h1、h2 ... 之類的標籤,必須都要設定文字大小,但難免會忘記到底設定是多少 Size,要再回去翻設計文件也是挺麻煩,我們可以使用 @apply 來設定,因為 h1、h2 是屬於 HTML 基本標籤,在最外層使用 @layer base 來包住,這樣 Tailwind 就會自動編譯到 Base 底下,範例如下:
/* style.css */

@layer base {
  h1 {
    @apply text-4xl font-bold;
  }

  h2 {
    @apply text-3xl font-bold;
  }

  h3 {
    @apply text-2xl font-bold;
  }

  h4 {
    @apply text-xl font-semibold;
  }

  h5 {
    @apply text-lg font-semibold;
  }

  h6 {
    @apply text-base font-medium;
  }
}
當然我們也可以使用 Plugin 來註冊新樣式,讓 Tailwind 使用 tailwind.config.js 來代替在 CSS 設定的樣式表。範例如下:
// tailwind.config.js

const plugin = require('tailwindcss/plugin')

module.exports = {
  ...
  plugins: [
    plugin(function({ addBase, config }) {
      addBase({
        'h1': {
            fontSize: config('theme.fontSize.4xl'),
            fontWeight: config('theme.fontWeight.bold')
        },
        'h2': {
            fontSize: config('theme.fontSize.3xl'),
            fontWeight: config('theme.fontWeight.bold')
        },
        'h3': {
            fontSize: config('theme.fontSize.2xl'),
            fontWeight: config('theme.fontWeight.bold')
        },
        'h4': {
            fontSize: config('theme.fontSize.xl'),
            fontWeight: config('theme.fontWeight.semibold')
        },
        'h5': {
            fontSize: config('theme.fontSize.lg'),
            fontWeight: config('theme.fontWeight.semibold')
        },
        'h6': {
            fontSize: config('theme.fontSize.base'),
            fontWeight: config('theme.fontWeight.medium')
        }
      })
    })
  ]
}
Plugins 有許多的 Functions 可以使用,例如今天講到的 addComponents()、addBase() 等,如果有興趣的同學們可以到官方文件看看。雖然威爾豬還是覺得在 CSS 使用 @apply 方便些,但可能會讓 CSS 變肥,就看各位夥伴們怎麼抉擇了。以上就是今天的內容,咱們明天見。
