在 Vue 中,使用了基於HMTL的模板,這種模板與允許開發者聲明式地將 DOM 綁定至底層 Vue 實例的數據。所有 Vue.js 的模板都是合法的 HTML,所以能被遵循規範的瀏覽器和 HTML 解析器解析。
在底層的實現上,Vue 會將模板編譯成渲染函數,而渲染函數則會因響應系統的觸發而重新渲染頁面。
而要如何在 Vue 上進行數據綁定呢? 在Vue中需使用 {{ }}(雙大括號)的形式告訴 Vue 你要將文本與誰進行綁定。
可以透過以下Grant預先鍵好的sandbox看看效果:
https://codesandbox.io/s/muddy-dust-hj5oy?file=/src/App.vue
<template>
  <div id="app">
    <span>Message: {{ msg }}</span>
  </div>
</template>

<script>
export default {
  name: "App",
  data() {
    return {
      msg: "Hi, this is Grant.",
    };
  },
};
</script>
結果顯示如下:
若使用 Vue 框架開發時,要綁定 HTML 元素上的屬性(attribute)時,就要搭配 v-bind 來使用。
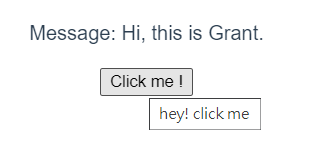
以 HTML 元素的 title 屬性作為範例,title 屬性的效果,就是當游標停留在 HTML 元素時,會跳出提示。
如下面的程式碼所示,我們將變數hint綁定在button之上,當經過渲染後,變數就會被綁定至button的title上。
<template>
  <div id="app">
    <span>Message: {{ msg }}</span
    ><br /><br />
    <button v-bind:title="hint">Click me !</button>
  </div>
</template>

<script>
export default {
  name: "App",
  data() {
    return {
      msg: "Hi, this is Grant.",
      hint: "hey! click me",
    };
  },
};
</script
<template>
  <div id="app">
    <span>Message: {{ msg }}</span
    ><br /><br />
    <button :class="title" :title="hint">Click me !</button>
  </div>
</template>

<script>
export default {
  name: "App",
  data() {
    return {
      msg: "Hi, this is Grant.",
      hint: "hey! click me",
      title: "title",
    };
  },
};
</script>

<style>
#app {
  font-family: "Avenir", Helvetica, Arial, sans-serif;
  -webkit-font-smoothing: antialiased;
  -moz-osx-font-smoothing: grayscale;
  text-align: center;
  color: #2c3e50;
  margin-top: 60px;
}

.title {
  color: #c995F2;
}
</style>
v-model 是綁定在表單元件或自訂元件上,為實現雙向綁定用的。表單元件像是"input"、"select"和"textarea"等等。
<template>
  <div id="app">
    <input type="text" v-model="message" /><br><br>
    <span>{{ message }}</span>
  </div>
</template>

<script>
export default {
  name: "App",
  data() {
    return {
      message: "Hello World!"
    };
  },
};
讓我們來看一下效果~
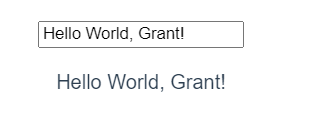
上述程式碼中我們建立一個input box,以及一個span的tag,在input box上我們將之與message進行綁定,並在span上顯示message變數的內容。
現在就來看一下雙向綁定的效果~
當修改textbox中的文字內容,span中的內容也隨之更新,是不是很神奇呢!
以上就是Vue的資料綁定與模板語法,明天見囉~
Hi, I am Grant.
個人部落格 - https://grantliblog.wordpress.com/
個人網站 - https://grantli-website.netlify.app/#/mainpage
我的寫作專題 - https://vocus.cc/user/5af2e9b5fd89780001822db4#


 iThome鐵人賽