如同先前的 Joseph/darknet 一樣, AlexeyAB/darknet 版本也提供了 Python 的介面,可以讓 Python 的開發人員直接調用,好方便結合原有的 Python 代碼,比較不同的是,他並沒有特別放在 python 這個目錄,而是直接放在根目錄裡,在 Day 20 - 重新檢視 mAP, F1, IoU, Precision-Recall 精準度 這篇文章有詳細介紹 AlexeyAB/darknet 的檔案結構,下圖是安裝 AlexeyAB/darknet 版本的 YOLO 的檔案結構圖,,這邊就只針對需要用到的部份加以說明:
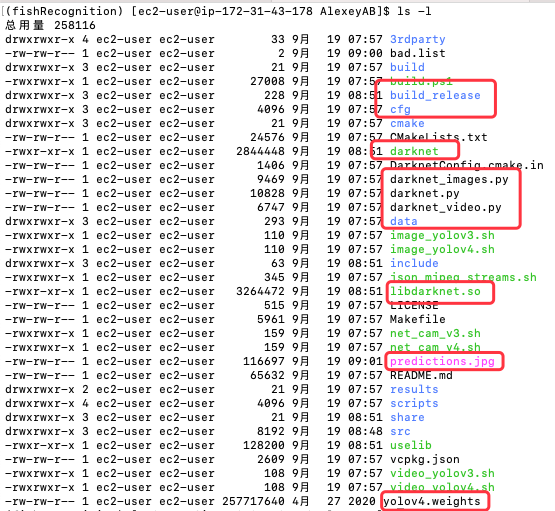
圖 1、AlexeyAB/darknet 版本的 YOLO 的檔案結構圖
Day 15 - 說明 YOLO 相關設定 這篇文章中,利用 Joseph/darknet 版本的辨識模型建立一個自建數據集的練習,現在將 AlexeyAV/darknet 相關檔案 (darknet, darknet.py, libdarknet.so) 複製到這個文件夾中
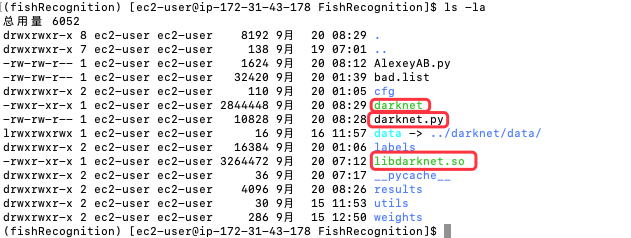
圖 2、自建數據集的影像辨識文件夾,引入 AlexeyAB/darknet
接著建立一個檔案,匯入 darknet.py,接著指定相關組態就可以了,yolov3.cfg,obj.data 這兩個檔案在 Day 15 - 說明 YOLO 相關設定 這篇文章有詳細說明,yolov3.backup 則是在 Day 16 - 進行影像辨識訓練 這篇文章訓練生成的。
AlexeyABYolo.py
import cv2
import darknet
import time

def image_detection(image_path, network, class_names, class_colors, thresh):
    width = darknet.network_width(network)
    height = darknet.network_height(network)
    darknet_image = darknet.make_image(width, height, 3)

    image = cv2.imread(image_path)
    image_rgb = cv2.cvtColor(image, cv2.COLOR_BGR2RGB)
    image_resized = cv2.resize(image_rgb, (width, height),
                               interpolation=cv2.INTER_LINEAR)

    darknet.copy_image_from_bytes(darknet_image, image_resized.tobytes())
    detections = darknet.detect_image(network, class_names, darknet_image, thresh=thresh)
    darknet.free_image(darknet_image)
    image = darknet.draw_boxes(detections, image_resized, class_colors)
    return cv2.cvtColor(image, cv2.COLOR_BGR2RGB), detections

# 指定網路結構配置檔 yolov3.cfg,自建數據集設定檔 obj.data,事先訓練好的權重檔 yolov3.backup
network, class_names, class_colors = darknet.load_network(
    "./cfg/yolov3.cfg",
    "./cfg/obj.data",
    "./weights/yolov3.backup",
    1
)

prev_time = time.time() # 用來計算辨識一張圖片的時間
print('predicting...', prev_time)
# 進行影像辨識,回傳畫出方塊框的圖片以及辨識結果,辨識結果包含標籤、置信度以及方塊框的座標
image, detections = image_detection(
        './labels/00-frame-608x608-0030.jpg', network, class_names, class_colors, 0.25
        )
# 印出標籤、置信度以及方塊框的座標
darknet.print_detections(detections, '--ext_output')
# 顯示辨識時間
print((time.time() - prev_time))
# 將結果圖片寫成檔案 result.jpg
cv2.imwrite('result.jpg', image)
運行之前需先安裝 OpenCV,因為這個程式會用到,畫面如下所示,辨識出三個物件,後面有有列出左上角座標以及長寬,時間約 0.566 秒。
pip3 install opencv-python
python3 AlexeyAB.py
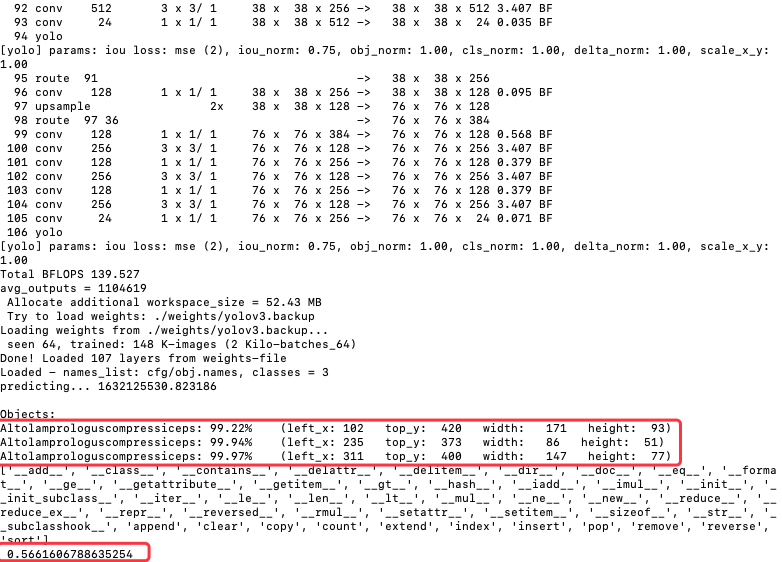
圖 3、AlexeyAB.py 執行的文字輸出畫面
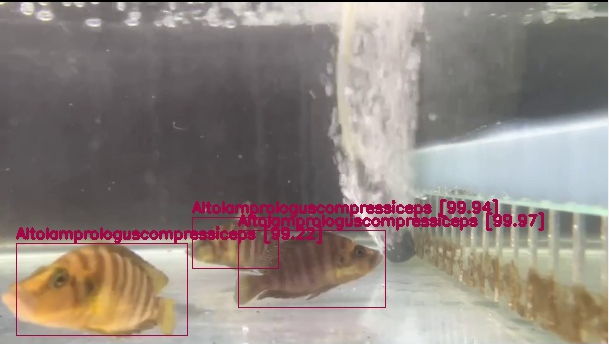
圖 4、AlexeyAB.py 執行的圖形輸出畫面
拿原來用命令方式來比較,底下是命令列的執行語法。
./darknet detector test cfg/obj.data cfg/yolov3.cfg weights/yolov3.backup ./labels/00-frame-608x608-0030.jpg -ext_output

圖 5、AlexeyAB版本的指令執行的文字輸出畫面
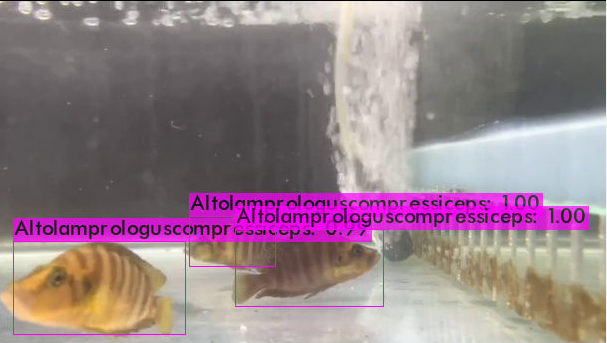
圖 6、AlexeyAB版本的指令執行的圖形輸出畫面
發現邊是的物件內容是一樣,但置信度的部份,使用 Python 的部份沒有在小數點後三位四捨五入,所以結果是 99.22%, 99.94%, 99.97%,而指令部分則是 99%, 100%, 100%;辨識時間上也差不多,指令執行約 0.558 秒,而Python部分則是 0.566 秒;最奇怪的是 bbox 的資料不一樣,下表列出使用 Python 與使用 command的方塊框座標比較表,直接觀看結果圖片,方塊框是一樣的,可以發現 Python 取的是中心點的座標,而 Command 取的是左上角座標。
表 1. 使用 Python 與使用 Command 的方塊框座標比較表
| left_x | top_y | width | height | |
|---|---|---|---|---|
| Python | 102 | 420 | 171 | 93 |
| Command | 16 | 374 | 171 | 93 |
以下為使用 Python 與 Command 的輸出座標內容。
# using Pyhon
Altolamprologuscompressiceps: 99.22%    (left_x: 102   top_y:  420   width:   171   height:  93)
Altolamprologuscompressiceps: 99.94%    (left_x: 235   top_y:  373   width:   86   height:  51)
Altolamprologuscompressiceps: 99.97%    (left_x: 311   top_y:  400   width:   147   height:  77)

# using Command
Altolamprologuscompressiceps: 99%	(left_x:   16   top_y:  374   width:  171   height:   93)
Altolamprologuscompressiceps: 100%	(left_x:  192   top_y:  348   width:   86   height:   51)
Altolamprologuscompressiceps: 100%	(left_x:  238   top_y:  361   width:  147   height:   77)
使用下列程式根據 Command 所提供的座標畫出第一個物件的方塊框,圖型如下所示。
DrawCoord.py
import cv2

inputImgPath = '../labels/00-frame-608x608-0030.jpg'
outputImgPath = '../image/00-frame-608x608-0030-1.jpg'
img_w= img_h = 608
cv2image = cv2.imread(inputImgPath)

# Altolamprologuscompressiceps: 99%	(left_x:   16   top_y:  374   width:  171   height:   93)
min_x, min_y, max_x, max_y = 16,374,16+171,374+93
cv2.rectangle(cv2image, (int(min_x),int(min_y)), (int(max_x),int(max_y)), (0,255,255), 2)
cv2.imwrite(r'{}'.format(outputImgPath), cv2image)
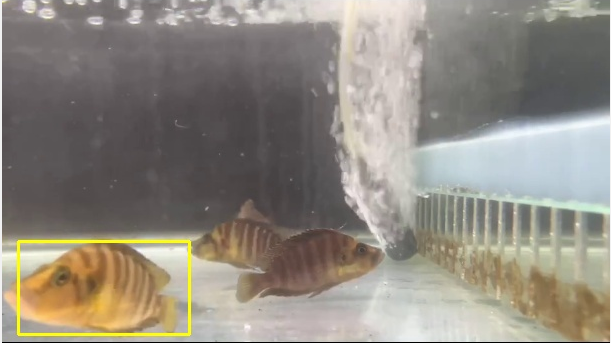
圖 7、檢驗 Python 與 Command 的輸出座標

您好:
想請問一下我想要辨識的是影片不是圖片,偵測的方法是需要自己完成還是有什麼資料可以參考呢?感謝您的回答
你可以直接參考這個網址,YOLO本身就擅長於影片即時辨識。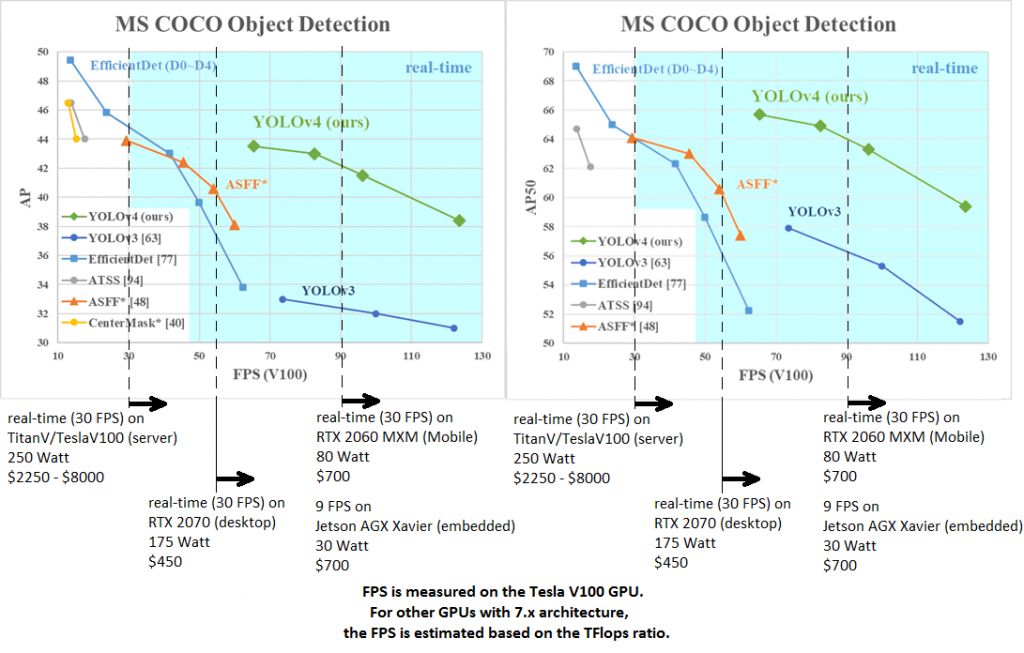
這是實驗數據,在效能表現跟精準度都有很好的數字。
Yolo v4, v3 and v2 for Windows and Linux, https://github.com/AlexeyAB/darknet