今日會以昨日同份專案繼續。
再次提醒,API Only,沒有view。
總不可能讓所有人都可以隨意更改別人內容,或隨意使用網站功能,所以如一般網頁一樣,還是要建立一個完整的會員機制。雖然我們可以設定所有資料只有read-only,但在開發途中也可能其他夥伴需要更改內容,或者未來讓只有部分串接者能使用,驗證的功能是一定需要的。
透過API與伺服器溝通,是無法以session cookie來記憶用戶登出登入,通常會在請求的Header或Body內夾帶access token來處理。最簡單的想,就像我們串接API一樣,需要有API KEY。
我們用最簡單的作法,讓用戶在註冊後就可以得到一組token也就是API KEY,另外多加一個小功能,讓用戶登出後,會發一組新的KEY,提高KEY的安全性。API KEY理所當然需要具有絕對獨特性,因為要建立會員系統所以順便使用Devise,而如果是要生成更好的API KEY,可以再找專門的gem處理。
這邊便只簡單說明流程,神器等級的gem,請多閱讀其首頁,解鎖更多使用姿勢。
Devise安裝
#Gemfile
gem 'devise', '~> 4.8'
$ rails g devise:install
$ rails g devise user
$ rails db:migrate
API token。我們用常見的方式取名吧。
$ rails g migration add_column_token_to_user

#migrate
class AddColumnTokenToUser < ActiveRecord::Migration[6.1]
  def change
    add_column :users, :authentication_token, :string
    # 加索引與要求unique
    add_index :users, :authentication_token, :unique => true

    #如果DB已經有其他user在,請多做這一步。
    # User.find_each do |user|
    #   user.generate_authentication_token
    #   user.save!
    # end
  end
end

$ rails db:migrate

#User Model
class User < ApplicationRecord
  #略...

  before_create :generate_authentication_token

  def generate_authentication_token
    self.authentication_token = Devise.friendly_token
  end
end
authentication_token其實命名好記就好。api_token、auth_token都可以。
比命名更重要的是User Model裡的設定那個方法,這樣才可以確保用戶取得API KEY,Devise.friendly_token很明顯是Devise給的方法,也可客製化長度.friendly_token(length = 20) ⇒ Object。
註冊,登入,登出。app/controllers/application_controller.rb。
class ApplicationController < ActionController::API
  before_action :authenticate_user_from_token!

  def authenticate_user_from_token!
    if params[:auth_token].present?
      user = User.find_by_authentication_token( params[:auth_token] )
      sign_in(user, store: false) if user
    end
  end
end
由於一開始用API-Only建立專案,所以原生application_controller內是ActionController::API,非API-Only需手動建立。
與一般專案設定Devise很像,有設定這個才有current_user方法。store: false是因為不是一般網頁式登入,不需要去記憶於session。
設定路徑routes.rb。
Rails.application.routes.draw do
  devise_for :users
  namespace :api do
    namespace :v1 do
      resources :articles
      post "/signup", to: "auth#signup"
      post "/login", to: "auth#login"
      post "/logout", to: "auth#logout"
    end
  end
end
建立auth_controller。
$ rails g controller api/v1/auth

class Api::V1::AuthController < ApplicationController
  before_action :authenticate_user!, only: [:logout]
  def signup
    user = User.new( email: params[:email], password: params[:password] )

    if user.save
      render json: { user_id: user.id, email: user.email}, status: 200
    else
      render json: { message: "Signup Failed", errors: user.errors }, status: 400
    end
  end

  def login
    if params[:email] && params[:password]
      user = User.find_by_email( params[:email] )
    end

    if user && user.valid_password?( params[:password] )
      render json: { message: "Login!",
                     auth_token: user.authentication_token,
                     user_id: user.id }, status: 200
    else
      render json: { message: "Email or Password wrong" }, status: 401
    end
  end

  def logout
    # 設計使用戶重新登入時,authentication_token會換。
    current_user.generate_authentication_token
    current_user.save!

    render json: { message: "See you!"}
    #加一點回傳值,讓用戶知道他確實登出了。
  end

end
這邊可以看到設計上,登入時才秀出KEY。
可以之後加工,會員還需要某些認證才可以正確登入,才可以看到KEY。
postman上測試吧。輸入Hendler與Body方式很多,可以再查詢自己覺得便利的方式,這邊一樣採用Head告知給什麼資料,Body給資料。Singup。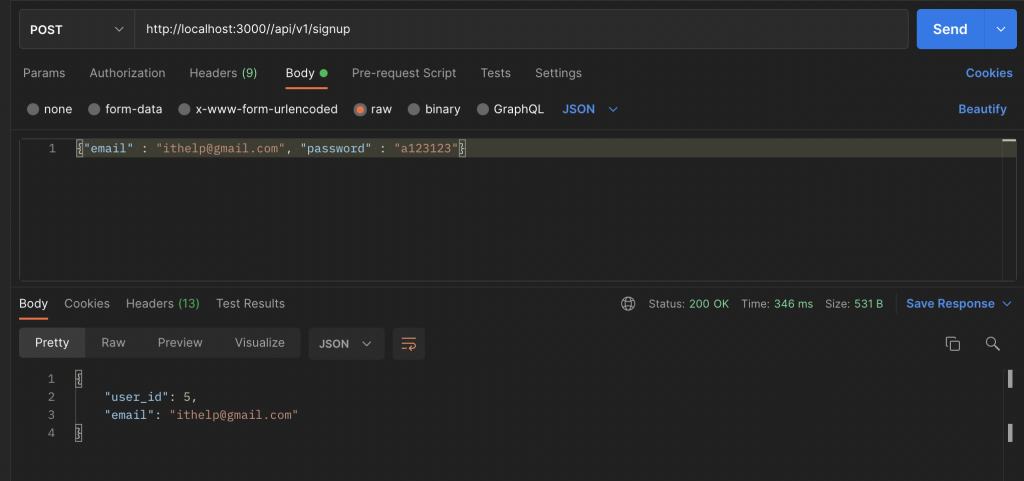
Login。"auth_token": "BMb-p3usAg3ic6_vRp-V"如果你跟我的一樣,請記得通知我買樂透,這邊紀錄一下待會會用到。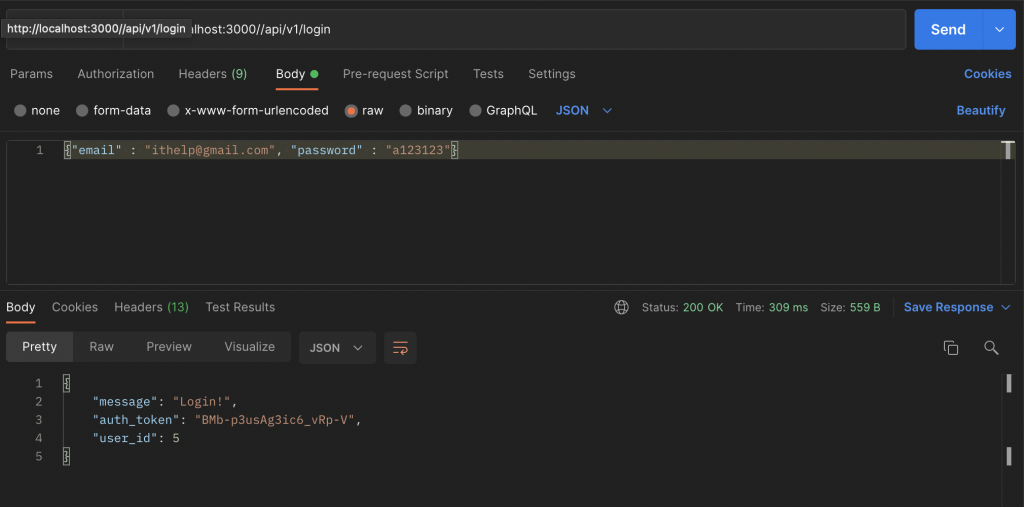
logout。要輸入的有點不同,就是剛剛紀錄的"auth_token": "BMb-p3usAg3ic6_vRp-V"。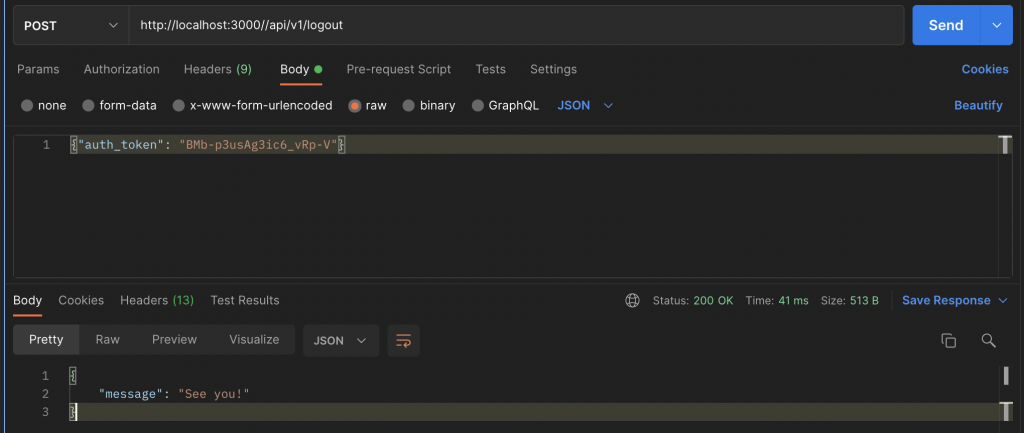
可以再login一次看看,確定是否token有換。
來實作誰建立的,誰才能修改吧。
Article。
$ rails g migration add_column_articles

#migrate
class AddColumnArticles < ActiveRecord::Migration[6.1]
  def change
    add_reference :articles, :user, foreign_key: true
  end
end

$ rails db:migrate

#Article Model
class Article < ApplicationRecord
  belongs_to :user
end

#User Model
class User < ApplicationRecord
  #略...
  has_many :articles

end
記得可以rails c --sandbox測試一下關聯性。
articles_controller.rb。改寫之後,postman上任何動作都開始要加"auth_token": "user_token"。
class Api::V1::ArticlesController < ApplicationController
  before_action :find_article, only: [:show, :update, :destroy]
  before_action :authenticate_user!
  #GET
  def index
    #故意測試只看得到自己建立的。
    @articles = current_user.articles
    render json:@articles, status: 200
  end

  #GET
  def show
    begin @article
      render json: @article, status: 200
    rescue
      render json: {error: "article not found!"}
    end
  end

  #PUT/POST
  def create
    #用關聯性建立。
    @article = current_user.articles.new(article_params)
      if @article.save
        render json: @article, status: 200
      else
        render json: {erroe: "create failed"}
      end
  end

  #PUT/POST/PATCH
  def update
    if @article.update(article_params)
      render json: @article, status: 200
    else
      render json: {erroe: "update failed"}
    end
  end

  #DELETE
  def destroy
    @article.destroy
    render json: {message: "DELETE Done!"}
  end

  private
  #規定他人不能操作。
  def find_article
    @article = current_user.articles.find(params[:id])
  end

  def article_params
    params.require(:article).permit(
      :title,
      :author,
      :description
    )
  end
end
這邊我是用兩個帳號互相測試,確認過沒問題。
請求的json如下。
GET、articles``articles/id。
{"auth_token": "your token"}
POST、articles。PATCH、articles/id。
{"auth_token": "your token",
 "article" : {
      "title" : "興奮到模糊",
      "author" : "剩最後一個禮拜",
      "description" : "加油!加油!加油!加油!"
             }
}
DELETE、articles/id。
{"auth_token": "your token"}
OK!需有認證才能使用的API完成啦。
雖然這個API非常簡單,可能只適合避免前後端吵架時用,但是至少也是了解大概怎麼運作了。
文件於此:https://github.com/nauosika/API-TEST
今天的leetcode.448 Find All Numbers Disappeared in an Array
老牌考古題?
題目連結:https://leetcode.com/problemsfind-all-numbers-disappeared-in-an-array/
題目重點:Ruby寶寶應該都是一行解決。
# @param {Integer[]} nums
# @return {Integer[]}
def find_disappeared_numbers(nums)

end

p find_disappeared_numbers([4,3,2,7,8,2,3,1]) #=> [5,6]
p find_disappeared_numbers([1,1]) #=> [2]
一般就。
(1..nums.size).to_a - nums
好看一點就
[*1..nums.size] - nums
但就想要手刻一個。
這題其實Constraints裡有說到,元素裡沒有0,1 <= nums[i] <= n,那這樣陣列會發生一個狀況。
a = [2, 3, 1, 4]
2.7.3 :026 > (1..a.size).each do |num|
2.7.3 :027 >   puts b.include?(num)
2.7.3 :028 > end
true
true
true
true

b = [2, 2, 1, 4]
2.7.3 :030 > (1..b.size).each do |num|
2.7.3 :031 >   puts b.include?(num)
2.7.3 :032 > end
true
true
false
true
 => 1..4
所以我們只需要把發生false時的num丟進一個新陣列就好。
def find_disappeared_numbers(nums)
  ans = []
  (1..nums.size).each do |num|
      ans << num unless nums.count(num)
  end
  ans
end
可是這個答案錯誤,會耗時太久,因為要一個一個判斷。
那我們先建立一個表單,是紀錄哪些數字有出現,就是true,沒出現就是false,比照原本nums時,false的才丟進去,減少一個一個判斷的時間。
def find_disappeared_numbers(nums)
  nums_present = []
  ans = []

  nums.each do |num|
    nums_present[num] = true
  end

  (1..nums.size).each do |num|
    ans << num unless nums_present[num]
  end
  ans
end
完成!但我還是當Ruby寶寶就好