在Vue的世界中,是由一個又一個的元件所構成,而我們可以透過自訂元件的方式量身打造客製化的元件並進行複用。
首先,我們先建立一個獨立的Component.vue。
<template>
  <div>
    <h1>Testing Component</h1>
  </div>
</template>
這樣之後,我們就可以將這個樣板作為元件來引入,透過import便可以達到這個效果。
import Component from "/src/components/Component.vue";
在Vue中,每個元件都必須向Vue實例來進行註冊,我們可以用兩種方式來註冊元件。
Global 全域註冊
如果有元件共用的需求,我們會使用Vue.component 語法來註冊一個元件,在註冊全域元件時要給予兩個參數,分別為「組件名稱」及「選項物件」,在下方範例中「組件名稱」為 test ,「選項物件」則為其後的內容。
<template>
  <div id="app">
    <test></test>
  </div>
</template>

<script>
import Component from "/src/components/Component.vue";

export default {
  name: "App",
  components: {
    test: Component,
  },
};
</script>
效果:
一旦子元件中改變,引用它的元件也會隨之更新。
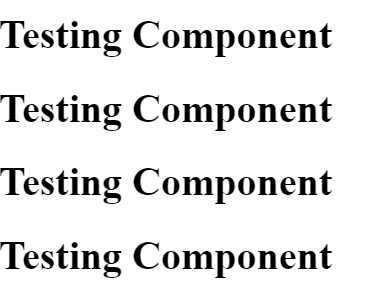
除此之外,一旦引入元件,就可以將元件進行任意次數的複用:
<template>
  <div id="app">
    <test></test>
    <test></test>
    <test></test>
    <test></test>
  </div>
</template>

透過元件化的方式,我們可以更簡單的切割每一個區塊,例如,一個頁面我們可能會有頁頭、側邊欄、內容區等組件,每個組件又包含了其它的像Navigation bar等等之類的組件,是不是很方便呢。
原始碼可參考: https://codesandbox.io/s/goofy-lichterman-jgt1r?file=/src/App.vue
另外,我們也可以透過區域註冊的方式註冊元件,只要使用全域註冊就一定會載入,因此使用全域註冊會將原本不需要的組件也載入進來,拖慢載入的時間。
區域註冊會是一個選項物件:
`const componentC = {
  // options
  template: `
    <div>c</div>
  `};`
<template>
  <div id="app">
    <test></test>
    <test2></test2>
  </div>
</template>

<script>
import Component from "/src/components/Component.vue";
const local_component = {
  // options
  template: `
    <div>Local Component</div>
  `,
};

export default {
  name: "App",
  components: {
    test: Component,
    test2: local_component,
  },
};
</script>
成果如下,test是以全域註冊的元件,而test2則是區域註冊的元件。
Hi, I am Grant.
個人部落格 - https://grantliblog.wordpress.com/
個人網站 - https://grantli-website.netlify.app/#/mainpage
我的寫作專題 - https://vocus.cc/user/5af2e9b5fd89780001822db4#
