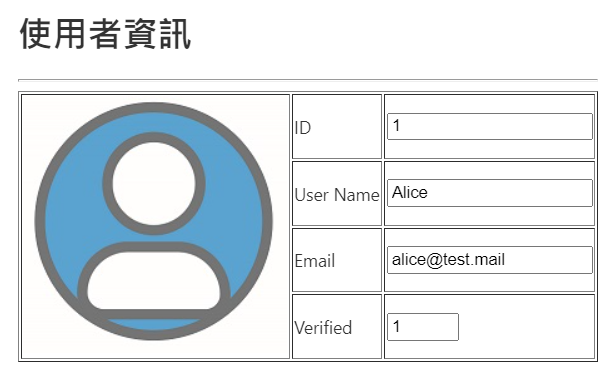
昨天我們的 Component 只有簡簡單單的一行 “ironman works!” 其他啥都沒有。今天,我們就來替他加點東西,讓它顯示資料。首先我們先在 ironman.component.html 用原生 HTML 刻出醜醜的使用者資訊頁面,存檔後我們醜醜的使用者資訊就會長在主頁的中間
如果已經執行 ng serve -o 指令,而且沒有 ctrl + c 或關閉命令提示字元,存檔之後 Angular 會自動套用變更並刷新頁面
這時候因為一切從簡,連使用者資訊都是寫死的字串,但是我們當然不能這麼做,我們一定得把它的資料來源跟某個地方做連結,這樣哪天資料做了變更,我們的頁面才能正確地更新。
首先,我們來介紹最簡單的資料繫結方法 – 內嵌繫結就是簡單直接的把 component.ts 裡的變數直接拿來嵌入 HTML 中,語法的規定是:在 HTML 用 "雙大括號" 把變數包起來。讓我們從剛剛的 HTML 把數值搬進 ts 檔,用變數存起來,然後在 HTML 中加入內嵌繫結的語法
// ironman.component.ts
export class IronmanComponent implements OnInit {

  constructor() { }

  userId = 1;
  userName = 'Alice';
  email = 'alice@test.mail';
  verified = 1;

  ngOnInit(): void {
  }
}
<-- !ironman.component.html -->
...
...
<tr>
      <td colspan="2">User Name</td>
      <td>
        <input type="text" value={{userName}}>
      </td>
</tr>
...
...
簡單的一些改動,就讓我們的 HTML 不再是寫死的字串。但是,這樣還是完全不行啊!你只不過是換個地方寫死而已嘛!欸都…是的,目前還是,所以我們接下來要介紹另外一個繫結。
好的,接下來,我們要繼續改我們的 ironman 元件,讓這個元件裡不再存寫死的資料,而是讓別人把資料傳給我們的 ironman,然後我們的 ironman 再把資料鑲嵌到 HTML 上。
首先,我們先來定義一個使用者資料的介面(interface),這裡特別注意一下,Angular 裡的介面與 .NET 的介面有些不同,在 Angular 裡如果我們只要定義資料的 model 而沒有要實作處理邏輯,那我們會用 interface 而不是 class,選用 interface 的原因是,這些用 interface 定義的資料 model 在編譯成 js 後會比較省資源。
export interface IronmanUser
{
  userId: number;
  userName: string;
  email: string;
  verified: number;
}
上面的宣告中,冒號(:)前面是物件的屬性名稱,後面是型別。
接著,把剛剛宣告的幾個拆散的變數刪掉,改成一個 IronmanUser 型別的變數然後給一些預設值,並用 @Input() 裝飾器修飾這個變數,@Input() 會告訴 Angular 這個變數預期要接受從外部傳進來的值。
@Input()
userInfo: IronmanUser = {
    userId: 0,
    userName: '',
    email: '',
    verified: 0
};
改完之後 HTML 的內嵌繫結語法會出錯,因為我們把資料搬進一個物件裡了,稍作修改把這些 error 修掉
...
...
<tr>
      <td colspan="2">User Name</td>
      <td>
        <input type="text" value={{userInfo.userName}}>
      </td>
</tr>
...
...
這時候如果直接執行程式,我們的使用者資訊表格的值會是剛剛宣告的預設值,因為我們還沒傳值給它。現在,讓我們從 app.component.ts 傳值給 ironman.component.ts,到 app.component.ts 裡,加入一個 IronmanUser 型別的變數,然後給有效的值
export class AppComponent {
  userInfoFromAppComponent: IronmanUser = {
    userId: 1,
    userName: 'Alice',
    email: 'alice@mail.test',
    verified: 1
  }
  title = 'ironman-frontend';
}
再來,我們就要實際用屬性繫結把值傳給 ironman.component.ts。被 @Input() 裝飾器修飾的變數,對外部的使用者來講,就好像是這個 Component 的屬性,我們透過對這個屬性賦值,就能把值傳遞給這個 Component。
到 app.component.html,用中括號選擇 ironman.component.ts 所擁有的 @Input() 屬性,然後把要傳遞的物件賦予這個屬性。
<app-ironman [userInfo]=userInfoFromAppComponent></app-ironman>
重新執行程式,就會看到我們的資料正確的顯示出來了~
什麼?你說我只不過是再換一個地方寫死而已啊!欸都…目前好像的確是這樣沒錯…,但是但是!請聽我解釋!以後我們只要把初始化這個變數的地方改成讀檔或抓 DB,就不會是寫死的了!我們過幾天也會講到 Angular 的 HttpClient,到時候就會從我們之前寫的 API 抓資料了。
剛剛所講的屬性繫結是從外部元件(AppComponent)送資料給內部元件(IronmanComponent),而我們很多時候也會需要從內部把資料往外送,這個時候,我們就需要用到事件繫結。事件繫結的運作方式為:內部元件在某個條件下觸發一個事件,事件發射器(EventEmitter)把這個這件跟資料一起往外送,當外部元件收到這個事件時,就能針對這個事件作處理。
要使用事件繫結,首先我們要到內層(IronmanComponent)的 ts 檔新增一個 @Output() 變數,這個變數固定會是泛型的 EventEmitter,後面的角括號裡放我們的事件資料的型別。在 import EventEmitter 到檔案中的時候,注意要選「從 "@angular/core"」。
@Output()
testOuputEvent = new EventEmitter<IronmanUser>();
有了這個事件發射器之後,我們就能在程式裡自由的決定什麼時候要發送事件,這裡,且讓筆者偷懶,直接用 setTimeout() 發一個測試事件並攜帶一筆使用者資料
ngOnInit(): void {
    const mockInfo = {
      userId: 999,
      userName: 'testUser',
      email: 'test@test.mail',
      verified: 0
    }

    setTimeout(() => {
      this.testOuputEvent.emit(mockInfo)
    }, 1000);
}
而要接收事件的 AppComponent 則是在 HTML 中,用小括號指定接收剛剛宣告的 @Output 事件發射器變數所發的事件,並指定一個 function 來處理這個事件發生之後要做的事。
<!-- app.component.html -->
<app-ironman
    [userInfo]=userInfoFromAppComponent
    (testOuputEvent)=handleTestEvent($event)>
</app-ironman>
// app.component.ts
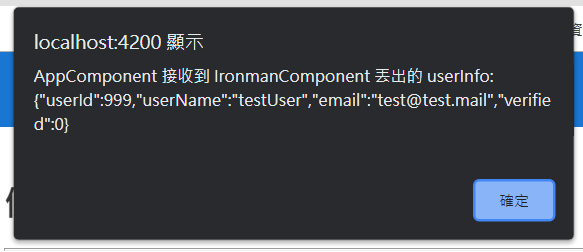
handleTestEvent(userInfo: IronmanUser): void {
alert(`AppComponent 接收到 IronmanComponent 丟出的 userInfo: ${JSON.stringify(userInfo)}`)
}
上面的 $event 是固定用法,事件所攜帶的資料都會存在這個 $event 變數裡。在目前的範例中,mockInfo 就會存在 $event 裡,handleTestEvent() 的 userInfo 參數就會變成 IronmanComponent 丟出的 mockInfo。
Day25 說要介紹三種 Binding 其實是有點錯誤的說法,因為有第四種:Two Way Binding(雙向繫結),如果屬性繫結是撒尿蝦,事件繫結是牛丸,那麼雙向繫結就是
現在,就讓我們來做撒尿牛丸,到 ironman.component.ts,再宣告一個 @Output 變數,但是因為要做混在一起做撒尿牛丸,所以這個變數的名稱一定是要 "@Input() 變數" 的變數名稱 + Change,前面我們宣告 @Input() 變數叫做 userInfo,這個新的 @Output() 變數就必須叫 userInfoChange。
@Output()
userInfoChange = new EventEmitter<IronmanUser>();
接著,再讓筆者偷懶一下,一樣用 setTimeout() 發射事件
const modifiedInfo = {
  userId: 2,
  userName: 'Bob',
  email: 'bob@test.mail',
  verified: 1
}

setTimeout(() => {
  this.userInfoChange.emit(modifiedInfo)
}, 1500);
最後,把 app.component.html 原本用中括號的屬性繫結改成中括號 + 小括號的雙向繫結,把 userInfo 包起來。
<app-ironman
  [(userInfo)]=userInfoFromAppComponent
  (testOuputEvent)=handleTestEvent($event)>
</app-ironman>
執行程式,就能看到我們畫面上的使用者資料在事件觸發之後,一起變成了內部元件發送出來的資料。也就是,雙向繫結的資料是糾纏在一起的,改變其中一端,另一端會同時被改變。