延續昨日
我們今天的目標是獲取帳戶訊息以及修改帳戶資料
首先先去views 裡面創一個Account.vue
在router 裡面新增一個新的path(這次的path比較不同)
 {
    path: '/account/:id',
    name: 'Account',
    component: Account
  },
我們帳戶的網址會是http://localhost:8080/account/登入者帳號
在navbar 裡面的Router 會是這樣設定(這樣的目的是為了知道是誰在修改自己的帳戶資料)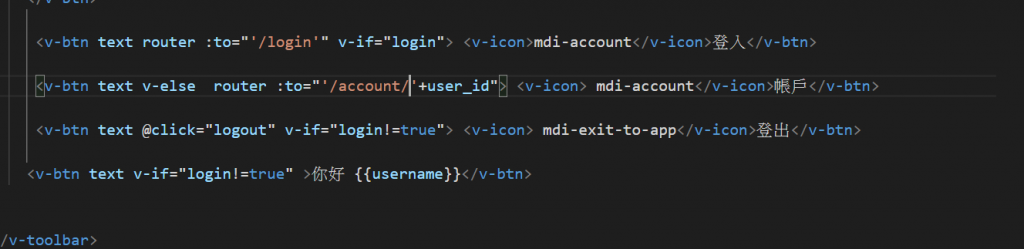

然後在註冊頁的data 裡面新增幾個變數
export default {

    data(){
      return{


        useraccount:'',
        userpassword:'',
        useremail:'',
        username:'',

      }
    },
然後在mounted裡面接session
mounted(){
     let user=sessionStorage.getItem('user-info')
   this.useraccount=JSON.parse(user).id
     this.username=JSON.parse(user).username
     this.userpassword=JSON.parse(user).password
     this.useremail=JSON.parse(user).email

     if(!user){
       alert('請先登入')
       this.$router.push({name:'Login'})
     }
   }
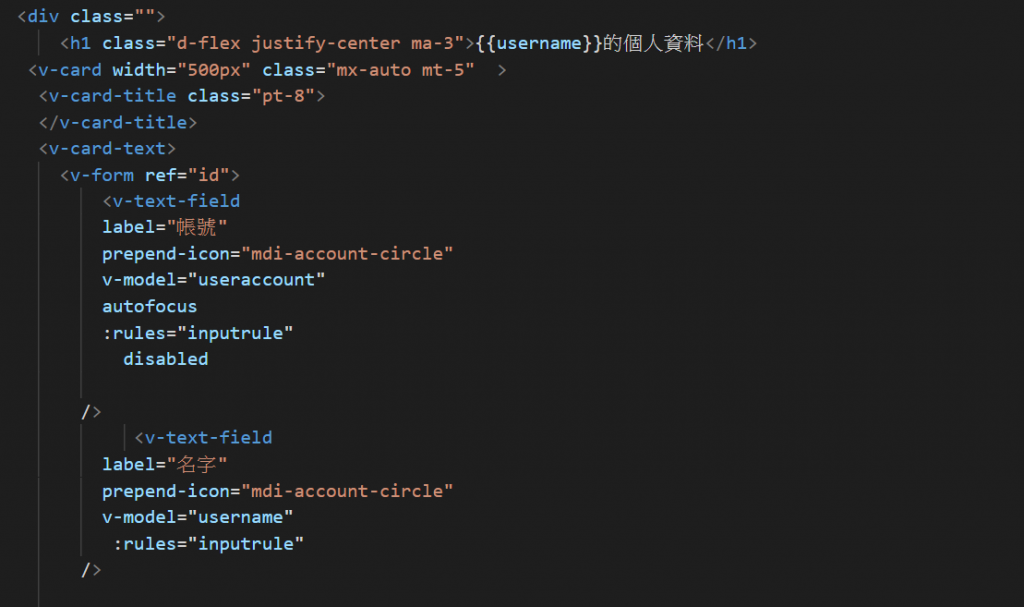
再來直接把註冊那一頁的code 複製過來
就可以看到這樣的畫面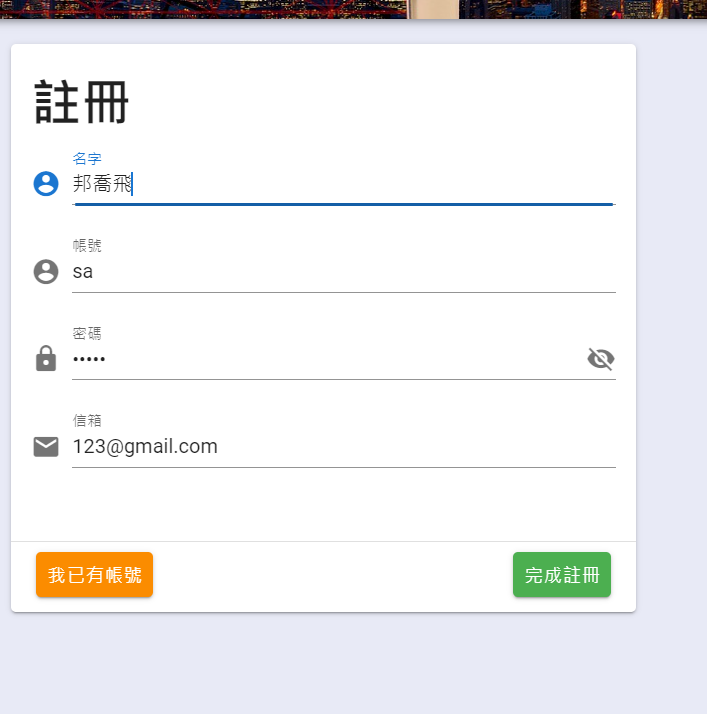
因為v-model都已經綁定了 所以會顯示出原本的資料 再來就是做一點小修正
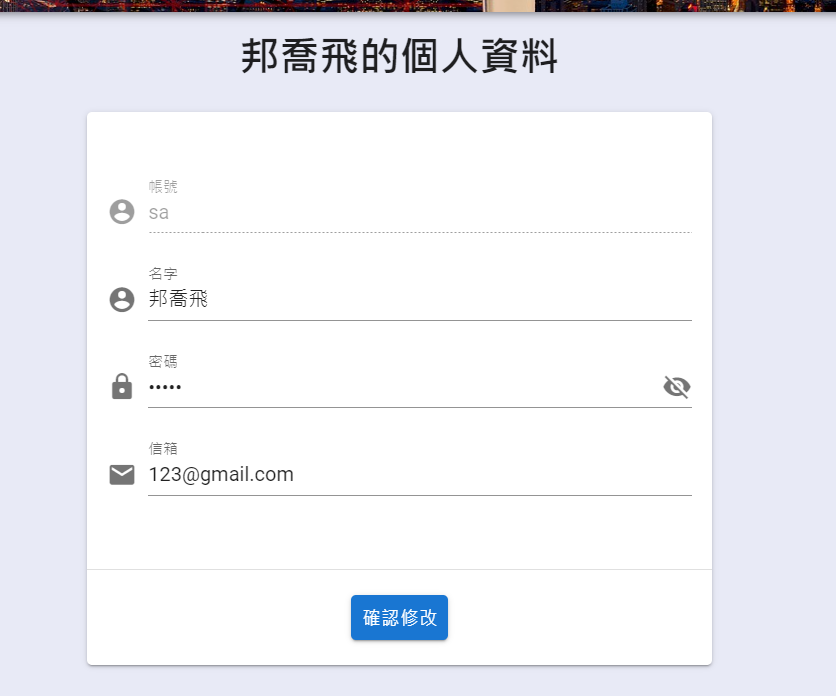
我將帳號跟名字的順序換一下 改了一下btn的顏色
並且設定帳號不能更動(disabled)
以下是程式碼
再來就是將新增的資料給更新到資料庫
首先我想要先把api的網址設定成全域變數
這麼做的目的是我之後若改成別的資料庫 或是資料庫的port更動時我不需要去一個一個改
所以先創立一個名叫global.vue的資料(和app.vue同階層)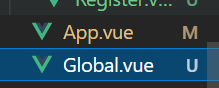
以下是global.vue的內容
<script>
const db_api="http://localhost:3000/"
export default {

db_api,
}
</script>
再來就是 import 進來並return
<script>
  import global from '../Global.vue';
export default {

    data(){
      return{
    db_api:global.db_api,
      showPassword:'',
        useraccount:'',
        userpassword:'',
        useremail:'',
        username:'',
         inputrule:[
          x=>x.length>0 || "不得為空值"
        ],

      }
    },
接著在btn裡設定@click的function名稱
也別忘了在methods 設定function
   methods:{
        async changeAccount(){
            const result = await axios.patch(`${this.db_api}`+"users/"+this.$route.params.id,{
                username:this.username,
                password:this.userpassword,
                email:this.useremail,
            })
                console.warn(result);
        }


    },
p.s. this.route.params.id是我們在index設定的/id的id 再來id的值是什麼
我們在前面提到從navbar的route進來的時候有設定id給這個網頁
我們的route是這樣設定的: to route=”’/account/’”+user_id 所以params.id的值就會是user_id 而user_id是useraccount (我等等就去把user_id改成useraccount)
再來就是測試看看能不能改動了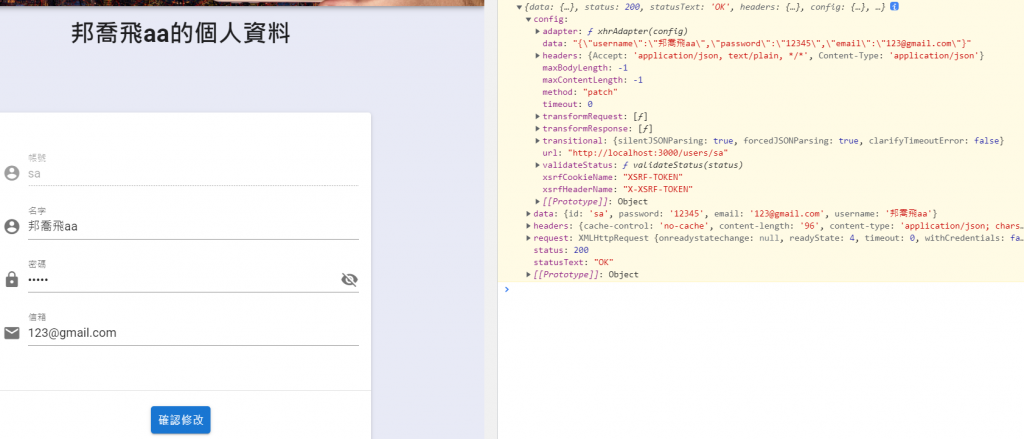
看起來是修改成功了 status是200
但是session 還是原本的session 所以必須再做一點修正
methods:{
        async changeAccount(){
            const result = await axios.patch(`${this.db_api}`+"users/"+this.$route.params.id,{
                username:this.username,
                password:this.userpassword,
                email:this.useremail,
            })
            if (result.status==200) {
                alert('修改成功')
                const newresult=await axios.get(`${this.db_api}`+"users?id="+`${this.useraccount}`+"&password="+`${this.userpassword}`)
                sessionStorage.setItem("user-info",JSON.stringify(newresult.data[0]))
                this.$router.push({name:'Home'})
                window.location.reload()

            }
        }


    },
再來就是把login.vue 跟register.vue有用到資料庫api的改成db_api(記得先import global.vue 再去data設定變數)
methods:{

      async login(){
        let result = await axios.get(`${this.db_api}`+"users?id="+`${this.useraccount}`+"&password="+`${this.userpassword}`)
        console.log(result)


        if(result.status==200 && result.data.length==1 ){
          alert("登入成功")
          sessionStorage.setItem("user-info",JSON.stringify(result.data[0]))
          this.$router.push({name:'Home'})
          window.location.reload()


        }
        else{
          alert("失敗")
        }


      },
然後我還去把navbar的user_id的變數名稱改成useraccount
不知道當時腦子在想什麼變數應該要固定才對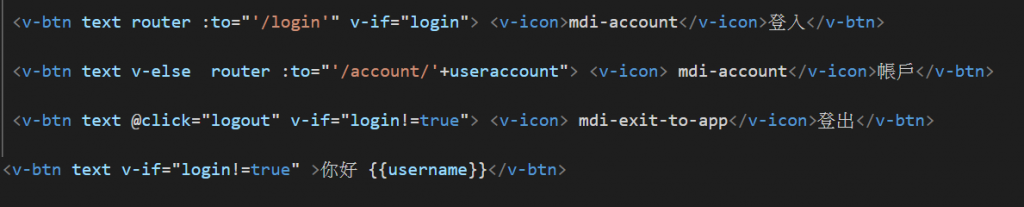
好了今天弄了超久的
明天把首頁的專案內容換成資料庫的專案內容
我們明天見!


 iThome鐵人賽