iT邦幫忙

2021 iThome 鐵人賽

DAY 29
0
Modern Web

用vue.js寫出一個實用的科內分享網站系列 第 29

Day29 vue.js網頁 團隊介紹 管理員功能

  • 分享至 

  • xImage
  •  

延續昨日
今天我們來實現 管理者帳號跟團隊介紹
其實這兩點應該可以同時執行
因為只有管理者可以新增跟刪減團隊人員
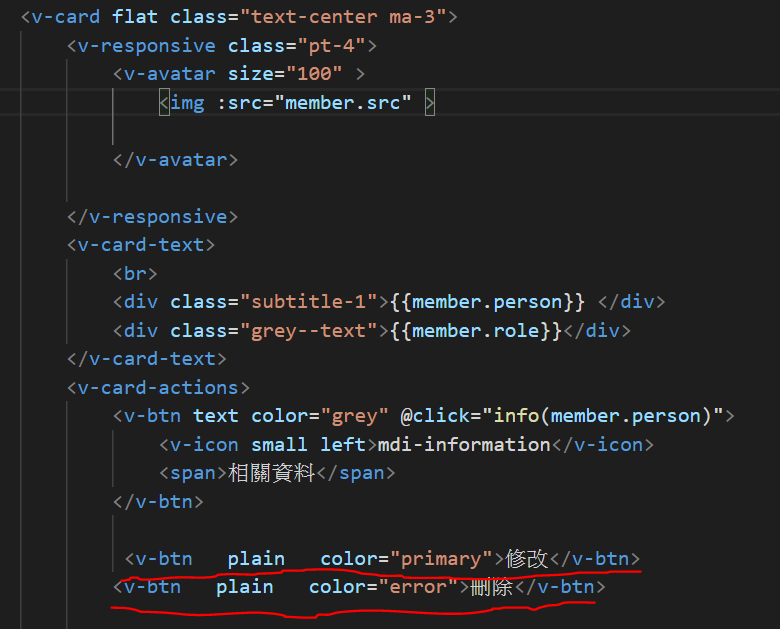
這樣子首先我們需要先有一個teams.vue
然後把route加上去
以下是程式碼
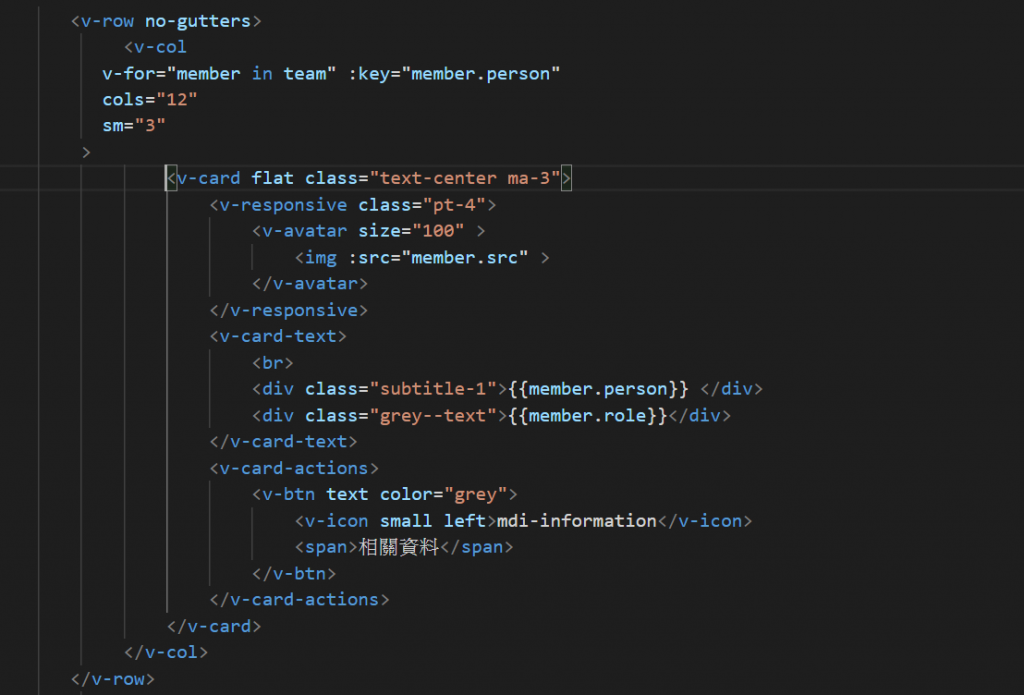
https://ithelp.ithome.com.tw/upload/images/20211011/201410071skOEsVVvH.png

 data(){
      return{
          team:[
              {person:'邦喬飛 ',role:'科長',src:require('../assets/avatar.png')},
              {person:'邦喬飛',role:'科長',src:require('../assets/avatar.png')},
              {person:'邦喬飛',role:'科長',src:require('../assets/avatar.png')},
              {person:'邦喬飛',role:'科長',src:require('../assets/avatar.png')},
              {person:'邦喬飛',role:'科長',src:require('../assets/avatar.png')},
              
          ]
      }
  },
}
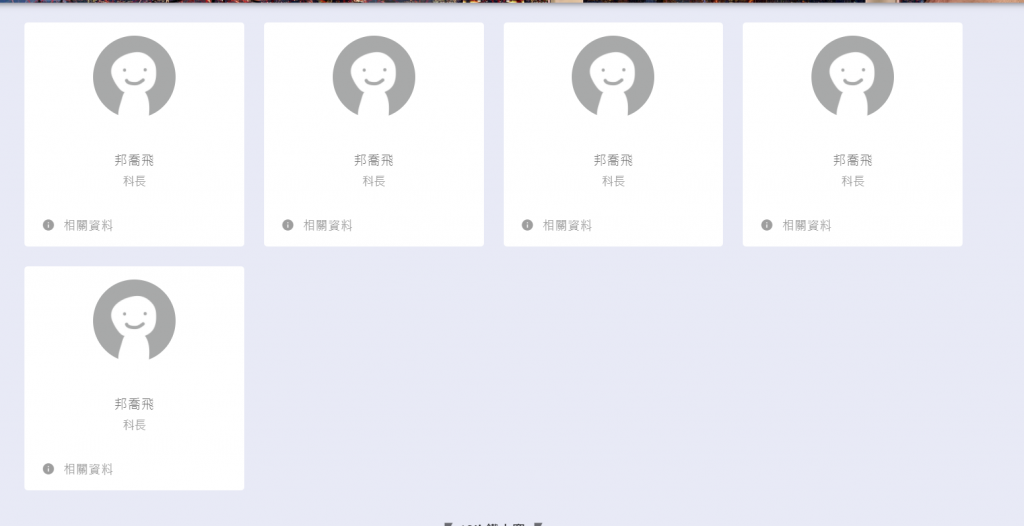
https://ithelp.ithome.com.tw/upload/images/20211011/20141007wzd35QFUvw.png
然後做一點修改
https://ithelp.ithome.com.tw/upload/images/20211011/20141007jiPfBn0mPY.png
https://ithelp.ithome.com.tw/upload/images/20211011/2014100786Nn0MoBKQ.png
等等會設定成只有管理員可以看到這些按鈕
https://ithelp.ithome.com.tw/upload/images/20211011/20141007UeyrQjO7KR.png
然後我npm insatall sweet alert 讓alert比較好看
(https://sweetalert.js.org/guides/#advanced-examples)
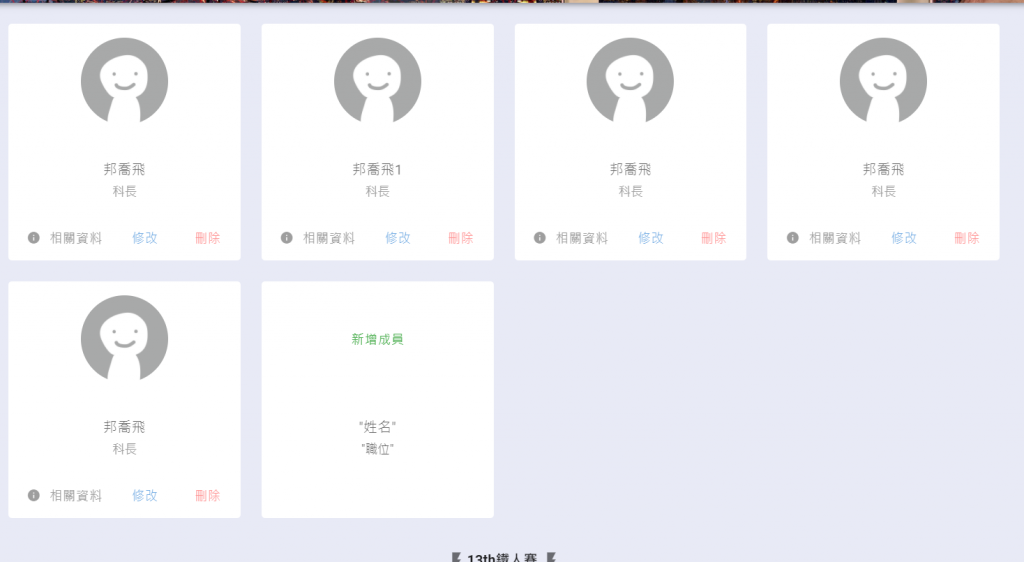
接下來來看看layout吧!
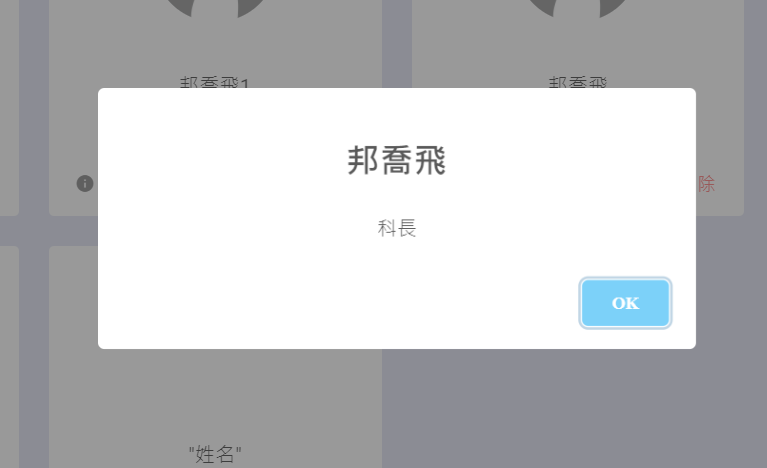
https://ithelp.ithome.com.tw/upload/images/20211011/20141007IJVYmRtSYm.png
再來是點選修改後預計是可以跟修改帳戶名稱一樣
接著去處理資料庫
https://ithelp.ithome.com.tw/upload/images/20211011/20141007ryK0AWq5mQ.png
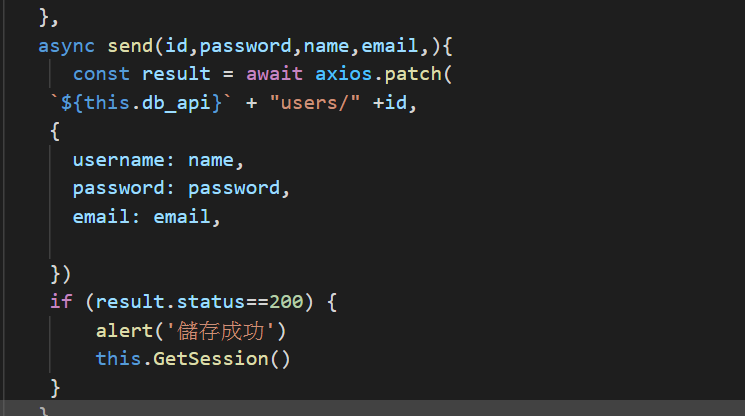
先處理最簡單的刪除按鈕(照抄projects.vue的刪除)

  GetInfo(v,v2){
       swal(v,v2)
    },
    async  GetSession(){
          let teams =await axios.get(`${this.db_api}`+"teams")
          this.team=teams.data
    }
},
async mounted(){
     this.GetSession()
}

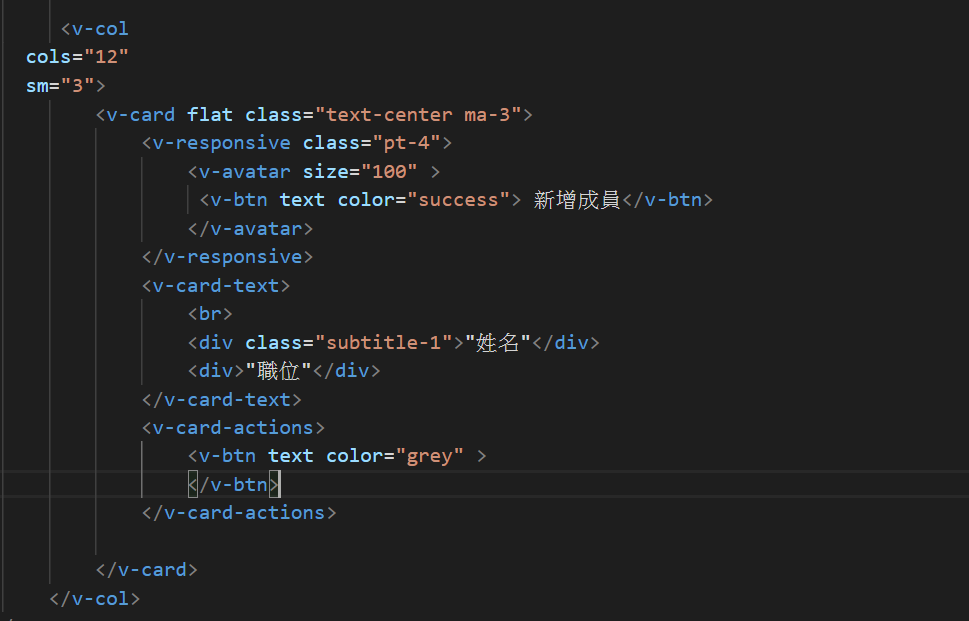
接著處理新增成員功能
這樣我們會需要一個addteam.vue 完全照抄後修改
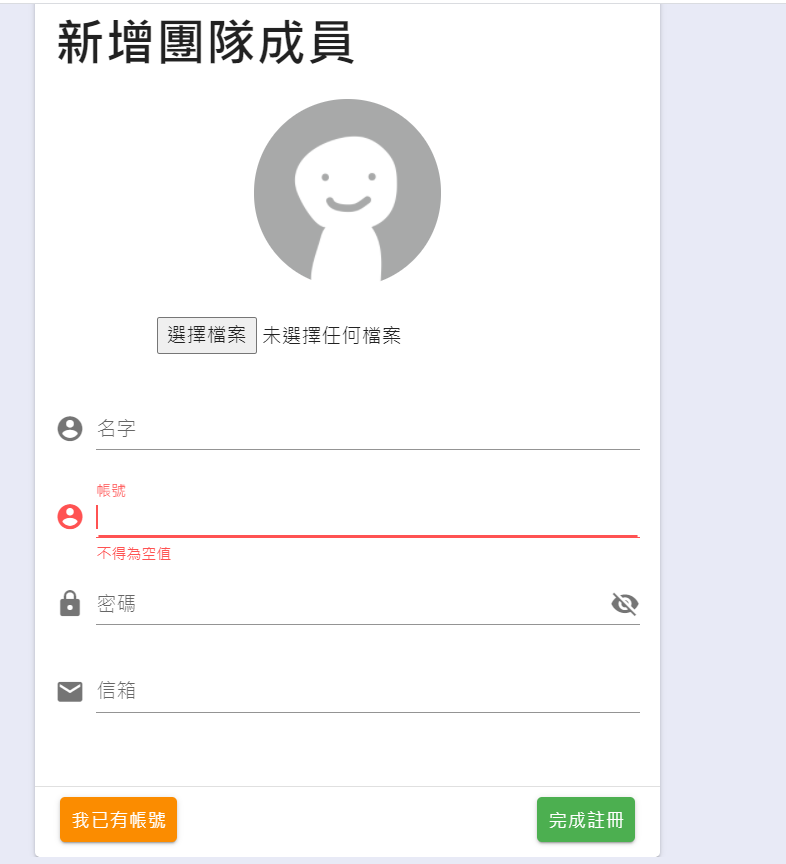
https://ithelp.ithome.com.tw/upload/images/20211011/20141007Mery5QcR7e.png
就修改部分內容就好完全和註冊一模一樣參考day14和day27(就不多贅述了)

接著創一個changeteam.vue 以及一個帶id的path
完成後跟修改帳戶一樣(所以不多做贅述了)
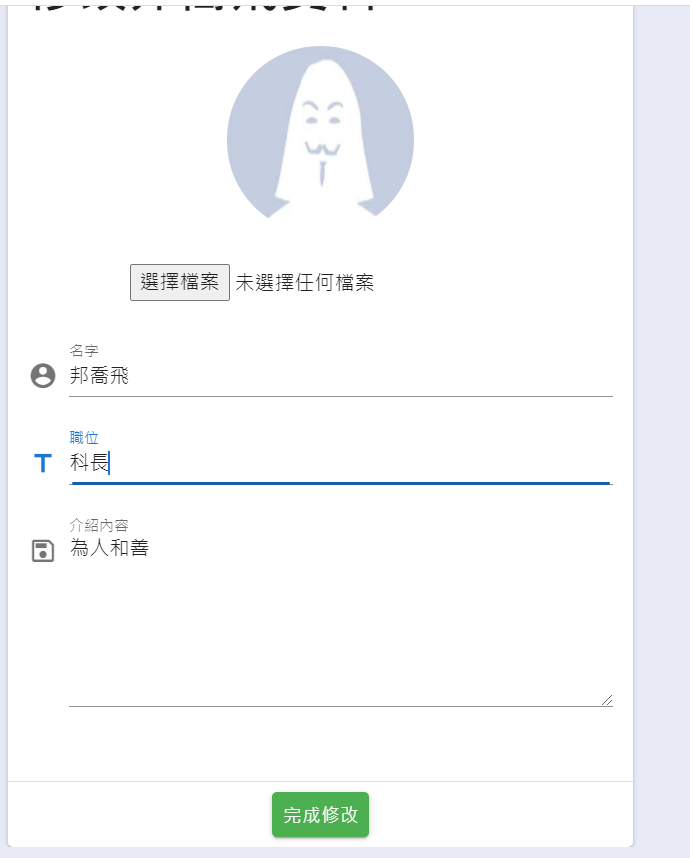
https://ithelp.ithome.com.tw/upload/images/20211011/20141007iUqQpXODBm.png

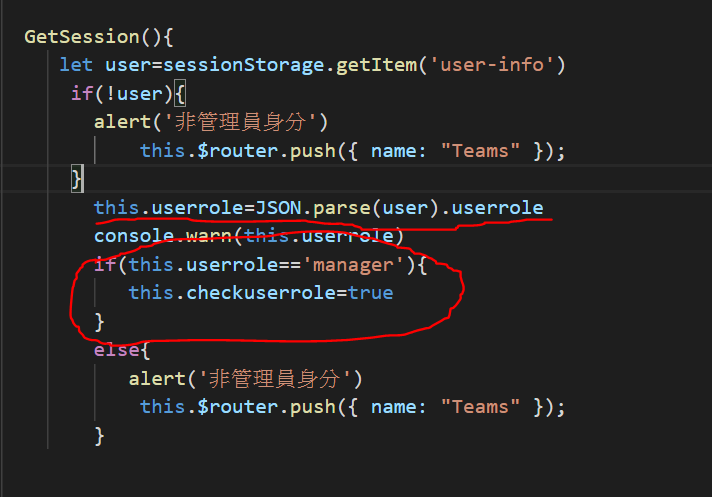
再來則是讓管理者才可以去新增修改刪除
這邊要先去db.json裡面新增一個管理者
https://ithelp.ithome.com.tw/upload/images/20211011/20141007EKeX9QkJwR.png
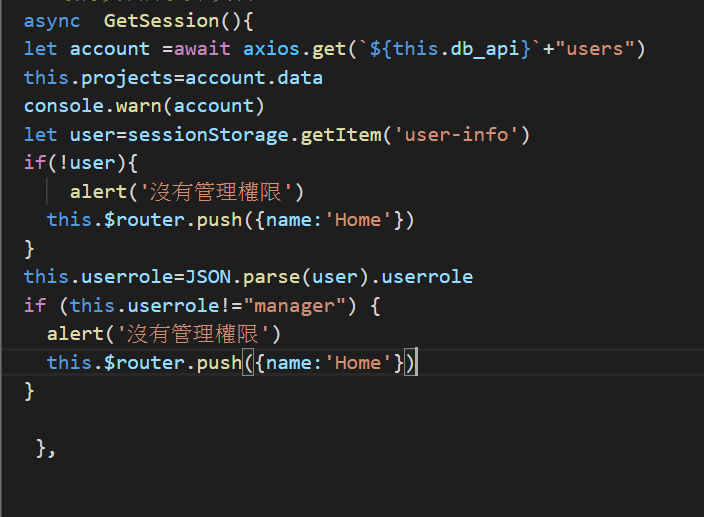
在getsession function裡面設定
https://ithelp.ithome.com.tw/upload/images/20211011/20141007ASJcpB93tn.png
這樣就可以實現 只有管理員能修改
回到teams.vue把 修改刪除的btn給一個v-if(還有新增的畫面也要給一個v-if)
確認是管理者的情況下才會顯示出來
https://ithelp.ithome.com.tw/upload/images/20211011/20141007ZATVj8U5FX.png
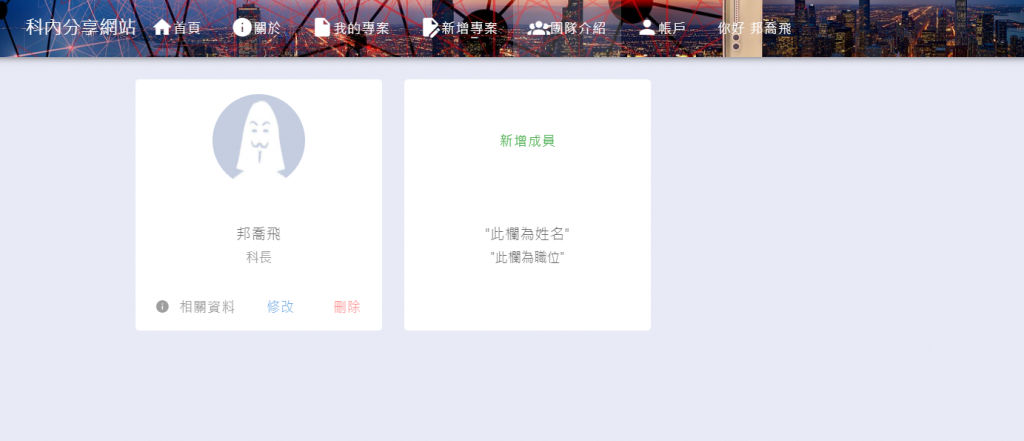
所以這就是目前的介面(非管理者)
https://ithelp.ithome.com.tw/upload/images/20211011/20141007Fzftv1HHM8.png
以下就是登入後判定為管理員後的介面
https://ithelp.ithome.com.tw/upload/images/20211011/20141007ciG4eUdGor.png
回到首頁
我們的管理者要可以刪除所有文章
所以先在home頁面加一個刪除的按鈕
https://ithelp.ithome.com.tw/upload/images/20211011/20141007eYjDV8Vas2.png
直接照抄 project.vue的刪除按鈕

async deleteArticles(val){
      let result =await axios.delete(`${this.db_api}`+"articles/"+val);
    
     if(result.status==200){
       alert('已刪除')
       this.GetSession();
     }
    },

Function也照抄
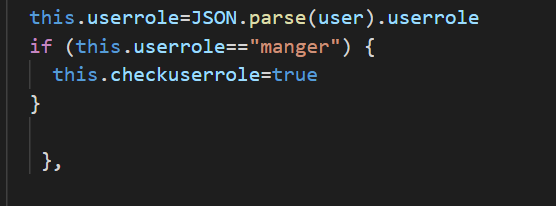
一樣新增2個data
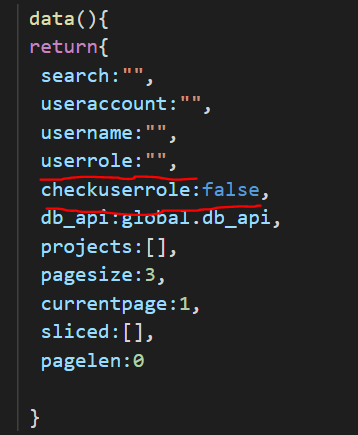
https://ithelp.ithome.com.tw/upload/images/20211011/20141007F186xmPnqP.png
https://ithelp.ithome.com.tw/upload/images/20211011/20141007goRmpD2dWr.png
最後在btn上面加一個v-if就完成啦!
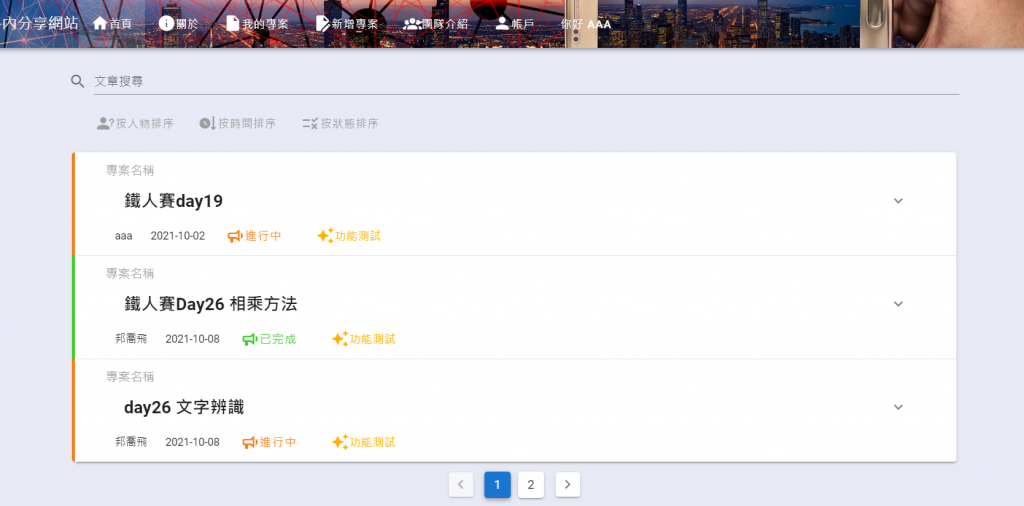
一般人的頁面
https://ithelp.ithome.com.tw/upload/images/20211011/201410079dFSRix2lh.png
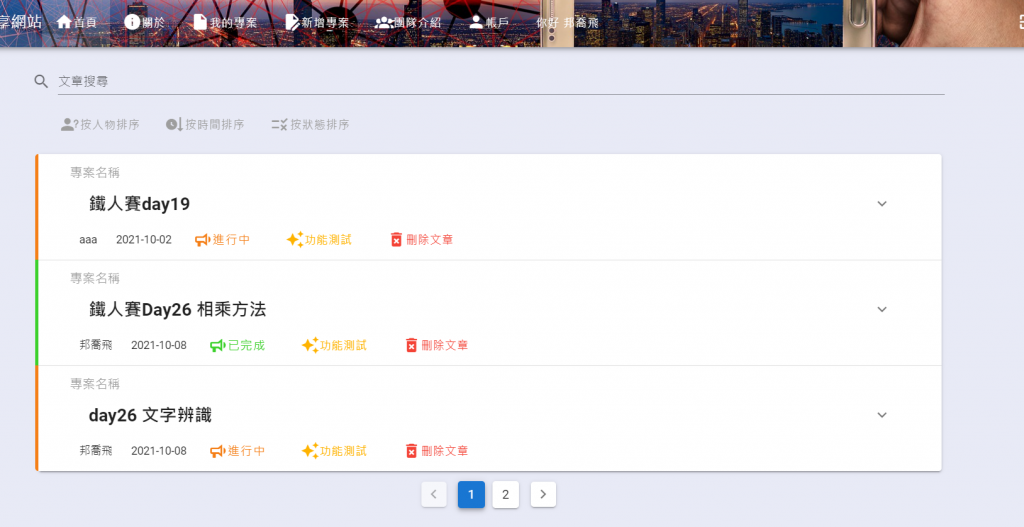
管理者的頁面
https://ithelp.ithome.com.tw/upload/images/20211011/20141007Y7p1zgnGiV.png
然後我刪除1篇文章之後發現我的最大page數還是2
原來是當時設定的問題
this.pagelen=parseInt(this.projects.length/this.pagesize)+1
改成這樣就是無條件進位 所以整除的話最大頁數就是1(參考day28)
this.pagelen=Math.ceil(this.projects.length/this.pagesize)

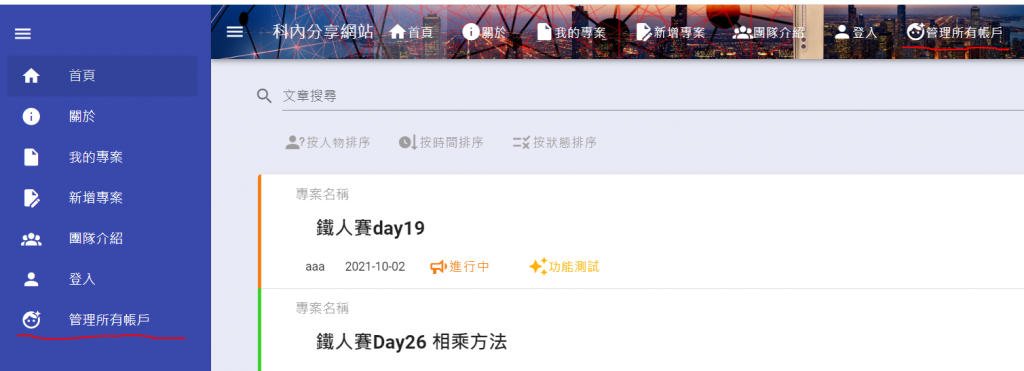
再來就是設定一個管理所有帳戶的按鈕
並創立manageraccount.vue
https://ithelp.ithome.com.tw/upload/images/20211011/2014100748C0Eq9qIu.png
再來就是簡單的tr td
https://ithelp.ithome.com.tw/upload/images/20211011/20141007jHezkEfurU.png
https://ithelp.ithome.com.tw/upload/images/20211011/20141007mqpqUyfe17.png
一樣在網站設定防止想要用route進來的人
https://ithelp.ithome.com.tw/upload/images/20211011/20141007UDnkxypNC5.png
一個簡易的傳接值作為基本訊息的修改和刪除帳號
https://ithelp.ithome.com.tw/upload/images/20211011/20141007s3e4DGfrTK.png
https://ithelp.ithome.com.tw/upload/images/20211011/201410071lvoUP4RsA.png
https://ithelp.ithome.com.tw/upload/images/20211011/20141007hTALojbvr7.png
再讓管理者可以快速新增帳號
https://ithelp.ithome.com.tw/upload/images/20211011/20141007qklEp6HfHt.png
全部照抄 註冊頁的東西要記得創data用v-model綁定(就不贅述了)

async add(){
         try {
        //用try catch的目的是為了檢測帳號是否重複
        if(this.$refs.id.validate()) {
         let result = await axios.post(`${this.db_api}`+"users",{
        id:this.nuseraccount,
        password:this.nuserpassword,
        email:this.nuseremail,
        username:this.nusername,
        avatar:this.nuseravatar
        
      })
          if(result.status==201){ 
            alert("新增成功")
            this.GetSession()
     
      }
      }
      
      } catch (error) {
          console.warn(error)
           alert('帳號不得重複')
      } 
     },

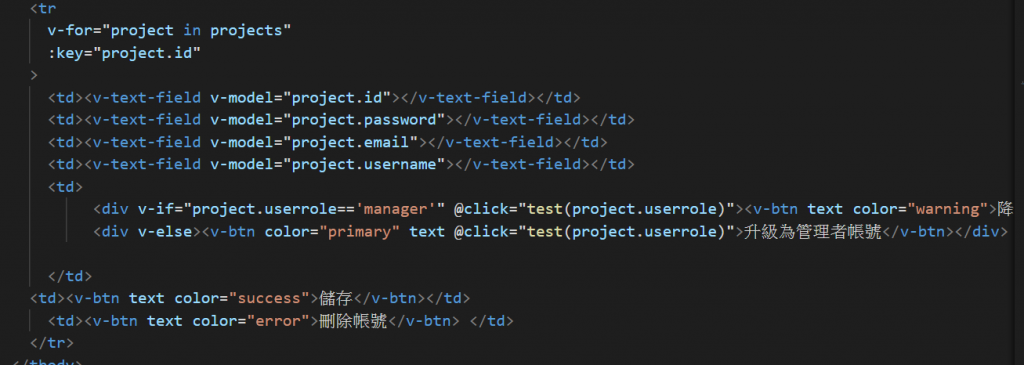
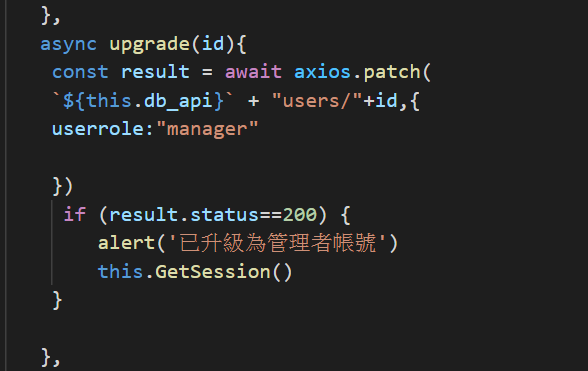
最後則是新增成管理員帳號 或降為一般帳號
https://ithelp.ithome.com.tw/upload/images/20211011/20141007PiUKnjey1c.png
https://ithelp.ithome.com.tw/upload/images/20211011/201410075cAspOaM2h.png
降級也是同一個道理只是把userrole改為:” ”
這樣我們網站的所有功能就完成了!!!
今天弄超多東西的
但其實都跟之前做過的很類似
最後則是把所有東西包成docker啦!
我們明天見


上一篇
Day28 vue.js搜尋欄 分頁(pagination)功能
下一篇
Day30 vue.js docker部署
系列文
用vue.js寫出一個實用的科內分享網站30
圖片
  直播研討會
圖片
{{ item.channelVendor }} {{ item.webinarstarted }} |
{{ formatDate(item.duration) }}
直播中

尚未有邦友留言

立即登入留言