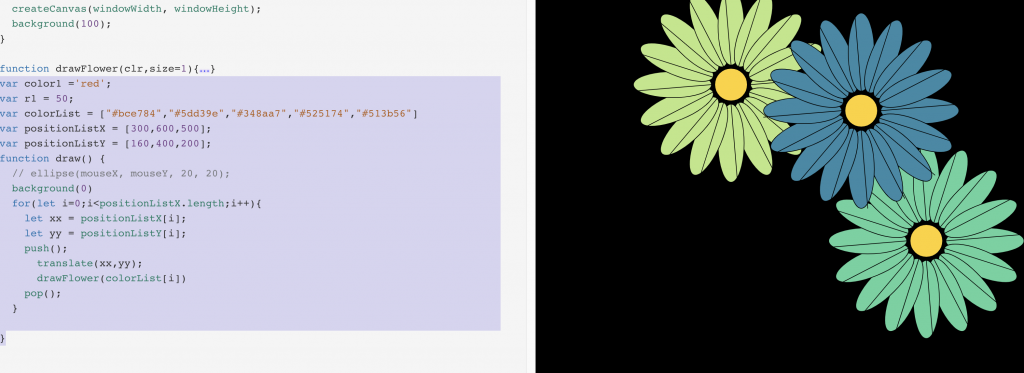
var color1 ='red';
var r1 = 50;
var colorList = ["#bce784","#5dd39e","#348aa7","#525174","#513b56"]
var positionListX = [300,600,500];
var positionListY = [160,400,200];
function draw() {
	print(mouseX+','+mouseY); //確認自己想要的排列位置
	// ellipse(mouseX, mouseY, 20, 20);
	background(0)
	for(let i=0;i<positionListX.length;i++){
		let xx = positionListX[i];
		let yy = positionListY[i];
		push();
			translate(xx,yy);
			drawFlower(colorList[i])
		pop();
	}

}
加上一些position的參數之後我們可以呈現出一個排列的花
!
那我們可以透過一些mousePressed設定 可以做出花掉落的效果
function setup() {
	createCanvas(windowWidth, windowHeight);
	background(100);
}
function generateRandomFlower(mouseX,mouseY){
	size.push(random(0,1));
	positionListX.push(mouseX || random(width))  // mouseX 沒有 就用 random在畫面放置
	positionListY.push( mouseY || rabdin(height));
	vYList.push(abs(random(0,3)));
	colorList.push(random(colorList));
}

function drawFlower(clr,size=1){
	push(); // 回到這裡
	fill(255,210,33)
	ellipse(0,0,50)
	ellipseMode(CORNER); //設定排列模式
	fill(255,90,61) // 變成預設顏色
	if(clr){
	fill(clr);} //如果有別的顏色就可以放在這

	for(let i=0;i<16;i++){
			ellipse(30,-20,120*size,40); // 增加花瓣
			line(30,0,150*size,-10) //花瓣線

			rotate(PI/8);
	}
	pop(); //推到push
}
var color1 ='red';
var r1 = 50;
var size=[1,0,0,5,0.4,0.8]
var colorList = ["#bce784","#5dd39e","#348aa7","#525174","#513b56"]
var positionListX = [300,600,500];
var positionListY = [160,400,200];
var vYList = [1,2,3] // 掉落數度

function mousePressed(){
	generateRandomFlower(mouseX,mouseY) // 製造一個點擊掉落
}

function draw() {
	// ellipse(mouseX, mouseY, 20, 20);
	background(0)
	for(let i=0;i<positionListX.length;i++){
		let xx = positionListX[i];
		let yy = positionListY[i];
		push();
			translate(xx,yy);
			drawFlower(colorList[i])
		pop();
		positionListY[i] += vYList[i]; // 把postionY 再加上掉落的數
		if(yy>height){
			positionListX.splice(i,1); // 記得pos超過要把array刪除
			positionListY.splice(i,1);
			colorList.splice(i,1);
			vYList.splice(i,1);
		}
	}

}
我們就可以做出那種無限可以掉落花瓣的功能了
https://openprocessing.org/sketch/1259915
