
經過一天的休息,我們又再度回到了物理模擬的世界~
我們在這次的chapter要來介紹的是彈力、張力、引力與磁力這種物體之間~與距離相關的作用力的演算方法。
首先我們會先從彈力開始做介紹~
在高中物理課我們有學過:
F = k * deltaX
這個公式的意思是說彈力的量值會跟物體被拉伸/壓縮的變形量成正比,k是一個常數(彈力係數),deltaX則是變形量。
彈力的概念其實也就是這麼簡單~我們接著來看看一個簡單實作在canvas 上的彈力 物理模擬案例~
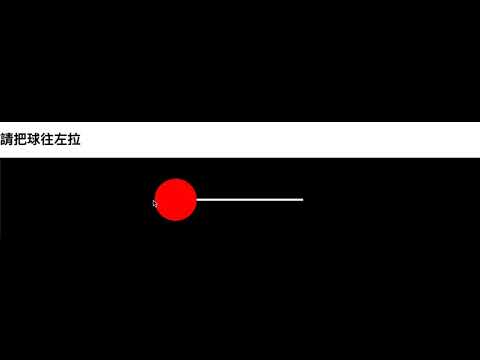
這個案例就是國高中常常看到的『一顆球被連接在一條彈簧上面,而彈簧另外一端連接在牆上,某A試圖去拉動這顆球然後放手』。
對
高中物理還有印象的人應該會知道球接下來就會開始進入簡諧運動(SHM)的狀態
在球運動的過程中,彈簧的變形量其實是會隨時間變化的,這也就是說彈力也會呈現波動的狀態,而我們知道牛頓第二定理:
F = m * a // 在 質量m 固定的狀況下,受力會和加速度成正比
也就是說加速度也會不斷的波動!~
看到這邊,大家應該可以大致上理解如果要把這樣的案例搬到canvas 上面要怎麼寫~
先來個實作的影片:
// 這邊我們把碰撞用的Ball Class稍微修正一下拿來用
class Ball {
  constructor(x, y, color , radius ) {
    this.x = x;
    this.y = y;
    this.color = color;
    this.radius = radius
    this.densityConst = 5;
    this.mass = this.radius * this.densityConst;
    this.force = new Vector2D(0,0);
    this.velocity = new Vector2D(0, 0);
    this.acc = new Vector2D(0, 0);
    this.time = 0;
  }

  draw(ctx) {
    ctx.save()
    ctx.fillStyle = this.color;
    ctx.beginPath();
    ctx.arc(this.x, this.y, this.radius, 0, Math.PI * 2, true);
    ctx.closePath();
    ctx.fill();
    ctx.restore();
  }
  refreshLocation(dt) {
    this.x += this.velocity.x * dt;
    this.y += this.velocity.y * dt;
  }
  refreshSpeed(dt) {
    this.velocity.scaleBy(0.995);
    this.velocity.incrementBy(this.acc.multiply(dt));
  }

  // 這次可以看到我們新增了這個方法,用來給外部操作更新受力
  refreshForce(force){
    this.force=force;
  }
  // 加速度 = 受力/ 質量, 應該不難理解
  refreshAcc(){
    this.acc = this.force.multiply(1/this.mass);
  }
}
// 主入口
class HorizontalSpring{
  constructor(ctx,springLength,ballRadius){
    this.springLength = springLength;
    this.ballRadius = ballRadius;
    this.ctx = ctx;
    this.cvs = ctx.canvas;
    this.mouse = {
      x:0,
      y:0
    }
    this.time = 0;
    this.init();
  }
  // 入口方法
  init(){
     let x = this.cvs.width/2 - this.springLength  + this.ballRadius;
      let y = this.cvs.height/2;
     this.ball = new Ball(x,y,'red',this.ballRadius);
    this.bindClickEvent();
    this.bindVisibilityChangeMech();
    this.animateBall();
  }

  bindVisibilityChangeMech(){
    // 綁定visibilitychange事件
    window.addEventListener('visibilitychange', () => {

      if (document.visibilityState !== "visible") {
        this.frameIsPaused = true;
      }
      else{
        this.frameIsPaused = false;
        this.time = performance.now();
      }


    });
  }
  // 綁定點擊事件,當點擊後移動滑鼠就可以拖曳球
  bindClickEvent(){
    this.cvs.addEventListener('mousedown',(e)=>{
      let x = e.clientX - this.cvs.getBoundingClientRect().left;
      let y = e.clientY - this.cvs.getBoundingClientRect().top;
      let bias = 20;
      // 這邊是利用偵測滑鼠點擊的位置是否接近球當下的位置來決定球有沒有被點到
      this.ballIsClicked =
      (this.ball.x+this.ball.radius+bias>=x && this.ball.x-this.ball.radius-bias<x) && (this.ball.y+this.ball.radius+bias>=y &&this.ball.y-this.ball.radius-bias<y);

      this.mouse.x = x;
      this.mouse.y = y;

    })

    this.cvs.addEventListener('mousemove',(e)=>{
      if(this.ballIsClicked){
        let x = e.clientX - this.cvs.getBoundingClientRect().left;
        let y = e.clientY - this.cvs.getBoundingClientRect().top;
        this.mouse.x = x;
        this.mouse.y = y;
      }
    })

    this.cvs.addEventListener('mouseup',(e)=>{
      this.ballIsClicked = false;
    })
  }

  // 刷新球的位置數據
  updateLocation(dt){
    // 如果滑鼠點擊到球時,球會跟著滑鼠一起動
    if(this.ballIsClicked){
      // 另外補一個防呆,讓球只能被向左邊拉
      if(this.mouse.x < this.cvs.width/2 - this.springLength - this.ballRadius){
          this.ball.x = this.mouse.x;
      }

    }
    else{

        this.ball.refreshLocation(dt);


    }
  }
  // 更新球的速度
  updateSpeed(dt){
     this.ball.refreshSpeed(dt);
  }

  // 這邊就是根據球的位置來決定彈簧變形量,然後再根據變形量求得彈力
  updateForce(){
    let  k  = 10;
    let deltaX = this.cvs.width/2 - this.ball.x + this.ballRadius - this.springLength;
    let force;
    force = new Vector2D( k * deltaX,0)

    this.ball.refreshForce(force);
  }

  updateAcc(){
    this.ball.refreshAcc();
  }
  // 老樣子的animateBall,但是這次多了刷新受力/ 加速度的方法
  animateBall(){
    let $this = this;
    let correct = 100; // 這邊這個correct的用途是讓我們在一幀內多次『重新計算』摩擦力耗損的現象,達到避開後續幀間誤差的情況
    if(!$this.frameIsPaused){
        let dt = (performance.now() - this.time)/1000;
          this.ctx.clearRect(0,0,this.cvs.width,this.cvs.height);
          this.drawSpring();
          this.drawBall();
          for(let i = 0 ;i<correct;i++){
            this.updateLocation(dt);
            this.updateSpeed(dt);
            this.updateForce();
            this.updateAcc();
          }
          this.time = performance.now();
          requestAnimationFrame(this.animateBall.bind($this))
    }
    else{
      this.animateBall();
    }

  }
  // 畫球
  drawBall(){
     this.ball.draw(this.ctx);
  }
  //畫彈簧
  drawSpring(){
    this.ctx.beginPath();
    this.ctx.moveTo(this.cvs.width/2,this.cvs.height/2);
    this.ctx.lineTo(this.ball.x - this.ballRadius,this.cvs.height/2);
    this.ctx.strokeStyle="white";
    this.ctx.lineWidth = 5;
    this.ctx.stroke();
    this.ctx.closePath();
  }

}


(()=>{
  let ctx = document.querySelector('canvas').getContext('2d');
  let instance  =  new HorizontalSpring(ctx,200,50)
})()
codepen連結: https://codepen.io/mizok_contest/pen/powBJbG?editors=1010
像這樣就是一個簡單的一維彈力模擬~
值得一提的是,彈力的模擬其實也會受到幀間誤差的影響,為什麼呢?
其實這個問題很簡單,我們之前有提到過幀間誤差與加速度的互動關係,以反彈的例子來講,球會因為沒辦法準確地停在『球心到牆壁距離等於半徑的位置』,而會有多餘的加速行為~其實彈力的案例也是一樣,在這個案例中我們可以發現,球在運動的過程中,也同樣很難回到變形量為0的那個點,這導致每次彈簧回彈一樣也會留下多餘的變形量。
這邊的解決方法雖然其實也一樣可以運用『加上一個摩擦耗損係數來遞減速度』來減少加速過度的問題 ~
但是因為幀間誤差對於彈力計算的影響其實會比之前我們看過的『球碰撞牆壁時越位的問題』來得多,所以這邊我們需要做一個操作,那就是要『強制』摩擦耗損這個行為多次發生。
指的就是源碼中這部分:
for(let i = 0 ;i<correct;i++){
            this.updateLocation(dt);
            this.updateSpeed(dt);
            this.updateForce();
            this.updateAcc();
          }
這邊我們會透過重複correct次的量值計算,來達到我們的目的。
這其實算是一種小技巧(雖然說物理上不見得正確),但是他卻能夠達成我們所需的視覺效果。
這一個小技巧能夠實現其實有一部分是因為近年瀏覽器運算的效率提高非常多,可以在一幀內完成很多的運算
我們在後面的案例會持續用到這種做法,來抵銷幀間誤差帶來的影響。
我們在下一篇文將會提到垂直向附帶重力狀況的彈力運算案例,敬請期待 :D ~
