上一篇談到 TensorFlow/PyTorch 自動微分及梯度下降的作法,這次我們再來比較神經層及神經網路模型的實作。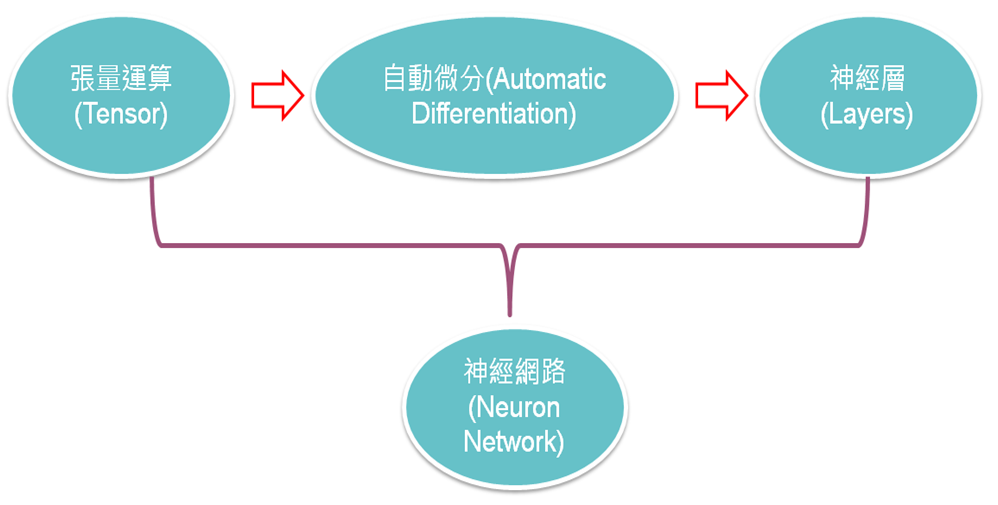
圖一. 神經網路學習路徑
TensorFlow、PyTorch 都提供兩種網路模型,TensorFlow/Keras 稱為順序型模型(Sequential Model)、Functional API,可參見Keras官網,PyTorch 則無正式名稱,只是分別放在不同的模組下torch.nn、torch.nn.functional,為方便說明,以下均使用TensorFlow/Keras定義。
TensorFlow:
import tensorflow as tf

# 建立模型
model = tf.keras.models.Sequential([
  tf.keras.layers.Flatten(input_shape=(28, 28)),
  tf.keras.layers.Dense(128, activation='relu'),
  tf.keras.layers.Dropout(0.2),
  tf.keras.layers.Dense(10, activation='softmax')
])
PyTorch:
import torch

# 建立模型
model = torch.nn.Sequential(
    torch.nn.Flatten(),
    torch.nn.Linear(28 * 28, 256),
    torch.nn.Dropout(0.2),
    torch.nn.Linear(256, 10),
    # 使用nn.CrossEntropyLoss()時,不需要將輸出經過softmax層,否則計算的損失會有誤
    # torch.nn.Softmax(dim=1)
)
完全連接層(Full Connected Layer) 用法有些差異:
Functional API 可以實作較複雜的模型,允許多個Input或Output、分叉及合併。
TensorFlow:
import tensorflow as tf
from tensorflow.keras import layers

# 建立模型
# 建立第一層 InputTensor
InputTensor = layers.Input(shape=(100,))

# H1 接在 InputTensor 後面
H1 = layers.Dense(10, activation='relu')(InputTensor)

# H2 接在 H1 後面
H2 = layers.Dense(20, activation='relu')(H1)

# Output 接在 H2 後面
Output = layers.Dense(1, activation='softmax')(H2)

# 建立模型,必須指定 inputs / outputs
model = tf.keras.Model(inputs=InputTensor, outputs=Output)
PyTorch:神經層串連與TensorFlow大同小異。
from torch import nn
from torch.nn import functional as F

inputs = torch.randn(100, 256)
x = nn.Linear(256,20)(inputs)
x = F.relu(x)
x = nn.Linear(20, 10)(x)
x = F.relu(x)
x = F.softmax(x, dim=1)
PyTorch 要建構整個模型,通常會使用類別,即所謂的專家模式,在__init__定義神經層,在forward串連神經層。
class MyModel(nn.Module):
    def __init__(self):
        super(Net, self).__init__()
        self.fc1 = nn.Linear(784,256)
        self.fc2 = nn.Linear(256, 10)
        self.dropout1 = nn.Dropout(0.2)
        self.dropout2 = nn.Dropout(0.2)

    def forward(self, x):
        x = torch.flatten(x, 1)
        x = self.fc1(x)
        x = self.dropout1(x)
        x = self.fc2(x)
        x = self.dropout2(x)
        output = F.softmax(x, dim=1)
        return output

model = MyModel()
TensorFlow 也支援專家模式,使用 call函數,與 PyTorch 的 forward 函數相對應。
class MyModel(tf.keras.Model):
  def __init__(self):
    super(MyModel, self).__init__()
    self.conv1 = Conv2D(32, 3, activation='relu')
    self.flatten = Flatten()
    self.d1 = Dense(128, activation='relu')
    self.d2 = Dense(10, activation='softmax')

  def call(self, x):
    x = self.conv1(x)
    x = self.flatten(x)
    x = self.d1(x)
    return self.d2(x)
model = MyModel()
TensorFlow/PyTorch 在建立模型的基本設計也是一致的,只是語法不同而已。不過,有些細節是存在差異的,例如PyTorch損失函數使用nn.CrossEntropyLoss時,不需要將輸出經過softmax層,否則計算的損失會有誤。
下一篇我們繼續比較Dataset/Dataloader的實作。
以下為工商廣告:)。
PyTorch:
開發者傳授 PyTorch 秘笈
預計 2022/6/20 出版。
TensorFlow:
深度學習 -- 最佳入門邁向 AI 專題實戰。
 I code so I am
