昨天我們成功完成第一條 Pipeline ,但是俗話說 『 天有不測風雲,Server 有旦夕禍福 』搞不好哪天犯水逆使得 Jenkins 內部資料遺失或是整台 Server 直接跟你 Say Goodbye ...... 為了讓傷害最小化,所以讓我們將我們的 Jenkinsfile 用 Git Server 來儲存吧。
The term "SCM" stands for Source code Management, a basic but essential part of any project developed in the current IT world. It is a kind of software that the developers usually use to manage their source code. It plays a vital role in the process of software development because it ensures that every member of the team stays on the top of source code changes in an ongoing project.
https://www.javatpoint.com/scm-tools
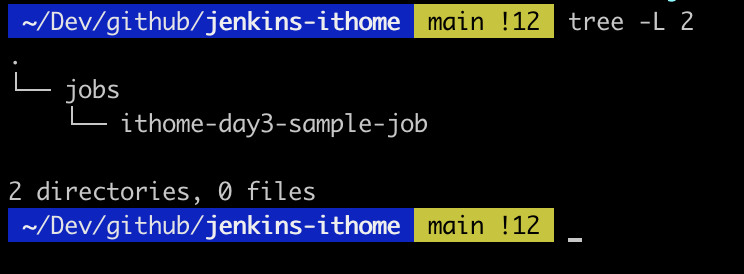
Github / GitLab / Bitbucket 是常見的 SCM 工具,此次會使用 Github 做為範例。先 Github 上建立 Project,建立 jobs/ithome-day3-sample-job 資料夾,並在其下新增 Jenkinsfile
為了區別昨天的 pipeline,在此將在 stage 中的 echo 'Hello Ben ~' 改為 echo 'Hello Github ~'
// 範例 Jenkinsfile
pipeline {
    agent any // 不指定執行 agent
    stages { // 開始宣告 Pipeline 流程
        stage('ithome 2022 pipeline') {
            // 行為宣告
            steps {
                echo 'Hello Github ~'
            }
        }
    }
}
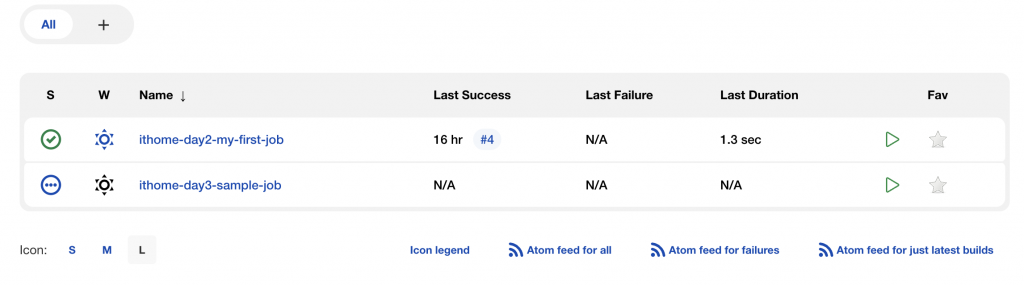
在完成上傳 Github 後,這時讓我們回到 Jenkins Server,與昨天相同我們再次建立一個新的 Pipeline 名稱取為 ithome-day3-sample-job
進入 Configure 頁面在最底端進行 Pipeline 設定
Pipeline script from SCM
Git
https://github.com/ben4932042/jenkins-ithome.git
main
jobs/ithome-day3-sample-job/Jenkinsfile
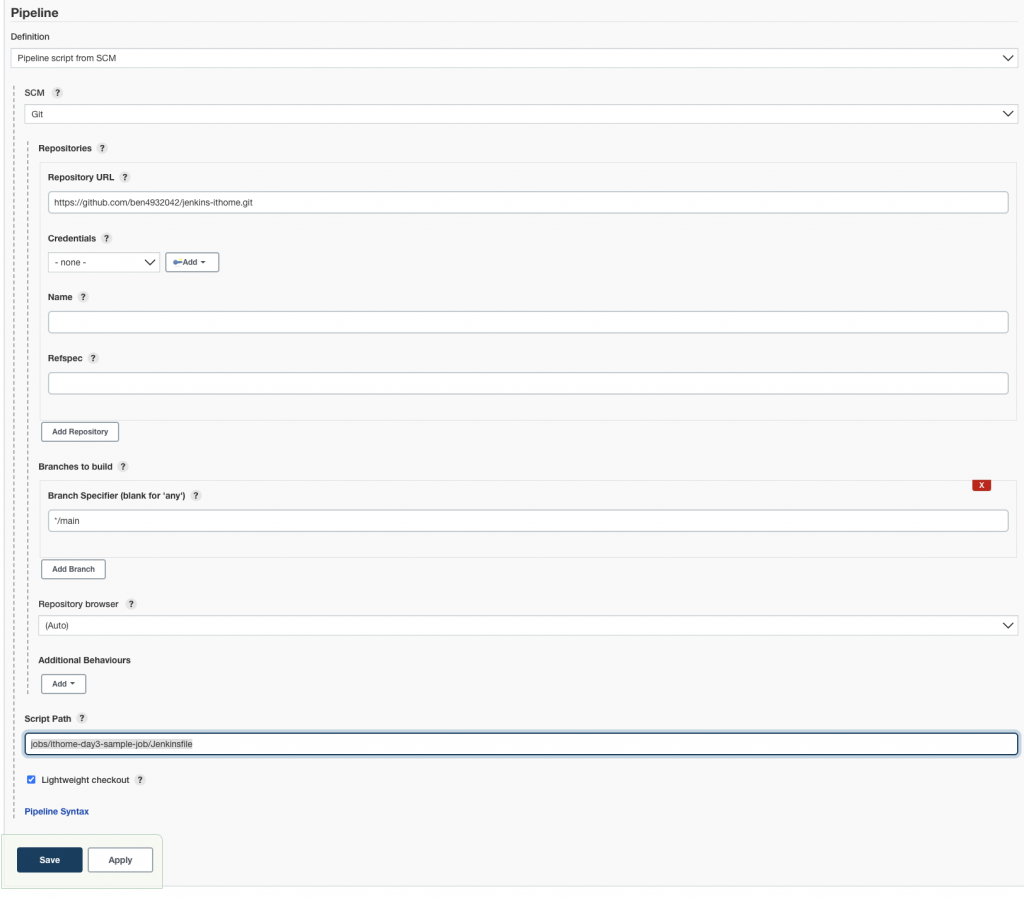
!!! 如果 Git Project 為非公開的,需要在 Credentials 中新增對應的權限(之後文章會詳細說明)
在完成設定後會到 Pipeline 介面按下 Build Now,即會開始執行 Job。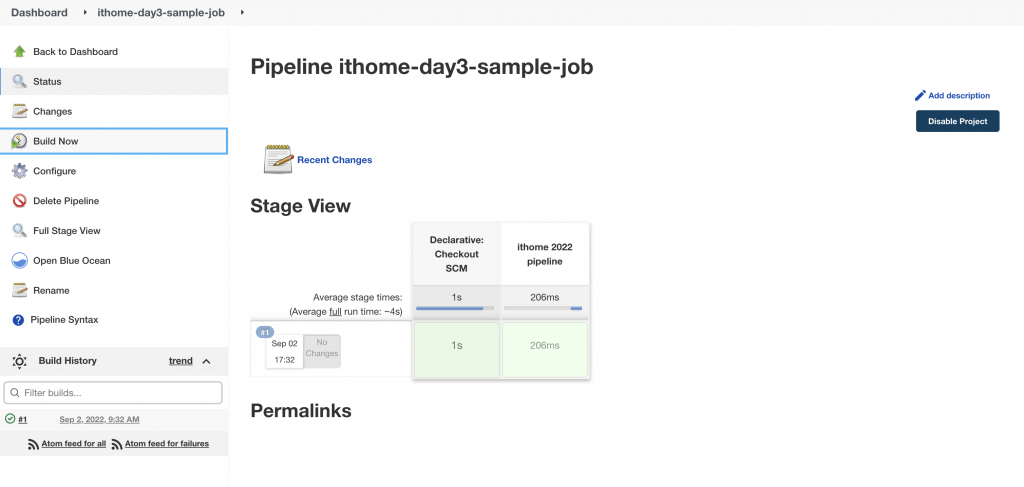
可以看到跟昨天執行結果比較起來,在 Stage ithome 2022 pipeline 前多了一個新的Stage Declarative: Checkout SCM,此 Stage 是 Jenkins 在執行 Pipeline 前,會先去我們指定的 Git Project 上更新我們的 source code。
Selected Git installation does not exist. Using Default
The recommended git tool is: NONE
using credential ithome-github-token
 > git rev-parse --resolve-git-dir /bitnami/jenkins/home/workspace/ithome-day3-sample-job/.git # timeout=10
Fetching changes from the remote Git repository
 > git config remote.origin.url https://github.com/ben4932042/jenkins-ithome.git # timeout=10
Fetching upstream changes from https://github.com/ben4932042/jenkins-ithome.git
 > git --version # timeout=10
 > git --version # 'git version 2.36.1'
using GIT_ASKPASS to set credentials
 > git fetch --tags --force --progress -- https://github.com/ben4932042/jenkins-ithome.git +refs/heads/*:refs/remotes/origin/* # timeout=10
 > git rev-parse refs/remotes/origin/main^{commit} # timeout=10
Checking out Revision b8b9a3114ddcdb4c806d07152308c894f62905ba (refs/remotes/origin/main)
 > git config core.sparsecheckout # timeout=10
 > git checkout -f b8b9a3114ddcdb4c806d07152308c894f62905ba # timeout=10
Commit message: "style: change echo message"
First time build. Skipping changelog.
到此我們已經基本完成以 SCM 管理我們的 Jenkins pipeline 設定檔的動作。之後的範例也將會盡可能使用 Pipeline script from SCM 進行設定檔的更新。所有更新的程式碼皆會放在我的 Github 專案上
https://github.com/ben4932042/jenkins-ithome
今天我們成功以 Github 託管我們的 Jenkinsfile,明天開始會正式進入到 Jenkinsfile 的語法介紹。
想要跟著實作的人注意是 Day-03
jobs/ithome-day03-sample-job/Jenkinsfile


 iThome鐵人賽