[碎碎念]
我今天才發現文章可以加 tag ...
今天要繼續把 Day01 的成果拿出來改編
另外, 第一天有個很重要很重要很基本的東西沒有提到, 就是視窗的名稱.
方法很簡單, 只要在 main 裡加上
QtWidgets.QApplication.setApplicationName("你想要的名稱")
即可
廢話不多說, 直接示範一次
import sys
from PySide6 import QtCore, QtWidgets

class MyWidget(QtWidgets.QWidget):
    def __init__(self):
        super().__init__()

        self.hello = "Hello, world!"
        self.isShow = True

        self.button = QtWidgets.QPushButton("Click")
        self.text = QtWidgets.QLabel("Hello World",
                                    alignment=QtCore.Qt.AlignCenter)

        self.layout = QtWidgets.QVBoxLayout(self)
        self.layout.addWidget(self.text)
        self.layout.addWidget(self.button)

if __name__ == "__main__":
    app = QtWidgets.QApplication([])
    QtWidgets.QApplication.setApplicationName("Hello")
    widget = MyWidget()
    widget.resize(300, 300)
    widget.show()

    sys.exit(app.exec())
從下圖就可以看到, 程式的名稱終於不再是 Python 了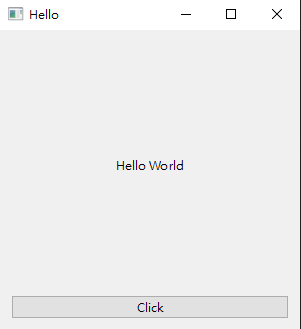
既然都改了程式名稱了, 那順便改程式的圖標好了, 圖就用小隊的照片吧
一樣只要在 main 裡加上
QtWidgets.QApplication.setWindowIcon(QtGui.QIcon("你的圖片位置"))
import sys
from PySide6 import QtCore, QtWidgets, QtGui

class MyWidget(QtWidgets.QWidget):
    def __init__(self):
        super().__init__()

        self.hello = "Hello, world!"
        self.isShow = True

        self.button = QtWidgets.QPushButton("Click")
        self.text = QtWidgets.QLabel("Hello World",
                                    alignment=QtCore.Qt.AlignCenter)

        self.layout = QtWidgets.QVBoxLayout(self)
        self.layout.addWidget(self.text)
        self.layout.addWidget(self.button)

if __name__ == "__main__":
    app = QtWidgets.QApplication([])
    QtWidgets.QApplication.setApplicationName("Hello")
    QtWidgets.QApplication.setWindowIcon(QtGui.QIcon("214.png"))
    widget = MyWidget()
    widget.resize(300, 300)
    widget.show()

    sys.exit(app.exec())
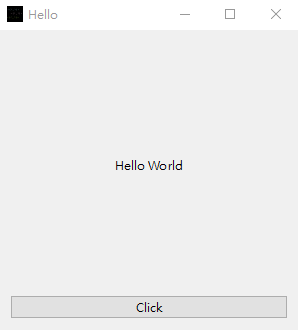
成功了! 但小隊的圖片上文字太細, 變成一團黑, 看不到表情 ╮(╯_╰)╭
回到今天主題, 今天想要完成的是, 按了按鈕後可以選擇顏色並改變 Hello, world! 的文字顏色
平時常使用的文字編輯器裡, 更改文字顏色的按鈕裡通常會有一個文字跟一個方塊預覽選擇的顏色
這樣的話就要在一個按鈕裡放兩個東西, 聽起來好像很困難
沒關係! 我們先從完成換文字顏色開始
Qt 有內建的顏色對話框 QColorDialog
長相如下圖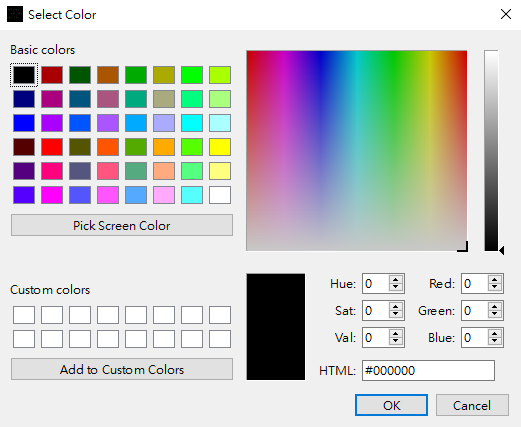
import sys
from PySide6 import QtCore, QtWidgets, QtGui

class MyWidget(QtWidgets.QWidget):
    def __init__(self):
        super().__init__()

        self.hello = "Hello, world!"
        self.isShow = True

        self.button = QtWidgets.QPushButton("Click")
        self.text = QtWidgets.QLabel("Hello World",
                                    alignment=QtCore.Qt.AlignCenter)

        self.layout = QtWidgets.QVBoxLayout(self)
        self.layout.addWidget(self.text)
        self.layout.addWidget(self.button)

        self.button.clicked.connect(self.changeTextColor)

    @QtCore.Slot()
    def changeTextColor(self):
        col = QtWidgets.QColorDialog.getColor(self.text.palette().color(QtGui.QPalette.WindowText), self)
        if not col.isValid():
            return
        self.text.setStyleSheet("color: %s"%col.name())

if __name__ == "__main__":
    app = QtWidgets.QApplication([])
    QtWidgets.QApplication.setApplicationName("Hello")
    QtWidgets.QApplication.setWindowIcon(QtGui.QIcon("214.png"))
    widget = MyWidget()
    widget.resize(300, 300)
    widget.show()

    sys.exit(app.exec())
途中展示
接下來建立一個 QPushButton class, 裡面有兩個 QLabel, 一個是按鈕上的文字, 一個是顯示目前字體顏色
外觀如下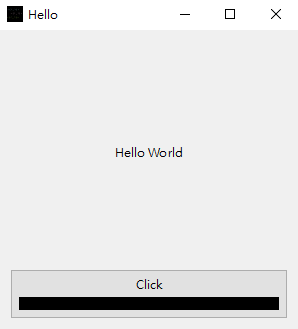
完整程式碼
import sys
from PySide6 import QtCore, QtWidgets, QtGui

class changeColorBtn(QtWidgets.QPushButton):
    def __init__(self, btnName = ""):
        super(changeColorBtn, self).__init__()
        self.setFixedHeight(50)
        self.textLabel = QtWidgets.QLabel(btnName, alignment=QtCore.Qt.AlignCenter)
        self.colorLabel = QtWidgets.QLabel("", alignment=QtCore.Qt.AlignCenter)
        self.colorLabel.setStyleSheet("background-color : black")
        self.layout = QtWidgets.QVBoxLayout(self)
        self.layout.addWidget(self.textLabel)
        self.layout.addWidget(self.colorLabel)

class MyWidget(QtWidgets.QWidget):
    def __init__(self):
        super().__init__()

        self.hello = "Hello, world!"
        self.isShow = True

        self.button = changeColorBtn(btnName="Click")
        self.text = QtWidgets.QLabel("Hello World",
                                    alignment=QtCore.Qt.AlignCenter)

        self.layout = QtWidgets.QVBoxLayout(self)
        self.layout.addWidget(self.text)
        self.layout.addWidget(self.button)

        self.button.clicked.connect(self.changeTextColor)

    def changeTextColor(self):
        col = QtWidgets.QColorDialog.getColor(self.text.palette().color(QtGui.QPalette.WindowText), self)
        if not col.isValid():
            return
        self.text.setStyleSheet("color: %s"%col.name())
        self.button.colorLabel.setStyleSheet("background-color: %s"%col.name())

if __name__ == "__main__":
    app = QtWidgets.QApplication([])
    QtWidgets.QApplication.setApplicationName("Hello")
    QtWidgets.QApplication.setWindowIcon(QtGui.QIcon("214.png"))
    widget = MyWidget()
    widget.resize(300, 300)
    widget.show()

    sys.exit(app.exec())
結果展示如下