前面介紹過將 OpenWeather API 回傳的資料如何展示在網頁上,除了文字以外也包含圖片,隨著天氣變化,溫度和天氣狀況會依照 API 回傳的資料來改變。不過目前地點是不能變動的。
所以這堂課要教的就是如何讓使用者在網頁就能更換地點,並依照地點給不一樣的天氣資料。
第一步要先在 index.html 上有輸入匡讓使用者輸入資料:
<body>
    <label for="cityInput">City Name:</label>
    <input id ="cityInput" type="text" name="cityName">
</body>
第二步用 <form> 把送出按鈕和上面的輸入匡包起來:
<form action="/" method="post">
<label for="cityInput">City Name:</label>
<input id ="cityInput" type="text" name="cityName">
<button type="submit">GO!</button>
</form>
第三步是到 js 檔案裡加上 post:
app.post('/', function(req,res){
    console.log("Post request recieved")
})
接著用 nodemon app.js 來看看是否在前端輸入文字送出,terminal 有出現 "Post request recieved"。有的話就代表基本的已經都接好了,可以繼續進行下一步。
接著回到 terminal,用 npm i body-parser 裝好套件。body-parser 是一個套件,讓我們可以看到 post request 和來抓取前端 <input> 給的東西。
裝好套件之後回到 js 檔案跟開始使用這個套件:
const bodyParser = require('body-parser');
app.use(bodyParser.urlencoded({extended: true}));
以及加上 console.log 在網頁輸入的內容,在 HTML 裡我的 input name 是 cityName:
app.post('/', function(req,res){

    console.log(req.body.cityName);
    console.log("Post request recieved");

})
還有這時候應該要可以看到我們 input 的內容,所以我會預期在 terminal 裡看到我剛剛在網頁上輸入的東西。
在 terminal 上確認好有收到網頁輸入的文字之後,把前兩天寫好的獲取 api 資訊的功能直接複製貼上在 app.post 裡面:
    const query = req.body.cityName;
    const url = 'https://api.openweathermap.org/data/2.5/weather?q=' + query +'&appid=Key';

    /* query 是網頁上輸入的文字,輸入什麼就會帶入這網址。

    https.get(url, function(response){
        // console.log('statusCode: ', response.statusCode);
        // console.log('headers: ', response.headers);
        response.on('data', function(data){
            const weatherData = JSON.parse(data)
            console.log(weatherData)

            const temp = weatherData.main.temp
            const weatherDescription = weatherData.weather[0].description
            const weatherIcon = weatherData.weather[0].icon
            const imageURL = ' http://openweathermap.org/img/wn/'+weatherIcon+'@2x.png'
            console.log('TEMPERATURE IS HERE: '+temp)
            res.write('<h1>The temperature in London is '+temp+'</h1>');
            res.write('<h1>The weather is currently '+weatherDescription+'</h1>');
            res.write('<img src='+imageURL+'>');
            res.send();

        })
    });
OK~ 目前已經完成簡單查其他城市天氣的功能。
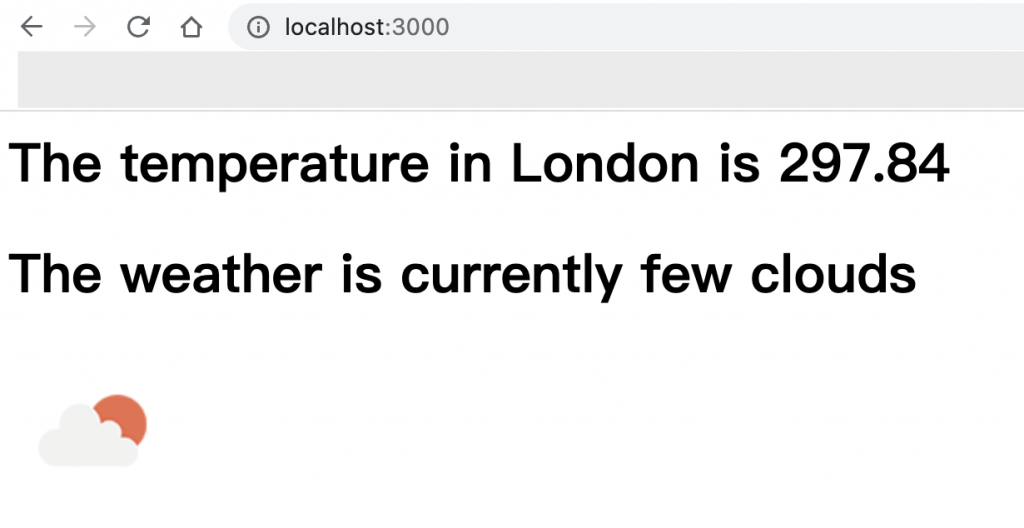
雖然上面截圖是倫敦,但其實這是台灣的天氣狀況 XD
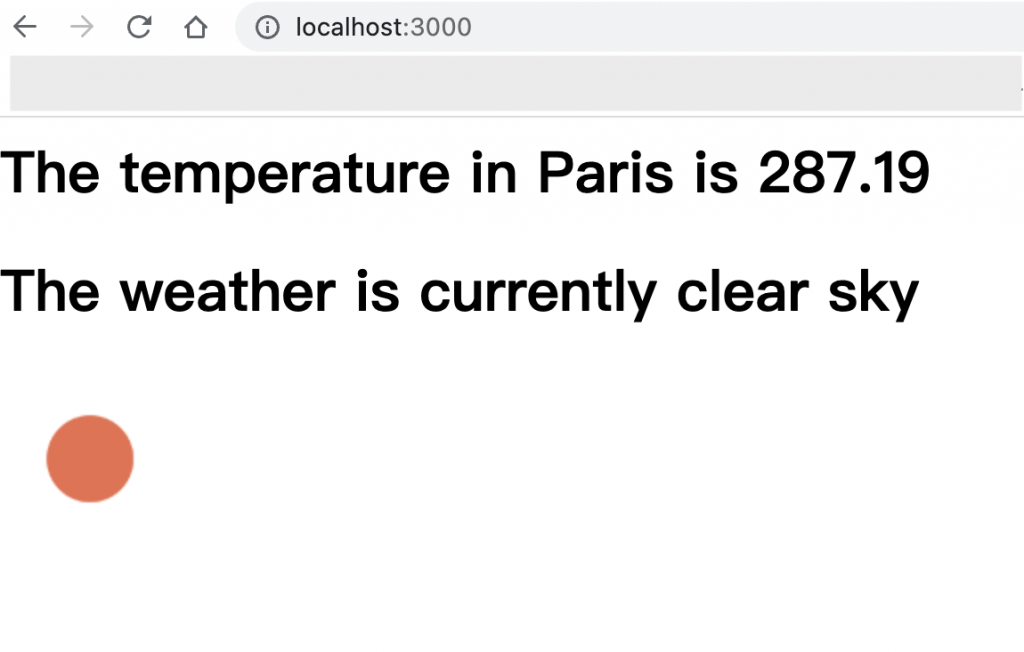
所以城市這邊也要改成動態去看 API 給的資料,所以「城市」這邊改成剛剛設定的變數 query
res.write('<h1>The temperature in '+query+' is '+temp+'</h1>');
登愣~ 輸入的城市名稱會自動帶入結果了:


 iThome鐵人賽