要建置一個小型的企業資料中心,首先我們需要了解怎麼安裝 Hypervisor環境。
目前最廣泛被使用的 Hypervisor環境大致有下面幾種:
至於什麼是Hypervisor?
為何使用Hypervisor虛擬機管理程式?
您可以參考以下文章:(參考文章來源:nutanix官網)
https://www.nutanix.com/tw/info/hypervisor

在此我先以VMware ESXi為範例進行後續的安裝作業,也就是上圖Server2+ESXi環境的建立。
安裝前環境準備:
VMware官網確認硬體相容:http://www.vmware.com/resources/compatibility
硬體:Dell Server
軟體:VMWware ESXi 7.0 (.iso)
設定好 Dell iDRAC環境
PS.上述 ESXi ISO檔案的取得,建議根據Server廠牌取得客制化的ISO檔,如此安裝後可以避免一些穩定性、硬體相容性問題,必要時建議安裝前事先更新Server的軔體,可避免後續系統不穩定等..其他議題)
如何更新Server的軔體,請參考>>https://ithelp.ithome.com.tw/articles/10301891
客制版本的取得可到 VMware原廠或Server廠商網站取得: (下圖為VMware和Dell原廠 Custom ISO)
VMware > https://www.vmware.com/tw.html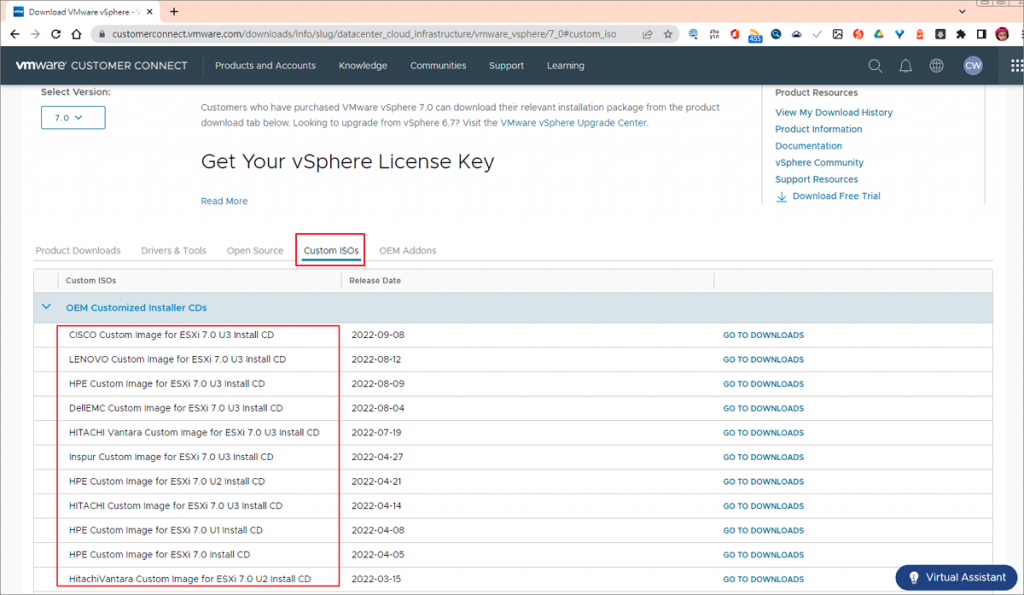
Dell > https://www.dell.com/zh-tw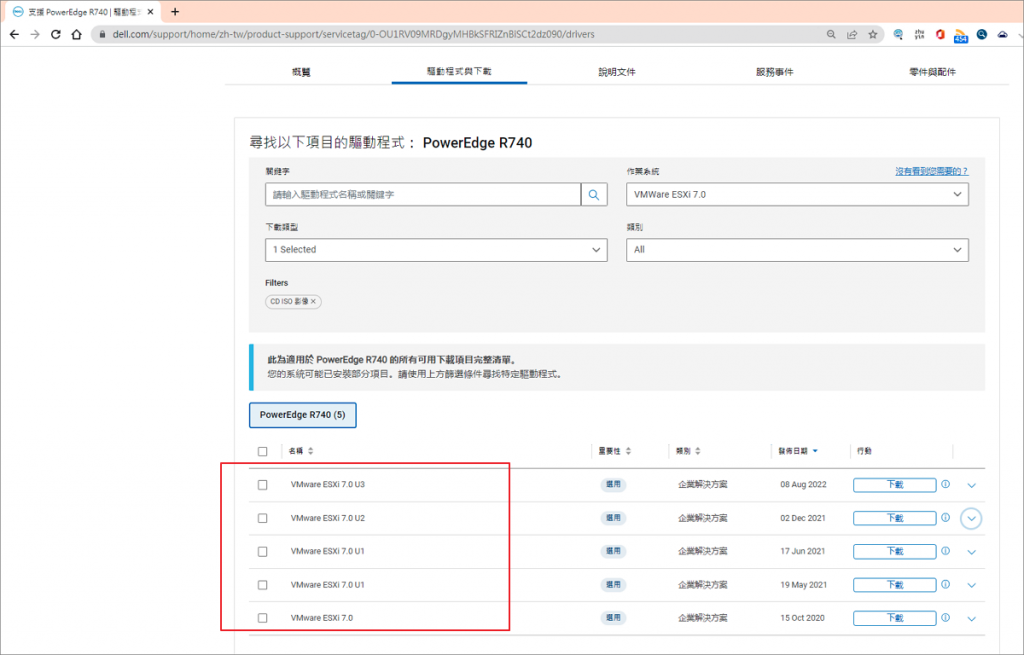
使用DellEMC iDRAC9 掛載本機ISO暨安裝 ESXi7步驟如下:
Step1.透過你的電腦瀏覽器連線Server的iDRAC IP後,啟動虛擬主控台並點選【虛擬介質】掛載下載於電腦上的ISO檔。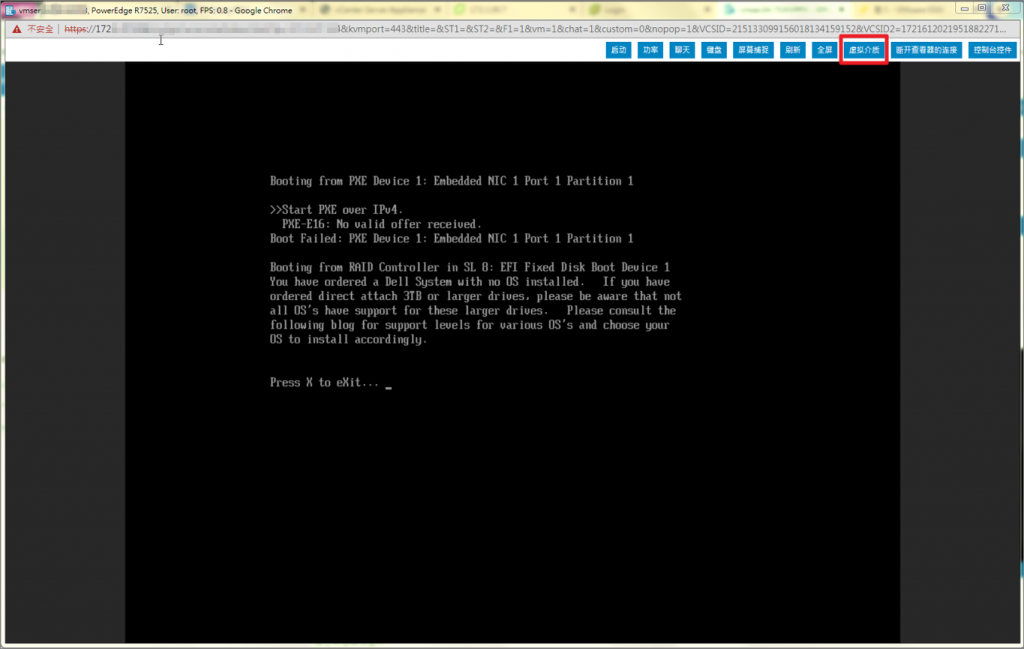
Step2.連接虛擬介質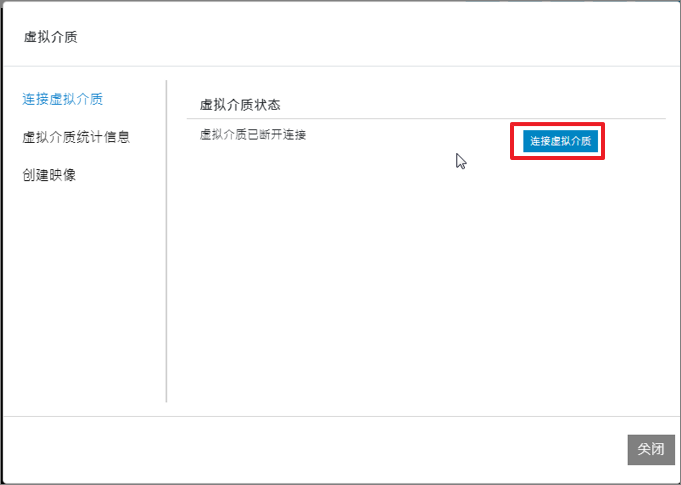
Step3.選擇檔案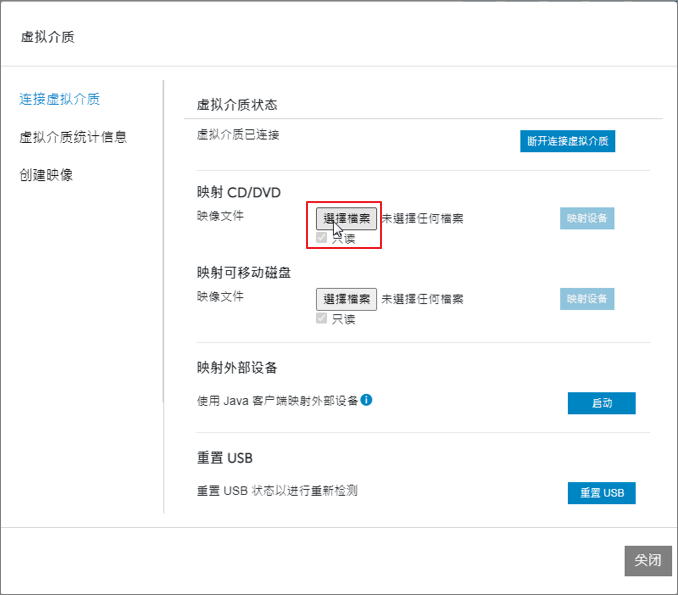
Step4.選擇ISO檔>開啟舊檔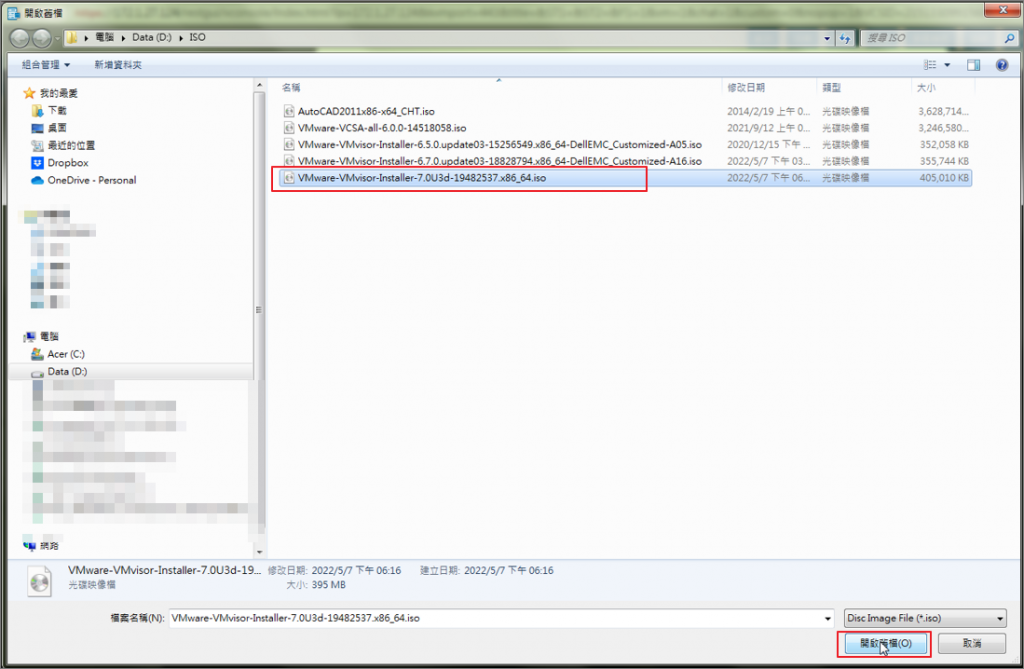
Step5.映射設備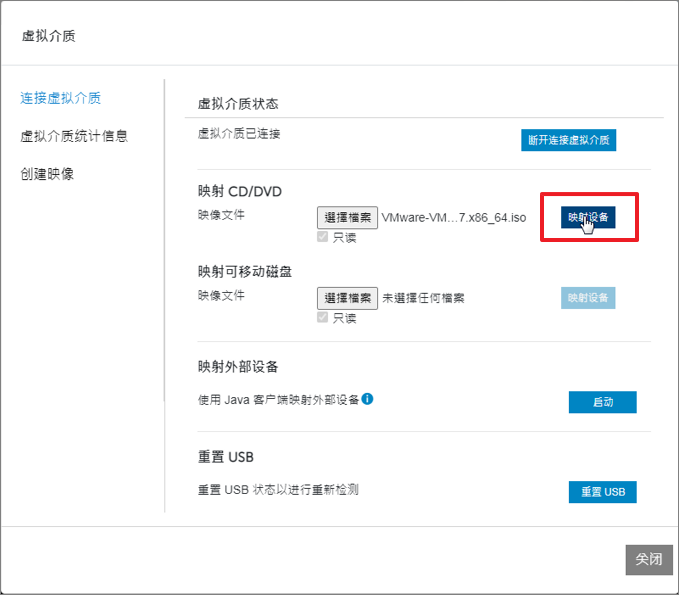
Step6.點選虛擬介質統計信息確認已掛載成功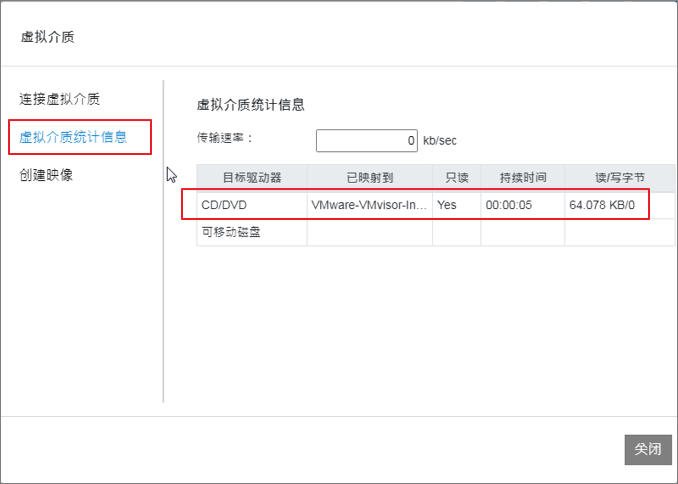
Step7.進入Dell 的開機管理畫面>選擇Virtual Optical Drive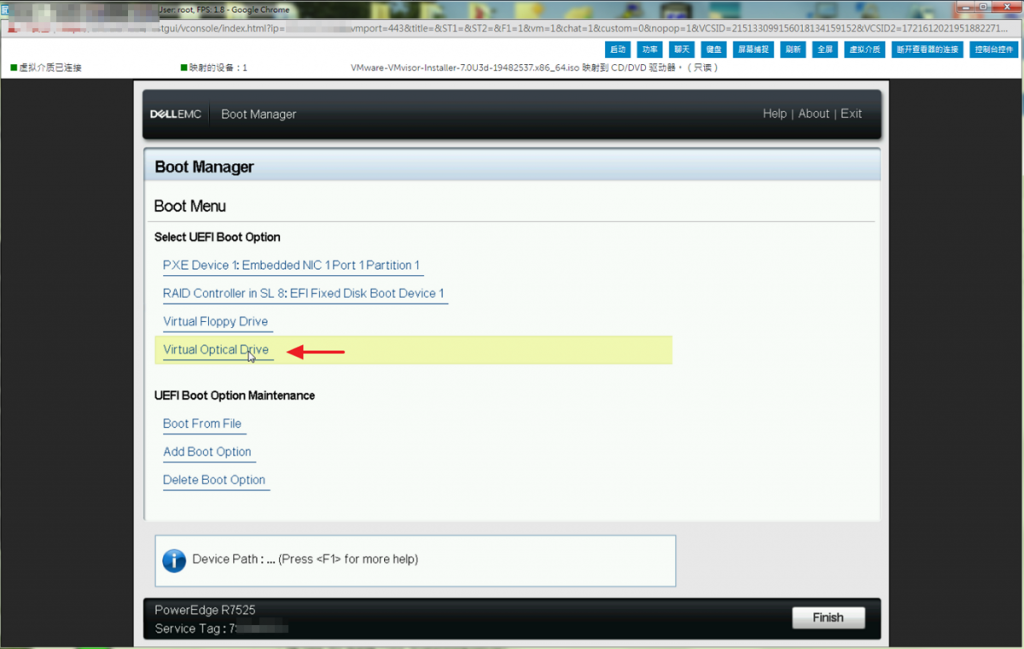
Step8.重新啟動後開始安裝ESXi7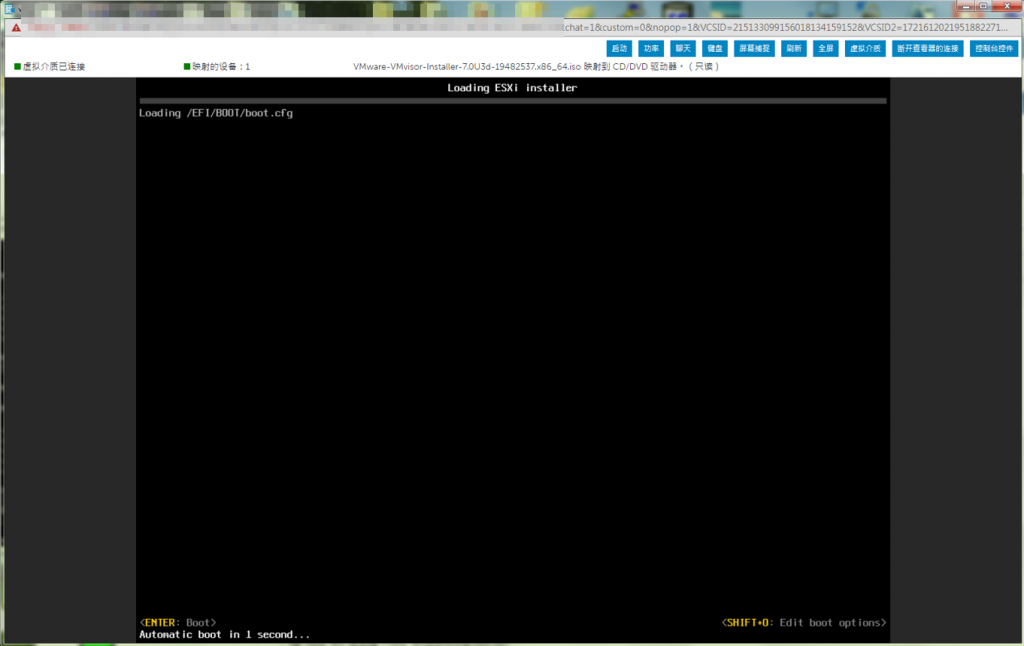
Step9.按Enter繼續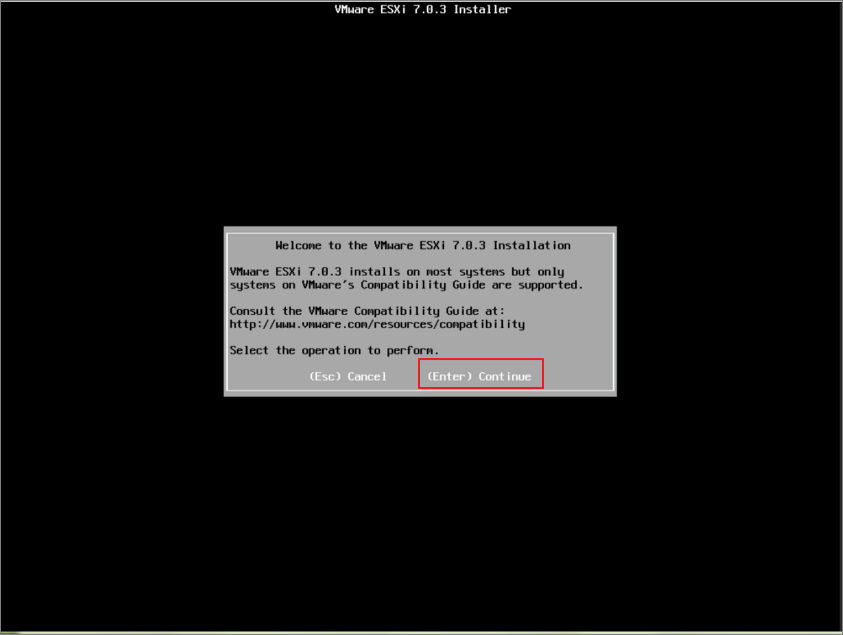
Step10.按F11接受並繼續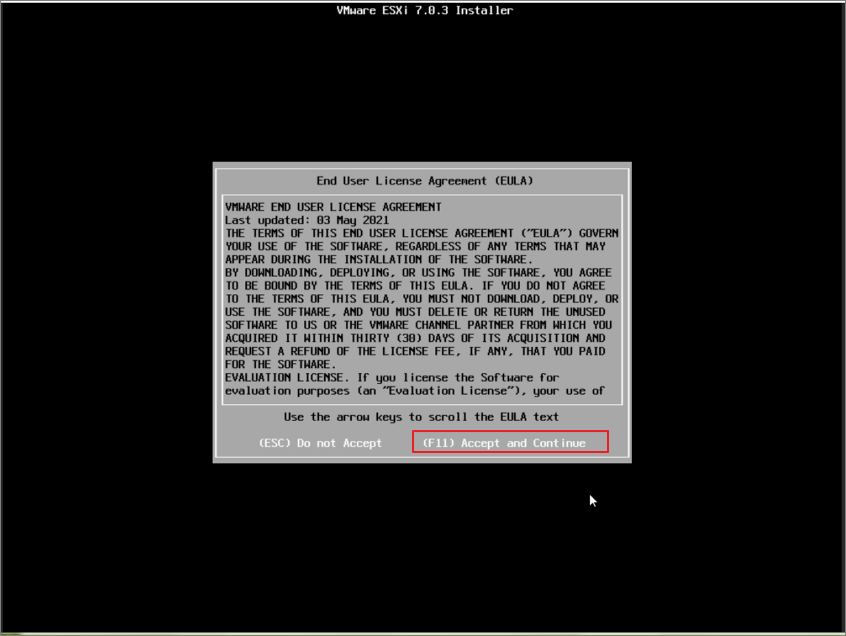
Step11.選擇ESXi要安裝的硬碟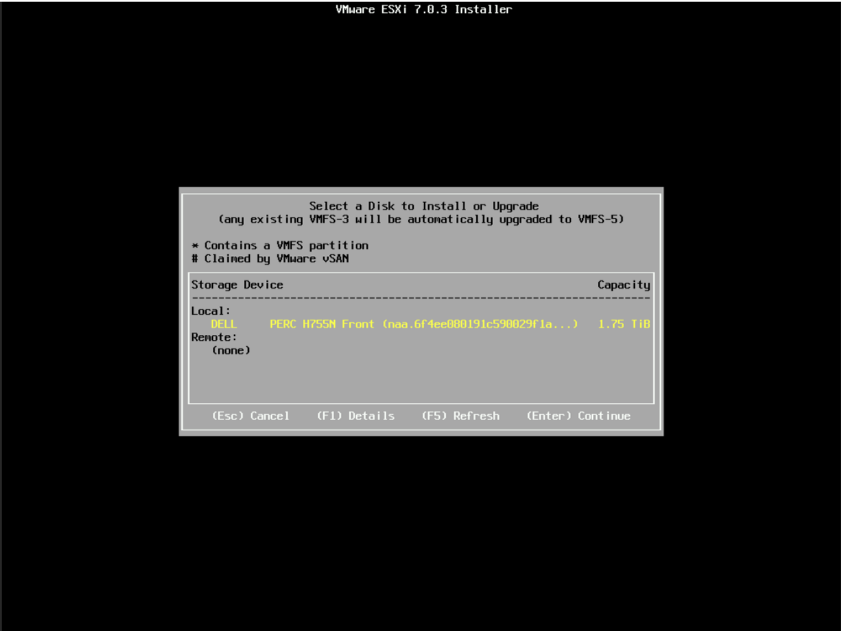
Step12.提醒您disk將被覆寫,確認後Enter繼續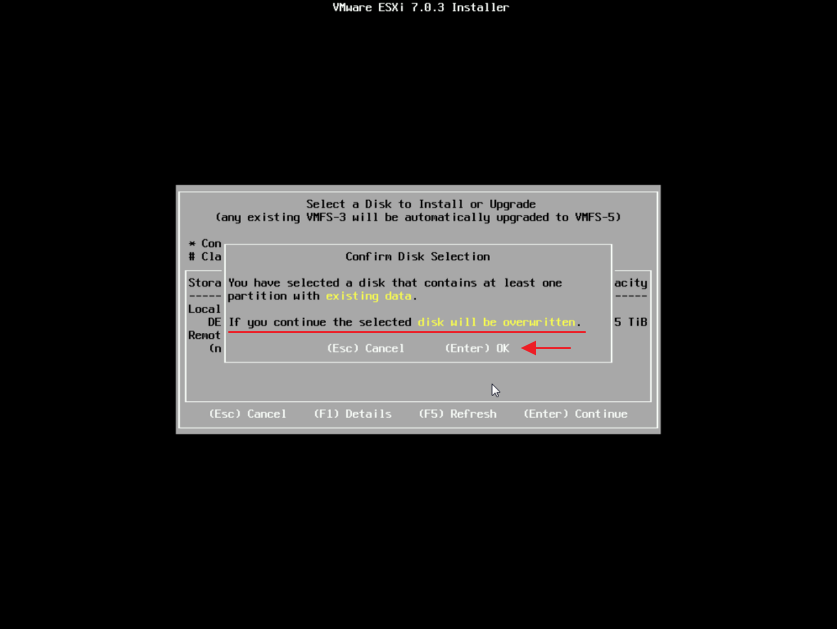
Step13.選擇鍵盤配置>選擇US Default >Enter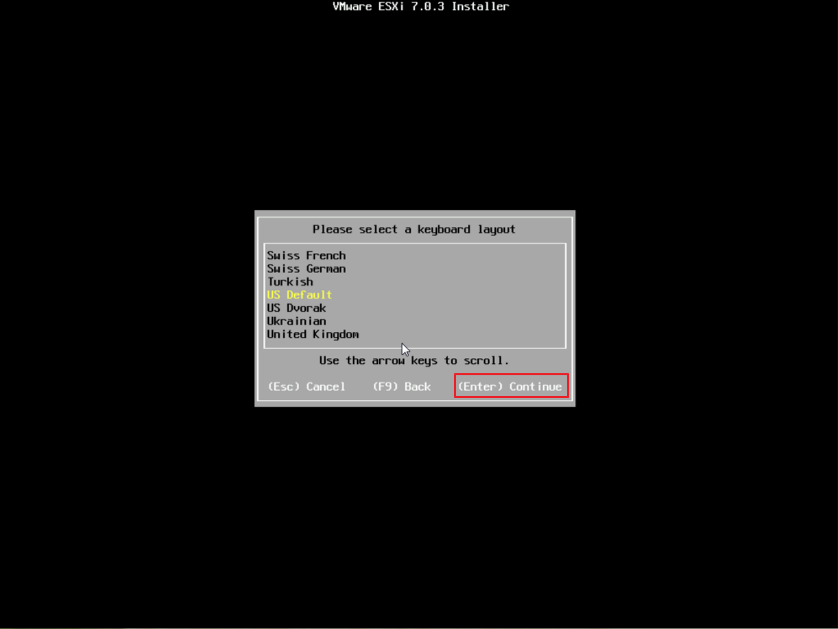
Step14.輸入root密碼並再次確認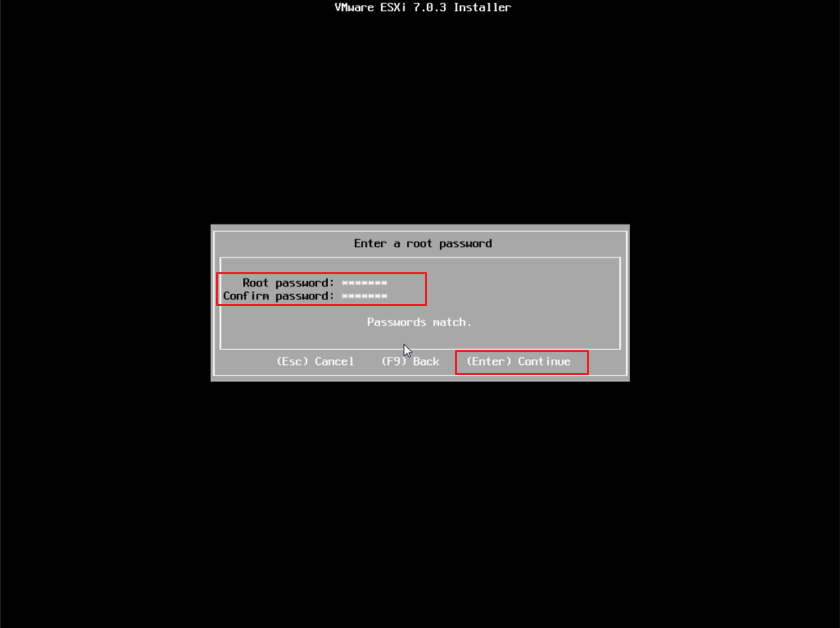
Step15.選擇F11安裝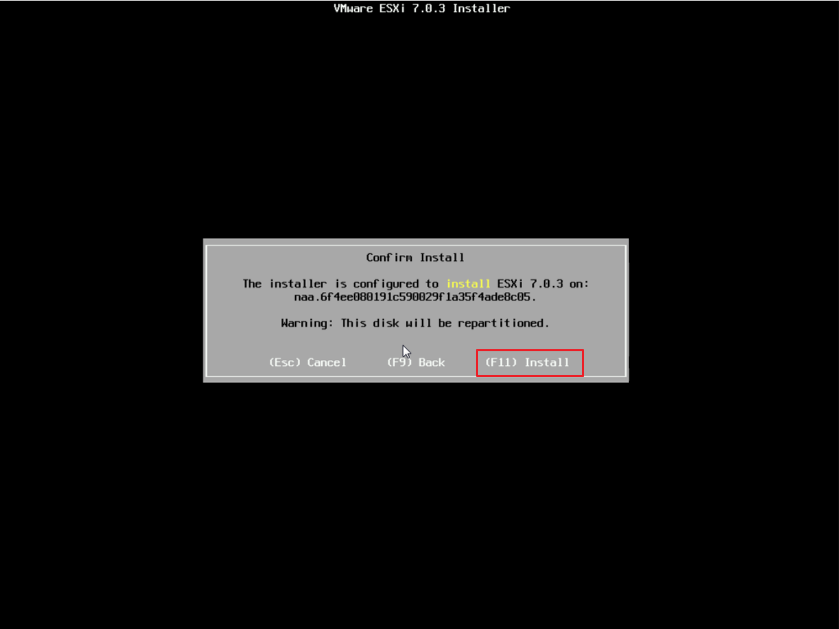
Step16.安裝中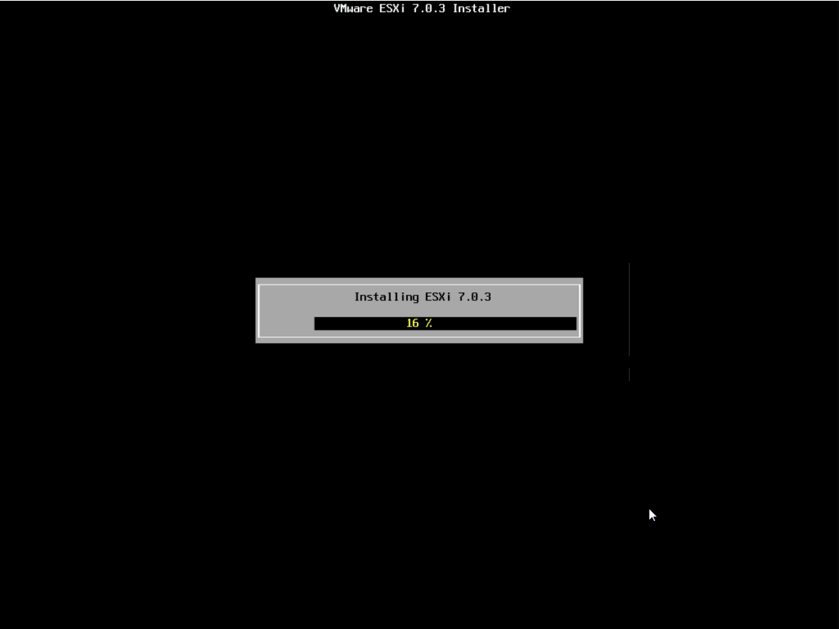
Step17.安裝完成,移除安裝媒體並重開機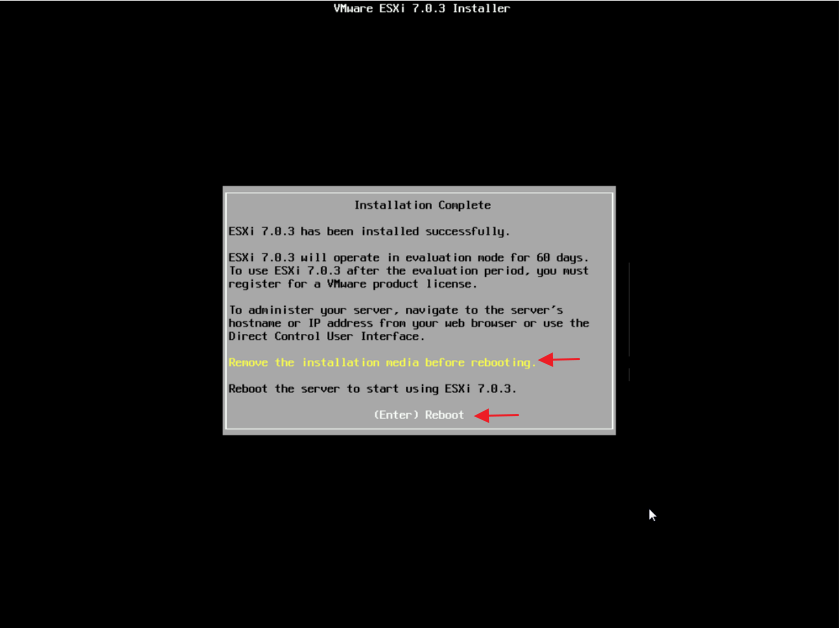
Step18.完成ESXi安裝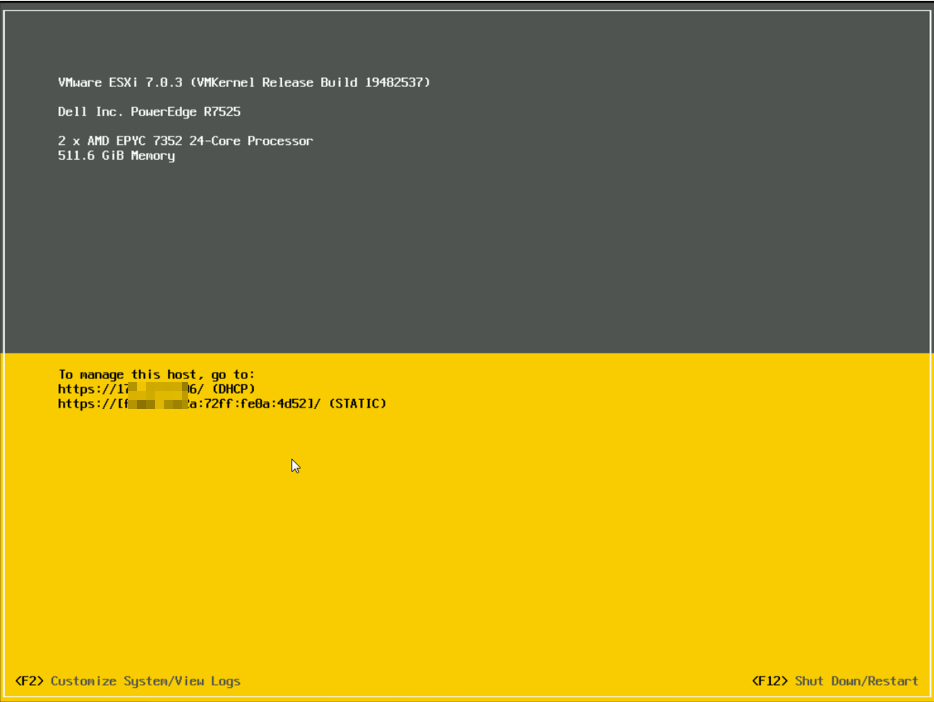
後續的Server1和Server3則以相同方式建置
以上初步已完成 Hypervisor環境建置。
目前最廣泛被使用的 Hypervisor環境有下面幾種:
我會說這點爭議很大
如果 google 搜尋 "top hypervisor"
基本是不會看到 Nutanix 的
再來
如果你希望你的 infra 是可靠的
恭喜你在最基本的 hypervisor 就已經崩了
在使用 hypervisor image 時
請使用 OEM Customized Installer
就像你圖中上面兩個 image
最大最大的差別在於 OEM Customized Installer 會包含自家硬體的 driver 來提供最好的穩定性
如果沒有使用的情況, 我曾遇過平時用都正常
但定期 hypervisor 會死當
如果你希望 infra 是穩定的
我會希望從更底層開始
在安裝 hypervisor 前
請先把 firmware 更新過
hypervisor 安裝後, 也上到最新的 patch
最後也務必定期更新來維持 infra 的可靠度
謝謝您的建議,學習了.

