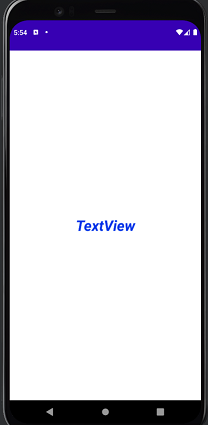
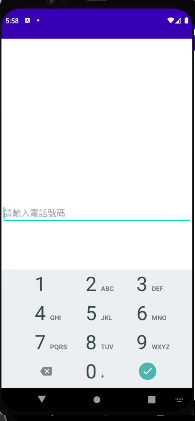
今天開始要來介紹一些Android Studio的簡單元件,我們會從各個不同的屬性下手,雖然應用這一些屬性並不難,但因為有很多的屬性種類,所以也是要花點時間記。![]()
而看完屬性後我們也會介紹這些元件在主程式裡的應用及方法。
因為這一些Text的屬性和主程式裡的應用,都大同小異所以我就一次介紹。
  <TextView
        //設定元件id。
        android:id="@+id/textView"
        android:layout_width="match_parent"
        android:layout_height="88dp"
        //元件位置在父層的中間。
        android:layout_gravity="center"
        //背景顏色。
        android:background="#FFFFFF"
        //文字置中。
        android:gravity="center"
        //顯示的文字。
        android:text="TextView"
        //字體顏色。
        android:textColor="#0032E8"
        //字體大小。
        android:textSize="30dp"
        //改變字體(bold:粗體,italic:斜體)。
        android:textStyle="bold|italic" />

EditView還有幾個比較常用的屬性。
    <EditText
        android:id="@+id/editTextNumberPassword"
        android:layout_width="match_parent"
        android:layout_height="wrap_content"
        //hint是在還未輸入值時所顯示在EditText欄位上淡淡的文字,功能有如提示一般。
        android:hint="請輸入密碼"
        //限制輸入的字串長度。
        android:maxLength="5"
        //用來限制顯示長度。
        android:ems="5"
        //EditText有很多種不同的類別(有:phone,password,email等等)。
        android:inputType="phone" />

這邊會順便講解藥怎麼在主程式綁定元件。
public class MainActivity extends AppCompatActivity {
    //宣告變數
    private EditText phone;
    @Override
    protected void onCreate(Bundle savedInstanceState) {
        super.onCreate(savedInstanceState);
        //這邊是設定你這一個Activity所綁定的layout,這樣才能拿取這個layout的元件。
        setContentView(R.layout.activity_main);
        //綁定元建
        phone=(EditText) findViewById(R.id.editTextPhone);
        //拿取元件的字串。
        phone.getText();
        //設定元件的字串。
        phone.setText("091234567");

    }
}
今天的Text就簡單講解到這了,謝謝大家。![]()
