當我們在查字典的時候,特別是英文,常會看到相似詞,或是反義詞,而我們怎麼讓機器去了解這件事情呢?這就像種距離的概念,而我們可以創造個宇宙,就像有些小說裡面的台詞,極北之地代表極相似,而極南之地是極相反。正規的名字是"word embedding",而我們可以用向量來表達詞彙的相似程度,這就是機器人理解的世界。
但如何讓機器人自己學習呢?這是我們用的資料是電影評語,而我們將它分為兩類:正評和負評。
首先我們將這TensorFlow附錄的library”tensorflow_datasets”(如果是local要自己pip)中的資料匯入,並建立句子庫和標籤庫:
import tensorflow_datasets as tfds

# Load the IMDB Reviews dataset
imdb, info = tfds.load("imdb_reviews", with_info=True, as_supervised=True)

import numpy as np

# Get the train and test sets
train_data, test_data = imdb['train'], imdb['test']

# Initialize sentences and labels lists
training_sentences = []
training_labels = []

testing_sentences = []
testing_labels = []

# Loop over all training examples and save the sentences and labels
for s,l in train_data:
    training_sentences.append(s.numpy().decode('utf8'))
    training_labels.append(l.numpy())

# Loop over all test examples and save the sentences and labels
for s,l in test_data:
    testing_sentences.append(s.numpy().decode('utf8'))
    testing_labels.append(l.numpy())

# Convert labels lists to numpy array
training_labels_final = np.array(training_labels)
testing_labels_final = np.array(testing_labels)
接下如之前的方式建立單字庫和句子庫:
# Parameters
vocab_size = 10000
max_length = 120
trunc_type='post'
oov_tok = "<OOV>"

from tensorflow.keras.preprocessing.text import Tokenizer
from tensorflow.keras.preprocessing.sequence import pad_sequences

# Initialize the Tokenizer class
tokenizer = Tokenizer(num_words = vocab_size, oov_token=oov_tok)

# Generate the word index dictionary for the training sentences
tokenizer.fit_on_texts(training_sentences)
word_index = tokenizer.word_index

# Generate and pad the training sequences
sequences = tokenizer.texts_to_sequences(training_sentences)
padded = pad_sequences(sequences,maxlen=max_length, truncating=trunc_type)

# Generate and pad the test sequences
testing_sequences = tokenizer.texts_to_sequences(testing_sentences)
testing_padded = pad_sequences(testing_sequences,maxlen=max_length, truncating=trunc_type)
在前面提到分為兩類時大家是隱隱感覺到什麼了,沒錯就像一開始辨識是人是馬那樣,我們可以用訓練的方式讓電腦自己去學習這單字的意思是接近哪個分類的感覺,第一層Embedding是新的,其中embedding_dim是定義要用多少維度的向量來表示,另兩個就是定義輸入的資料大小和長度:
embedding_dim = 16

import tensorflow as tf

# Build the model
model = tf.keras.Sequential([
    tf.keras.layers.Embedding(vocab_size, embedding_dim, input_length=max_length),
    tf.keras.layers.Flatten(),
    tf.keras.layers.Dense(6, activation='relu'),
    tf.keras.layers.Dense(1, activation='sigmoid')
])

# Setup the training parameters
model.compile(loss='binary_crossentropy',optimizer='adam',metrics=['accuracy'])

num_epochs = 10

# Train the model
model.fit(padded, training_labels_final, epochs=num_epochs, validation_data=(testing_padded, testing_labels_final))
其他的是不是很熟悉XD
而我們可從embedding那層取得訓練後各個單字的向量:
# Get the embedding layer from the model (i.e. first layer)
embedding_layer = model.layers[0]

# Get the weights of the embedding layer
embedding_weights = embedding_layer.get_weights()[0]
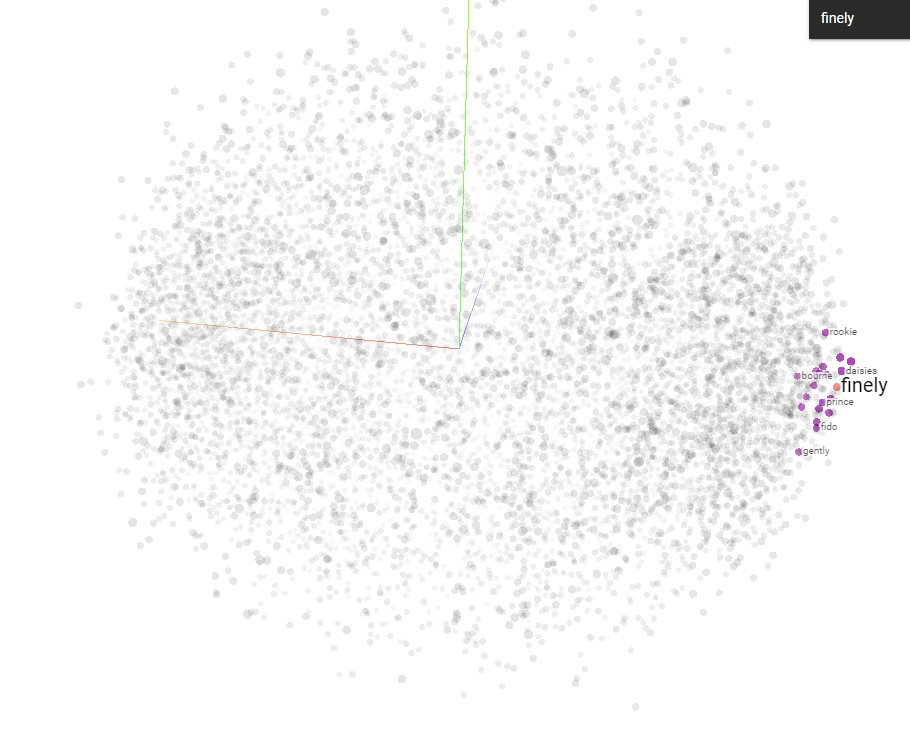
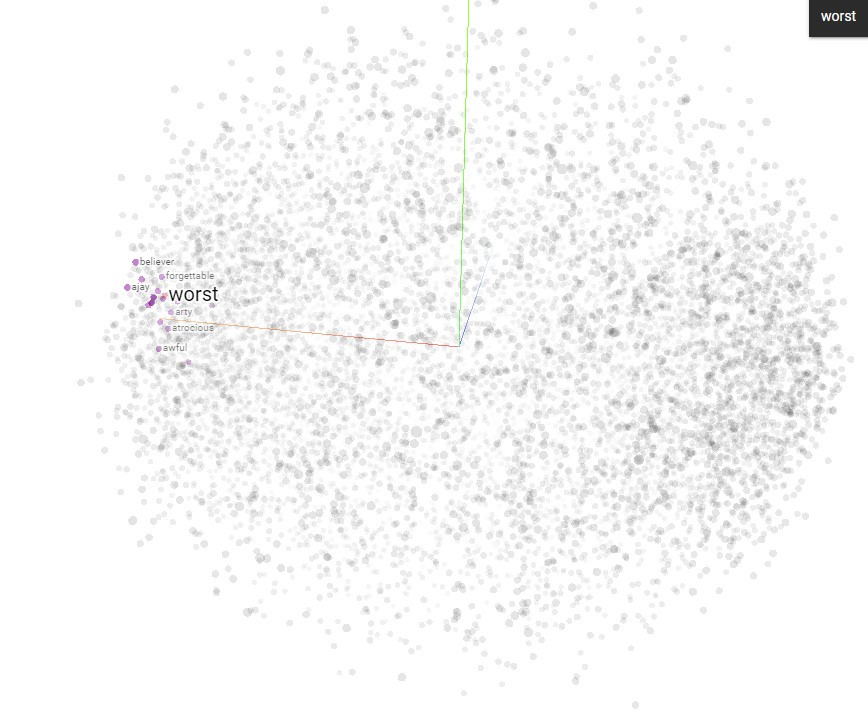
最後我們可以將結果匯入一個視覺化的工具來感受它的意義,它可以標示所有單字的座標,並能highlight特定單字,以及和它最近的幾個字,我這邊分別選了"finely"和"worst"為例:

