專案需求通常來源於對資料的處理,在專案規劃期間,前端開發人員經常需要先做一些 POC,甚至專案開始後,也經常需要在後端 API 尚未就緒前,先完成前端的功能需求,這時候假資料開發系統就非常實用。
假如現在有一個需求,一批租戶的基本資料需要被列表出來讓使用者查詢,同時也提供新增,修改與刪除租戶的功能,雖然租戶的資料已經存在資料庫,但是後端還沒根據上述功能開發好相關的 API,使用假資料系統,先跟後端開發人員協調好 API 的請求與回應格式,前端就可以先接 Mockserver 提供的 API 進行開發,等後端 API 完成後再對接起來就可以了。
大多數商業應用程式必須與其它內部和第三方應用程式溝通,RESTful API 是目前較主流用於安全地透過網際網路交換資訊的介面。
相對於直接將假資料寫在代碼裡,或另外開一個檔案做維護比起來,假資料系統有以下優點,
Mockserver 可獨立運行,用於 Postman 調試。fakerjs 或其他程式庫,可程式化快速製作巨量測試資料。Mock API 服務。有了 Mock Server 之後,前後端就能夠並行開發。
安裝 JSON Server
npm install -g json-server

or

npm install -D json-server
建立假資料 db.json
{
  "posts": [
    { "id": 1, "title": "json-server", "author": "typicode" }
  ],
  "comments": [
    { "id": 1, "body": "some comment", "postId": 1 }
  ],
  "profile": { "name": "typicode" }
}
啟動 JSON Server
json-server --watch db.json
連到 http://localhost:3000
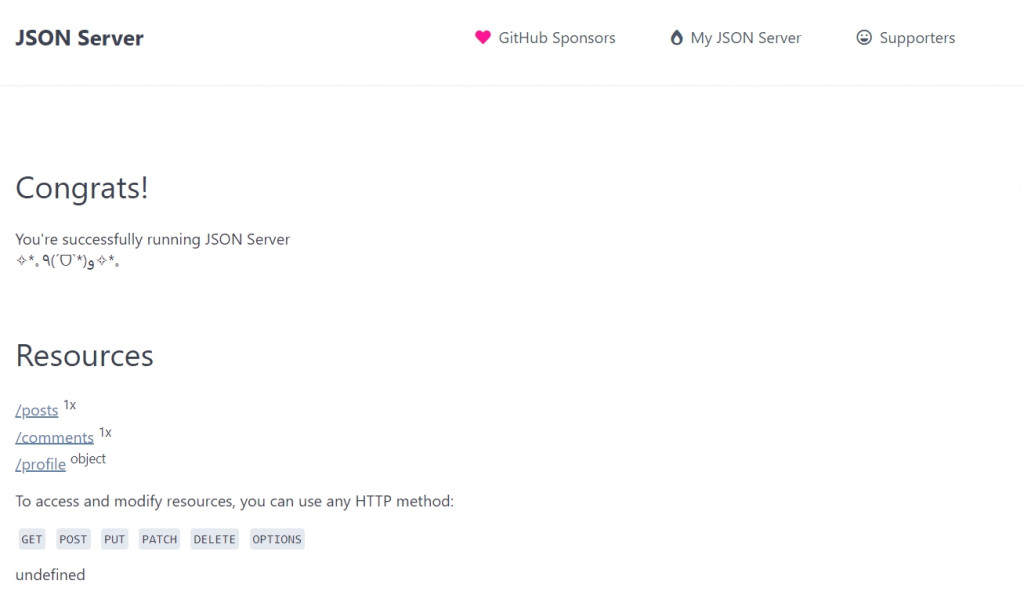
GET API http://localhost:3000/posts/1 結果如下,
{ "id": 1, "title": "json-server", "author": "typicode" }
格式: json-server [options] <source>

範例:
  [本地靜態檔案] json-server db.json
  [本地動態檔案] json-server db.js
  [遠端靜態檔案] json-server http://example.com/db.json

選項:
  --config, -c       Path to config file           [default: "json-server.json"]
  --port, -p         Set port                                    [default: 3000]
  --host, -H         Set host                             [default: "localhost"]
  --watch, -w        Watch file(s)                                     [boolean]
  --routes, -r       Path to routes file
  --middlewares, -m  Paths to middleware files                           [array]
  --static, -s       Set static files directory
  --read-only, --ro  Allow only GET requests                           [boolean]
  --no-cors, --nc    Disable Cross-Origin Resource Sharing             [boolean]
  --no-gzip, --ng    Disable GZIP Content-Encoding                     [boolean]
  --snapshots, -S    Set snapshots directory                      [default: "."]
  --delay, -d        Add delay to responses (ms)
  --id, -i           Set database id property (e.g. _id)         [default: "id"]
  --foreignKeySuffix, --fks  Set foreign key suffix, (e.g. _id as in post_id)
                                                                 [default: "Id"]
  --quiet, -q        Suppress log messages from output                 [boolean]
  --help, -h         Show help                                         [boolean]
  --version, -v      Show version number                               [boolean]
通常 Angular 外的系統,我會另建資料夾方便管理,
例如在根目錄下,建立 _mockserver/ 然後
將 _mockserver/db.json 改成 js 的格式,使我們可以引入其他檔案。
db.json 改名為 _db.js,僅作為 API 請求入口。
var apiFiles = [__dirname + "/myapp/hello/world.js"];
var data = {};
apiFiles.forEach(function (filePath) {
    var apiContent = require(filePath);

    var url = filePath.split("_mockserver/")[1]; // e.g. comments.js
    url =
        url.slice(url.length - 9) === "/index.js"
            ? url.slice(0, url.length - 9) // remove /index.js
            : url.slice(0, url.length - 3); // remove .js

    urlPath = url.replace(/\//g, "-");

    data[urlPath] = apiContent;
});

module.exports = () => {
    return data;
};
建立設定檔 _mockserver\config.json
{
    "host": "localhost",
    "port": 3000,
    "watch": true,
    "routes": "./_mockserver/router.json",
    "middlewares": ["./_mockserver/middlewares/_postAsGet.js"]
}
建立路由設定 _mockserver\router.json,例如 /myapp/query/something 會對應到 /myapp-query-something。
{
    "/myapp/*/*": "/myapp-$1-$2",
    "/myapp/*/*/*": "/myapp-$1-$2-$3"
}
建立假資料檔案 _mockserver\myapp\hello\world.js
module.exports = {
    data: {
        posts: [{ id: 1, title: "hello-world123", author: "typicode" }],
        comments: [{ id: 1, body: "some comment", postId: 1 }],
        profile: { name: "typicode" },
    },
};
發送請求 http://localhost:3000/myapp-hello-world
{
    "data": {
        "posts": [{
            "id": 1,
            "title": "hello-world123",
            "author": "typicode"
        }],
        "comments": [{
            "id": 1,
            "body": "some comment",
            "postId": 1
        }],
        "profile": {
            "name": "typicode"
        }
    }
}
Mockserver是我對假資料開發系統的統稱,本篇是以Json Server做為 Mockserver。
請參考 JSON Server
將 db.json 改成 db.js 就可以引用 fakerjs 庫自動產生假資料
_mockserver\myapp\hello\mockdata.js
var faker = require("@faker-js/faker");

function generateCustomers() {
    var customers = [];

    // 自動產生 50筆 假資料
    for (var id = 0; id < 50; id++) {
        // 產生 firstName 假資料
        var firstName = faker.faker.name.firstName();

        // 產生 lastName 假資料
        var lastName = faker.faker.name.firstName();

        // 產生 phoneNumber 假資料
        var phoneNumber = faker.faker.phone.phoneNumberFormat();

        customers.push({
            id: id,
            first_name: firstName || null,
            last_name: lastName || null,
            phone: phoneNumber || null,
        });
    }

    return customers;
}

// 如果你要用json-server的話,就需要export
module.exports = generateCustomers();
訪問 http://localhost:3000/myapp-hello-mockdata,可得到 50筆 假資料,
[
  {
    "id": 0,
    "first_name": "Kiera",
    "last_name": "Devon",
    "phone": "603-291-8218"
  },
  {
    "id": 1,
    "first_name": "Lucious",
    "last_name": "Skyla",
    "phone": "547-243-8260"
  },
  {
    "id": 2,
    "first_name": "Monica",
    "last_name": "Gerson",
    "phone": "239-670-4843"
  },

  ...

]
VSCode點擊 F12即可進入faker index.d.ts查閱所有用法
請參考 fakerjs guide
mockserver 資料夾檔案結構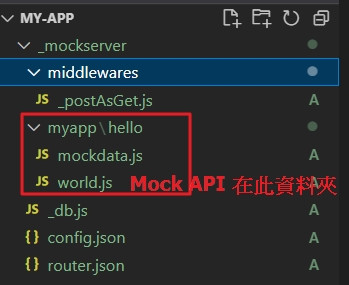
訪問 http://localhost:3000/
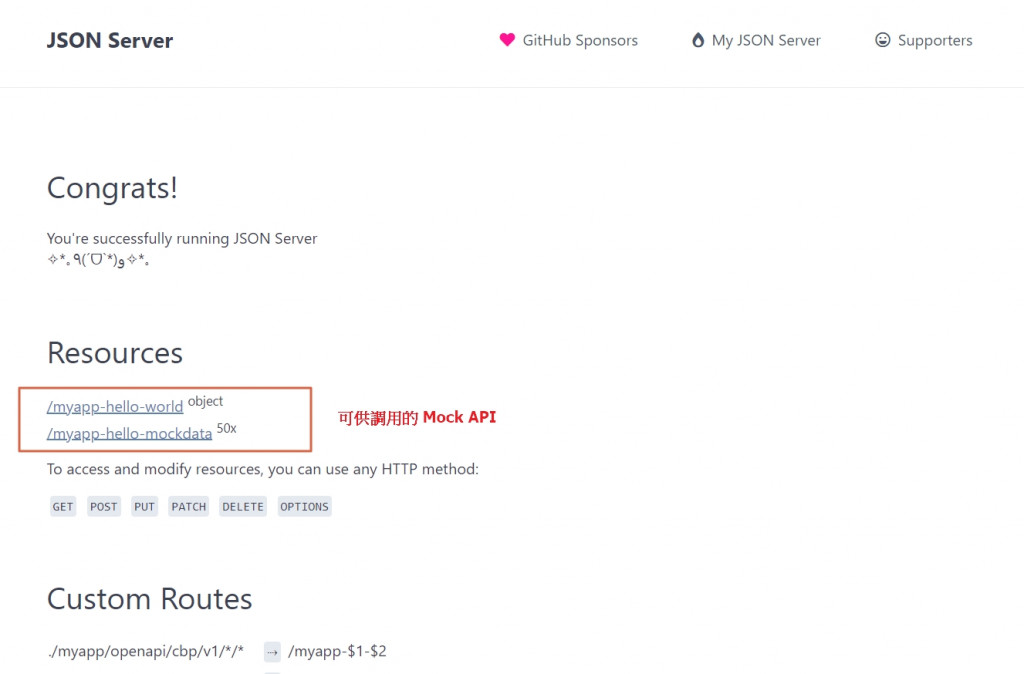
本次範例建立了 2筆 Mock API
假資料系統支援一般的新增修改刪除進階的搜尋查找與排序等操作,也能快速製作大量的隨機資料,用於不同場景的測試,不論是開發前的 POC 還是開發中,在後端沒有提供 API 的情形下,前端可以透過這套系統先完成開發需求。
Angular 提供 HTTP 與後端服務進行通訊 模組,接下來我們用
Angular HTTP來調用 Mockserver 提供的 Mock API。