當我們將widget完全構建後,我們開始介紹如何更新布局
我們一個widget在畫面更新的流程為
1.重新構建widget
2.繪製frame
接著我們看到布局階段
我們到flutter\packages\flutter\lib\src\widgets\binding.dart: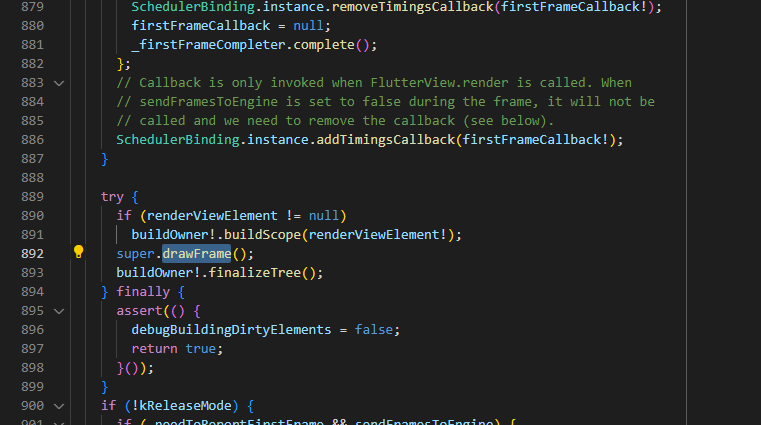
    try {
      if (renderViewElement != null)
        buildOwner!.buildScope(renderViewElement!);
      super.drawFrame();
      buildOwner!.finalizeTree();
    } finally {
在line890~893來進行widget更新顯示
並且在flutter\packages\flutter\lib\src\rendering\binding.dart: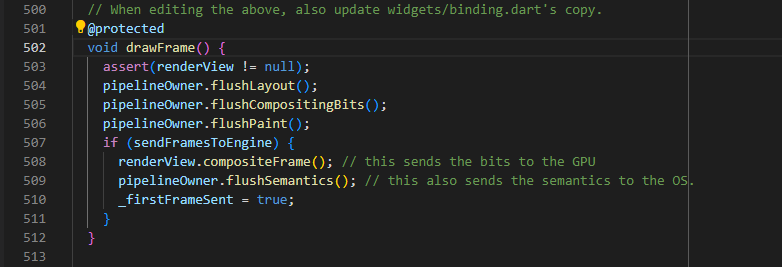
  @protected
  void drawFrame() {
    assert(renderView != null);
    pipelineOwner.flushLayout();
    pipelineOwner.flushCompositingBits();
    pipelineOwner.flushPaint();
    if (sendFramesToEngine) {
      renderView.compositeFrame(); // this sends the bits to the GPU
      pipelineOwner.flushSemantics(); // this also sends the semantics to the OS.
      _firstFrameSent = true;
    }
  }
其中line504進行更新layout,line505進行更新layer合成的訊息,line506重新繪製widget,最後當sendFramesToEngine為ture時,會在line508將製後的數據發送出去給GPU
而我們的layout布局透過flushLayout實現
打開flutter\packages\flutter\lib\src\rendering\object.dart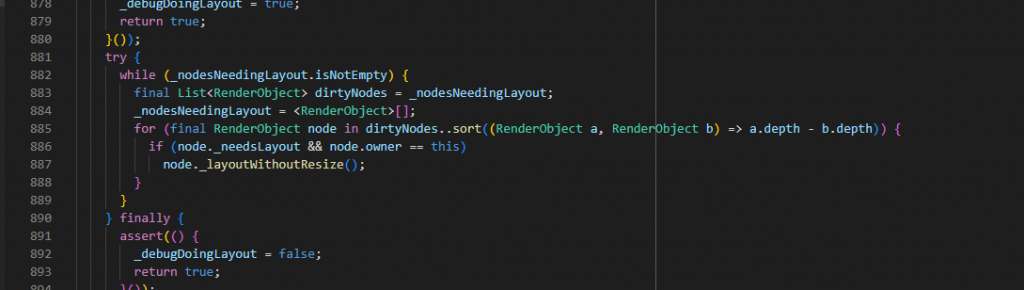
在Line884,我們把需要佈局的RederObject都加入到_nodesNeedingLayout這個list裡面
並在Line885將dirtyNodes裡的所有RenderObject,當要重新layout時,會調用_layoutWithoutResize。
_layoutWithoutResize會先執行performLayout,然後又調用了markNeedsPaint()。(一般父RenderObject在performLayout時是會調用child的layout的)
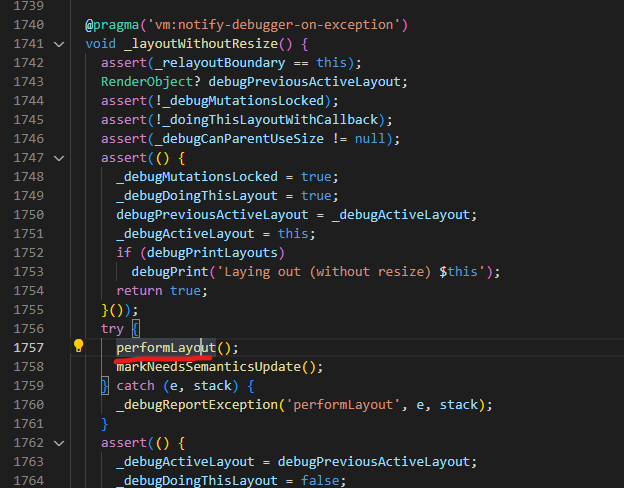
接著就開始進行我們layout,他會計算此渲染對象的layoutflutter\packages\flutter\lib\src\rendering\object.dart
佈局過程簡單來說:
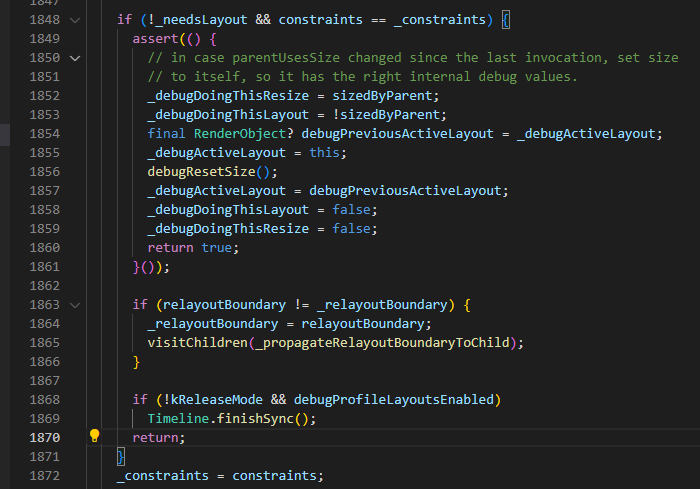
不需要layout時需要同時滿足
當前組件沒有被標記為需要重新佈局、父組件傳遞的約束沒有發生變化以及當前組件的佈局邊界也沒有發生變化時
以上,是簡單的布局過程,如果有興趣的話,大家能透過trace源碼來了解過程,並且flutter上的註解也是時分得清楚,這裡只簡單的講解,明天開始繼續我們Todo App實做


 iThome鐵人賽