.gif)
.gif)
看完這篇文章,你將能用three.js開發出地球。
如同前一篇所說,地球可以應用在很多場景上,例如:行銷網站、企業形象網站、活動網站、全球數位戰情室、航太科技、GIS畫面等等。這些對於前端視覺特效都非常重要。
製作地球也能讓我們釐清貼圖底層的運作模式,不僅討論到底層webGL、fragmentShader、vertexShader的渲染方式,也提到很多種貼圖,包含以下貼圖:
詳情可以看前一篇文章。
在開發完後,仍需要讓用戶能夠跟地球互動,實作的方法可以參考下一篇文章。
讓我們來開始開發地球吧!
我們從上上次的程式碼開始,以下是程式碼:
https://codepen.io/umas-sunavan/pen/WNJEKZo
連結:https://codepen.io/umas-sunavan/pen/WNJEKZo
import * as THREE from 'three';
import { OrbitControls } from 'https://unpkg.com/three@latest/examples/jsm/controls/OrbitControls.js';

const scene = new THREE.Scene();

const camera = new THREE.PerspectiveCamera(50, window.innerWidth / window.innerHeight, 0.1, 1000);
// 已經存在的鏡頭位置設定
camera.position.set(0, 0, 90)

const renderer = new THREE.WebGLRenderer();
renderer.setSize(window.innerWidth, window.innerHeight);
document.body.appendChild( renderer.domElement );

const geometry = new THREE.SphereGeometry(100,50,50)
console.log(geometry);
// 匯入材質
// image source: https://www.deviantart.com/kirriaa/art/Free-star-sky-HDRI-spherical-map-719281328
const texture = new THREE.TextureLoader().load('free_star_sky_hdri_spherical_map_by_kirriaa_dbw8p0w.jpg')
// 帶入材質,設定內外面
const material = new THREE.MeshBasicMaterial( { color: 0xffffff, map: texture, side: THREE.DoubleSide})
// 新增環境光
const light = new THREE.AmbientLight(0xffffff,0.1)
scene.add(light)

const sphere = new THREE.Mesh(geometry, material);
scene.add(sphere);

// 新增地球
const earthGeometry = new THREE.SphereGeometry(5,50,50)
const earthTexture = new THREE.TextureLoader().load('https://upload.wikimedia.org/wikipedia/commons/thumb/0/04/Solarsystemscope_texture_8k_earth_daymap.jpg/800px-Solarsystemscope_texture_8k_earth_daymap.jpg')
const earthMaterial = new THREE.MeshStandardMaterial( { map: earthTexture, side: THREE.DoubleSide})
const earth = new THREE.Mesh(earthGeometry, earthMaterial);
earth.position.set(20,0,0)
scene.add(earth);

// 新增太陽
const sunGeometry = new THREE.SphereGeometry(5,50,50)
const sunTexture = new THREE.TextureLoader().load('https://upload.wikimedia.org/wikipedia/commons/thumb/9/99/Map_of_the_full_sun.jpg/800px-Map_of_the_full_sun.jpg')
const sunMaterial = new THREE.MeshBasicMaterial( { map: sunTexture, side: THREE.DoubleSide})
const sun = new THREE.Mesh(sunGeometry, sunMaterial);
scene.add(sun);

// 新增點光
const pointLight = new THREE.PointLight(0xffffff, 1)
scene.add(pointLight);
// 新增Helper
const lightHelper = new THREE.PointLightHelper(pointLight, 20, 0xffff00)
scene.add(lightHelper);
// 更新Helper
lightHelper.update();

// 帶入鏡頭跟renderer.domElement實例化它即可
new OrbitControls( camera, renderer.domElement );

const axesHelper = new THREE.AxesHelper( 5 );
scene.add( axesHelper );

function animate() {
	requestAnimationFrame( animate );
	renderer.render( scene, camera );

}
animate();
修改一下鏡頭與地球位置
- // 已經存在的鏡頭位置設定
- camera.position.set(0, 0, 90)
+ camera.position.set(0, 10, 15)
- earth.position.set(20,0,0)
把光源包成三個函式,純粹是為了好檢視。這些函式你可以在Day9: LightShowcase找到(非必要)
-   // 新增環境光
-   const light = new THREE.AmbientLight(0xffffff,0.1)
-   scene.add(light)

-   // 新增點光
-   const pointLight = new THREE.PointLight(0xffffff, 1)
-   scene.add(pointLight);
-   // 新增Helper
-   const lightHelper = new THREE.PointLightHelper(pointLight, 20, 0xffff00)
-   scene.add(lightHelper);
-   // 更新Helper
-   lightHelper.update();
    // 新增環境光
    const addAmbientLight = () => {
        const light = new THREE.AmbientLight(0xffffff, 0.5)
        scene.add(light)
    }
    // 新增點光
    const addPointLight = () => {
        const pointLight = new THREE.PointLight(0xffffff, 1)
        scene.add(pointLight);
        pointLight.position.set(10, 10, -10)
        pointLight.castShadow = true
        // 新增Helper
        const lightHelper = new THREE.PointLightHelper(pointLight, 20, 0xffff00)
        scene.add(lightHelper);
        // 更新Helper
        lightHelper.update();
    }

    // 新增平行光
    const addDirectionalLight = () => {
        const directionalLight = new THREE.DirectionalLight(0xffffff, 1)
        directionalLight.position.set(0, 0, 10)
        scene.add(directionalLight);
        directionalLight.castShadow = true
        const d = 10;

        directionalLight.shadow.camera.left = - d;
        directionalLight.shadow.camera.right = d;
        directionalLight.shadow.camera.top = d;
        directionalLight.shadow.camera.bottom = - d;

        // 新增Helper
        const lightHelper = new THREE.DirectionalLightHelper(directionalLight, 20, 0xffff00)
        scene.add(lightHelper);
        // 更新位置
        directionalLight.target.position.set(0, 0, 0);
        directionalLight.target.updateMatrixWorld();
        // 更新Helper
        lightHelper.update();
    }

    addPointLight()
    addAmbientLight()
    addDirectionalLight()
移除太陽
-    // 新增太陽
-    const sunGeometry = new THREE.SphereGeometry(5,50,50)
-    const sunTexture = new THREE.TextureLoader().load('https://upload.wikimedia.org/wikipedia/commons/thumb/9/99/Map_of_the_full_sun.jpg/800px-Map_of_the_full_sun.jpg')
-    const sunMaterial = new THREE.MeshBasicMaterial( { map: sunTexture, side: THREE.DoubleSide})
-    const sun = new THREE.Mesh(sunGeometry, sunMaterial);
-    scene.add(sun);
修改名字,把sphere改成skydome(非必要)
-   // 匯入材質
-   // image source: https://www.deviantart.com/kirriaa/art/Free-star-sky-HDRI-spherical-map-719281328
-   const texture = new THREE.TextureLoader().load('star_sky_hdri_spherical_map_with_galaxy2 (3).jpg')
-   // 帶入材質,設定內外面
-   const material = new THREE.MeshBasicMaterial( { map: texture, side: THREE.DoubleSide})
-   const geometry = new THREE.SphereGeometry(100,50,50)
-   const sphere = new THREE.Mesh(geometry, material);
-   scene.add(sphere);

    // 改名成skydome
    const skydomeTexture = new THREE.TextureLoader().load('star_sky_hdri_spherical_map_with_galaxy2 (3).jpg')
    const skydomeMaterial = new THREE.MeshBasicMaterial( { map: skydomeTexture, side: THREE.DoubleSide})
    const skydomeGeometry = new THREE.SphereGeometry(100,50,50)
    const skydome = new THREE.Mesh(skydomeGeometry, skydomeMaterial);
    scene.add(skydome);
處理完後,就能方便後續加上材質了
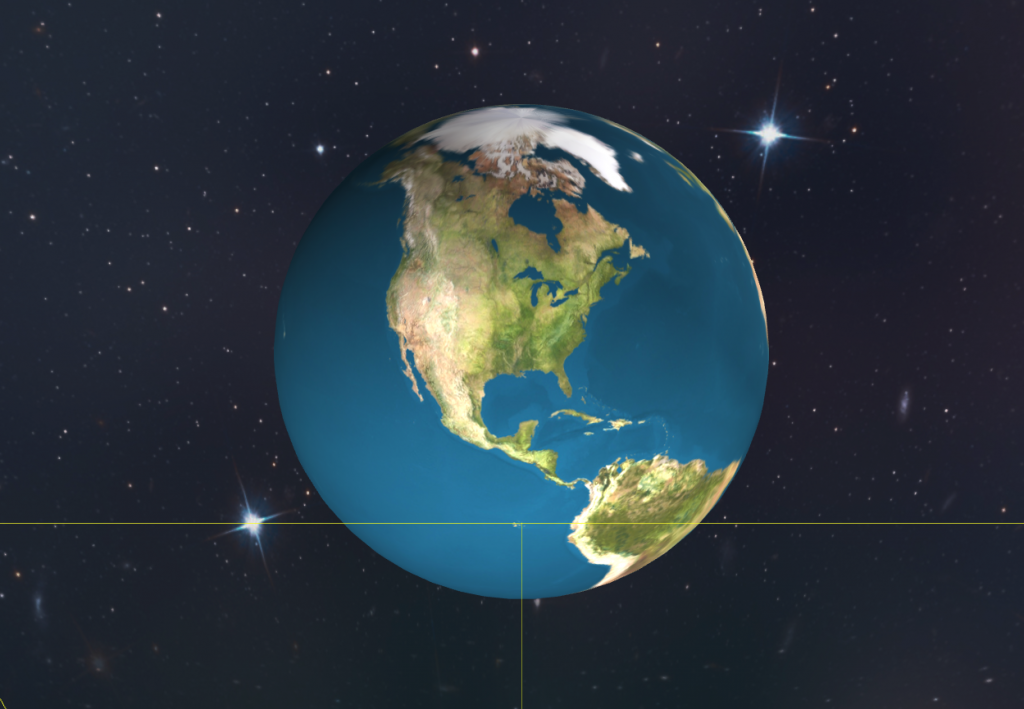
目前看起來,地球扁扁的。
原因是這樣的:雖然說實際上光源就只有太陽這個平行光,但平行光的效果真的很單調。點光可以加上畫面的豐富度,我讓它在後續能夠產生反光,襯托出特效。我的大學素描老師教我:素描時未必要忠實的把畫面畫出來,「加上自己的創作也很重要」,我相信特效也是一樣,重點是畫面優美、客戶滿意。
素材來源:http://planetpixelemporium.com/earth8081.html
const earthGeometry = new THREE.SphereGeometry(5,50,50)
const earthTexture = new THREE.TextureLoader().load('https://storage.googleapis.com/umas_public_assets/michaelBay/day10/8081_earthmap2k.jpg')
// 新增灰階高度貼圖
const displacementTexture = new THREE.TextureLoader().load('https://storage.googleapis.com/umas_public_assets/michaelBay/day10/editedBump.jpg')

const earthMaterial = new THREE.MeshStandardMaterial( {
	map: earthTexture,
	side: THREE.DoubleSide,
	// 將貼圖貼到材質參數中
	displacementMap:displacementTexture,
})
畫面看起來非常奇怪,怎麼越弄越醜?
先別急。這是因為前一篇有提到,灰階高度貼圖跟其他貼圖最大的差別是:所有錨點取樣材質圖的顏色以隆起錨點位置。如果我們在地球的MeshStandardMaterial加上wireframe:true,就可以看出原因:
const earthMaterial = new THREE.MeshStandardMaterial( {
	...
	wireframe:true,
})
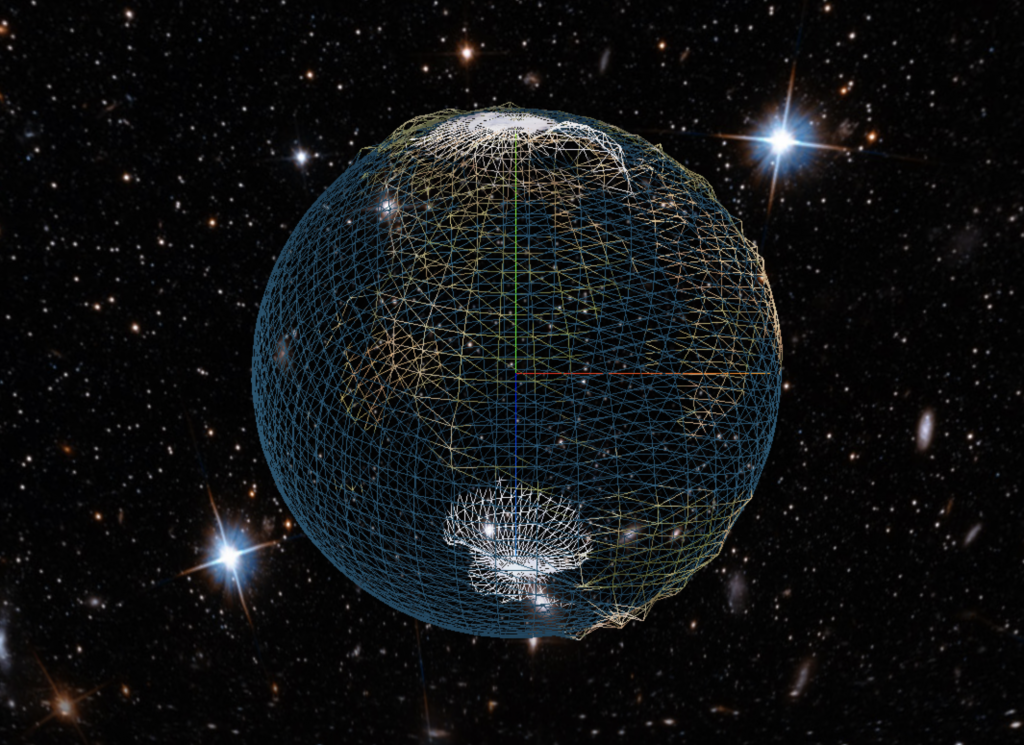
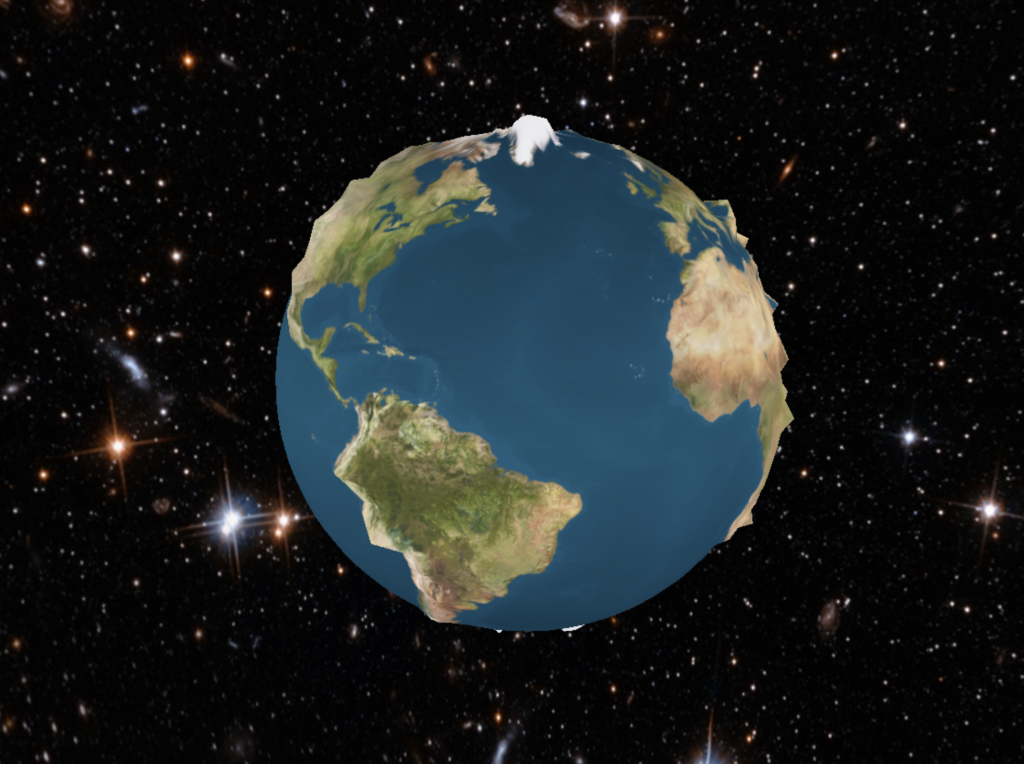
看起來很醜是因為錨點密度不夠。若是我們將地球的錨點密度增加,那麼高度的解析度也會增加。
- const earthGeometry = new THREE.SphereGeometry(5,50,50)
+ const earthGeometry = new THREE.SphereGeometry(5,600,600)
你會看到高度解析度增加。但我們也不能太密集。錨點很消耗計算資源,如果開太多錨點,勢必會使GPU不夠的裝置卡頓。
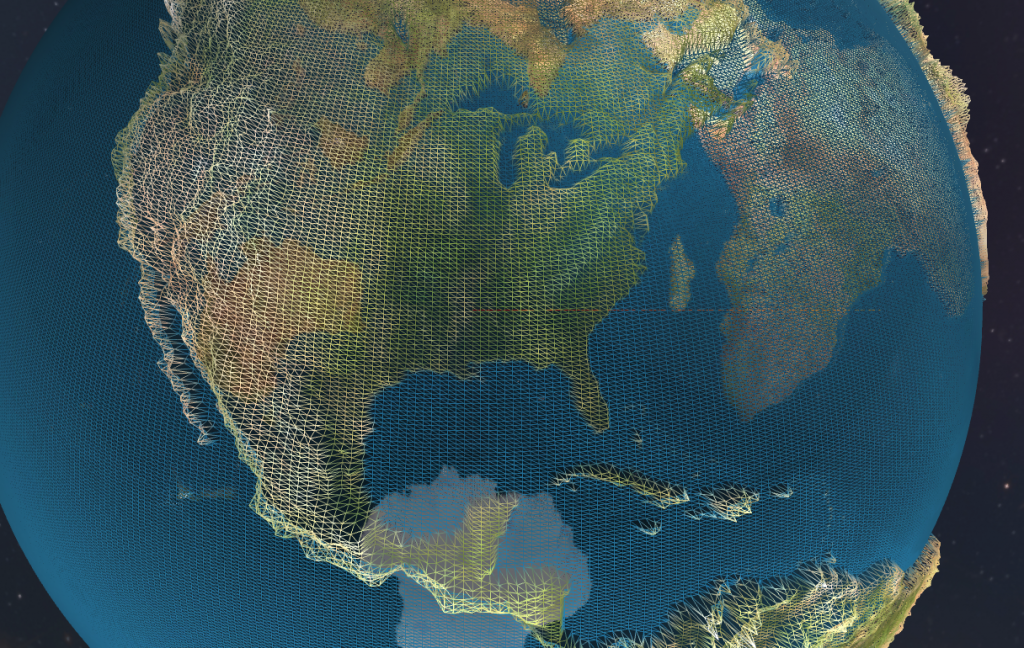
接著我們把wireframe關掉,就可以看到地形已經出來了。
現在地形非常明顯,但有點太明顯了……。為了控制錨點隆起的幅度,我們透過displacementScale 加以處理。
.gif)
const earthMaterial = new THREE.MeshStandardMaterial( {
	...
	displacementScale:0.5,
})
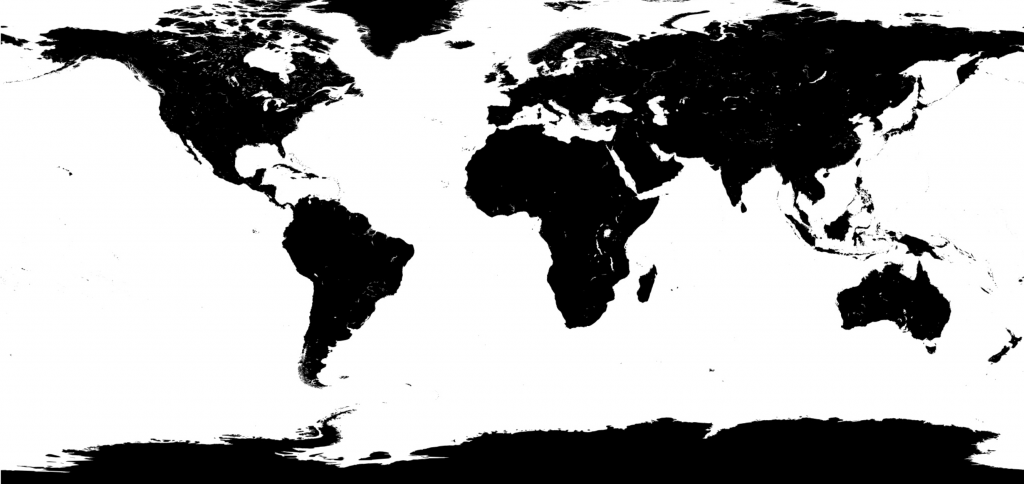
素材來源:http://planetpixelemporium.com/earth8081.html
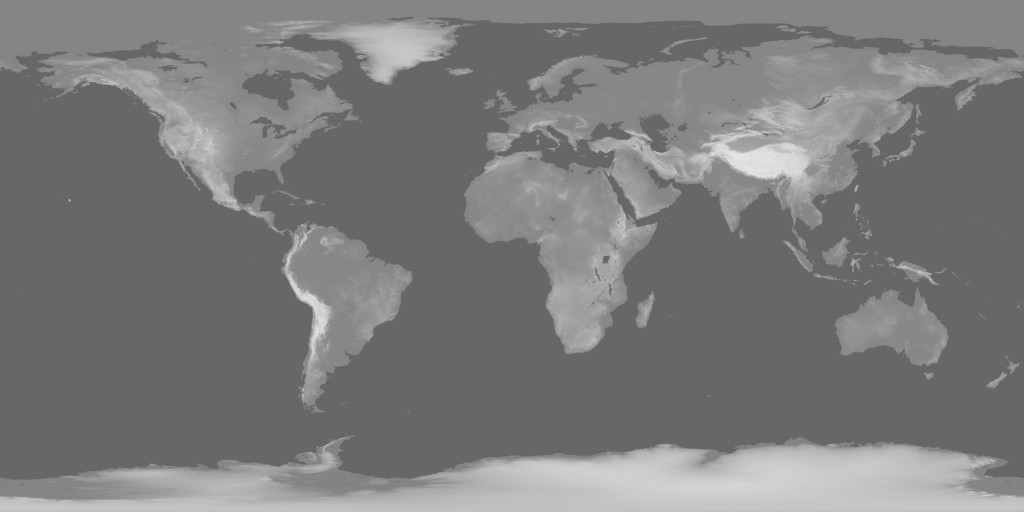
圖中,白色代表有金屬,黑色代表沒有金屬。這張圖分離了陸地與海洋。我要讓海洋「金屬」一點,所以加入白色。我要讓陸地不金屬一點,所以使用黑色。
const speculatMapTexture = new THREE.TextureLoader().load('https://storage.googleapis.com/umas_public_assets/michaelBay/day10/8081_earthspec2k.jpg')
const earthMaterial = new THREE.MeshStandardMaterial( {
	...
	// 加上金屬貼圖
	metalnessMap: speculatMapTexture,
	// 由於預設金屬為0,所以必須調成1,才使得我們的貼圖可以呈現0~1的金屬範圍。黑代表0,白代表1
	metalness:1,
})
加上之後,可以見到海洋因為材質像是金屬的關係,所以變暗很多。
.gif)
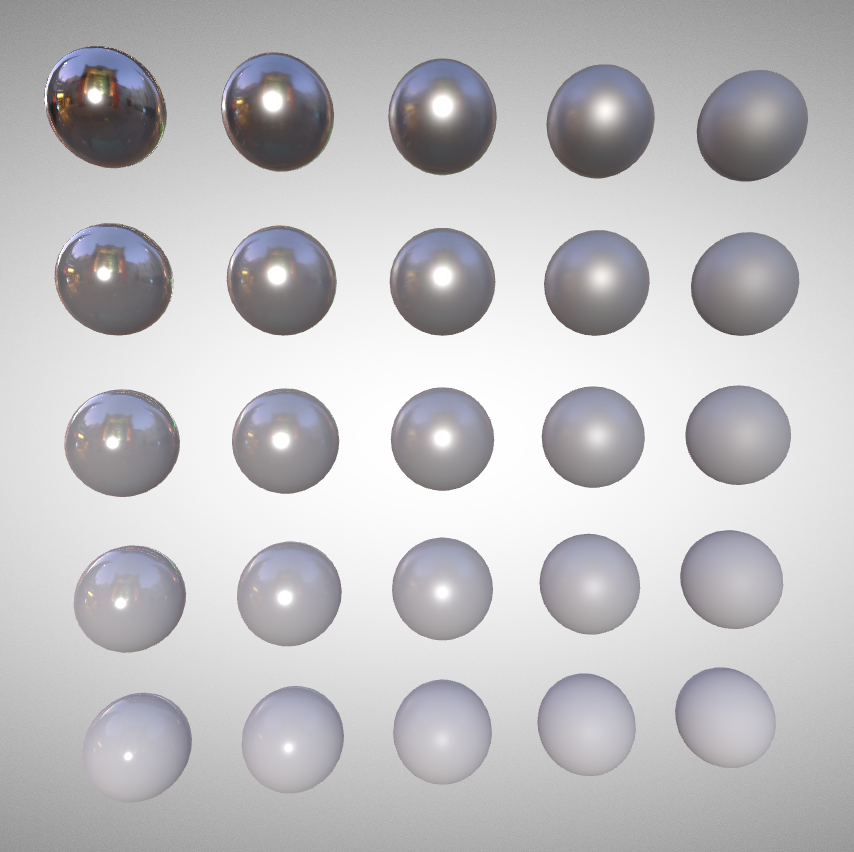
為什麼會變黑?
下圖為three.js的金屬、光滑材質球分佈圖。最左邊那欄光滑程度是0,最右邊那欄光滑程度是1。最上面那列金屬程度是1,最下面那列金屬程度是0。這樣的分布能以下圖呈現:
素材來源:http://planetpixelemporium.com/earth8081.html
這張圖是我透過金屬貼圖跟灰階高度貼圖所合成的貼圖。由此,我可以更突出陸地,並且讓山脈更精緻。你會發現,加上了bump,地球就已經相當精緻了。
.gif)
如果你仔細看落磯山山脈,你將能看到很明顯的區別:

素材來源:http://planetpixelemporium.com/earth8081.html
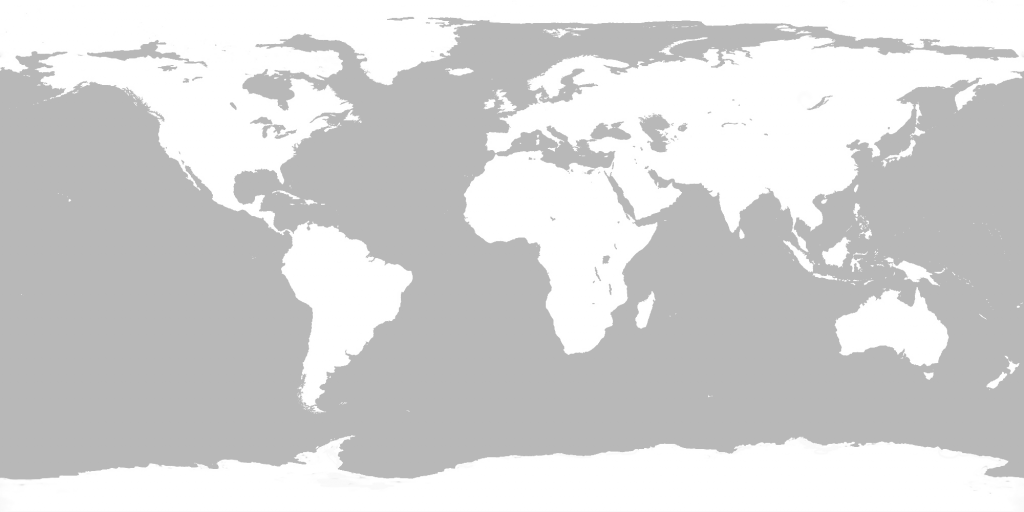
這也是我合成的貼圖,透過這個貼圖,我讓海洋更光滑,讓陸地保持粗糙。這使得海洋會反射光現。凸顯材質的差異感。
const roughtnessTexture = new THREE.TextureLoader().load('https://storage.googleapis.com/umas_public_assets/michaelBay/day10/8081_earthspec2kReversedLighten.png')
const earthMaterial = new THREE.MeshStandardMaterial( {
	...
	roughnessMap:roughtnessTexture,
	roughness:0.9,
})
.gif)
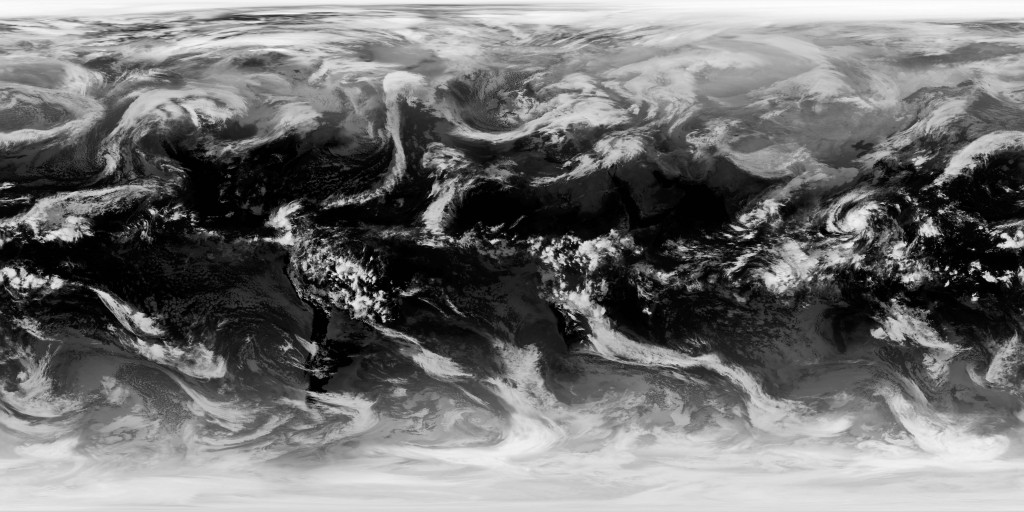
素材來源:http://planetpixelemporium.com/earth8081.html
一樣從網路上下載雲圖。我們先建立一個新的球體,設定它可為透明。
// 雲的球比地球大一點
const cloudGeometry = new THREE.SphereGeometry(5.4,60,60)
const cloudMaterial = new THREE.MeshStandardMaterial( {
// 開啟透明功能
	transparent: true,
})
const cloud = new THREE.Mesh(cloudGeometry, cloudMaterial);
scene.add(cloud);
並且將雲圖的材質、雲圖的透明材質加上去,這使得球體貼上雲的貼圖,並且可以穿透看到地球陸地的模樣。
很多人會忘記加上transparent:true,如果沒有加上,那就沒辦法呈現透明。
// texture source: http://planetpixelemporium.com/earth8081.html
const cloudTransparency = new THREE.TextureLoader().load('8081_earthhiresclouds4K.jpg')
const cloudMaterial = new THREE.MeshStandardMaterial( {
// 開啟透明功能
	transparent: true,
// 加上透明貼圖
	opacity: 1,
	alphaMap: cloudTransparency
})
const cloud = new THREE.Mesh(cloudGeometry, cloudMaterial);
scene.add(cloud);
雲嚴格來說不會一致的往同一個方向旋轉,但為了快速製作雲,我使用一張雲的貼圖處理。
能不能用即時的雲圖資料呈現畫面呢?其實是可以的,過去我有一個side project就是在抓取氣象局的雲圖,以渲染成3D畫面,如果有興趣的話可以查看開源原始碼作研究。而網路上也有提供全球雲圖資訊的服務,都可以拿來發揮。
有興趣的工程師可以深入研究。
地球要旋轉,雲也要轉,背景的星星也是。這三個如果速度不同,也能增加層次感,使得我們的地球更生動。
雲的真實度依照專案而定。網路上有些服務是可以提供實際上的雲圖資料,但我們這次從簡——直接讓全部的雲往同一個方向旋轉。
function animate() {
	...
	earth.rotation.y +=0.005
	cloud.rotation.y +=0.004
	sphere.rotation.y += 0.001
}
.gif)
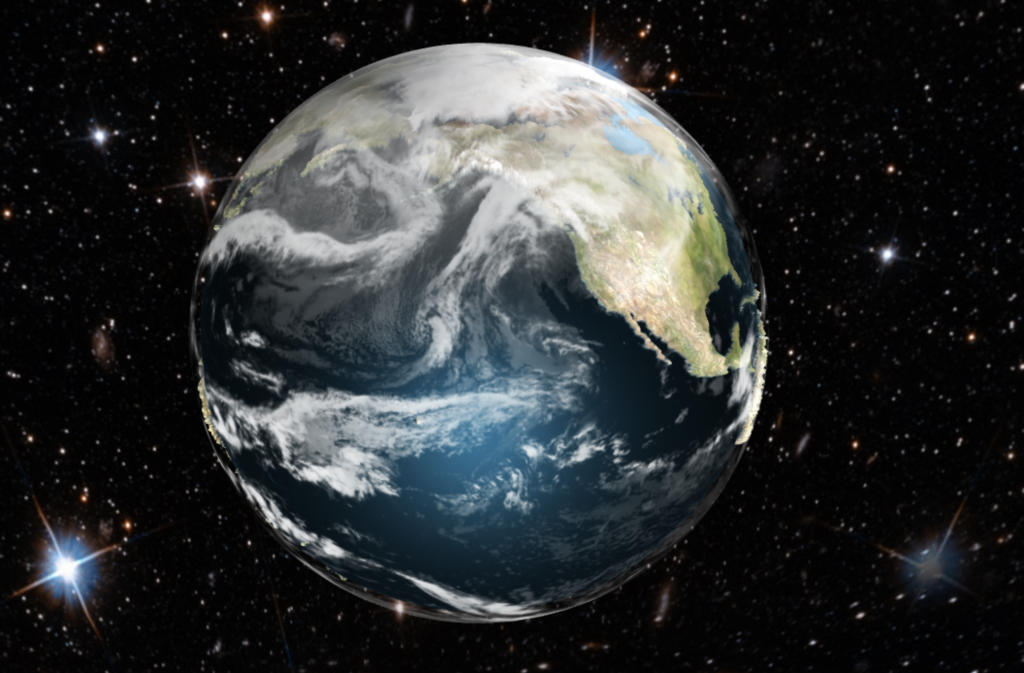
如此一來,地球就完成了。
這邊附上codepen連結。
https://codepen.io/umas-sunavan/pen/eYreGpa
以上你會發現,好像只要找到圖,要做多酷的特效都可以。
是的,有圖就可以,但圖從哪裡來?這會是一個重點。以上有幾張圖是依據本專案需求網路上合成出來,如果要做出其他特效,勢必就要透過一些修圖軟體去製作貼圖。當跨到貼圖領域時,這就是一種必備技能。有些公司有專門出的美術當你同事,然而一旦沒有美術幫忙,這就會是前端視覺特效的業務。
而這又是另一個領域了。我們點到為止,聚焦在前端開發與底層概念即可。
雖然我們做出很漂亮的地球,但這對前端視覺特效工程師來說只是一開始。要能夠跟用戶互動才是重點。為了製作出互動,必須有一些UI介面輔助操作。包含快速跳轉到各處的廠房,並且在地球上顯示廠房的名稱。
下篇將實作這段開發,使得我們的地球不只是地球,而是有商業價值的前端產品。