將 Supabase 資料秀在螢幕上
從 Supabase 成功讀取資料後,要秀出這些資料在螢幕上,需要兩個動作。
每一個影像(image)需要一個圖片卡來放圖片及圖片相關文字資料,我們也需要一個 container 來放這些圖片卡。
首先,建立一個顯示圖片的 grid container 元件(PostImage.js)後,再新增圖片卡的元件(ImageCard.js)。
新增 /components/PostImage.js 內容如下:
import ImageCard from "./ImageCard";

const PostImage = ({ twimgs }) => {
  return (
    <div className="bg-gray-700 container max-w-7xl mx-auto pb-10 px-4">
      <h1 className="text-white text-2xl mt-8 mb-5">福興穀倉 華國美學</h1>
      {twimgs.map(twimg => <ImageCard twimg={twimg} key={twimg.id} />)}
    </div>
  );
};

export default PostImage;
新增 /components/ImageCard.js 內容如下:
const ImageCard = ({ twimg }) => {
  return (
    <div>{twimg.title}</div>
  )
};

export default ImageCard;
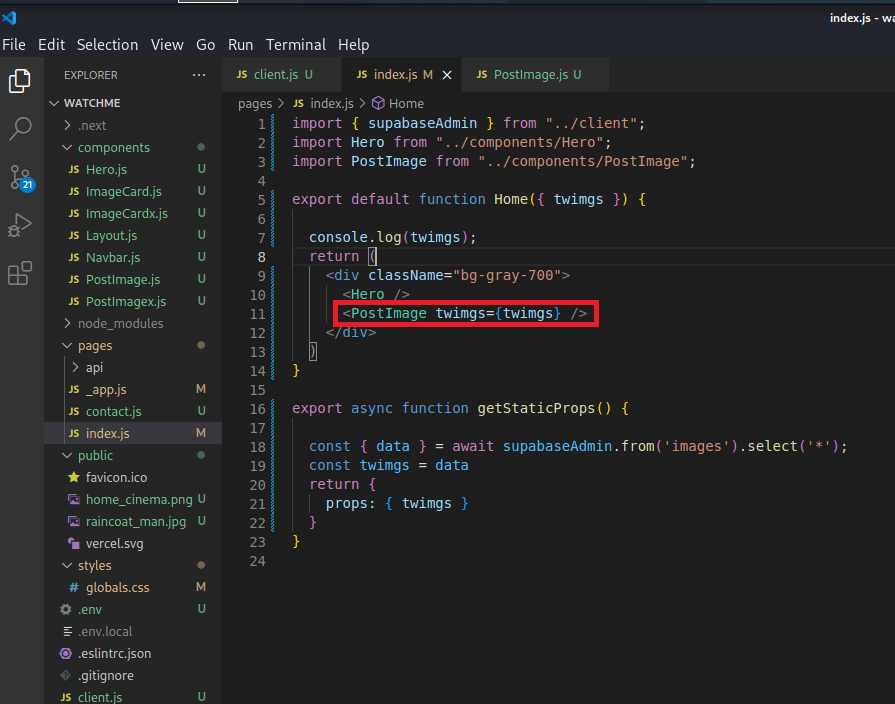
pages/index.js 加入 PostImage 元件:
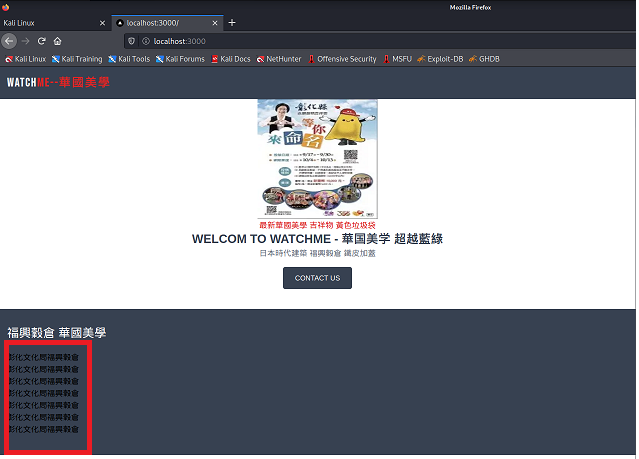
確認 title 有沒有出現在螢幕上:
設計卡片風格(styling the card)
使用 Image 元件優化圖片,需要定義寬度(width)和高度(height)。
修改 /components/ImageCard.js:
import Image from "next/image";

const ImageCard = ({ twimg }) => {
  return (
    <div className="bg-white shadow-sm rounded-md cursosr-pointer">
        <Image src={twimg.imageSrc} width={960} height={540} />
    </div>
  )
};

export default ImageCard;
使用 Image 元件,需到 next.config.js 設定圖片來源網站(domain)資料。我們使用 twitter 網站圖片,所以加 images: { domains: ['pbs.twimg.com'], }, 到 next.config.js 檔案裡。
/** @type {import('next').NextConfig} */
const nextConfig = {
  reactStrictMode: true,
  swcMinify: true,
  images: {
    domains: ['pbs.twimg.com'],
  },
}

module.exports = nextConfig
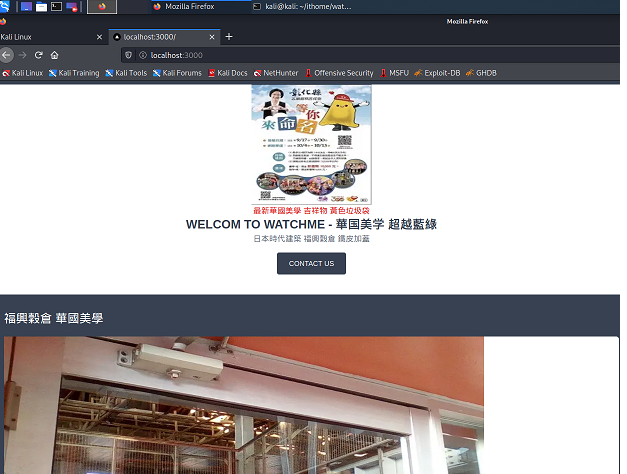
重新執行 npm run dev 看圖片是否顯示在螢幕上。
