每天的專案會同步到 github 上,可以前往 這個網址 如果對於專案有興趣或是想討論一些問題,歡迎留言 OR 來信討論,信箱為:nickchen1998@gmail.com
今天我們要來介紹 Github Actions 這個工具,他是 2019 年 Github 推出的 CI 工具,我們可以透過他來協助我們進行簡單的自動化測試
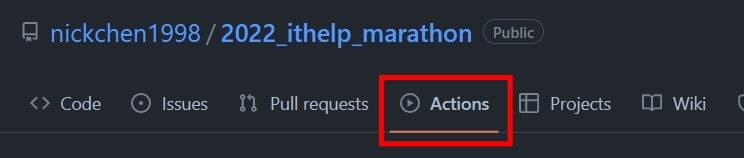
進入 github 專案並點選 Actions 選項
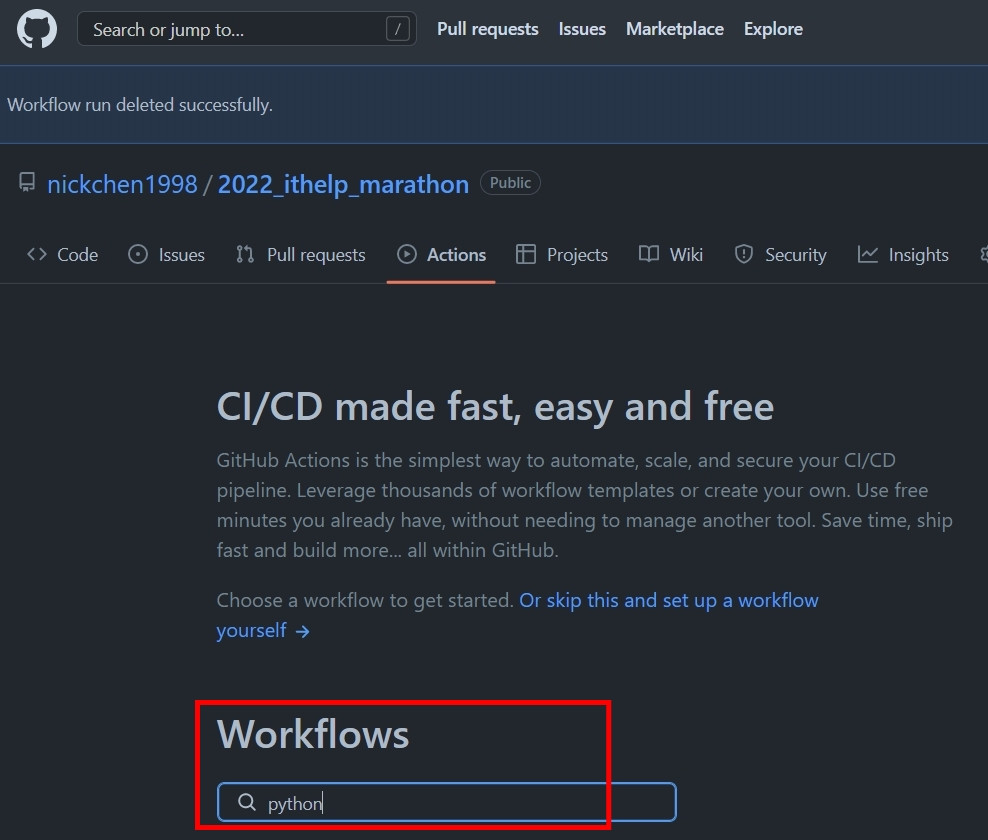
在 Workflows 欄位底下輸入 "python" 進行搜尋
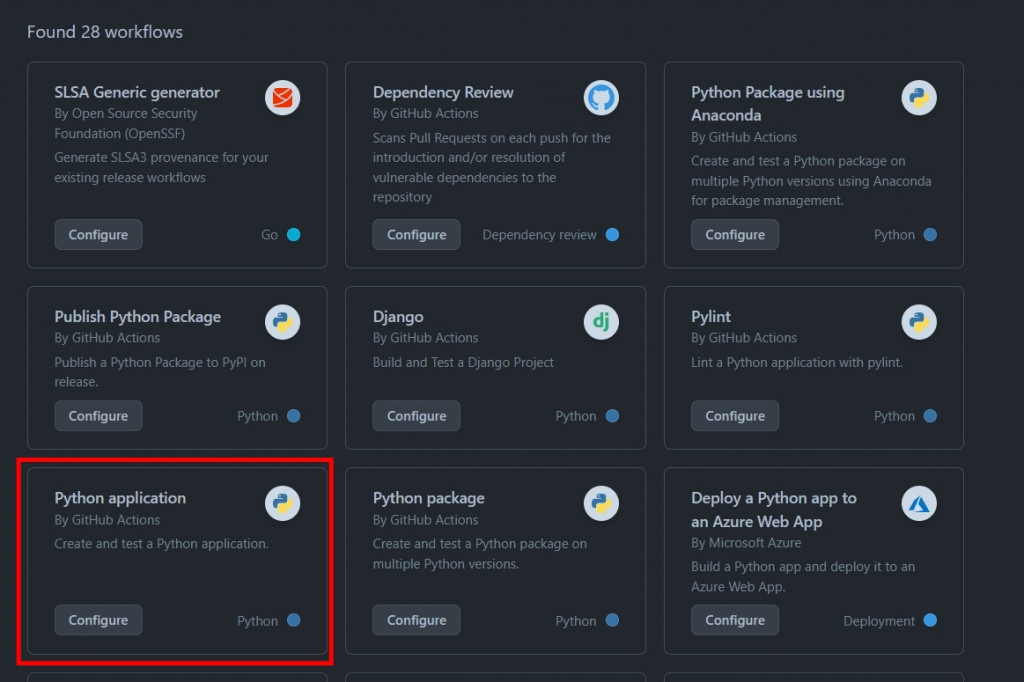
選擇 Python Application,並點選 Configure 選項
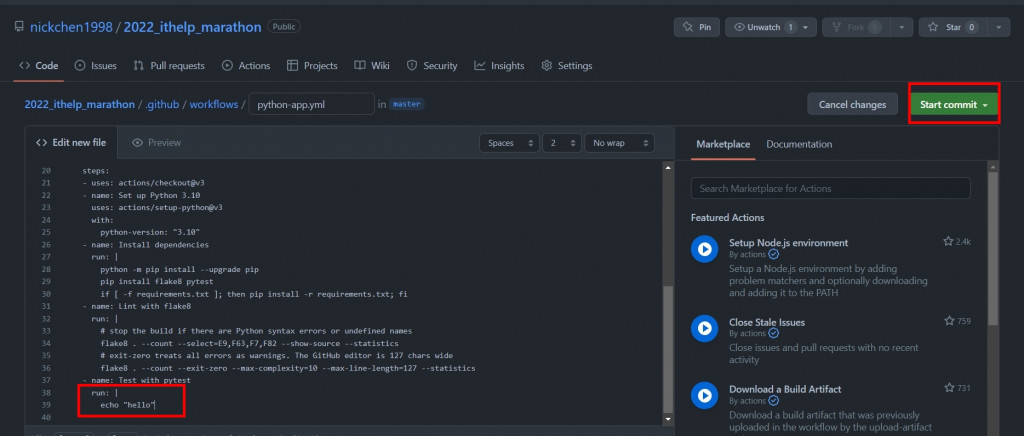
將跳轉後出現的頁面的程式碼滑到最底下,並將 pytest 更改為 echo "hello"
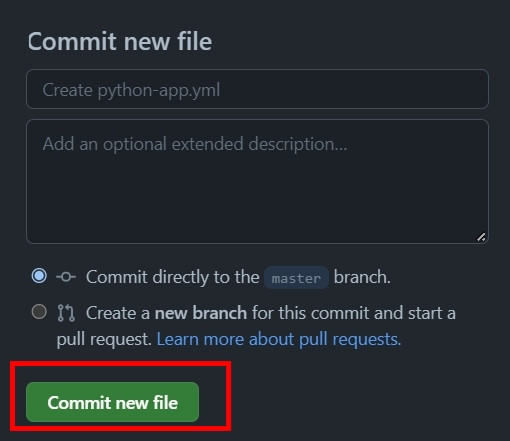
點選右上方 "Start Commit" 選項
點選 "Commit new file" 選項
頁面會自動跳轉回專案首頁,請點選回 "Actions",就可以看到 github 按照剛剛建立的檔案建立了一個 CI 任務
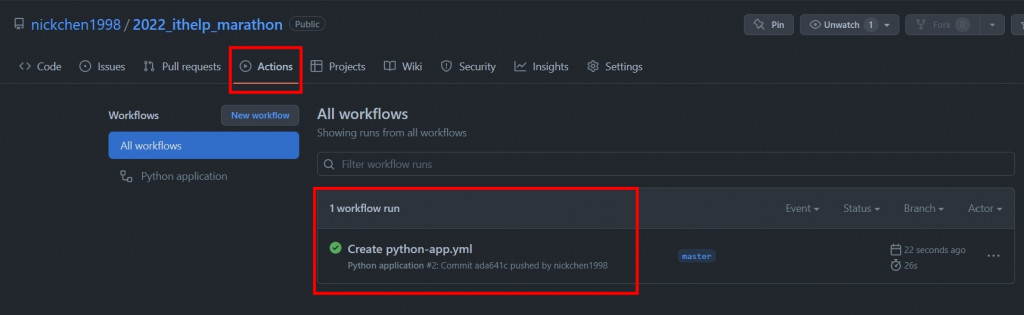
點進此任務,並選擇 build 選項

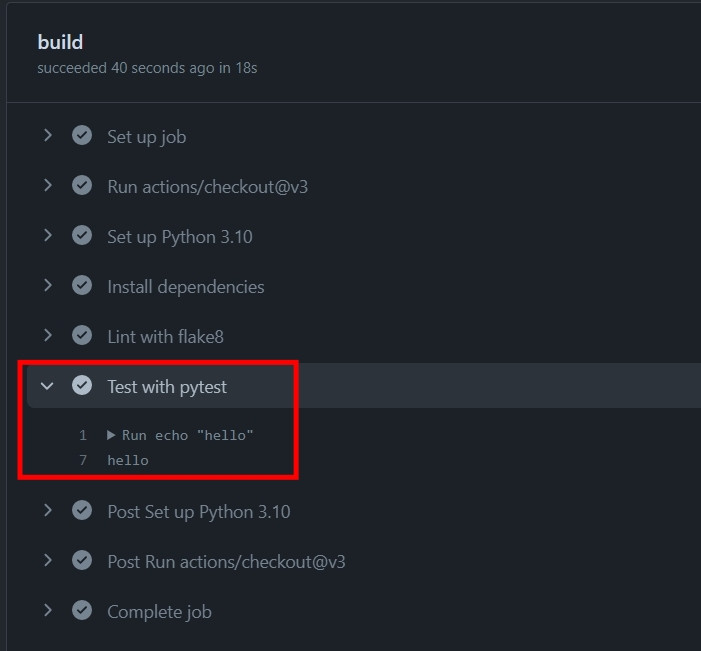
點選 "Test with pytest" 部分即可看到剛剛修改的 echo "hello"
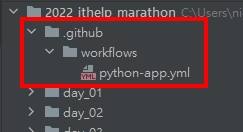
由於我們剛剛是直接在 github 上進行 commit 來新增 workflows,因此我們要先回到專案上執行 git pull 確保專案同步
執行完 git pull 後即可在專案上看到 ".github" 這個目錄,並且有 "workflows" 這個子目錄
"workflows" 目錄下會有一個 python-app.yml 檔案,這個就是我們等一下要修改的檔案
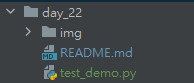
在修改 yml 前我們先建立幾個簡單的 test case 並存放到 day_22/test_demo.py 目錄下
  def test_export_report_1():
      a = 1 + 1
      b = 2 + 2

      assert b > a


  def test_export_report_2():
    a = 2 + 2
    b = 4 + 4

    assert a < b
打開 python-app.yml
將剛剛的 echo "hello" 修改為 pytest -s -v ./day_22/test_demo.py
# This workflow will install Python dependencies, run tests and lint with a single version of Python
# For more information see: https://help.github.com/actions/language-and-framework-guides/using-python-with-github-actions

name: Python application

on:
  push:
    branches: [ "master" ]
  pull_request:
    branches: [ "master" ]

permissions:
  contents: read

jobs:
  build:

    runs-on: ubuntu-latest

    steps:
    - uses: actions/checkout@v3
    - name: Set up Python 3.10
      uses: actions/setup-python@v3
      with:
        python-version: "3.10"
    - name: Install dependencies
      run: |
        python -m pip install --upgrade pip
        pip install flake8 pytest
        if [ -f requirements.txt ]; then pip install -r requirements.txt; fi
    - name: Lint with flake8
      run: |
        # stop the build if there are Python syntax errors or undefined names
        flake8 . --count --select=E9,F63,F7,F82 --show-source --statistics
        # exit-zero treats all errors as warnings. The GitHub editor is 127 chars wide
        flake8 . --count --exit-zero --max-complexity=10 --max-line-length=127 --statistics
    - name: Test with pytest
      run: |
        pytest -s -v ./day_22/test_demo.py
修改完成後,我們就可以將整個專案 push 到 Github 上,這個時候我們就可以回到剛剛的 "Actions" 頁面察看結果了
下圖中我們可以看到 Acitons 這邊多了一個任務,任務名稱會使用剛剛的 commit message 命名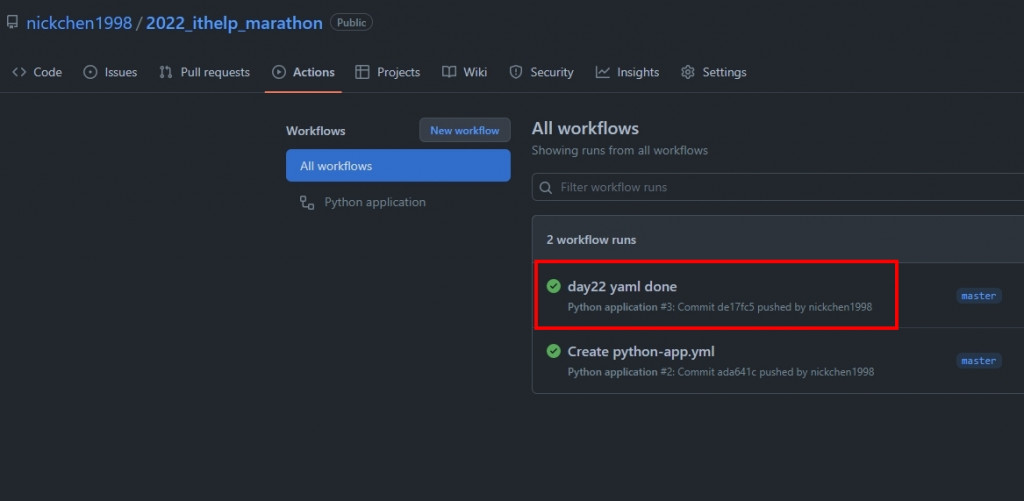
點進去該任務後就可以查看 pytest 的執行結果了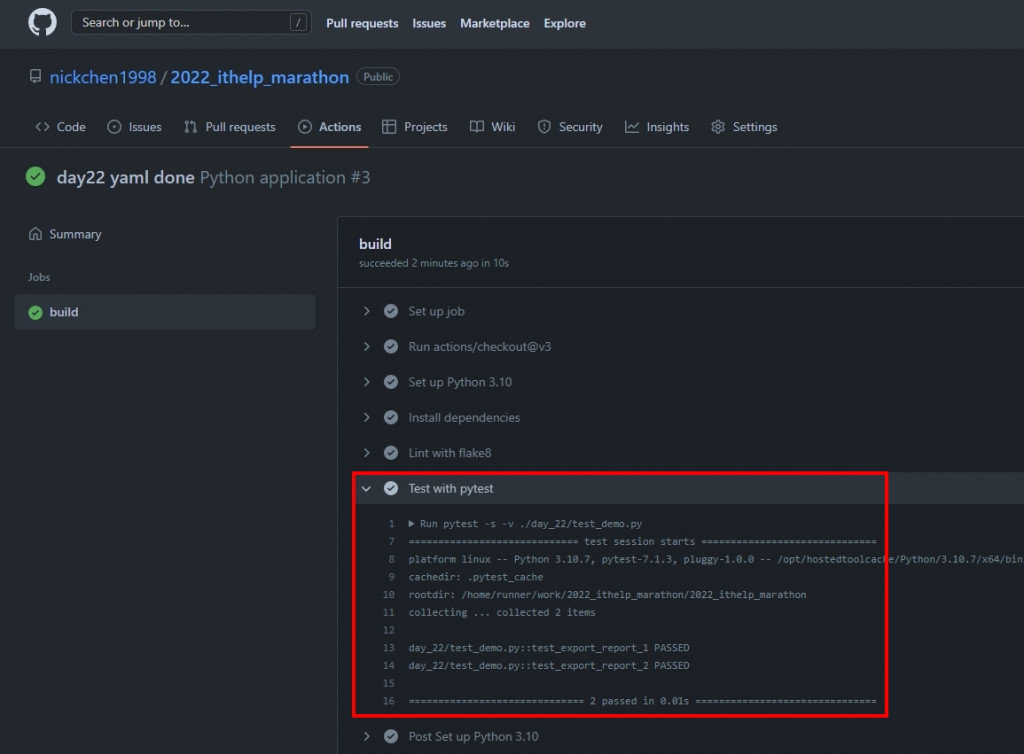
今天我們簡單介紹了該如何使用 Github Actions,過程中有請各位編輯 python-app.yml 這個檔案,明天我們直接藉由這個檔案來介紹,該如何編輯我們的工作流程