當有越來越多的商品後,查詢後能快速的找到商品將會是一大課題,為網站裝上搜尋引擎會是我們最佳的選擇,今天就來為我們的網站裝上引擎。
Elasticsearch 是基於 Elastic Stack 核心的分佈式 RESTful 查詢和分析引擎。可以使用來 Elasticsearch 儲存、搜尋和管理各種資料。
在專案 data 目錄下建立 elasticsearch_data 資料目錄並開啟權限
cd ~/example_tenant
cd data
mkdir elasticsearch_data
chmod 777 elasticsearch_data
這裡安裝的是 7.10.2 版本,加上 9200 port 之後可以用來確認資料,
在 docker-compose.yml 加入以下內容,
es01:
    image: docker.elastic.co/elasticsearch/elasticsearch:7.10.2
    container_name: ${IMAGE_NAME}_es01
    restart: always
    environment:
      - node.name=es01
      - cluster.name=es-docker-cluster
      - discovery.type=single-node
      - bootstrap.memory_lock=true
      - "ES_JAVA_OPTS=-Xms512m -Xmx512m"
    ulimits:
      memlock:
        soft: -1
        hard: -1
    volumes:
      - ./data/elasticsearch_data:/usr/share/elasticsearch/data # chmod 777
    ports:
        - "9200:9200"
重新啟動 docker-compose
cd ~/example_tenant
docker-compose down -v
docker-compose up -d
運行成功!
在 localhost:9200 可以查看啟動後的參數
// http://localhost:9200/

{
  "name": "es01",
  "cluster_name": "es-docker-cluster",
  "cluster_uuid": "kUvI31_wQzSTbPRw9tFPfg",
  "version": {
    "number": "7.10.2",
    "build_flavor": "default",
    "build_type": "docker",
    "build_hash": "747e1cc71def077253878a59143c1f785afa92b9",
    "build_date": "2021-01-13T00:42:12.435326Z",
    "build_snapshot": false,
    "lucene_version": "8.7.0",
    "minimum_wire_compatibility_version": "6.8.0",
    "minimum_index_compatibility_version": "6.0.0-beta1"
  },
  "tagline": "You Know, for Search"
}
Django Elasticsearch DSL 是一個能在 elasticsearch 中索引 Django Model 的套件,
它基於 elasticsearch-dsl-py,因此可以使用 elasticsearch-dsl-py 的所有功能。
加入租戶共用應用程式
# main/settings.py

# ...

SHARED_APPS = (
    'django_tenants',
    'customers',
    'django.contrib.contenttypes',
    'django_elasticsearch_dsl', # new
)
加入 ELASTICSEARCH_DSL 設定檔,這裡的 hosts 使用 docker 啟動的服務
# main/settings.py

# ...

ELASTICSEARCH_DSL={
    'default': {
        'hosts': 'es01:9200'
    },
}
使用 Django Elasticsearch DSL 來為商品與商品分類建立索引,我們要在 products 應用程式目錄下建立 documents.py ,並在其中新增 ProductDocument 與 ProductCategoryDocument 兩個 Document 索引文件。
ProductDocument 的簡單說明如下:
class Index 的 name 為 elasticsearch 中索引的名稱
class Django 為設定對應的模型,並且可以在 field 定義要索引的欄位
使用 ObjectField 可以定義關聯欄位,這邊設定關連到商品分類,並設定關聯後的下一層欄位
以下為 documents.py:
from django_elasticsearch_dsl import Document, Index, fields
from django_elasticsearch_dsl.registries import registry
from products.models import Product, ProductCategory

# The name of your index
product = Index('products')
# See Elasticsearch Indices API reference for available settings
product.settings(
    number_of_shards=1,
    number_of_replicas=0
)

@registry.register_document
class ProductDocument(Document):
    category = fields.ObjectField(properties={
        'name': fields.TextField(),
        'name_en': fields.TextField(),
        'description': fields.TextField(),
        'description_en': fields.TextField(),
        'created': fields.DateField(),
        'modified': fields.DateField(),
        'image': fields.FileField(),
    })

    class Django:
        model = Product
        # we removed the type field from here
        fields = [
            'name',
            'description',
            'price',
            'created',
            'modified',
        ]

    class Index:
        name = "product"

@registry.register_document
class ProductCategoryDocument(Document):

    class Django:
        model = ProductCategory
        fields = [
            'name',
            'name_en',
            'description',
            'description_en',
            'created',
            'modified',
            'image'
        ]

    class Index:
        name = "productcategory"
透過 http://localhost:9200/product/_search 可以查看 product 索引表的內容,先來看看建立索引前找不到引所的回應內容:
// http://localhost:9200/product/_search

{
  "error": {
    "root_cause": [
      {
        "type": "index_not_found_exception",
        "reason": "no such index [product]",
        "resource.type": "index_or_alias",
        "resource.id": "product",
        "index_uuid": "_na_",
        "index": "product"
      }
    ],
    "type": "index_not_found_exception",
    "reason": "no such index [product]",
    "resource.type": "index_or_alias",
    "resource.id": "product",
    "index_uuid": "_na_",
    "index": "product"
  },
  "status": 404
}
接下來透過 Django Elasticsearch DSL 提供的 manage 指令來根據 document 建立空索引表:
docker exec --workdir /opt/app/web example_tenant_web \
    python3.10 manage.py search_index --create

...

Creating index 'product'
Creating index 'productcategory'
再次查詢,這時候可以看到空的索引表筆數顯示為 0 筆
// http://localhost:9200/product/_search

{
  "took": 1,
  "timed_out": false,
  "_shards": {
    "total": 1,
    "successful": 1,
    "skipped": 0,
    "failed": 0
  },
  "hits": {
    "total": {
      "value": 0,
      "relation": "eq"
    },
    "max_score": null,
    "hits": [

    ]
  }
}
Django 擁有一個信號分派器,當框架中的其他地方發生動作時,可以幫助其他用用程式收到通知執行對應的程式,而這裡將會使用 Django 的內建信號,在 model 儲存與刪除時會進行觸發的 post_save 與 pre_delete。
update_document 與 delete_document 分別接收這兩種信號,並判斷當前收到信號的模型,若判斷為有設定索引的模型就進行更新,而更新索引則會使用 Django Elasticsearch DSL 提供的 registry 函數來進行。
在 core 建立 signals.py 並寫入以下內容:
from django.conf import settings
from django.db.models.signals import post_save, pre_delete
from django.dispatch import receiver

from django_elasticsearch_dsl.registries import registry

__all__ = (
    'update_document',
    'delete_document',
)

@receiver(post_save)
def update_document(sender, **kwargs):
    app_label = sender._meta.app_label
    model_name = sender._meta.model_name
    instance = kwargs['instance']

    if app_label == 'products':
        if model_name == 'productcategory':
            instances = instance.product_set.all()
            for _instance in instances:
                registry.update(_instance)

@receiver(pre_delete)
def delete_document(sender, **kwargs):
    app_label = sender._meta.app_label
    model_name = sender._meta.model_name
    instance = kwargs['instance']

    if app_label == 'products':
        if model_name == 'productcategory':
            instances = instance.product_set.all()
            for _instance in instances:
                registry.update(_instance)
在 core 的 apps.py 註冊信號
from django.apps import AppConfig

class CoreConfig(AppConfig):
    default_auto_field = 'django.db.models.BigAutoField'

    name = 'core'
    def ready(self):
        from core import signals
在管理介面選擇一項商品後進行儲存
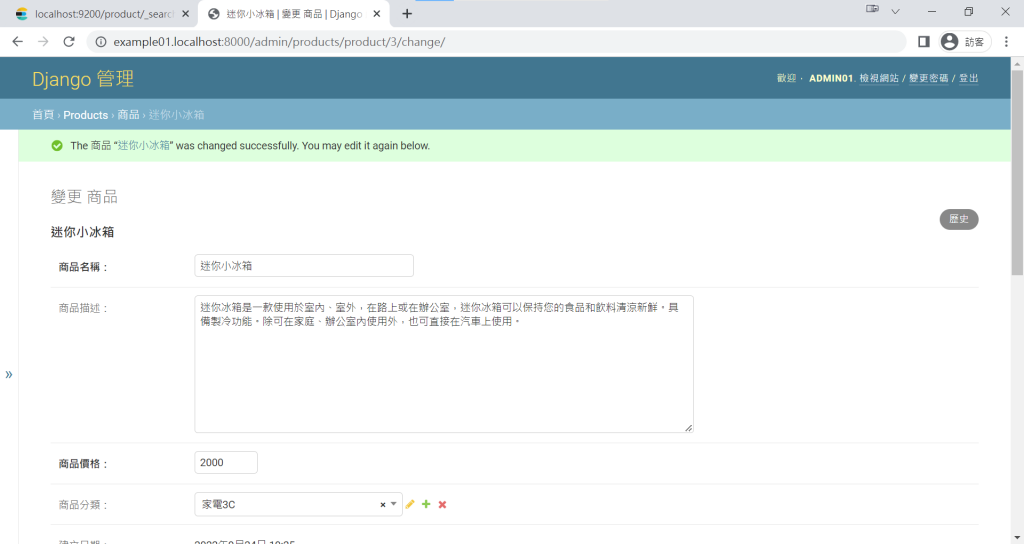
查看 http://localhost:9200/product/_search 回應內容
// http://localhost:9200/product/_search

{
  "took": 1,
  "timed_out": false,
  "_shards": {
    "total": 1,
    "successful": 1,
    "skipped": 0,
    "failed": 0
  },
  "hits": {
    "total": {
      "value": 1,
      "relation": "eq"
    },
    "max_score": 1.0,
    "hits": [
      {
        "_index": "product",
        "_type": "_doc",
        "_id": "3",
        "_score": 1.0,
        "_source": {
          "category": {
            "name": "家電3C",
            "name_en": "Appliance 3C",
            "description": "走在科技尖端",
            "description_en": "on the cutting edge of technology",
            "created": "2022-09-13T20:11:59.723669+08:06",
            "modified": "2022-10-06T22:01:08.914940+08:06",
            "image": "/media/example01/productcategory_media/pexels-tyler-lastovich-6991221664214284.jpg"
          },
          "name": "迷你小冰箱",
          "description": "迷你冰箱是一款使用於室內、室外,在路上或在辦公室,迷你冰箱可以保持您的食品和飲料清涼新鮮。具備製冷功能。除可在家庭、辦公室內使用外,也可直接在汽車上使用。",
          "price": 2000,
          "created": "2022-09-24T19:31:58.153375+08:06",
          "modified": "2022-10-06T15:30:33.099137+00:00"
        }
      }
    ]
  }
}
成功生成索引!
今天為我們的 Django 裝上引擎,但可不要忘記我們可以有很多個租戶,Elasticsearch 雖然可以支援多租戶,但是 Django Elasticsearch DSL 並沒有支援,明天我們將一起來進行改造『改造引擎,Django 多租戶下的搜尋引擎』