如果要新增一個 Django 租戶,最好的方式並不是重新建立一個全新的,而是先擁有一個設定好初始資料的基底租戶,在要新增租戶的時候直接從這個基底租戶進行複製,就不需要重複進行初始化了。
然而要連到主機裡面下 clone 指令是很麻煩的,為了簡化日後的作業流程,可以將複製租戶的功能新增至管理介面,馬上就來看看要如何進行吧!
在之前的『第一個房客,建立租戶』有提到建立租戶與其他基礎指令,現在要來了解透過指令要如何對租戶進行複製與刪除。
複製租戶
clone 為複製租戶指令,這裡將 example01 作為基底租戶進行複製, 以下為參數說明:
這裡要注意最後這些參數會執行 PostgreSQL 的指令,schema 名稱不可使用 . 或是純數字以免造成指令發生錯誤。
複製租戶範例指令:
docker exec --workdir /opt/app/web example_tenant_web \
	python3.10 manage.py clone_tenant \
	--clone_from example01 \
	--clone_tenant_fields True \
	--schema_name example03 \
	--name example03 \
	--domain-domain example03.localhost \
	--domain-tenant_id example03 \
	--domain-is_primary True
刪除租戶
delete_tenant 為刪除租戶指令, -s 為指定要刪除的 schema 名稱。
docker exec - it --workdir /opt/app/web example_tenant_web \
	python3.10 manage.py delete_tenant -s example03

...

Warning you are about to delete 'example03' there is no undo.
Are you sure you want to delete 'example03'?yes
Deleting 'example03'
Deleted 'example03'
首先要定義一個新增租戶的表單,最終會透過 clone 指令來進行複製,
以下為表單欄位說明:
這些欄位需要進行驗證是否重複與 schema 名稱不可使用 . 或是純數字。
在 customers 建立 forms.py,並建立 CustomersForm 表單:
from django import forms
from django.db import models
from customers.models import Client, Domain

class CustomersForm(forms.Form):

    def __init__(self, *args, **kwargs):
        super(CustomersForm, self).__init__(*args, **kwargs)
        self.fields['name'].label = "租戶名稱"
        self.fields['from_schema_name'].label = "要複製的 schema 名稱"
        self.fields['to_schema_name'].label = "新增的 schema 名稱"
        self.fields['description'].label = "說明"
        self.fields['domain'].label = "網域"

    name = forms.CharField(required=True)
    from_schema_name = forms.CharField(required=True)
    to_schema_name = forms.CharField(required=True)
    description = forms.CharField(required=True)
    domain = forms.CharField(required=True)

    def clean_name(self):
        data = self.cleaned_data['name']
        if Client.objects.filter(name=data).exists():
            raise forms.ValidationError(f'租戶名稱 "{data}" 已存在。')
        return data

    def clean_from_schema_name(self):
        data = self.cleaned_data['from_schema_name']
        if not Client.objects.filter(schema_name=data).exists():
            raise forms.ValidationError(f'要複製的 schema 名稱 "{data}" 不存在。')
        return data

    def clean_to_schema_name(self):
        data = self.cleaned_data['to_schema_name']
        if '.' in data:
            raise forms.ValidationError(f'新建的 schema 名稱 "{data}" 不可包含 "." 字元。')
        if not data.isalnum() or data.isdigit():
            raise forms.ValidationError(f'新建的 schema 名稱 "{data}" 需英數字混和。')
        if Client.objects.filter(schema_name=data).exists():
            raise forms.ValidationError(f'新建的 schema 名稱 "{data}" 已存在。')
        return data

    def clean_domain(self):
        data = self.cleaned_data['domain']
        if Domain.objects.filter(domain=data).exists():
            raise forms.ValidationError(f'網域"{data}" 已存在。')
        return data
在 customers 應用程式的 views.py 建立 CustomersFormView 視圖。
由於我們接下來要使用自定義管理介面,需要使用 LoginRequiredMixin 來要求使用者進行登入,另外則是在 get 方法限制特定的超級使用者帳號才可進行新增,與取得 admin.site 的 context 傳遞給 template。
指定表單 template 為 customers/customers_form.html(將在之後建立)。
使用 form_valid 函數在表單驗證通過後執行 clone 指令,並且複製一份多語系檔。
# customers/views.py

import os
from django.conf import settings
from django.contrib import admin
from django.contrib.auth.mixins import LoginRequiredMixin
from django.db import connection
from django.http import HttpResponseRedirect, HttpResponseNotFound
from django.views.generic.edit import FormView
from django.views.decorators.cache import never_cache
from django.utils.decorators import method_decorator
from django.urls import reverse

from django_tenants.management.commands.clone_tenant import Command

from customers.models import Client
from random import choice

from customers.forms import CustomersForm

@method_decorator(never_cache, name='dispatch')
class CustomersFormView(LoginRequiredMixin, FormView):
    login_url = '/admin/login/'
    template_name = 'customers/customers_form.html'
    form_class = CustomersForm

    def get_context_data(self, **kwargs):
        context = super(CustomersFormView, self).get_context_data(**kwargs)
        return context

    def form_valid(self, form):
        now_schema_name = connection.schema_name
        name = form.cleaned_data['name']
        from_schema_name = form.cleaned_data['from_schema_name']
        to_schema_name = form.cleaned_data['to_schema_name']
        domain = form.cleaned_data['domain']
        description = form.cleaned_data['description']

        c = Command()
        tenant_data = {'schema_name': to_schema_name, 'name': name, 'description': description}
        tenant = c.store_tenant(clone_schema_from=from_schema_name,
                                    clone_tenant_fields=True,
                                    **tenant_data)
        tenant.name = name
        tenant.save()
        domain_data = {'domain': domain, 'tenant': tenant, 'is_primary': 'True'}
        domain = c.store_tenant_domain(**domain_data)
        connection.set_schema(now_schema_name)
        # locale dir
        from_locale_path = locale_path = os.path.join(settings.BASE_DIR, f'tenant_locale/{from_schema_name}')
        to_locale_path = locale_path = os.path.join(settings.BASE_DIR, f'tenant_locale/{to_schema_name}')
        if not os.path.isdir(to_locale_path):
            print(f"cp -pr {from_locale_path} {to_locale_path}")
            os.system(f"cp -pr {from_locale_path} {to_locale_path}")
        return HttpResponseRedirect(reverse('admin:customers_client_changelist'))

    def get_success_url(self):
        return reverse('admin:customers_client_changelist')

    def post(self, request, *args, **kwargs):
        form = self.get_form()
        if form.is_valid():
            return self.form_valid(form)
        else:
            context = self.get_context_data(**kwargs)
            request.current_app = 'admin'
            context.update(admin.site.each_context(request))
            return self.render_to_response(context)

    def get(self, request, *args, **kwargs):
        # 限制特定使用者才可進入該頁面
        if not request.user.username.startswith('admin') and not request.user.is_superuser:
            return HttpResponseRedirect(reverse('admin:index'))
        context = self.get_context_data(**kwargs)
        request.current_app = 'admin'
        context.update(admin.site.each_context(request))
        return self.render_to_response(context)
在 customers 應用程式建立 templates 目錄後其中再建立 customers 目錄,最後建立 customers_form.html。
這裡繼承 Django 的管理介面 admin/base_site.html,並使用 form 生成表單。
<!-- customers/templates/customers/customers_form.html -->

{% extends "admin/base_site.html" %}
{% load i18n static %}

{% block breadcrumbs %}
<div class="breadcrumbs">
  <a href="{% url 'admin:index' %}">{% trans 'Home' %}</a>
  {% if title %} › {% if back %} <a href="{{ back }}">{{ title }}</a> {% else %} {{ title }} {% endif %}{% endif %}
  {% if subtitle %} › {{ subtitle|safe }}{% endif %}
</div>
{% endblock %}

{% block content %}

<meta name="robots" content="NONE,NOARCHIVE" />
<style>

</style>

<div class="card">
  <div class="card-block">
    <div>
      <fieldset class="form module">
        <form id="form" name="form" method="post">
          {% csrf_token %}
          {{form.media}}
          <div class="col-xs-12 col-sm-9 col-md-10 col-multi-fields">
            <table border="0" width="100%">
              {% for field in form %}
                <tr>
                  <td colspan=2>
                    <div class="form-group row form-row">
                      <label class="form-control-label col-xs-12 col-sm-3 col-md-2 {% if field.field.required %} field-required{% endif %}"
                        id="{{ field.auto_id }}_filter" name="{{ field.name }}">{{field.label}}</label>
                      <div class="col-xs-9">{{field}}</div>
                      {% for error in field.errors %}
                        {{ error }}
                      {% endfor %}
                    </div>
                  </td>
                </tr>
              {% endfor %}
              <tr>
                <td colspan=2> </td>
              </tr>
              <tr>
                <td colspan=2>
                  <center>
                    <button class="btn btn-primary" type="submit" value="新增" name="add">新增</button>
                  </center>
                </td>
              </tr>
            </table>
          </div>
        </form>
      </fieldset>
    </div>
  </div>
</div>

{% endblock %}
在 main 應用程式下的 URLS 進行匯入
# main/urls.py

# ...

urlpatterns = [
    # ...
    path('customers/', include(('customers.urls', 'customers'), namespace='customers')),
] + static(settings.STATIC_URL, document_root=settings.STATIC_ROOT)

# ...
在 customers 應用程式目錄下建立 urls.py 檔案,
form 對應至 CustomersFormView 新增租戶表單視圖。
from django.urls import path
from django.urls.conf import include

from . import views

urlpatterns = [
    path('form/', views.CustomersFormView.as_view(), name='customers_form'),
]
新增按鈕
接下來要增加一個新增租戶的按鈕,為了能自定義按鈕區塊,要繼承 Django 原生的 admin 模板 change_list.html 來進行修改。
將 Django 模板複製至 customers 應用程式模板的指令如下:
docker exec example_tenant_web \
	cp -pr \
	/usr/local/lib/python3.10/dist-packages/django/contrib/admin/templates/admin/change_list.html \
	/opt/app/web/customers/templates/customers/
在 change_list.html 的 object-tools-items 區塊 增加新增租戶按鈕:
<!-- ... -->

{% block object-tools-items %}
  <li>
    <a href="{% url 'customers:customers_form' %}" class="not add_tenant">新增租戶</a>
  </li>
  {% if has_add_permission %}
  <li>
    {% url cl.opts|admin_urlname:'add' as add_url %}
    <a href="{% add_preserved_filters add_url is_popup to_field %}" class="addlink">
      {% blocktranslate with cl.opts.verbose_name as name %}Add {{ name }}{% endblocktranslate %}
    </ a>
  </li>
  {% endif %}
{% endblock %}
指定模板與權限控制
接著更新租戶管理介面,指定 change_list_template 為自定義的模板,並調整管介面權限,只有特定超級使用者帳號才可以進行刪除租戶。
# customers/admin.py

from django.contrib import admin

from customers.models import Client, Domain
from . import forms

class DomainInline(admin.TabularInline):
    model = Domain

@admin.register(Client)
class ClientAdmin(admin.ModelAdmin):
    change_list_template = "customers/change_list.html"
    inlines = [DomainInline]
    list_display = ('schema_name', 'name')

    def has_add_permission(self, request):
        return False

    def has_delete_permission(self, request, obj=None):
        # 限制特定使用者才可刪除
        if request.user.username.startswith('admin') and request.user.is_superuser:
            return True
透過指令刪除 schema 需要將 auto_drop_schema 設為 True。
在模型執行 delete 函數時,同時將多語系檔案也進行刪除。
# customers/models.py

import os
from django.conf import settings
from django.db import models, connection
from django_tenants.models import TenantMixin, DomainMixin

class Client(TenantMixin):
    name = models.CharField(max_length=100)
    paid_until =  models.DateField()
    on_trial = models.BooleanField()
    created_on = models.DateField(auto_now_add=True)

    # default true, schema will be automatically created and synced when it is saved
    auto_create_schema = True
    auto_drop_schema = True

    def delete(self, force_drop=False, *args, **kwargs):
        """
        Deletes this row. Drops the tenant's schema if the attribute
        auto_drop_schema set to True.
        """
        locale_path = locale_path = os.path.join(settings.BASE_DIR, f'tenant_locale/{connection.schema_name}')
        os.system(f"rm -rf {locale_path}")
        self._drop_schema(force_drop)
        super().delete(*args, **kwargs)

class Domain(DomainMixin):
    pass
然而透過管理介面進行刪除操作在預設的情況會進行 admin log 的紀錄,資料庫會因為這條紀錄尚未執行完畢而無法正常刪除 schema,所以要在 admin 將刪除 log 紀錄功能停用。
# customers/admin.py

# ...

class ClientAdmin(admin.ModelAdmin):

    # ...

    def log_deletion(self, request, object, object_repr):
        pass
到這裡,新增與刪除租戶功能就都完成了。
租戶列表管理介面:
在右上角可以看到新增租戶按鈕,點選後進入新增租戶表單頁面。

新增租戶表單頁面:
這裡我們要複製租戶 example01 為新租戶 example03 。
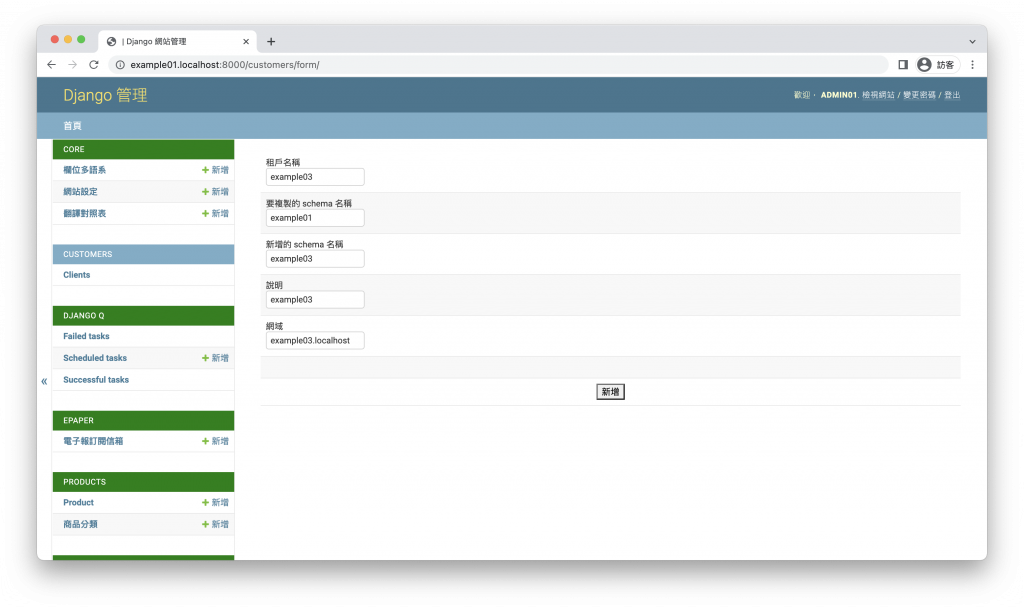
點選新增送出表單。

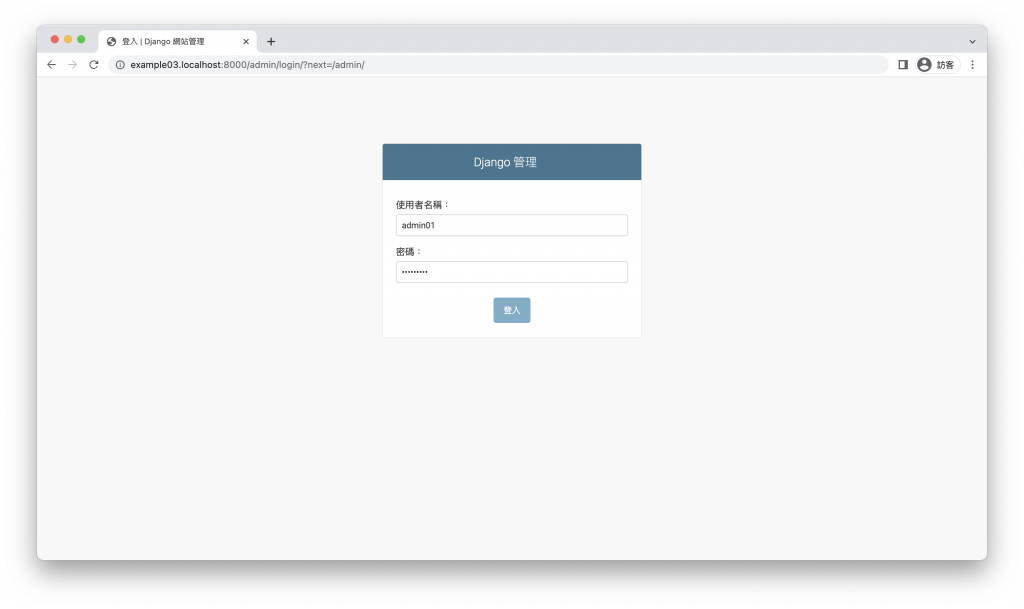
登入租戶 example03 管理介面
由以下網址進入
http://example03.localhost:8000/admin/
因為是從租戶 example01 複製過來,登入時使用租戶 example01 的超級使用者帳號密碼
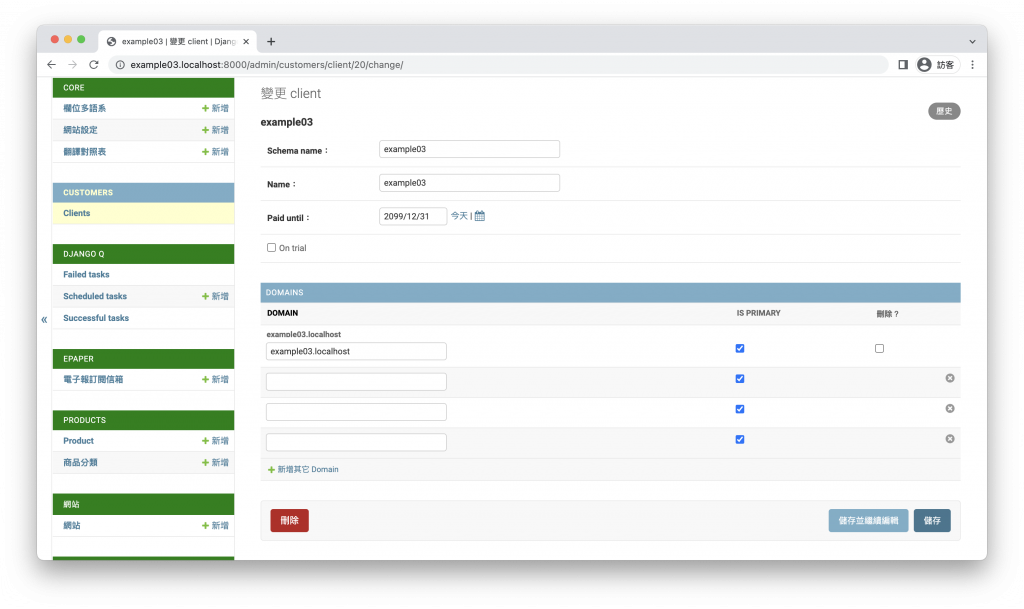
租戶 example03 的管理介面
進入後可以看到租戶 example03 的資料與刪除按鈕,刪除按鈕只能刪除當前租戶,無法刪除其他租戶。
刪除租戶
點選刪除按鈕後點選確認。
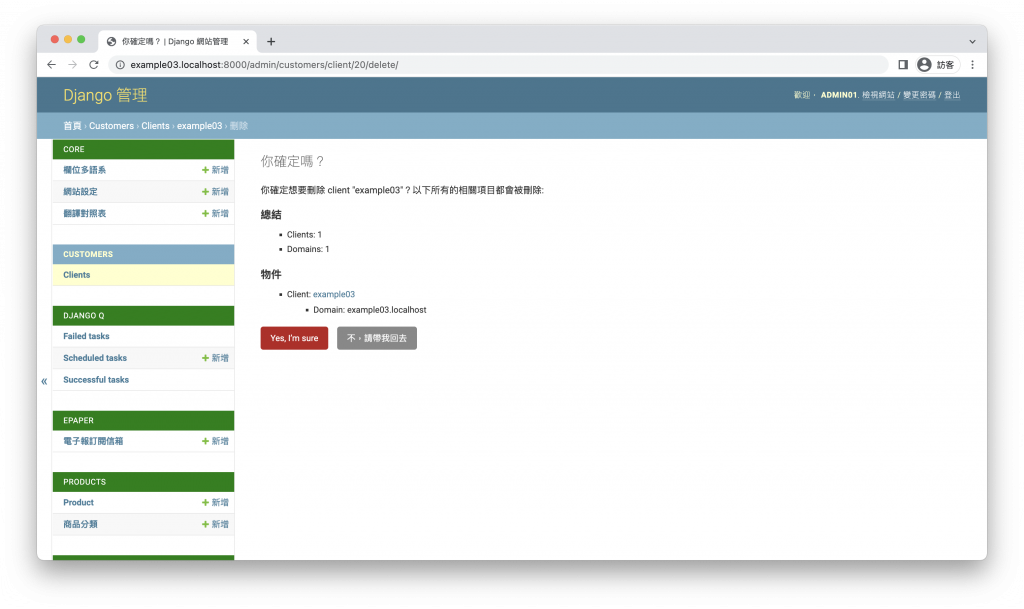
刪除完成,因為該租戶已經被刪除,會返回 404 頁面。
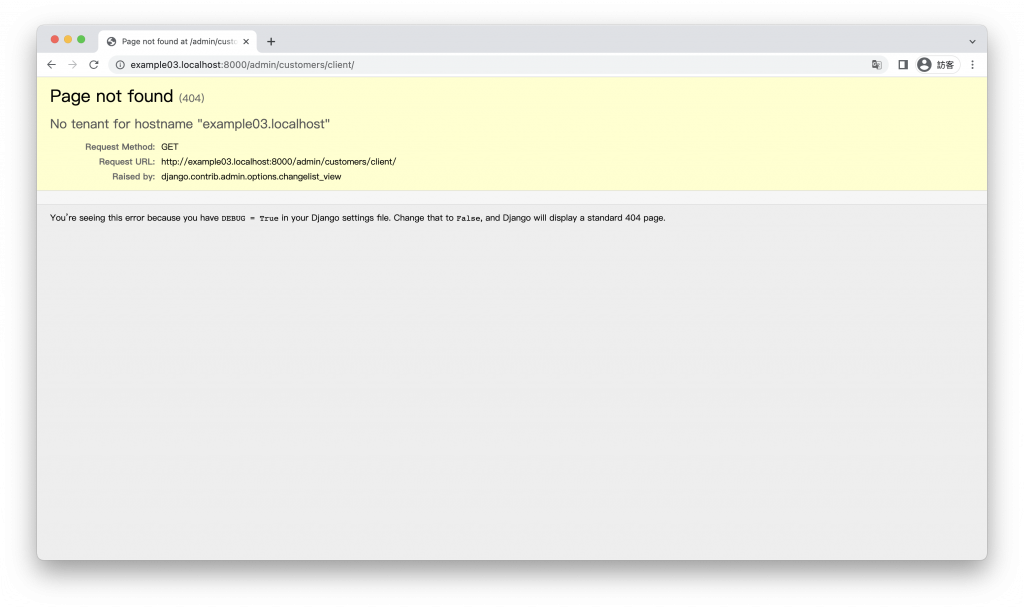
大功告成!
今天透過管理介面來操作租戶,可以省下許多開發工作,但也要注意對超級使用者的管控,避免誤操作導致資料被刪除哦。
接下來我們將來把電商網站的訂單功能完成,下一回『全都要買,Django 實作購物車功能』。