終於來到了最後一天,今天要來將我們的多租戶架構網站進行雲端部署,馬上就開始吧!
網域是多租戶網站不可或缺的一部分,Django 多租戶架構會透過子網域名稱進行租戶的區分。
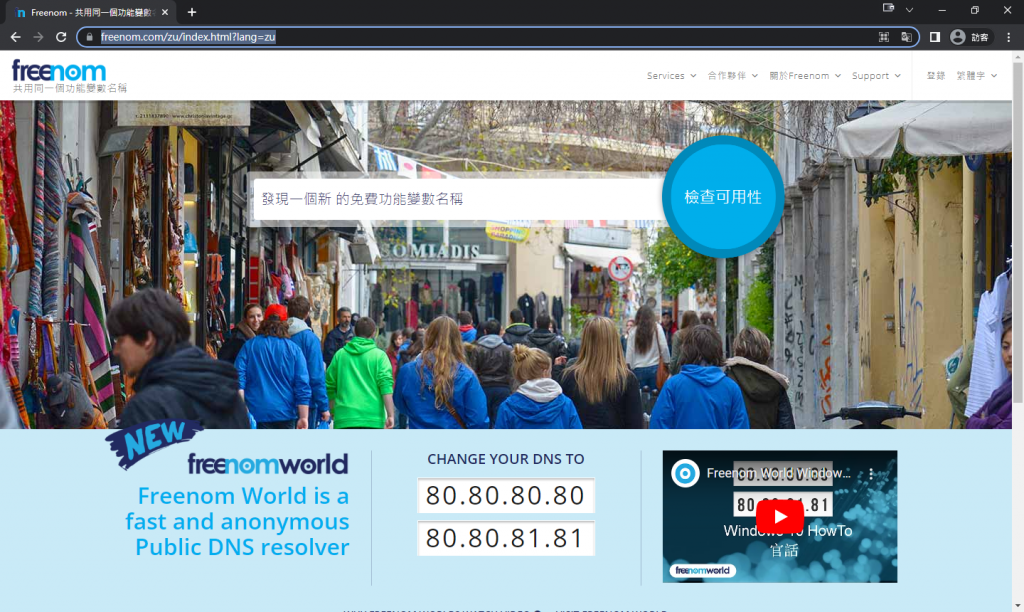
前往 freenom 。
https://www.freenom.com/zu/index.html?lang=zu
輸入想要建立的網域名稱(若無法通過判斷,事先加上後面兩碼即可通過)
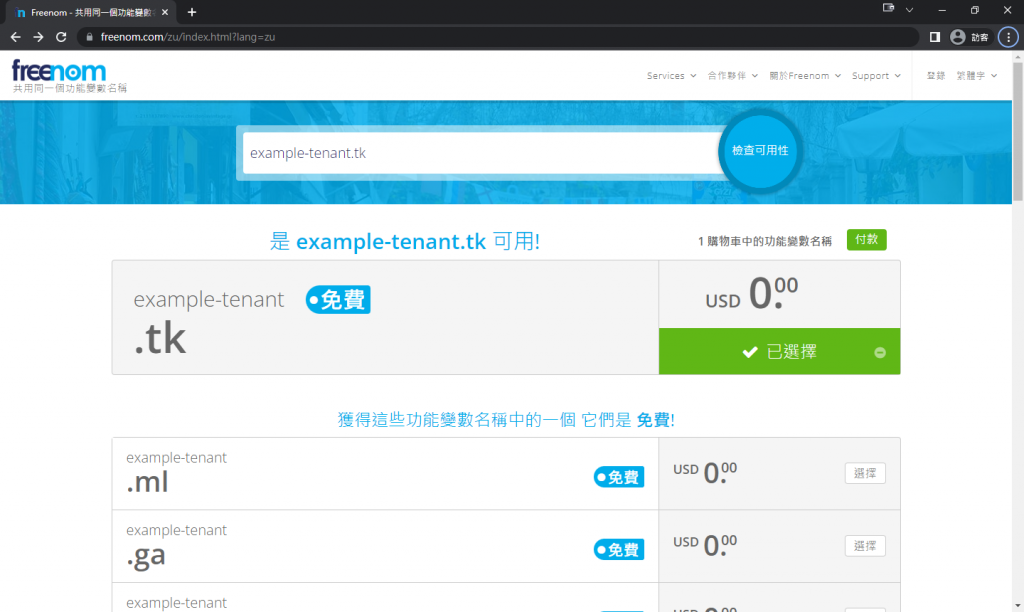
確認網域
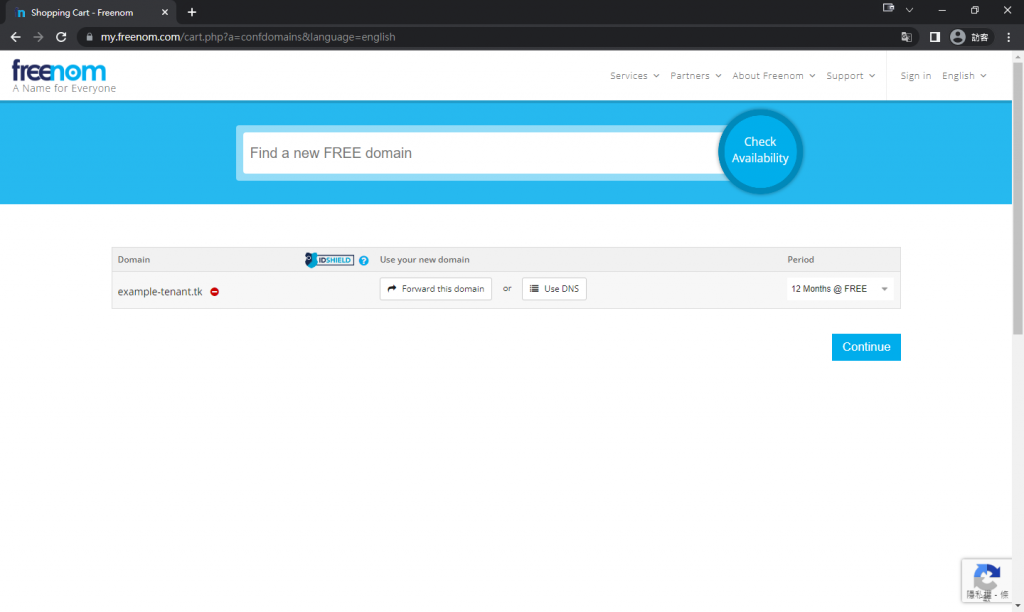
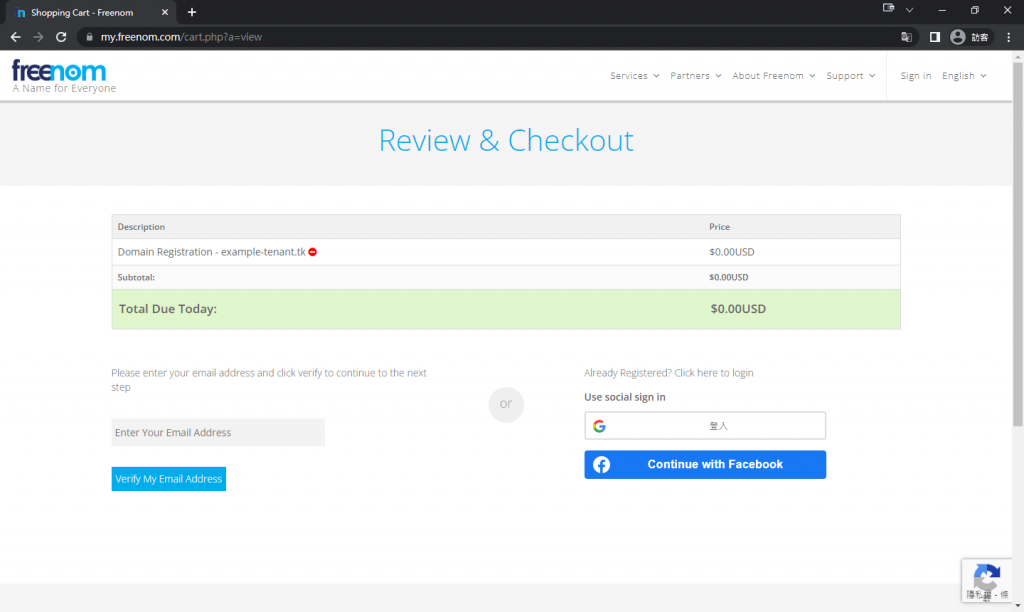
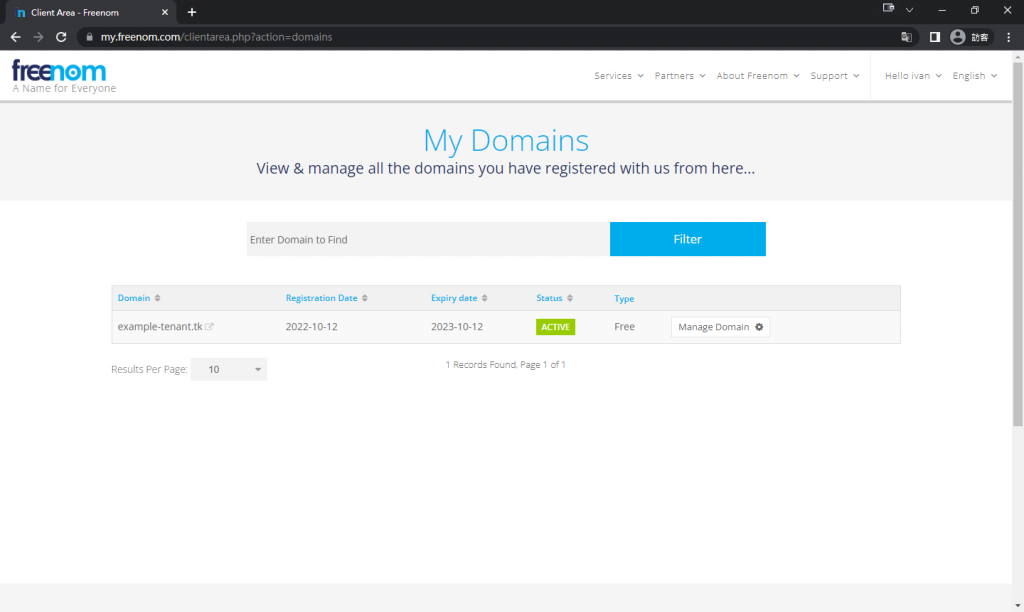
註冊或登入後送出
選擇一年免費方案
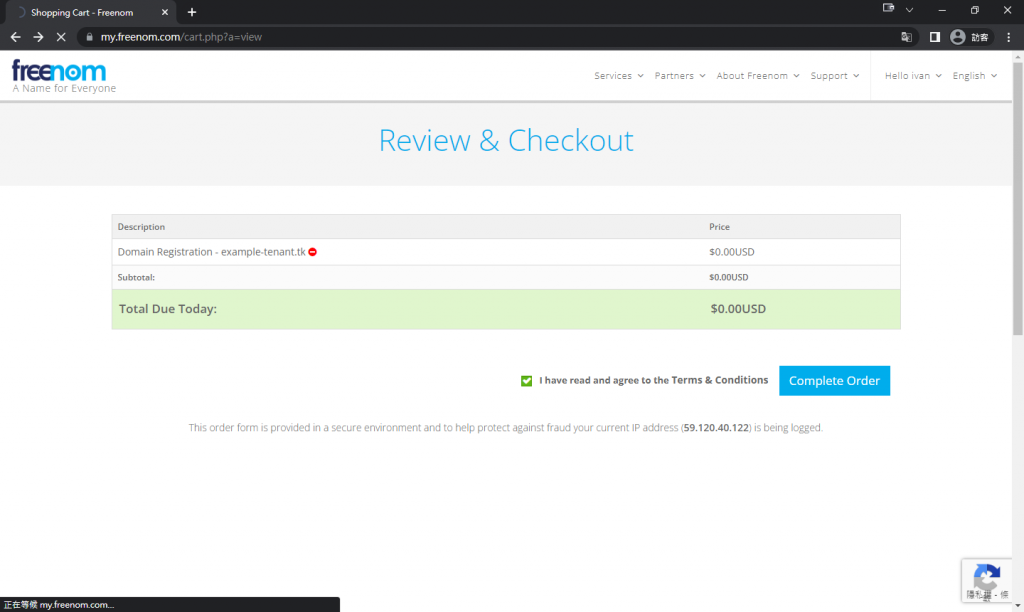
建立完成
Nginx 是非同步框架的網頁伺服器,也可以用作反向代理、負載平衡器和HTTP快取。我們將使用他來運行我們的多租戶架構網站。
建立 nginx 目錄
cd ~/exmaple_tenant
mkdir nginx
建立自簽憑證,讓 nginx 的 https 可以先正常啟動,這裡可以將 .localhost 改為 freenom 申請的 .domain 。
cd ~/exmaple_tenant
mkdir nginx/certificates
cd nginx/certificates
openssl genrsa -des3 -passout pass:example_tenant -out example_tenant.pass.key 4096
openssl rsa -passin pass:example_tenant -in example_tenant.pass.key -out example_tenant.key
rm example_tenant.pass.key
openssl req -new -key example_tenant.key -out example_tenant.csr \
    -subj "/C=TW/ST=TW/L=Taipei/O=IVANKAO/OU=IT Department/CN=*.localhost"
openssl x509 -req -days 365 -in example_tenant.csr -signkey example_tenant.key -out example_tenant.crt
建立設定檔
這裡的範例使用 conf.d 目錄,有些 nginx 的目錄結構可能放至 sites-available 與 sites-enabled,要根據情況做對應的調整。
cd ~/exmaple_tenant
mkdir nginx/conf.d
cd nginx/conf.d
touch django.conf
django.conf 說明
# the upstream component nginx needs to connect to
upstream uwsgi {
    server unix:/opt/app/web/app.sock; # for a file socket
}

limit_req_zone $binary_remote_addr zone=reqlimit:1m rate=500r/s;
# configuration of the server
server {
    uwsgi_read_timeout 1200;
    include  /etc/nginx/mime.types;
    # when a client closes the connection then keep the channel to uwsgi open. Otherwise uwsgi throws an IOError
    uwsgi_ignore_client_abort on;
    add_header Access-Control-Allow-Headers "Authorization";
    add_header 'Referrer-Policy' 'origin';
    # the port your site will be served on
    listen    80;
    listen 443 ssl http2 default_server;
    listen [::]:443 ssl http2 default_server;

    # # 憑證與金鑰的路徑
    ssl_certificate /etc/nginx/certificates/example_tenant.crt;
    ssl_certificate_key /etc/nginx/certificates/example_tenant.key;

    # index  index.html;
    # the domain name it will serve for
    # substitute your machine's IP address or FQDN
    server_name  localhost;
    charset     utf-8;

    client_max_body_size 200M;   # adjust to taste

    # Django media
    location /media  {
        alias /opt/app/web/media;  # your Django project's media files - amend as required
    }

    location /static {
        alias /opt/app/web/static; # your Django project's static files - amend as required
    }

    location / {
        uwsgi_pass  uwsgi;
        include     /etc/nginx/uwsgi_params; # the uwsgi_params file you installed
    }

}
建立 uwsgi.ini 設定檔
在 web 目錄底下建立 uwsgi.ini 並寫入以下內容:
[uwsgi]

# http=0.0.0.0:8000
socket=app.sock
chmod-socket=666
master=True
# maximum number of worker processes
processes=4
buffer-size=65535
# Django's wsgi file
module=main.wsgi:application

# clear environment on exit
vacuum=True
py-autoreload = 2
在 docker-compose.yml 建立 nginx service
# docker-compose.yml

# ...

  nginx:
      image: nginx
      container_name: ${IMAGE_NAME}_nginx
      restart: always
      volumes:
          - .:/opt/app
          - ./nginx/conf.d:/etc/nginx/conf.d
          - ./nginx/certificates:/etc/nginx/certificates
      ports:
          - "80:80"
          - "443:443"
      depends_on:
          - web
在部署前要先做一些設定與調整。
調整 settings.py
將 DEBUG 改為 False,並設定 STATIC_ROOT 與關閉 STATICFILES_DIRS。
# main/settings.py

# ...

DEBUG = False

# ...

STATIC_ROOT = os.path.join(BASE_DIR, 'static')
STATIC_URL = '/static/'
# STATICFILES_DIRS = [
#     BASE_DIR / "static",
# ]
收集靜態文件
將所有 static 收集至 ~/example_tenant/static 目錄。
docker exec -it --workdir /opt/app/web example_tenant_web \
    python3.10 manage.py collectstatic
前往 Google Cloud ,註冊後可以獲得免費試用的額度。
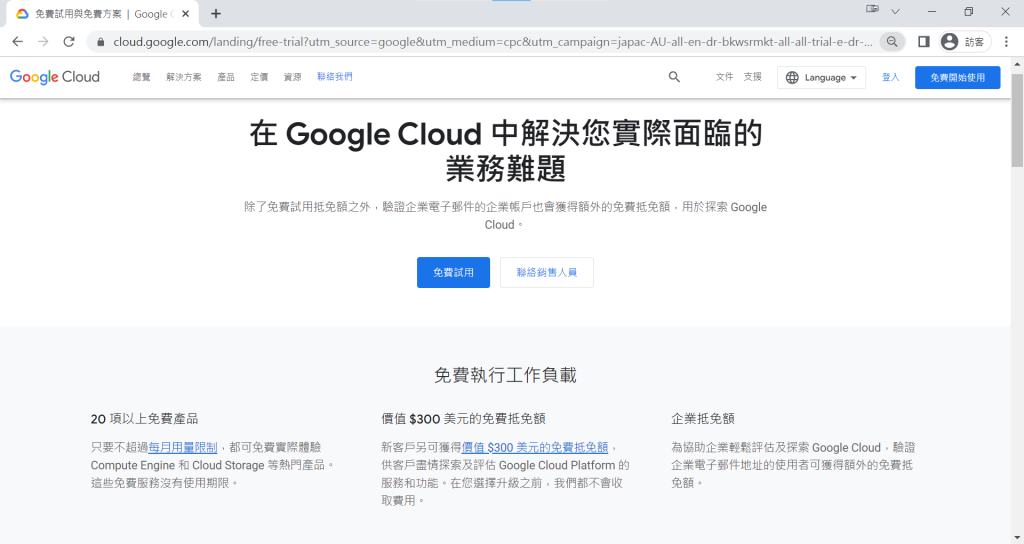
註冊後須要先輸入付款資訊,此階段並不會扣款。
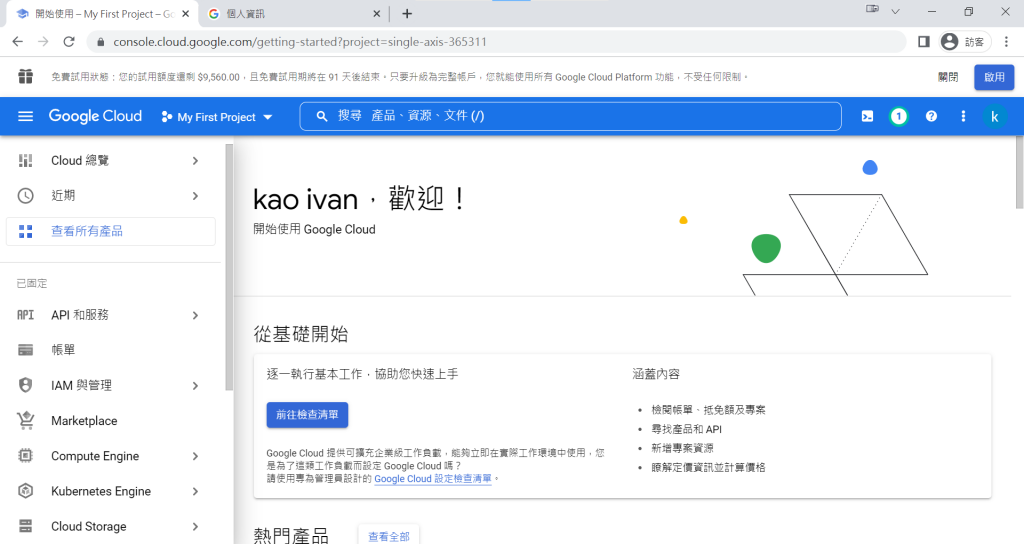
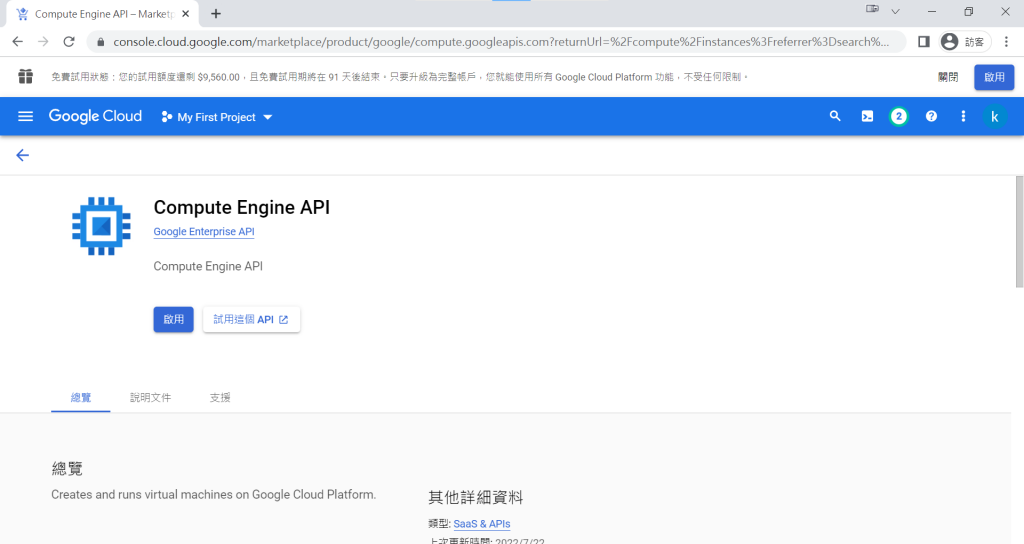
啟用 Compute Engine API,我們將透過它來建立雲端主機。
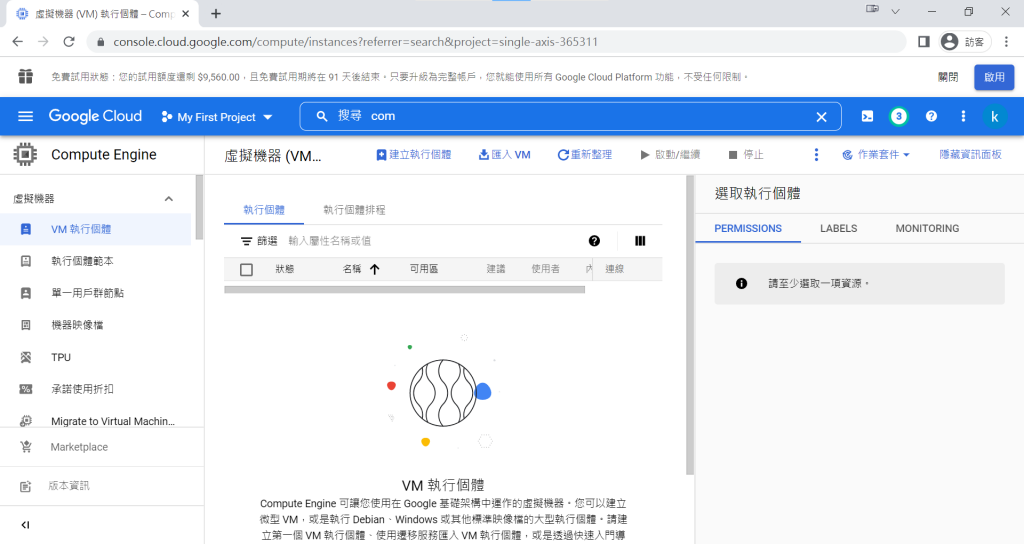
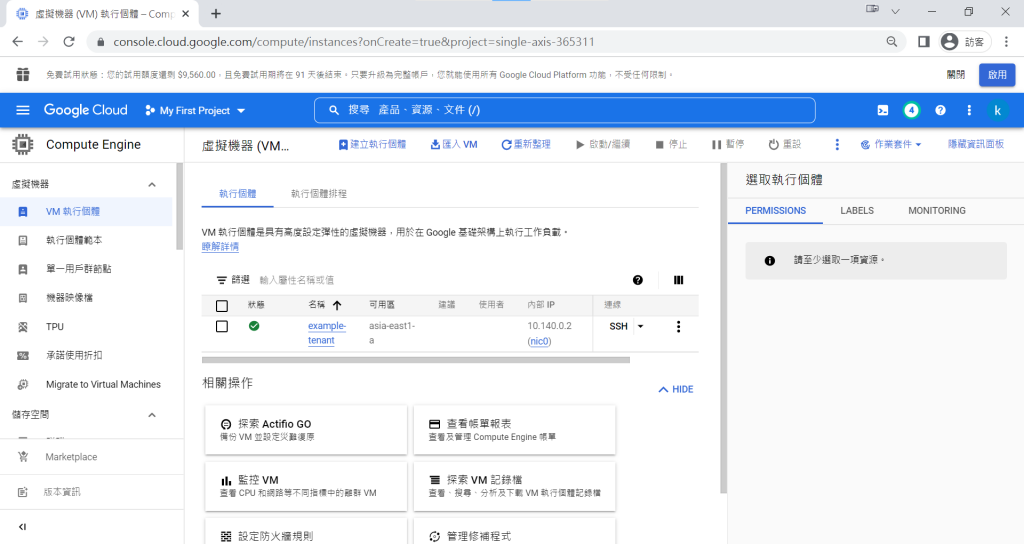
建立執行個體。
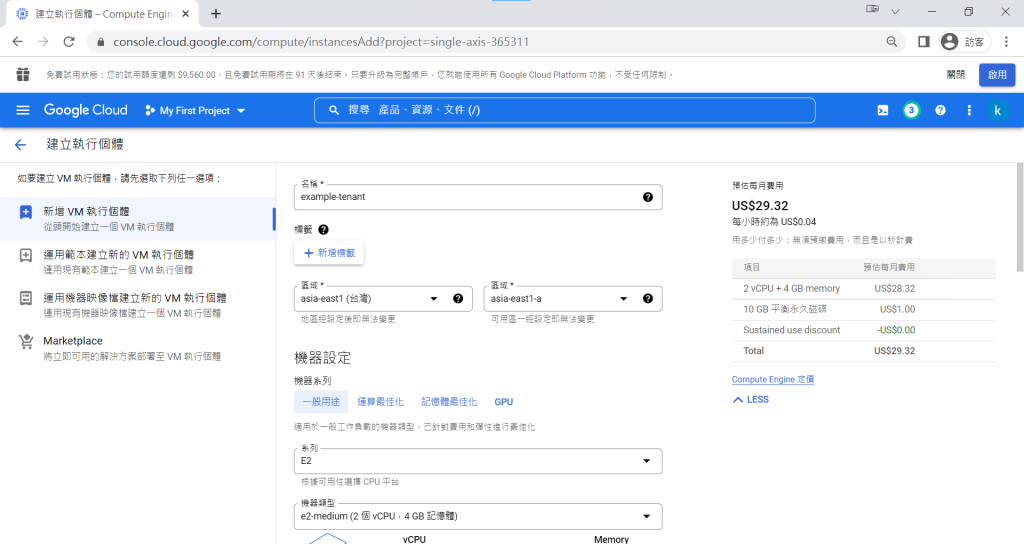
填寫執行個體名稱與選擇區域,這裡可以選擇台灣。
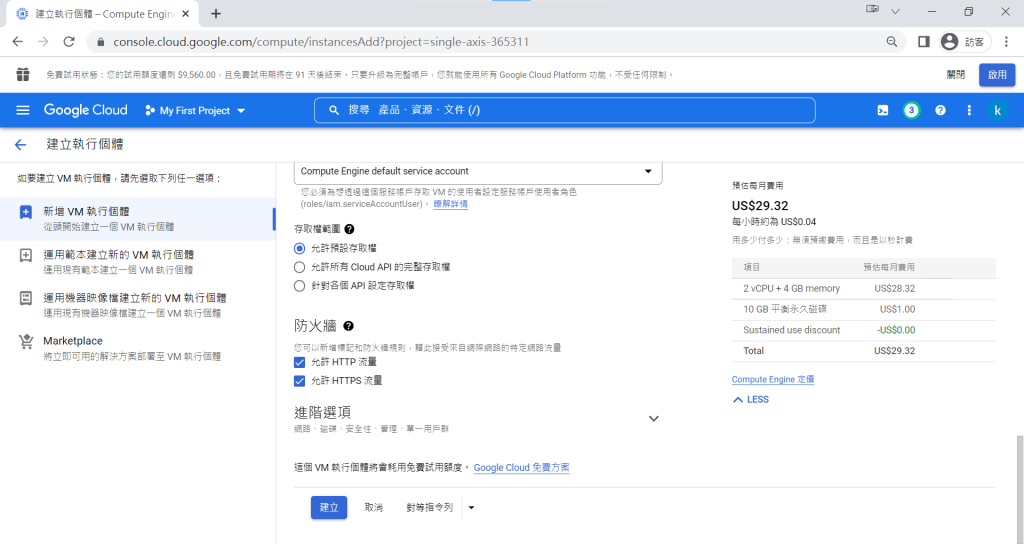
下方防火牆設定允許 HTTP 與 HTTPS 流量。
建立完成。
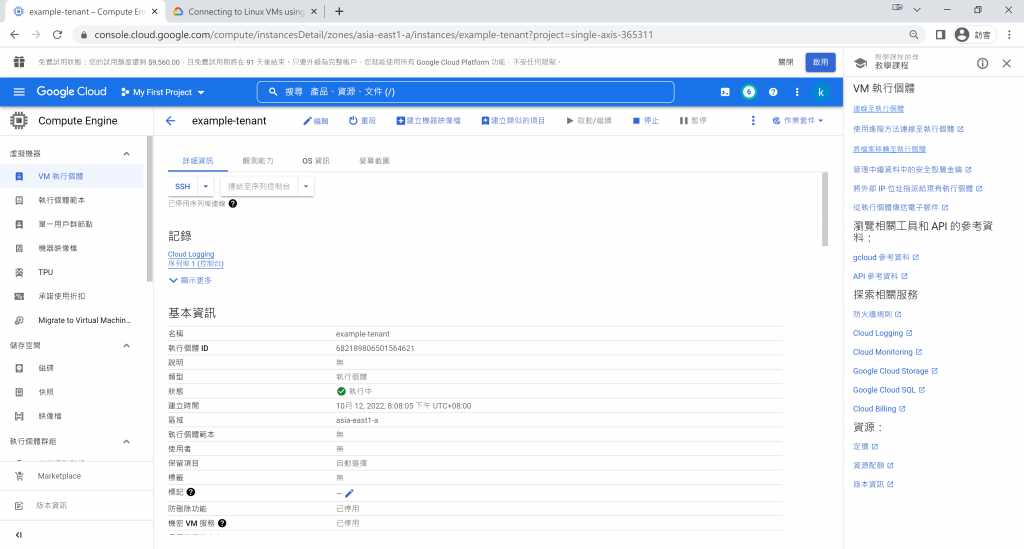
點選編輯,需要對一些主機設定進行調整。
建立 IP 位址,預設並沒有外部 IP,要讓外面的網際網路能連線需要定義外部 IP。
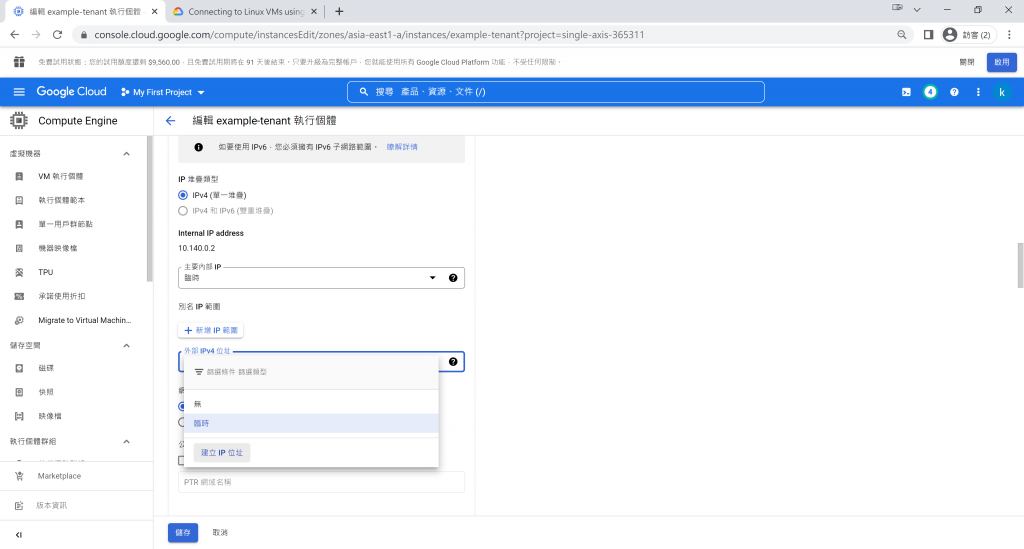
建立 IP 位址名稱。
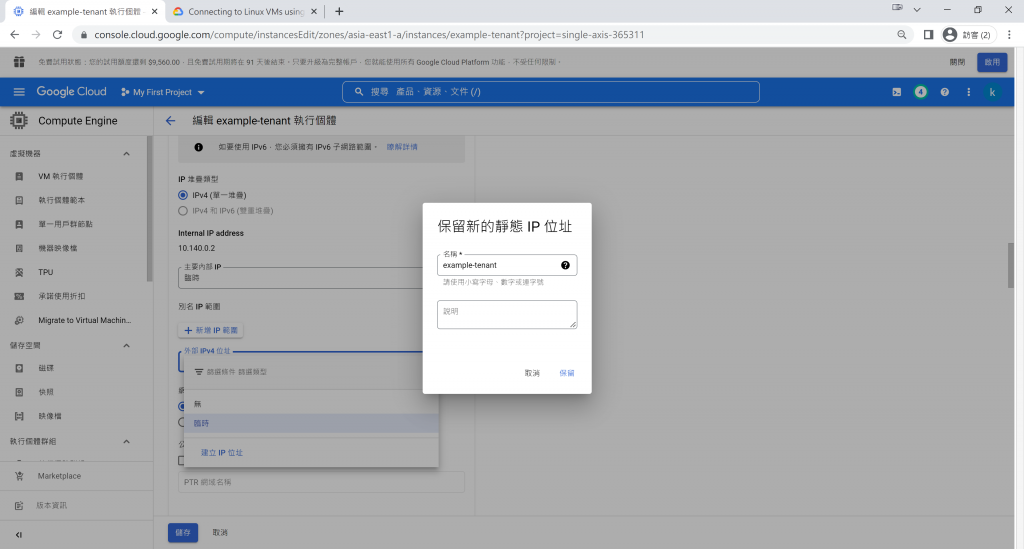
新增完成後點選儲存按鈕。
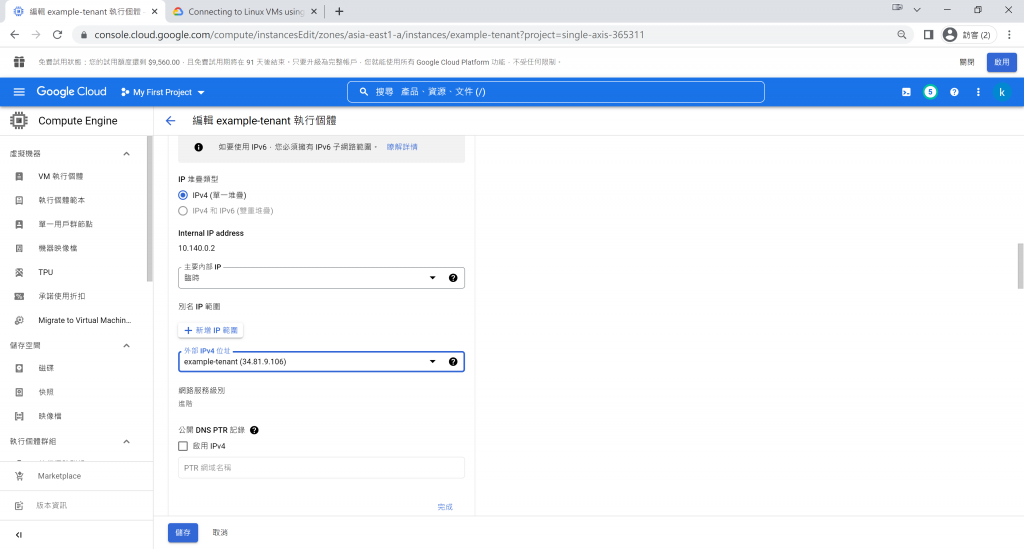
生成一組外部 IP 完成。
設定網域 DNS
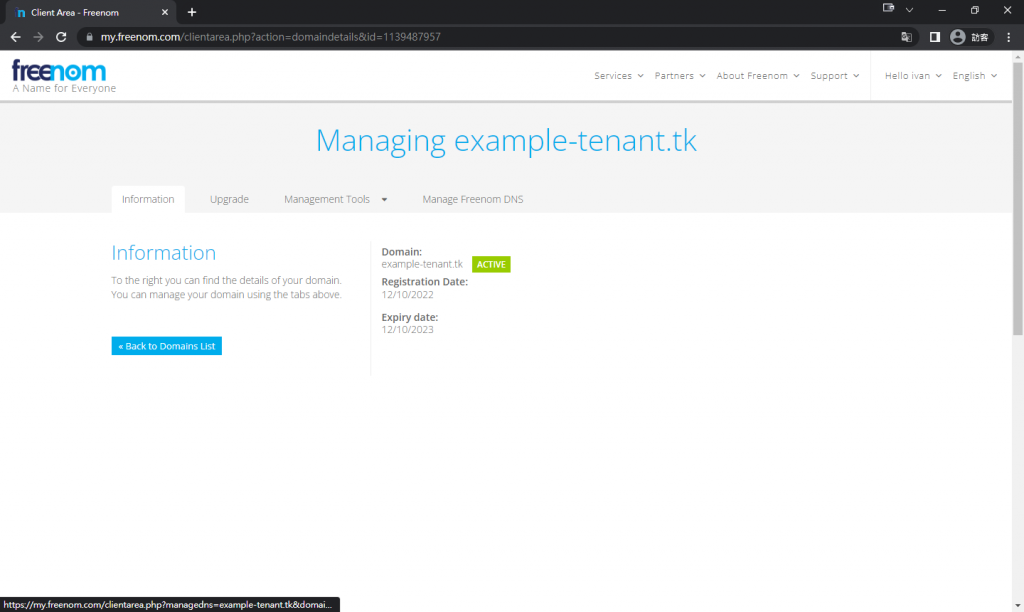
進入管理網域頁面
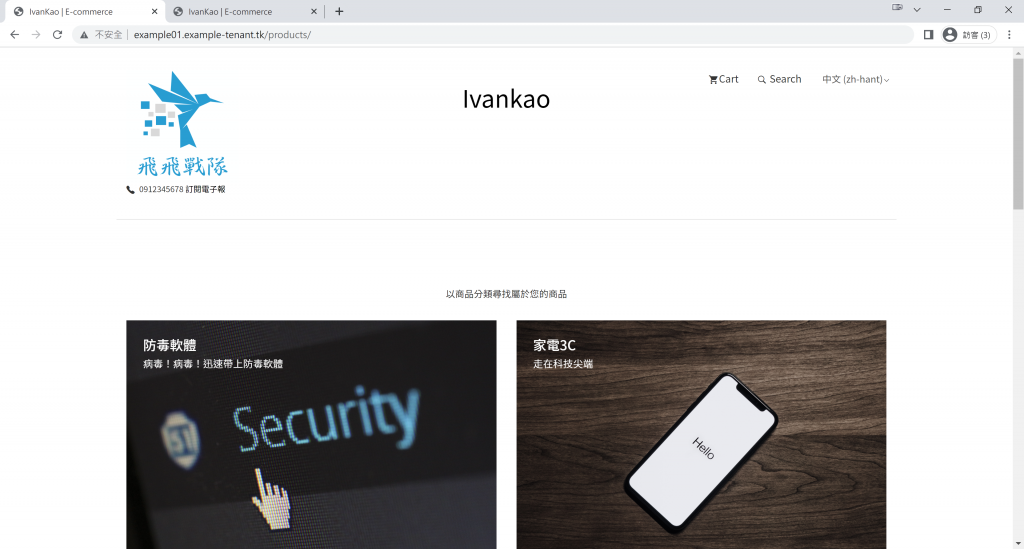
設定網域如下,這裡設定了租戶 example01 與 租戶 example02。
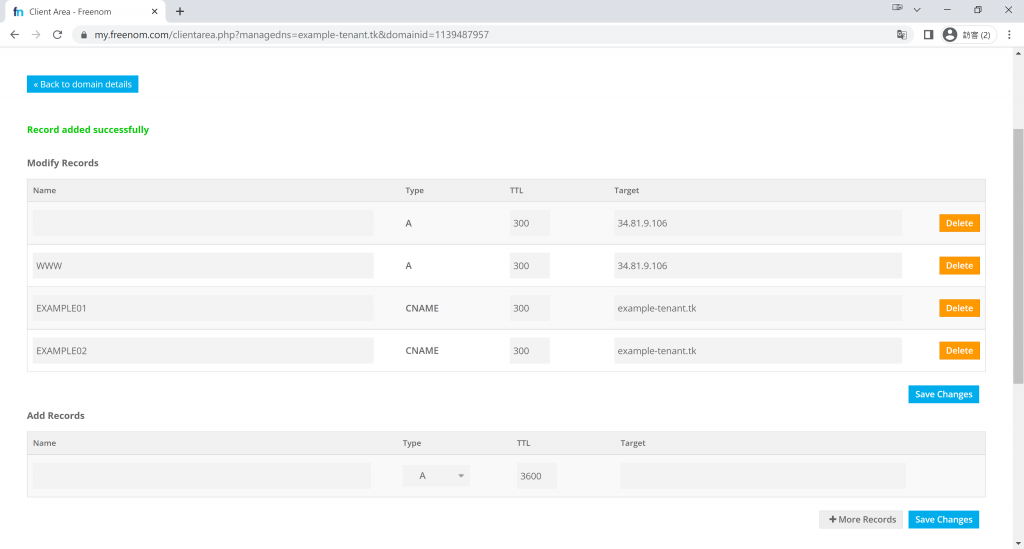
設定好後先至開發環境透過個租戶的管理介面加上新的 domain。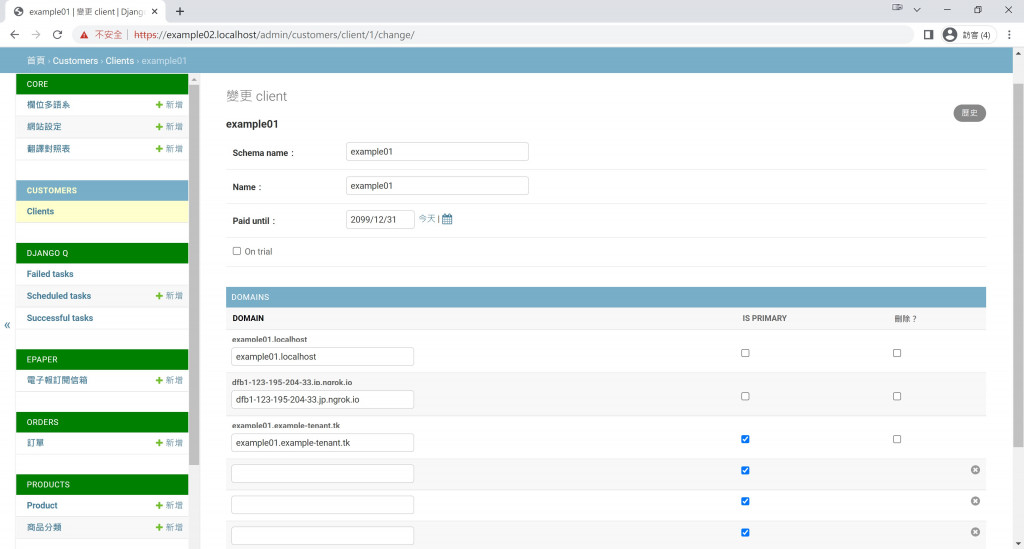
從開發環境(Ubuntu VM)連線至雲端主機
在開發環境(Ubuntu VM)建立金鑰。
ssh-keygen -t rsa -f ~/.ssh/KEY_FILENAME -C USERNAME -b 2048
Generating public/private rsa key pair.
Enter file in which to save the key (/home/ivankao/.ssh/id_rsa): example_tenant
Enter passphrase (empty for no passphrase):
Enter same passphrase again:
Your identification has been saved in example_tenant
複製金鑰 ssh-rsa …
cat example_tenant.pub
ssh-rsa AAAA...
貼上金鑰至 GCP Compute Engine 的金鑰欄位並儲存。
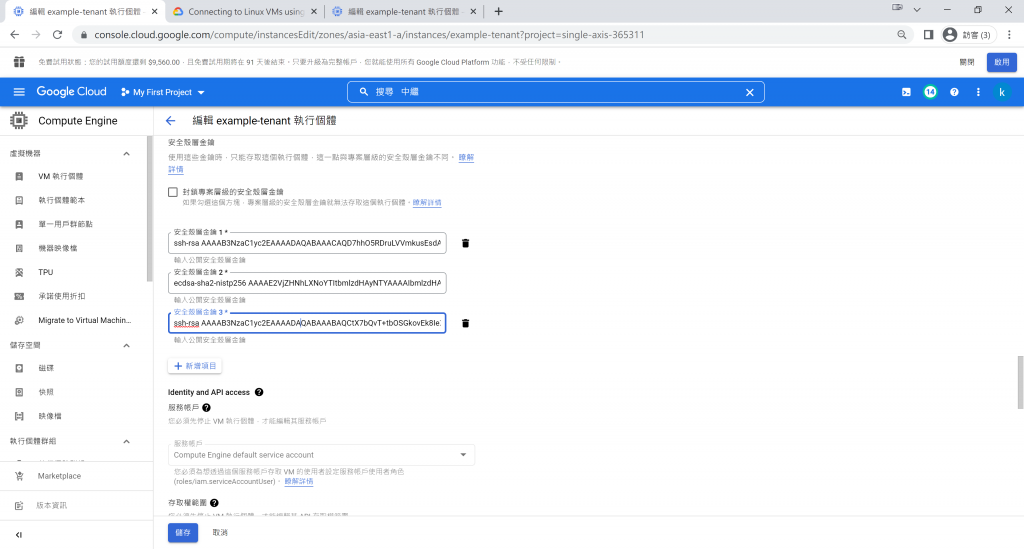
從開發環境(Ubuntu VM)透過金鑰連線至 GCP
ssh -i ~/.ssh/example_tenant USERNAME@雲端主機外部IP

...
# 連線成功
USERNAME@example-tenant:~$
如果要在開 VM 的本機透過 VScode 連線,也可以將私鑰放至本機後連線。
在雲端主機建立專案目錄
之後要同步開發環境(Ubuntu VM)與雲端主機的程式與資料,需要在雲端主機安裝 rsync 套件。
安裝 rsync。
sudo apt-get install rsync
回到開發環境(Ubuntu VM),記得先將服務先停止。
cd ~/example_tenant
docker-compose down -v
接著使用 tar 打包檔案後再透過 rsync 傳送檔案至雲端主機
cd ~
sudo tar -zcvf example_tenant.tar.gz example_tenant

rsync -avzh -e "ssh -i ~/.ssh/example_tenant" ~/.example_tenant.tar.gz USERNAME@雲端主機外部IP:~/
建立專案目錄
在雲端主機將 tar 檔案解開。
USERNAME@example-tenant:~$
cd ~
tar -zxvf example_tenant.tar.gz
安裝 Docker
設定 apt 套件,並允許透過 HTTPS
sudo apt-get update
sudo apt-get install \
  ca-certificates \
  curl \
  gnupg \
  lsb-release
加入 Docker GPG key
sudo mkdir -p /etc/apt/keyrings
curl -fsSL https://download.docker.com/linux/ubuntu/gpg | sudo gpg --dearmor -o /etc/apt/keyrings/docker.gpg
設置儲存庫
echo \
  "deb [arch=$(dpkg --print-architecture) signed-by=/etc/apt/keyrings/docker.gpg] https://download.docker.com/linux/debian \
  $(lsb_release -cs) stable" | sudo tee /etc/apt/sources.list.d/docker.list > /dev/null
安裝 Docker
sudo apt-get update
sudo apt-get install docker-ce docker-ce-cli containerd.io docker-compose-plugin
測試是否安裝完成
sudo docker run hello-world

...
Unable to find image 'hello-world:latest' locally
latest: Pulling from library/hello-world
2db29710123e: Pull complete
Digest: sha256:7d246653d0511db2a6b2e0436cfd0e52ac8c066000264b3ce63331ac66dca625
Status: Downloaded newer image for hello-world:latest

Hello from Docker!
This message shows that your installation appears to be working correctly.

To generate this message, Docker took the following steps:
 1. The Docker client contacted the Docker daemon.
 2. The Docker daemon pulled the "hello-world" image from the Docker Hub.
    (amd64)
 3. The Docker daemon created a new container from that image which runs the
    executable that produces the output you are currently reading.
 4. The Docker daemon streamed that output to the Docker client, which sent it
    to your terminal.

To try something more ambitious, you can run an Ubuntu container with:
 $ docker run -it ubuntu bash

Share images, automate workflows, and more with a free Docker ID:
 https://hub.docker.com/

For more examples and ideas, visit:
 https://docs.docker.com/get-started/
安裝 Docker Compose
docker compose version

...
Docker Compose version v2.6.0
不習慣使用 CLI,使用自訂別名
echo 'alias docker-compose="docker compose"' >> ~/.bashrc
source ~/.bashrc
docker-compose version

...
Docker Compose version v2.6.0
以非 root 身分管理 Docker,在 GCP Compute Engine 環境預設的 UID 不是 1000,稍後需要對設定檔進行調整。
sudo groupadd docker
sudo usermod -aG docker $USER
newgrp docker
sudo chmod 666 /var/run/docker.sock
重啟 docker 服務
sudo systemctl restart docker
雲端主機的 Docker 的環境架設完成。
運行網站
建立 example_tenant Image
docker build -t example_tenant .
調整 .env ,這裡因為 GCP 預設使用者對照的 UID 是 1001,參數也要進行調整才能正常運行。
# Docker Compose .env
IMAGE_NAME=example_tenant
POSTGRES_DB=db_name
POSTGRES_USER=db_user
POSTGRES_PASSWORD=db_password
WEB_PORT=8000
UID=1001
運行 docker-compose
cd ~/example_tenant
docker-compose up -d
雲端部署大功告成!!
租戶 example01
租戶 example02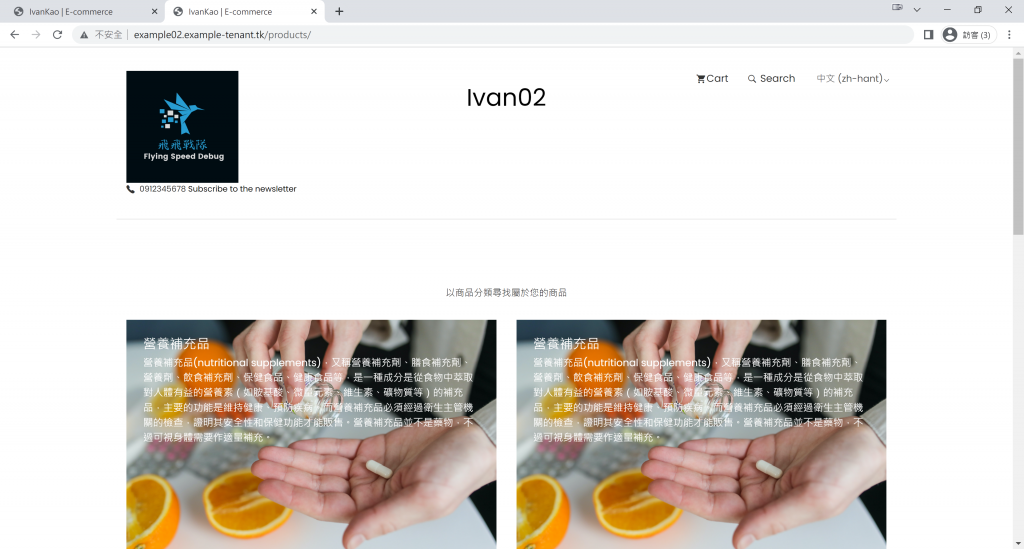
在這三十天我們從認識 Django 與 多租戶架構,開始架設多租戶網站,從環境建置、套版、功能開發、串接金流、雲端部署逐步實作完成,其中在多租戶的情境會遇到的問題也有進行了許多變化與問題排除,最後完成了我們的電商網站。
本系列已經將多租戶網站整體架構與電商網站的基本功能都已經完成,比較細節的文字翻譯或是一些頁面連結礙於篇幅與時間就沒有進行說明與調整,就留給實作的你來自由發揮囉,如果有遇到任何問題都歡迎留言,Github 連結已經放在系列的第一篇,歡迎參考。
一直以來都喜歡隨手寫一些技術文,可惜一直沒有時間好好地寫成系列文章,透過這次的鐵人賽與隊友們一起成功鍊成了,非常辛苦但也非常開心。這三十天就可以想像成每天加班到晚上12點,假日無休!!重複的寫程式整理文章、寫程式整理文章,尤其是最後幾天都在趕 Deadline,一個晚上要開發完功能再快速寫成文章,感覺像是功能即將上線卻發現重大 BUG 的緊張刺激感,只有每天送出文章後才能稍微鬆一口氣。
這些天雖然寫得很苦但不後悔,謝謝這次的鐵人賽與一起參加隊友,當然還有願意看到這裡的你,期待大家下次再見!

 iThome鐵人賽