假設網站中有琳瑯滿目的商品,那要讓使用者快速找到商品就一定需要搜尋功能,馬上就來試試改造完的多租戶架構搜尋引擎吧!
在之前的『裝上引擎,Django 的移動城堡』我們已經定義過了商品索引,但還缺少了 ID 欄位與商品圖片的巢狀欄位。
調整商品索引
首先要為之前的索引加上 id 欄位,id 欄位將會在使用 Django CBV 的 ListView 時,能直接取用 Django Elasticsearch DSL 的 search 返回結果,若沒有 id 會無法正常取用。
# products/documents.py

# ...

@registry.register_document
class ProductDocument(Document):

    # ...

    class Django:
        model = Product
        # we removed the category field from here
        fields = [
            'id',   # add id field
            'name',
            'description',
            'price',
            'created',
            'modified',
        ]

    class Index:
        name = "product"

@registry.register_document
class ProductCategoryDocument(Document):

    class Django:
        model = ProductCategory
        fields = [
            'id',  # add id field
            'name',
            'name_en',
            'description',
            'description_en',
            'created',
            'modified',
            'image'
        ]

    class Index:
        name = "productcategory"
新增 ProductImageDocument 商品圖片索引,而因為商品會有多張商品圖片,所以要在 ProductDocument 新增 product_image_set 為巢狀欄位與新增 ProductImageDocument 索引。
# products/documents.py

# ...

from products.models import Product, ProductCategory, ProductImage

# ...

@registry.register_document
class ProductDocument(Document):

    # ...

    product_image_set = fields.NestedField(properties={
        'name': fields.TextField(),
        'image': fields.FileField(),
        'order': fields.IntegerField(),
    })

    # ...

@registry.register_document
class ProductImageDocument(Document):

    class Django:
        model = ProductImage
        fields = [
            'id',
            'name',
            'image',
            'order'
        ]

    class Index:
        name = "productimage"
使用指令更新索引
# 租戶 example01
docker exec --workdir /opt/app/web example_tenant_web \
    python3.10 manage.py search_index --populate --schema example01

...

Indexing 3 'ProductCategory' objects
Indexing 2 'Product' objects
Indexing 6 'ProductImage' objects

# 租戶 example02
docker exec --workdir /opt/app/web example_tenant_web \
    python3.10 manage.py search_index --populate --schema example02

...

Indexing 1 'ProductCategory' objects
Indexing 2 'Product' objects
Indexing 1 'ProductImage' objects
資料展示
{
    "_index": "product",
    "_type": "_doc",
    "_id": "example01-2",
    "_score": 1,
    "_routing": "example01",
    "_source": {
        "category": {
            "name": "家電3C",
            "name_en": "Appliance 3C",
            "description": "走在科技尖端",
            "description_en": "on the cutting edge of technology",
            "created": "2022-09-13T20:11:59.723669+08:06",
            "modified": "2022-10-06T22:01:08.914940+08:06",
            "image": "/media/example01/productcategory_media/pexels-tyler-lastovich-6991221664214284.jpg"
        },
        "product_image_set": [
            {
                "name": "圖片1",
                "image": "/media/example01/productimage_media/%E5%9C%96%E7%89%8711664206061.jpg",
                "order": 1
            },
            {
                "name": "圖片2",
                "image": "/media/example01/productimage_media/%E5%9C%96%E7%89%8721664206061.jpg",
                "order": 2
            },
            {
                "name": "圖片3",
                "image": "/media/example01/productimage_media/%E5%9C%96%E7%89%8731664206061.jpg",
                "order": 3
            }
        ],
        "id": 2,
        "name": "義式咖啡機",
        "description": "咖啡機是一種沖煮咖啡機具的總稱。以沖煮方式來分類,有滴濾式咖啡機(俗稱美式咖啡機)跟義式咖啡機兩種,滴濾咖啡機因構造簡單,以滴濾方法沖調咖啡,機身細小,操作容易,較為一般家庭採用。義式咖啡機以加壓後的熱水沖調濃縮咖啡,因為需要裝設鍋爐,體積較大,價錢也較昂貴,通常用於咖啡廳等營業場所。但隨著濃縮咖啡的流行,針對家庭用戶所設計的小型化義式咖啡機也漸漸普及。",
        "price": 9990,
        "created": "2022-09-13T22:18:40.622796+08:06",
        "modified": "2022-09-27T01:33:13.109226+08:06"
    }
}
調整商品視圖
在視圖匯入 ProductDocument 索引後,使用 search() 建立物件,並用 query 函數查詢 routing 為當前 schema 名稱的所有資料並返回。
# products/views.py

# ...

from products.documents import ProductDocument

# ...

class ProductListView(ListView):
    model = Product
    template_name = 'products/list.html'
    context_object_name = 'items'
    paginate_by = 10

    def get_queryset(self):
        results = ProductDocument.search().query("term", **{"_routing": connection.schema_name})
        return results
調整商品列表頁面
使用 Django Elasticsearch DSL 的返回值會與透過 ORM 返回的巢狀關聯欄位有一些差異,這裡我們要修改取得商品圖片的模板語法:
<!-- products/templates/products/list.html -->

<!-- ... -->

<div class="product-thumb">
    {% if item.product_image_set.0.image %}
    <img class="img-responsive" src="{{ item.product_image_set.0.image }}" alt="product-img" />
    {% endif %}

<!-- ... -->

<div class="modal-image">
    {% if item.product_image_set.0.image %}
    <img class="img-responsive" src="{{ item.product_image_set.0.image }}" alt="product-img" />
    {% endif %}
頁面展示
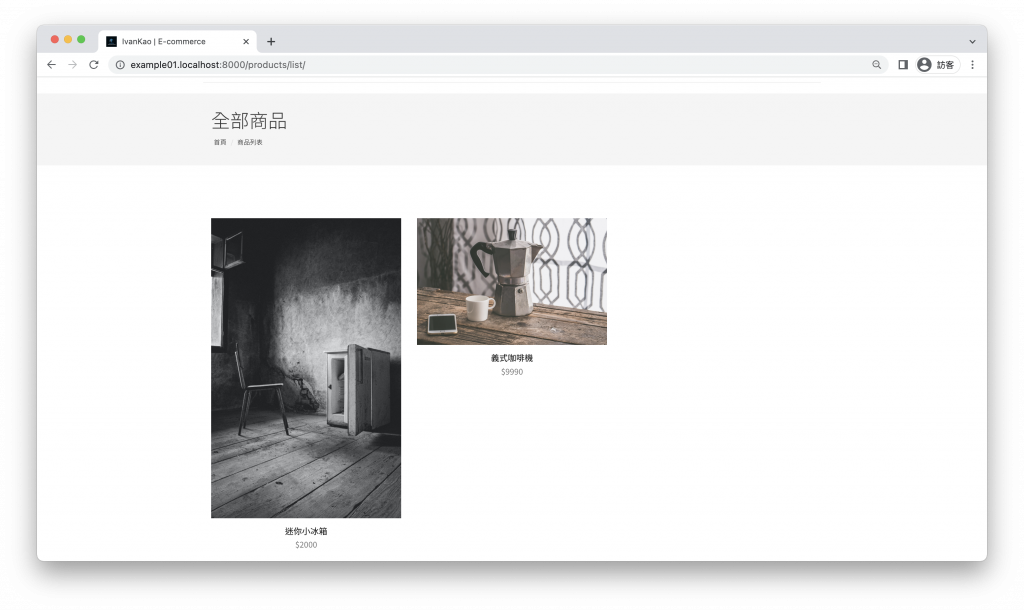
使用搜尋引擎顯示的內容已成功與原先使用 ORM 的方式相同。

調整商品列表視圖
我們要在商品列表視圖接收使用者搜尋的查詢詞 q 參數,並儲存到 self.query_string 變數。
在 get_queryset 函數查詢索引時,使用 self.query_string 尋找 name 欄位,若無則返回全部資料,最後將結果儲存至 context 的 query_string 中 。
查詢結果筆數則儲存至 count 變數與 context 的 count 中。
最後將 context 傳遞給 template。
# products/views.py

# ...

class ProductListView(ListView):
    model = Product
    template_name = 'products/list.html'
    context_object_name = 'items'
    paginate_by = 10

    def get(self, request, *args, **kwargs):

        self.query_string = request.GET.get('q', '')
        self.object_list = self.get_queryset()

        context = self.get_context_data()
        if self.query_string:
            count = self.object_list.count()
            context['query_string'] = self.query_string
            context['count'] = count
        else:
            context['query_string'] = ''
            context['count'] = 0
        return self.render_to_response(context)

    def get_queryset(self):
        results = ProductDocument.search().query("term", **{"_routing": connection.schema_name})
        if self.query_string:
            results = results.query("match", name=self.query_string)
        return results
調整商品列表頁面
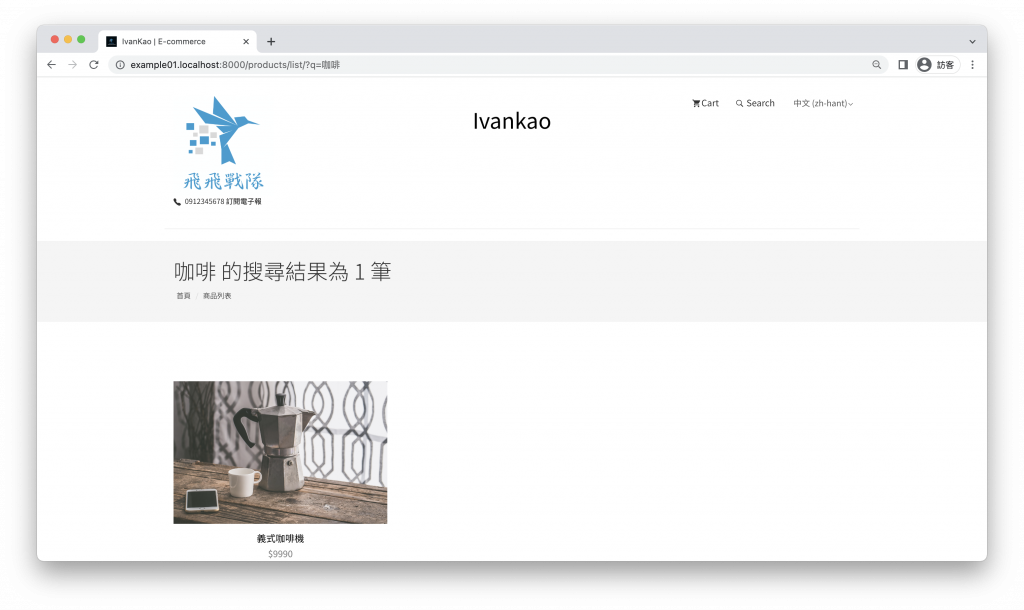
若有接收到 query_string 則顯示查詢詞與的查詢結果筆數。
<!-- products/templates/products/list.html -->

<!-- ... -->

{% extends "base.html" %}
{% load static %}

{% block content %}
<section class="page-header">
    <div class="container">
        <div class="row">
            <div class="col-md-12">
                <div class="content">
                    <h1 class="page-name">
                        {% if query_string %}
                          {{query_string}} 的搜尋結果為 {{ count }} 筆
                        {% else %}
                            全部商品
                        {% endif%}
                    </h1>
                    <ol class="breadcrumb">
                        <li><a href="{% url 'products:home' %}">首頁</a></li>
                        <li class="active"><a href="{% url 'products:list' %}">商品列表</a></li>
                    </ol>
                </div>
            </div>
        </div>
    </div>
</section>
調整基底頁面
更新原先的 Search 區塊,使用 GET 方法將 q 參數傳遞至商品列表頁面
<!-- products/templates/base.html -->

<!-- ... -->

<!-- Search -->
<li class="dropdown search dropdown-slide">
    <a href="#!" class="dropdown-toggle" data-toggle="dropdown" data-hover="dropdown"><i
            class="tf-ion-ios-search-strong"></i> Search</a>
    <ul class="dropdown-menu search-dropdown">
        <li>
            <form method="GET" action="{% url 'products:list' %}"
                onsubmit="this.action = this.action + this.search.value;alert(this.action); this.submit();">
                <input type="search" name="q" class="form-control" placeholder="Search..."/>
            </form>
        </li>
    </ul>
</li>
<!-- / Search -->
到這裡搜尋功能就大功告成了!
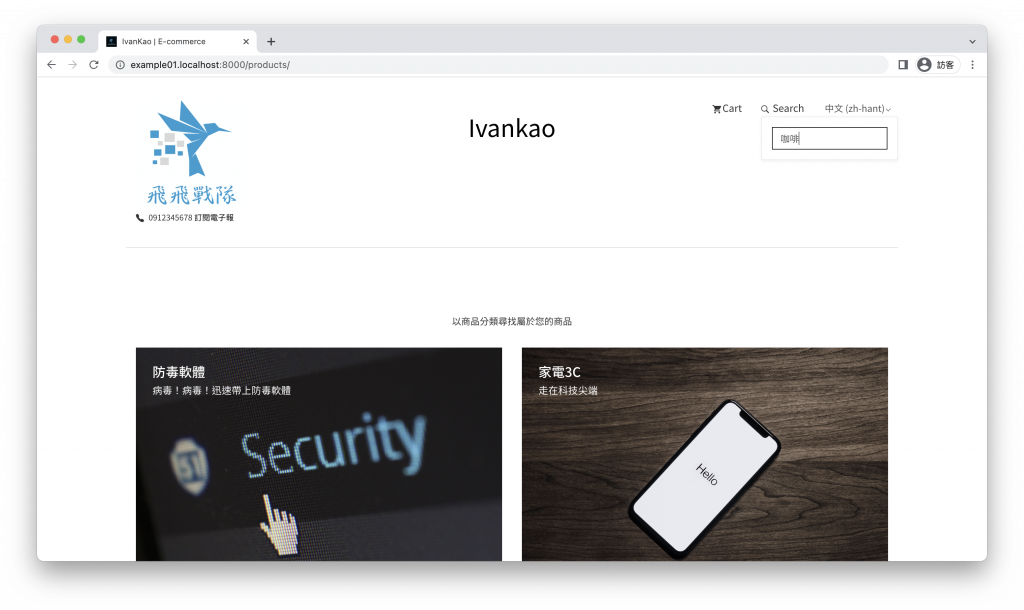
在右上方的搜尋區塊輸入查詢詞

按下 enter 送出後,進入查詢結果頁面

完美!
多租戶搜尋引擎的介紹到這裡告一段落了,主要是帶大家了解與在多租戶架構下使用搜尋引擎的方式,搜尋引擎本身能為網站做的遠遠不止這裡示範的查詢功能,剩下就請大家自行研究囉~
下一回我們要回到 Django 的管理介面『合法克隆,複製你的 Django 租戶』。
