購物車可以說是電商網站的基本配備之一,實作的方法不只一種,其中又分為使用者未登入與使用者已登入,本系列文章礙於篇幅沒有講解登入功能,現在就來看看使用者未登入的購物車功能要如何實作吧!
Cookie 是使用者在瀏覽網站時,由網站伺服器建立資料,並透過網頁瀏覽器儲存在使用者電腦或其他裝置,我們將使用它來完成我們的購物車功能。
首先我們要為購物車與訂單功能建立一個新的應用程式,
建立 orders 訂單應用程式
docker exec --workdir /opt/app/web example_tenant_web \
    python3.10 manage.py startapp orders
TENANT_APPS 加入 orders 應用程式
# main/settings.py

# ...

TENANT_APPS = (
    'django.contrib.auth',
    'django.contrib.sessions',
    'django.contrib.sites',
    'django.contrib.messages',
    'django.contrib.staticfiles',
    'django.contrib.admin',
    'django.contrib.sitemaps',
    'django_q',
    'django_tenants_q',
    'django_elasticsearch_dsl',
    'core',
    'products',
    'epaper',
    'orders',
)
在 main 應用程式下的 URLS 進行匯入
# main/urls.py

# ...

urlpatterns = [
    # ...
    path('orders/', include(('orders.urls', 'orders'), namespace='orders')),
] + static(settings.STATIC_URL, document_root=settings.STATIC_ROOT)

# ...
在 orders 應用程式目錄下建立 urls.py 檔案,
cart 對應至 CartView 購物車列表視圖。
# orders/urls.py

from django.urls import path

from . import views

urlpatterns = [
    path('cart/', views.CartView.as_view(), name='cart'),
]
在 orders 應用程式的 views.py 新增 CartView 類繼承 TemplateView,用來傳遞資料給購物車列表模板。
這裡先預設一取得商品列表的第一筆資料,將數量設定為 1 ,儲存至 product_dict 字典後傳遞給模板。
# orders/views.py

from django.db import connection
from django.http import JsonResponse
from django.views.generic import TemplateView
from products.models import Product

class CartView(TemplateView):
    template_name = "orders/cart.html"

    def get(self, request, *args, **kwargs):
        product_dict = {}
        product = Product.objects.all().first()
        product_dict[product.id] = {
            "count": 1,
            "product": product
        }
        return self.render_to_response(context)
在 orders 應用程式建立 templates 目錄後在其中再建立 orders 目錄,最後建立 cart.html。
我們將使用『裝潢大廳,套用 Template 版面』中的模板 aviato/cart.html 來套用。
在 DTL 使用迴圈字典的標籤語法為 {% for key, value in dict.items %} ,這裡將取得 product_dict 的資料。
在 DTL 使用乘法除法的標籤為 widthratio ,例如 (5 / 1) * 100 的範例如下:
{% widthratio 5 1 100 %}
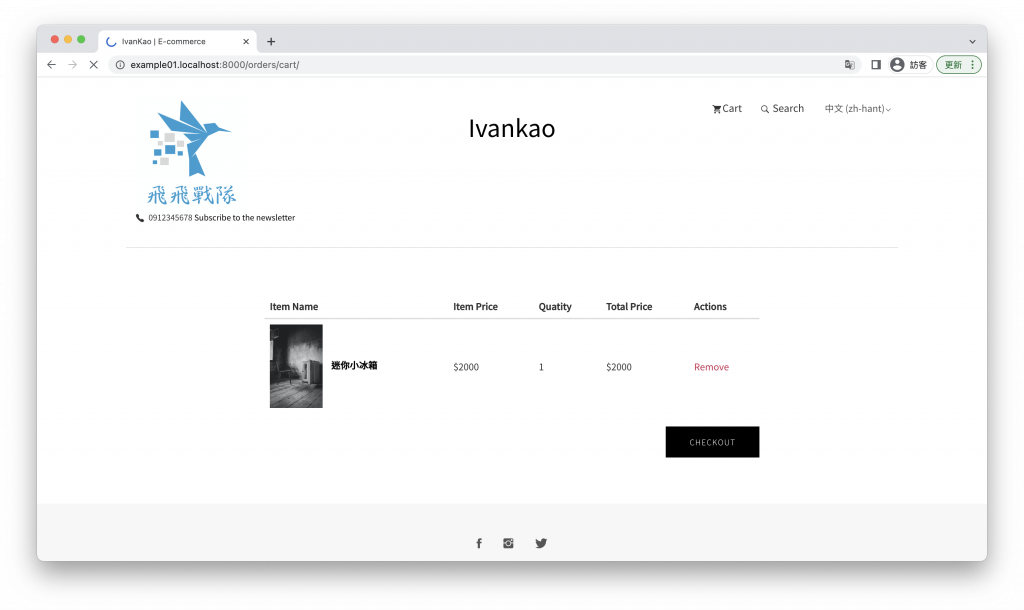
以下為購物車列表頁面:
<!-- orders/templates/orders/cart.html -->

{% extends "base.html" %}
{% load static %}

{% block content %}
<!-- Main Menu Section -->
<div class="page-wrapper">
    <div class="cart shopping">
      <div class="container">
        <div class="row">
          <div class="col-md-8 col-md-offset-2">
            <div class="block">
              <div class="product-list">
                <form method="post">
                  <table class="table">
                    <thead>
                      <tr>
                        <th class="">Item Name</th>
                        <th class="">Item Price</th>
                        <th class="">Quatity</th>
                        <th class="">Total Price</th>
                        <th class="">Actions</th>
                      </tr>
                    </thead>
                    <tbody>
                      {% for product_id, product in product_dict.items %}
                      <tr class="">
                        <td class="">
                          <div class="product-info">
                            {% if product.product.product_image_set.all %}
                              {% if product.product.product_image_set.all.0.image %}
                                <img width="80" src="{{ product.product.product_image_set.all.0.image.url }}" alt="" />
                              {% endif %}
                            {% endif %}
                            <a href="#!">{{ product.product.name }}</a>
                          </div>
                        </td>
                        <td class="">${{ product.product.price }}</td>
                        <td class="">
                          {{ product.count }}
                        </td>
                        <td class="">${% widthratio product.product.price 1 product.count %}</td>
                        <td class="">
                          <a href="#" class="product-remove" >Remove</a>
                        </td>
                      </tr>
                      {% endfor %}
                    </tbody>
                  </table>
                  <a href="checkout.html" class="btn btn-main pull-right">Checkout</a>
                </form>
              </div>
            </div>
          </div>
        </div>
      </div>
    </div>
  </div>

{% endblock content %}
基底頁面
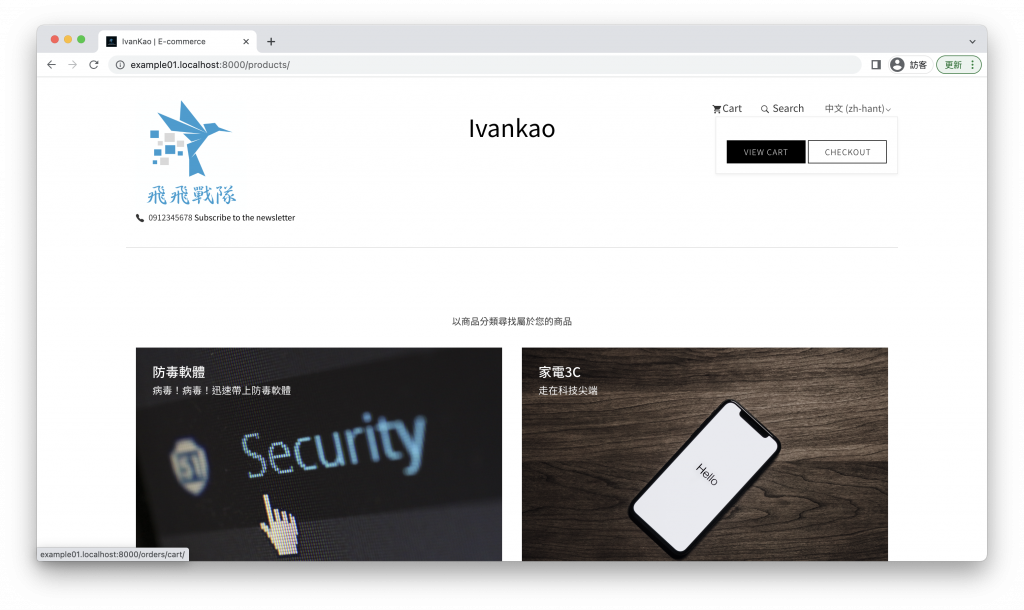
在上方導覽列更新購物車列表頁面的進入按鈕 url
<!-- products/templates/base.html -->

<!-- Cart -->
  <ul class="top-menu text-right list-inline">
      <li class="dropdown cart-nav dropdown-slide">
          <a href="#!" class="dropdown-toggle" data-toggle="dropdown" data-hover="dropdown"><i
                  class="tf-ion-android-cart"></i>Cart</a>
          <div class="dropdown-menu cart-dropdown">
              <ul class="text-center cart-buttons">
                  <li><a href="{% url 'orders:cart' %}" class="btn btn-small">View Cart</a></li>
                  <li><a href="checkout.html" class="btn btn-small btn-solid-border">Checkout</a></li>
              </ul>
          </div>
	    </li><!-- / Cart -->

<!-- ... -->
購物車列表頁面的進入按鈕
在 orders 應用程式新增 AddCartView 視圖,我們將透過傳入的 product_id 值與數量來儲存資料至 cookie 中的 cart。
從 url 取得 product_id 參數與透過 cookie 取得 cart 資料,這裡會使用 base64 與 pickle 來編碼與壓縮 cookie 儲存的資料。
若 cookie 已有 cart 資料,就進行解碼取得購物車列表,再根據列表判斷是否建立新的 product_id 或是只要增加數量,若 cookie 沒有 cart 資料,則不新增至 cookie。
最後返回一個 JSON 格式的回應狀態碼為 200。
# orders/views.py

import base64
import pickle

from django.http import JsonResponse
from django.views.generic import View, TemplateView
from products.models import Product

# ...

class AddCartView(View):

    def get(self, request, *args, **kwargs):
        product_id = self.kwargs.get('product_id', '')
        cart_str = request.COOKIES.get('cart', '')
        if product_id:
            if cart_str:
                cart_bytes = cart_str.encode()
                cart_bytes = base64.b64decode(cart_bytes)
                cart_dict = pickle.loads(cart_bytes)
            else:
                cart_dict = {}
            if product_id in cart_dict:
                cart_dict[product_id]['count'] += 1
            else:
                cart_dict[product_id] = {
                    'count': 1,
                }
            cart_str = base64.b64encode(pickle.dumps(cart_dict)).decode()
        context = {}
        context["status"] = 200
        response = JsonResponse(context)
        response.set_cookie("cart", cart_str)
        return response
在 orders 應用程式新增 DeleteCartView 視圖,我們將透過傳入的 product_id 值來刪除 cookie 中的 cart 儲存的資料。
由於並沒有減少數量的功能,這裡只需要判斷 cookie 中的 cart 資料有傳入的 product_id,就將該筆資料刪除即可。
最後返回一個 JSON 格式的回應狀態碼為 200。
# orders/views.py

# ...

class DeleteCartView(View):

    def get(self, request, *args, **kwargs):
        product_id = self.kwargs.get('product_id', '')
        cart_str = request.COOKIES.get('cart', '')
        if product_id:
            if cart_str:
                cart_bytes = cart_str.encode()
                cart_bytes = base64.b64decode(cart_bytes)
                cart_dict = pickle.loads(cart_bytes)
            else:
                cart_dict = {}
            if product_id in cart_dict:
                del cart_dict[product_id]
            cart_str = base64.b64encode(pickle.dumps(cart_dict)).decode()
        context = {}
        context["status"] = 200
        response = JsonResponse(context)
        response.set_cookie("cart", cart_str)
        return response
更新 CartView 視圖,這裡要將原本從資料改為由 cookie 中的 cart 取得。
在解碼之後,將原本的 cart_dict 存入新字典 product_dict。
將 product_id 使用 ORM 至資料庫查詢,若無該筆資料則刪除。
最後將 product_dict 透過 context 傳遞給模板。
# orders/views.py

# ...

class CartView(TemplateView):
    template_name = "orders/cart.html"

    def get(self, request, *args, **kwargs):
        cart_str = request.COOKIES.get('cart', '')
        product_dict = {}
        if cart_str:
            cart_bytes = cart_str.encode()
            cart_bytes = base64.b64decode(cart_bytes)
            cart_dict = pickle.loads(cart_bytes)
            product_dict = cart_dict.copy()
            for product_id in cart_dict:
                if product := Product.objects.filter(id=product_id):
                    product_dict[product_id]["product"] = product.first()
                else:
                    del product_dict[product_id]
        context = self.get_context_data(**kwargs)
        context["product_dict"] = product_dict
        return self.render_to_response(context)
add_cart 對應至 AddCartView 加入購物車視圖。
delete_cart 對應至 DeleteCartView 移除購物車商品視圖。
# orders/urls.py

from django.urls import path

from . import views

urlpatterns = [
    path('cart/', views.CartView.as_view(), name='cart'),
    path('addcart/<int:product_id>/', views.AddCartView.as_view(), name='add_cart'),
    path('deletecart/<int:product_id>/', views.DeleteCartView.as_view(), name='delete_cart'),
]
在 HTML 頁面點選加入購物車、刪除購物車商品按鈕時要停留在原本的頁面,並發出一個非同步請求去執行。
我們要使用 JQuery 的 .get() 函數來執行非同步請求。
執行完請求還需要一個 alert 提示訊息,則是使用 sweetalert2 來美化顯示。
非同步請求函數
在基底模板頁面的下方新增 getAjax 函數,將會傳遞三個引數:
<!-- products/templates/base.html -->

<!-- ... -->

    <!-- Main Js File -->
    <script src="{% static 'products/js/script.js' %}"></script>

    <!-- sweetalert2 -->
    <script src="//cdn.jsdelivr.net/npm/sweetalert2@11"></script>

    <script>
        function getAjax(url, msg, reload){
            $.get(url, function(data, status){
                Swal.fire({
                    icon: 'success',
                    title: msg,
                    showConfirmButton: false,
                    timer: 1500
                }).then((result) => {
                    if (reload == 'true'){
                        location.reload()
                    }
                })
          });
        }


    </script>

<!-- ... -->
加入購物車按鈕
更新在首頁、商品列表、商品詳細資料頁面的加入購物車按鈕,這邊調整首頁的按鈕作為範例:
<!-- products/templates/products/home.html -->

<!-- ... -->

<div class="product-item">

    <!-- ... -->

		<div class="preview-meta">
		    <ul>
		        <li>
		            <span  data-toggle="modal" data-target="#product-modal-{{ item.id }}">
		                <i class="tf-ion-ios-search-strong"></i>
		            </span>
		        </li>
		        <li>
		            <a href="#" ><i class="tf-ion-ios-heart"></i></a>
		        </li>
		        <li>
		            <a href="javascript:void(0)" onclick="getAjax('{% url 'orders:add_cart' item.id %}', '已加入購物車', 'false');"><i class="tf-ion-android-cart"></i></a>
		        </li>
		    </ul>
		</div>

    <!-- ... -->

</div>

<!-- ... -->

<div class="modal-content">

    <!-- ... -->

		<div class="col-md-4 col-sm-6 col-xs-12">
		    <div class="product-short-details">
		        <h2 class="product-title">{{ item.name }}</h2>
		        <p class="product-price">${{ item.price }}</p>
		        <p class="product-short-description">
		            {{ item.description }}
		        </p>
		        <a href="javascript:void(0)" onclick="getAjax('{% url 'orders:add_cart' item.id %}', '已加入購物車', 'false')" class="btn btn-main">加入購物車</a>
		        <a href="{% url 'products:detail' item.id %}" class="btn btn-transparent">檢視商品詳細資料</a>
		    </div>
		</div>

    <!-- ... -->

</div>
移除購物車商品按鈕
更新購物商品列表頁面的移除按鈕
<!-- ... -->

<div class="product-list">

    <!-- ... -->

		<td class="">
		  <a href="javascript:void(0)" onclick="getAjax('{% url 'orders:delete_cart' product_id %}', '已移除商品', 'true');" class="product-remove" >Remove</a>
	  </td>

    <!-- ... -->

</div>

<!-- ... -->
到這裡,購物車功能就完成了。
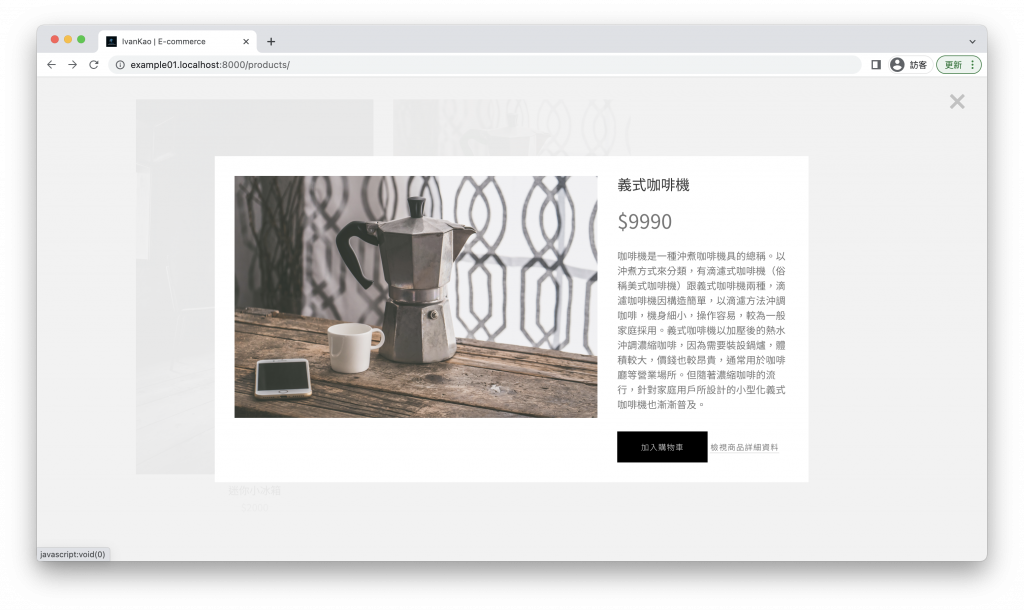
在首頁下方的商品列表區塊點選商品
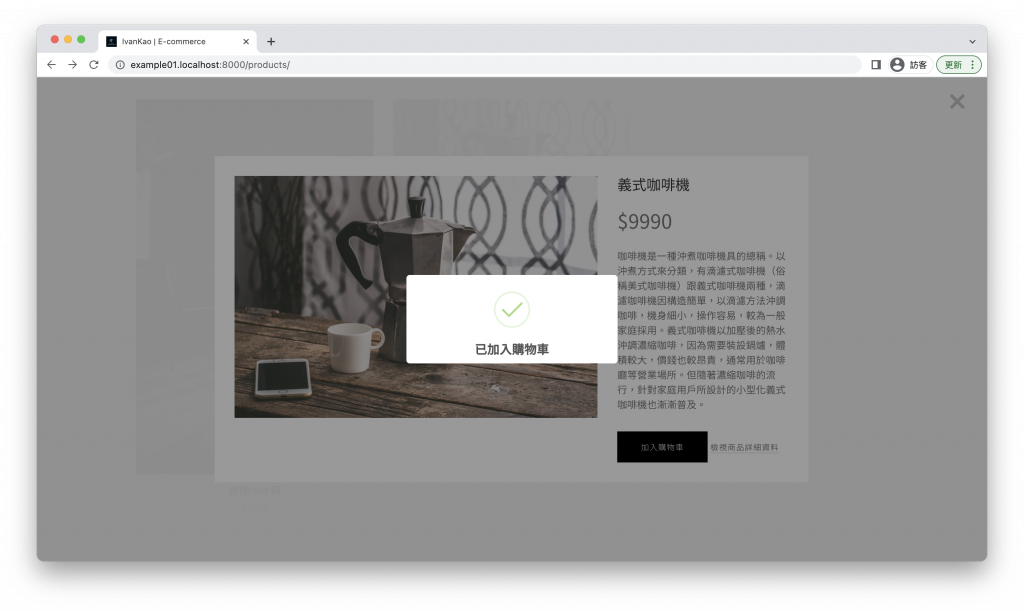
點選加入購物車,跳出已加入購物的提示訊息
進入購物車列表頁面查看剛才加入的商品
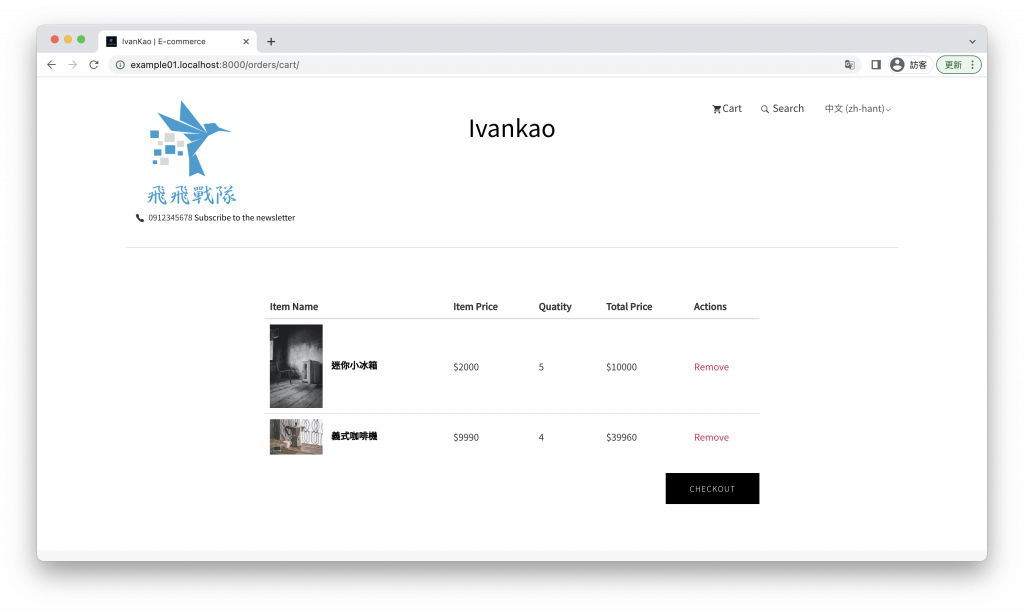
點選移除按鈕,跳出已移除商品的訊息
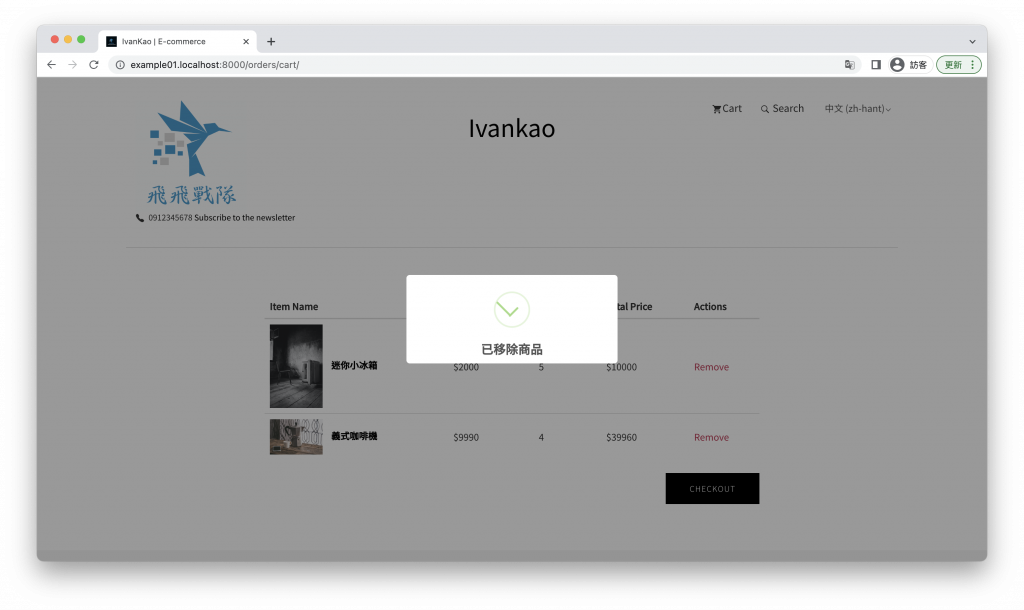
移除後頁面會自動重新整理,可以看見已成功刪除了。
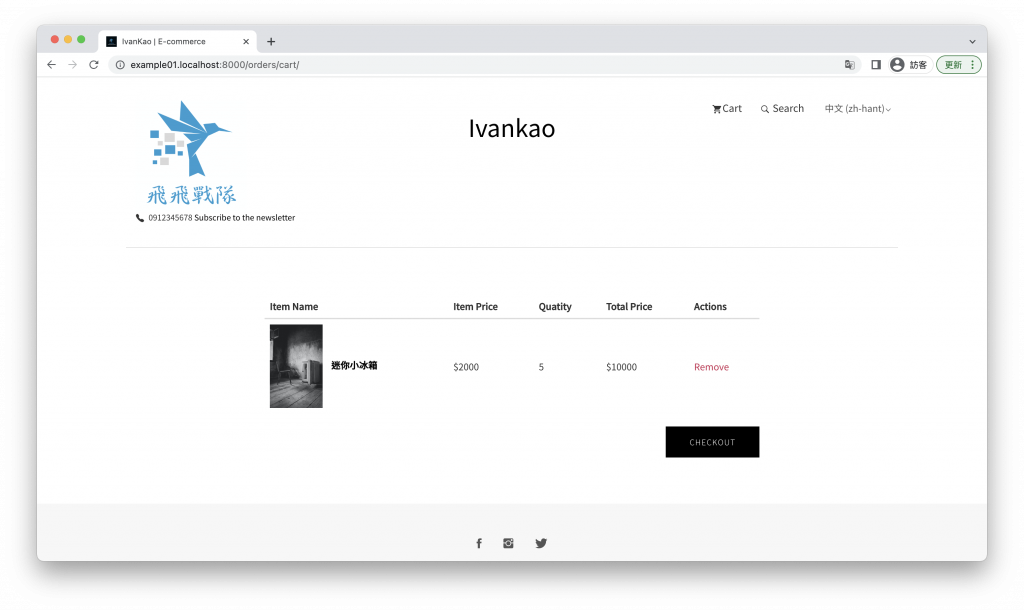
購物車功能實作完成!
今天完成了購物車功能,緊接著我們要把這些選好的商品下單送出,明天將介紹『大花錢,Django 訂單串接金流』。
