前面介紹了許多 Master CSS 的語法以及自定義的方式,從這個單元開始,要開始實際使用 Master CSS 來製作一個網站,這次使用的設計稿,是我在六角學院舉辦的第三屆 The F2E 第一週的主題 - 台灣旅遊景點導覽,今天要實作的區塊是導覽列。

有興趣的朋友可以下載 GitHub 專案檔 一起來練習,今天是 Day 24 這個資料夾,example 為完成的範例,exercise 為練習檔,之後會陸續更新每天的進度。
exercise 練習檔已經幫大家把架構都準備好了,這邊說明一下載入了哪些資源。
<link
  href="https://fonts.googleapis.com/css2?family=Noto+Sans+TC:wght@400;500&display=swap"
  rel="stylesheet"
/>
<link href="https://unpkg.com/@master/normal.css" rel="stylesheet" />
main.css,裡面設定了一個全局變數 --font-noto-sans-tc。<link href="main.css" rel="stylesheet" />
:root {
  --font-noto-sans-tc: "Noto Sans TC", sans-serif;
}
<script>
  window.MasterCSSManual = true;
</script>
<script src="https://cdn.master.co/css"></script>
<script>
const Style = window.MasterStyle;
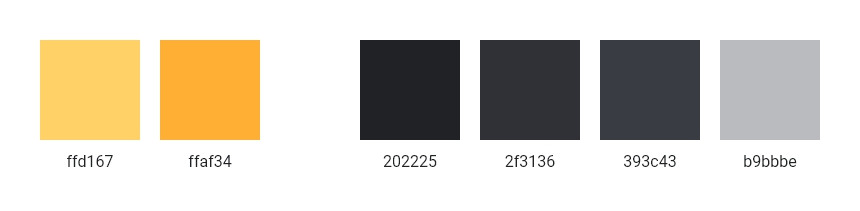
Style.extend("colors", {
primary: "ffd167",
secondary: "ffaf34",
fade: {
10: "202225",
20: "2f3136",
30: "393c43",
40: "b9bbbe",
},
});
window.initMasterCSS();
</script>
首先設定網頁的字體,在 main.css 這支檔案裡,有設定了一個全局變數 --font-noto-sans-tc。
:root {
  --font-noto-sans-tc: "Noto Sans TC", sans-serif;
}
Master CSS 可以使用 $(value) 的方式來讀取 root 設定的變數,這邊將網頁的字體設為思源黑體 font-family:$(font-noto-sans-tc)。
<body class="font-family:$(font-noto-sans-tc)">
  ...
</body>
網頁背景色為 #2f3136,上面已經自定義好網頁的色調,所以可以使用 fade-20 這個參數 bg:fade-20。
<body class="font-family:$(font-noto-sans-tc) bg:fade-20">
  ...
</body>

導覽列的部分希望會一直固定在頁面上方,因此使用 fixed 這個類名,定位在左上角 top:0 left:0,並且 z-index 給高一點的數值 z:999,讓導覽列保持較高的層級,這邊要注意使用 fixed 的時候,元素本身的寬度會基於內部元素,因此要加上 w:full 這個屬性,背景色 #2f3136 bg:fade-20,最後補上陰影 shadow:0|1|3|black/.3,就完成了導覽列最外層的架構。
<header class="fixed top:0 left:0 z:999 w:full bg:fade-20 shadow:0|1|3|black/.3">
  ...
</header>
內層的部分,有 logo 以及按鈕這兩個元素,分別位於左側及右側,首先使用 flex 讓元素水平排列,加上 jc:space-between 讓 logo 置於左側、按鈕置於右側,ai:center 讓兩個元素垂直置中,按鈕高度 96px h:96,最後左右兩側推 20px 的空間 px:20。
<header class="fixed top:0 left:0 z:999 w:full bg:fade-20 shadow:0|1|3|black/.3">
  <div class="flex jc:space-between ai:center h:96 px:20">
    <a href="index.html">
      <img src="img/logo/taiwan-logo.svg" alt="台灣旅遊景點導覽" />
    </a>
    <button type="button"></button>
  </div>
</header>

按鈕的部分包含了 icon、文字以及數字圓圈這三個元素。
icon 跟文字要水平排列、垂直置中 flex ai:center,內距為上下 16px、左右 30px p:16|30,背景顏色 #393c43 bg:fade-30,圓角 6px r:6,由於數字圓圈會針對按鈕定位於右上角,因此需要給予相對定位 rel。
互動的部分,屬標懸停時按鈕背景色改為 #202225 bg:fade-10:hover,最後加上 0.2 秒的 transition 做過渡 ~background-color|.2s。
<button
  class="rel flex ai:center p:16|30 bg:fade-30 r:6 ~background-color|.2s bg:fade-10:hover"
  type="button"
>
  <svg>...</svg>
  <span>我的最愛</span>
  <div>3</div>
</button>
icon 的部分使用 svg 原始碼,將顏色設定為主色 fill:primary。
<svg class="fill:primary" width="16" height="16" viewBox="0 0 16 16">
  <path
    d="M14.7,2.8c-0.4-0.4-0.9-0.7-1.4-0.9c-0.6-0.2-1.1-0.3-1.8-0.3c-0.6,0-1.2,0.1-1.8,0.4C9.2,2.2,8.7,2.6,8.3,3C8.2,3.2,8.1,3.3,8,3.4C7.9,3.3,7.8,3.2,7.7,3C7.3,2.6,6.8,2.2,6.2,1.9C5.7,1.7,5.1,1.5,4.5,1.5c-0.6,0-1.2,0.1-1.8,0.3c-0.5,0.2-1,0.5-1.4,0.9C0.5,3.6,0,4.7,0,5.8C0,6.4,0.1,7,0.3,7.5c0.2,0.5,0.6,1,0.9,1.4c0.4,0.4,6.2,5.4,6.7,5.6c0.6-0.2,6.2-5.2,6.7-5.6C15.5,8.1,16,7,16,5.8c0-0.6-0.1-1.1-0.3-1.7C15.4,3.6,15.1,3.2,14.7,2.8z"
  />
</svg>
文字與左側 icon 距離為 8px ml:8,文字大小 14px,顏色為白色 f:14 f:white。
<span class="ml:8 f:14 f:white">我的最愛</span>
數字圓圈的部分使用絕對定位 abs,定位於上 -6px、右 -6px top:-6 right:-6,數字位於圓圈正中間 flex center-content,圓圈的寬高 20px w:20 h:20,背景為主色且為圓型 bg:primary round,文字大小 12px f:12,顏色 #2f3136 f:fade-20。
<div
  class="abs top:-6 right:-6 flex center-content w:20 h:20 f:12 f:fade-20 bg:primary round"
>
  3
</div>
center-content 這個類名包含了 justify-content: center; 以及 align-items: center; 這兩個屬性。
.center-content {
  justify-content: center;
  align-items: center;
}
最終我們使用 Master CSS 完成了導覽列的撰寫,完整架構如下:
<header
  class="fixed top:0 left:0 z:999 w:full bg:fade-20 shadow:0|1|3|black/.3"
>
  <div class="flex jc:space-between ai:center h:96 px:20">
    <a href="index.html">
      <img src="img/logo/taiwan-logo.svg" alt="台灣旅遊景點導覽" />
    </a>
    <button
      class="rel flex ai:center p:16|30 bg:fade-30 r:6 ~background-color|.2s bg:fade-10:hover"
      type="button"
    >
      <svg class="fill:primary" width="16" height="16" viewBox="0 0 16 16">
        <path
          d="M14.7,2.8c-0.4-0.4-0.9-0.7-1.4-0.9c-0.6-0.2-1.1-0.3-1.8-0.3c-0.6,0-1.2,0.1-1.8,0.4C9.2,2.2,8.7,2.6,8.3,3C8.2,3.2,8.1,3.3,8,3.4C7.9,3.3,7.8,3.2,7.7,3C7.3,2.6,6.8,2.2,6.2,1.9C5.7,1.7,5.1,1.5,4.5,1.5c-0.6,0-1.2,0.1-1.8,0.3c-0.5,0.2-1,0.5-1.4,0.9C0.5,3.6,0,4.7,0,5.8C0,6.4,0.1,7,0.3,7.5c0.2,0.5,0.6,1,0.9,1.4c0.4,0.4,6.2,5.4,6.7,5.6c0.6-0.2,6.2-5.2,6.7-5.6C15.5,8.1,16,7,16,5.8c0-0.6-0.1-1.1-0.3-1.7C15.4,3.6,15.1,3.2,14.7,2.8z"
        />
      </svg>
      <span class="ml:8 f:14 f:white">我的最愛</span>
      <div
        class="abs top:-6 right:-6 flex center-content w:20 h:20 f:12 f:fade-20 bg:primary round"
      >
        3
      </div>
    </button>
  </div>
</header>
今天是實戰演練的第一天,我們完成了導覽列的製作,有興趣的朋友可以下載 GitHub 專案檔一起來練習!