這篇教學會使用 OpenCV 讀取包含 QRCode ( 二維條碼 ) 和 BarCdoe ( 條碼 ) 的影像,搭配 QRCodeDetector() 和 barcode_BarcodeDetector() 方法,實現在攝影機影像中即時辨識 QRCode 和 BarCode 的功能。
原文參考:辨識 QRCode 和 BarCode
因為程式中的 OpenCV 會需要使用鏡頭或 GPU,所以請使用本機環境 ( 參考:使用 Python 虛擬環境 ) 或使用 Anaconda Jupyter 進行實作 ( 參考:使用 Anaconda ) ,並安裝 OpenCV 函式庫 ( 參考:OpenCV 函式庫 )。
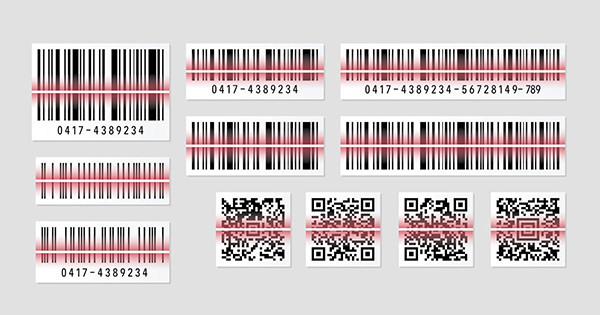
OpenCV 開啟圖片後,使用 QRCodeDetector() 建立 QRCode 偵測器,接著就能使用 detectAndDecode() 方法開始偵測圖片中的 QRCode,偵測 QRCode 之後會回傳三個數值:
| 回傳數值 | 說明 |
|---|---|
| data | 偵測到的資料。 |
| bbox | 偵測到的座標範圍,如果沒有偵測到 QRCode 會是 None。 |
| rectified | 將帶有角度的 QRCode 轉換成垂直 90 度的陣列。 |
import cv2
import numpy as np
img = cv2.imread("qrcode.jpg")                       # 開啟圖片

qrcode = cv2.QRCodeDetector()                        # 建立 QRCode 偵測器
data, bbox, rectified = qrcode.detectAndDecode(img)  # 偵測圖片中的 QRCode
# 如果 bbox 是 None 表示圖片中沒有 QRCode
if bbox is not None:
    print(data)                # QRCode 的內容
    print(bbox)                # QRCode 的邊界
    print(rectified)           # 換成垂直 90 度的陣列

cv2.imshow('oxxostudio', img)  # 預覽圖片
cv2.waitKey(0)                 # 按下任意鍵停止
cv2.destroyAllWindows()        # 結束所有圖片視窗
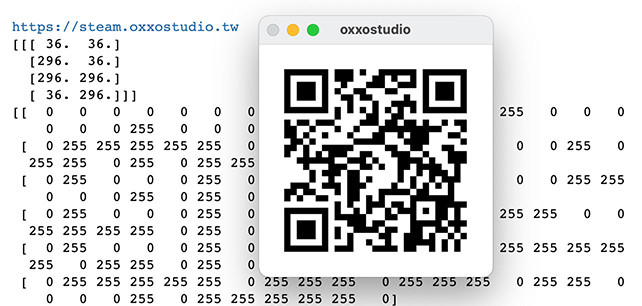
因為 bbox 的內容為 QRCode 邊界四個點的座標,所以可以建立一個簡單的函式,取出左上和右下的座標,透過座標標記出 QRCode 的外框,下方的程式碼執行後,會在偵測到的 QRCode 邊緣標記出紅色外框。
import cv2
import numpy as np
img = cv2.imread("qrcode.jpg")

qrcode = cv2.QRCodeDetector()
data, bbox, rectified = qrcode.detectAndDecode(img)

# 取得座標的函式
def boxSize(arr):
    global data
    box_roll = np.rollaxis(arr,1,0)   # 轉置矩陣,把 x 放在同一欄,y 放在同一欄
    xmax = int(np.amax(box_roll[0]))  # 取出 x 最大值
    xmin = int(np.amin(box_roll[0]))  # 取出 x 最小值
    ymax = int(np.amax(box_roll[1]))  # 取出 y 最大值
    ymin = int(np.amin(box_roll[1]))  # 取出 y 最小值
    return (xmin,ymin,xmax,ymax)

# 如果 bbox 是 None 表示圖片中沒有 QRCode
if bbox is not None:
    print(data)
    print(bbox)
    print(rectified)
    box = boxSize(bbox[0])
    cv2.rectangle(img,(box[0],box[1]),(box[2],box[3]),(0,0,255),5)  # 畫矩形

cv2.imshow('oxxostudio', img)
cv2.waitKey(0)
cv2.destroyAllWindows()
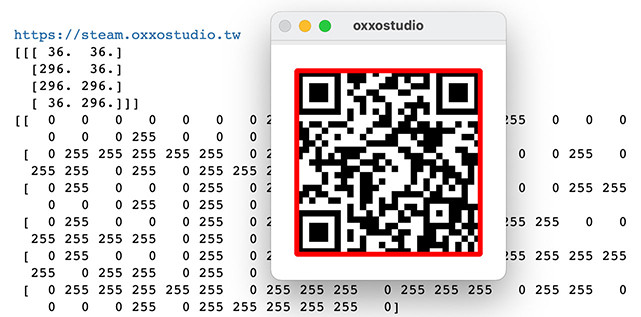
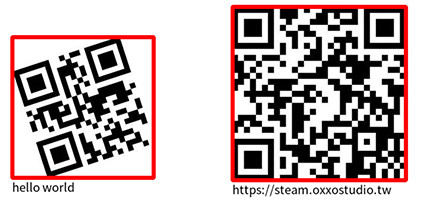
如果是帶有角度的 QRCode,也可以正常偵測並標記外框。
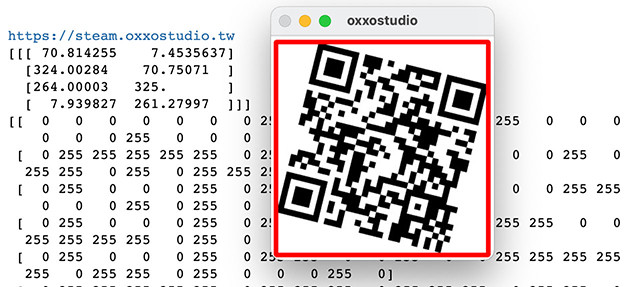
額外建立一個放入文字的函式,就能根據讀取到的內容和座標,將文字顯示在 QRCode 的正下方。
參考:使用中文字型
import cv2
import numpy as np
from PIL import ImageFont, ImageDraw, Image          # 載入 PIL ( 為了放中文字 )
img = cv2.imread("qrcode.jpg")

qrcode = cv2.QRCodeDetector()
data, bbox, rectified = qrcode.detectAndDecode(img)

# 建立放入文字的函式
def putText(x,y,text,color=(0,0,0)):
    global img
    fontpath = 'NotoSansTC-Regular.otf'      # 字體 ( 從 Google Font 下載 )
    font = ImageFont.truetype(fontpath, 20)  # 設定字型與大小
    imgPil = Image.fromarray(img)            # 將 img 轉換成 PIL 圖片物件
    draw = ImageDraw.Draw(imgPil)            # 建立繪圖物件
    draw.text((x, y), text, fill=color, font=font)  # 寫入文字
    img = np.array(imgPil)                   # 轉換回 np array

def boxSize(arr):
    global data
    box_roll = np.rollaxis(arr,1,0)
    xmax = int(np.amax(box_roll[0]))
    xmin = int(np.amin(box_roll[0]))
    ymax = int(np.amax(box_roll[1]))
    ymin = int(np.amin(box_roll[1]))
    return (xmin,ymin,xmax,ymax)

if bbox is not None:
    print(data)
    print(bbox)
    print(rectified)
    box = boxSize(bbox[0])
    cv2.rectangle(img,(box[0],box[1]),(box[2],box[3]),(0,0,255),5)

cv2.imshow('oxxostudio', img)
cv2.waitKey(0)
cv2.destroyAllWindows()

如果影像中有「多組」QRcode 需要辨識,則需要改用 detectAndDecodeMulti() 方法進行偵測,detectAndDecodeMulti() 方法會回傳四個數值:
| 回傳數值 | 說明 |
|---|---|
| ok | 是否有偵測到,True 表示有,False 表示沒有。 |
| data | 偵測到的資料,使用陣列依序紀錄不同 QRCode 的內容。 |
| bbox | 偵測到的座標範圍,使用陣列依序紀錄不同 QRCode 的座標範圍。 |
| rectified | 旋轉成正九十度的 QRCode 矩陣,使用陣列依序紀錄不同 QRCode 的矩陣。 |
import cv2
import numpy as np
from PIL import ImageFont, ImageDraw, Image
img = cv2.imread("many-qrcode.jpg")

def putText(x,y,text,color=(0,0,0)):
    global img
    fontpath = 'NotoSansTC-Regular.otf'
    font = ImageFont.truetype(fontpath, 20)
    imgPil = Image.fromarray(img)
    draw = ImageDraw.Draw(imgPil)
    draw.text((x, y), text, fill=color, font=font)
    img = np.array(imgPil)

def boxSize(arr):
    global data
    box_roll = np.rollaxis(arr,1,0)
    xmax = int(np.amax(box_roll[0]))
    xmin = int(np.amin(box_roll[0]))
    ymax = int(np.amax(box_roll[1]))
    ymin = int(np.amin(box_roll[1]))
    return (xmin,ymin,xmax,ymax)

qrcode = cv2.QRCodeDetector()
ok, data, bbox, rectified = qrcode.detectAndDecodeMulti(img)   # 改用 detectAndDecodeMulti
# 如果有偵測到
if ok:
    # 使用 for 迴圈取出每個 QRCode 的資訊
    for i in range(len(data)):
        print(data[i])
        print(bbox[i])
        text = data[i]          # QRCode 內容
        box = boxSize(bbox[i])  # QRCode 左上與右下座標
        cv2.rectangle(img,(box[0],box[1]),(box[2],box[3]),(0,0,255),5)  # 標記外框
        putText(box[0],box[3],text)   # 寫出文字

cv2.imshow('oxxostudio', img)
cv2.waitKey(0)
cv2.destroyAllWindows()
OpenCV 開啟圖片後,使用 BarcodeDetector() 建立 QRCode 偵測器,接著就能使用 barcode_BarcodeDetector() 方法開始偵測圖片中的 BarCode ( 可以同時偵測多組 BarCode ),偵測 BarCode 之後會回傳四個數值:
| 回傳數值 | 說明 |
|---|---|
| ok | 是否有偵測到,True 表示有,False 表示沒有。 |
| data | 偵測到的資料,使用 Tuple 依序紀錄不同 BarCode 的內容。 |
| data_type | 偵測到的型態。 |
| bbox | 偵測到的座標範圍,使用陣列依序紀錄不同 BarCode 的座標範圍。 |
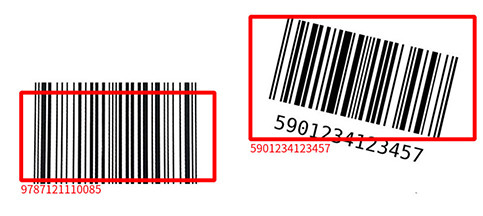
下方的程式碼延伸前面辨識 QRCode 的 putText 和 boxSize 函式,同時偵測畫面中的兩個 BarCode,偵測到 BarCode 後會使用紅色框標記並顯示內容。
注意,BarCode 圖片的上下左右需要保持一定距離,不然發生偵測不到的狀況
import cv2
import numpy as np
from PIL import ImageFont, ImageDraw, Image
img = cv2.imread("barcode.jpg")

def putText(x,y,text,color=(0,0,0)):
    global img
    fontpath = 'NotoSansTC-Regular.otf'
    font = ImageFont.truetype(fontpath, 20)
    imgPil = Image.fromarray(img)
    draw = ImageDraw.Draw(imgPil)
    draw.text((x, y), text, fill=color, font=font)
    img = np.array(imgPil)

def boxSize(arr):
    global data
    box_roll = np.rollaxis(arr,1,0)
    xmax = int(np.amax(box_roll[0]))
    xmin = int(np.amin(box_roll[0]))
    ymax = int(np.amax(box_roll[1]))
    ymin = int(np.amin(box_roll[1]))
    return (xmin,ymin,xmax,ymax)

barcode = cv2.barcode_BarcodeDetector()                   # 建立 BarCode 偵測器
ok, data, data_type, bbox = barcode.detectAndDecode(img)  # 偵測 BarCode
# 如果有 BarCode
if ok:
    # 依序取出所有 BarCode 內容
    for i in range(len(data)):
        box = boxSize(bbox[i])   # 取出座標
        text = data[i]           # 取出內容
        cv2.rectangle(img,(box[0],box[1]),(box[2],box[3]),(0,0,255),5)  # 繪製外框
        putText(box[0],box[3],text,color=(0,0,255))                     # 放入文字

cv2.imshow('oxxostudio', img)
cv2.waitKey(0)
cv2.destroyAllWindows()
參考「讀取並播放影片」文章,將讀取攝影鏡頭影像的範例,結合辨識 QRCode 的範例,就能即時透過攝影機,偵測並辨識 QRCode。
import cv2
import numpy as np
from PIL import ImageFont, ImageDraw, Image

cap = cv2.VideoCapture(0)

def putText(x,y,text,color=(0,0,0)):
    global img
    fontpath = 'NotoSansTC-Regular.otf'
    font = ImageFont.truetype(fontpath, 20)
    imgPil = Image.fromarray(img)
    draw = ImageDraw.Draw(imgPil)
    draw.text((x, y), text, fill=color, font=font)
    img = np.array(imgPil)

def boxSize(arr):
    global data
    box_roll = np.rollaxis(arr,1,0)
    xmax = int(np.amax(box_roll[0]))
    xmin = int(np.amin(box_roll[0]))
    ymax = int(np.amax(box_roll[1]))
    ymin = int(np.amin(box_roll[1]))
    return (xmin,ymin,xmax,ymax)

qrcode = cv2.QRCodeDetector()             # QRCode 偵測器

while True:
    ret, frame = cap.read()
    if not ret:
        print("Cannot receive frame")
        break
    img = cv2.resize(frame,(720,420))     # 縮小尺寸,加快速度
    ok, data, bbox, rectified = qrcode.detectAndDecodeMulti(img)  # 辨識 QRCode
    if ok:
        for i in range(len(data)):
            text = data[i]            # QRCode 內容
            box = boxSize(bbox[i])    # QRCode 座標
            cv2.rectangle(img,(box[0],box[1]),(box[2],box[3]),(0,0,255),5)  # 繪製外框
            putText(box[0],box[3],text,color=(0,0,255))                     # 顯示文字
    cv2.imshow('oxxostudio', img)
    if cv2.waitKey(1) == ord('q'):
        break

cap.release()
cv2.destroyAllWindows()

大家好,我是 OXXO,是個即將邁入中年的斜槓青年,我已經寫了超過 400 篇 Python 的教學,有興趣可以參考下方連結呦~ ^_^
