我們前幾天自己訓練的模型,都可以在 TrainingArguments 裡面加個參數 push_to_hub=True ,把模型推送到 Hugging Face Hub 裡面。如果是 Quantization 的 model,也可以加上 model.push_to_hub("a_local_path_for_convert_onnx_model", repository_id="my-onnx-repo", use_auth_token=True) 來把模型推到 Hugging Face Hub。
現在 Azure 可以直接支援 Hugging Face Hub 的 model,今天我們就來利用 Azure 裡的功能,把模型快速部署在 Azure 裡面吧!
在 Azure 上面的搜尋欄,輸入 Hugging Face ,可以在 Marketplace 裡面找到如下圖的頁面,我們點 Create。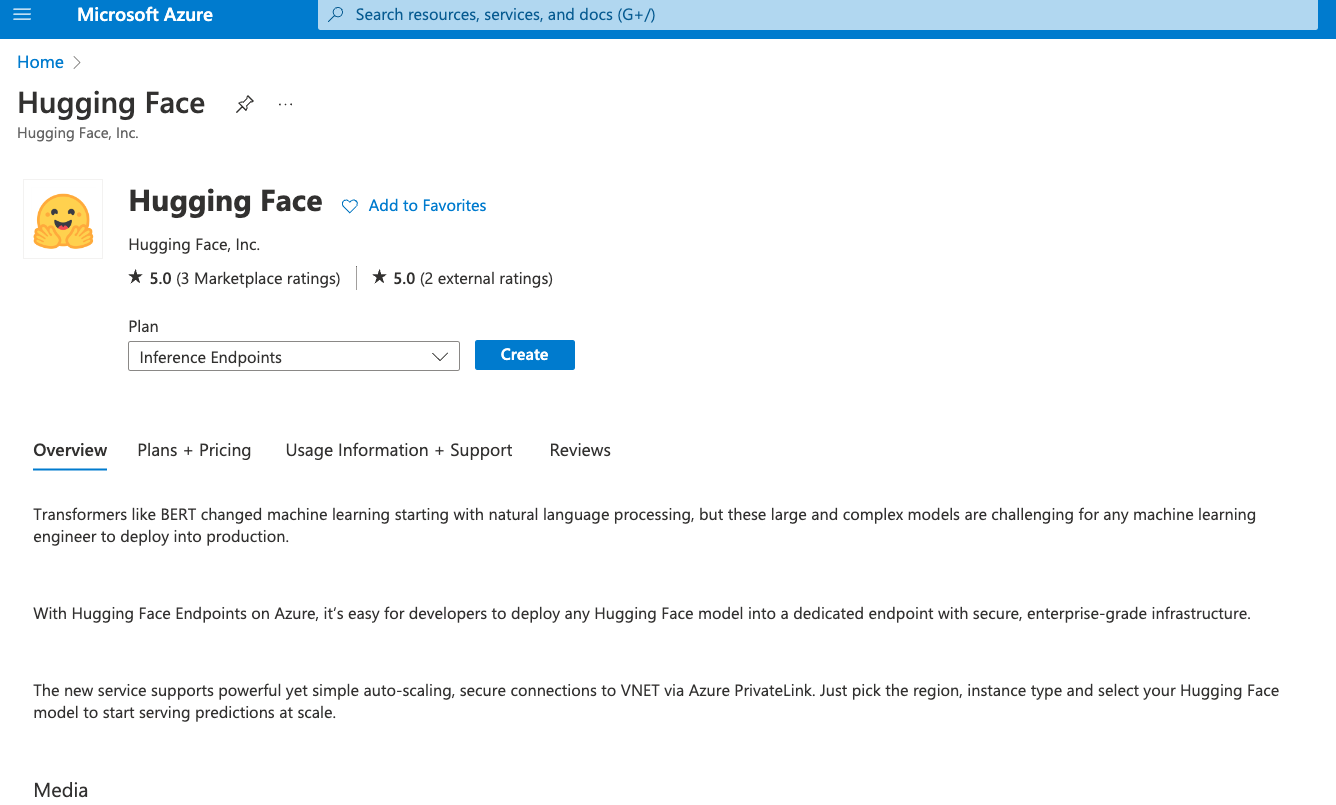
接著我們填入該填的資料,如 resource group、名稱等等的資訊,然後點 NEXT,如下圖。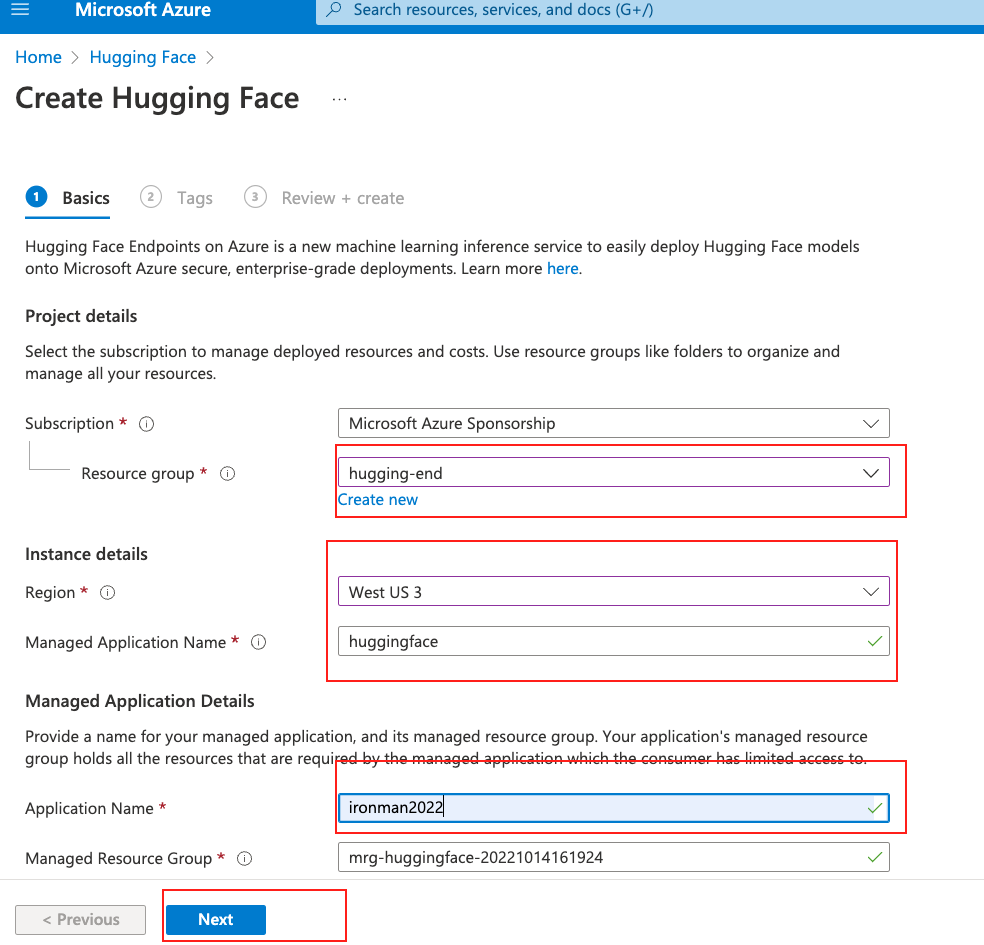
Tag 頁面我們可以跳過,當然你可以輸入 Tag 方便管理你的資源。
接著把同意條款給勾起來,然後就可點擊 Create,如下圖。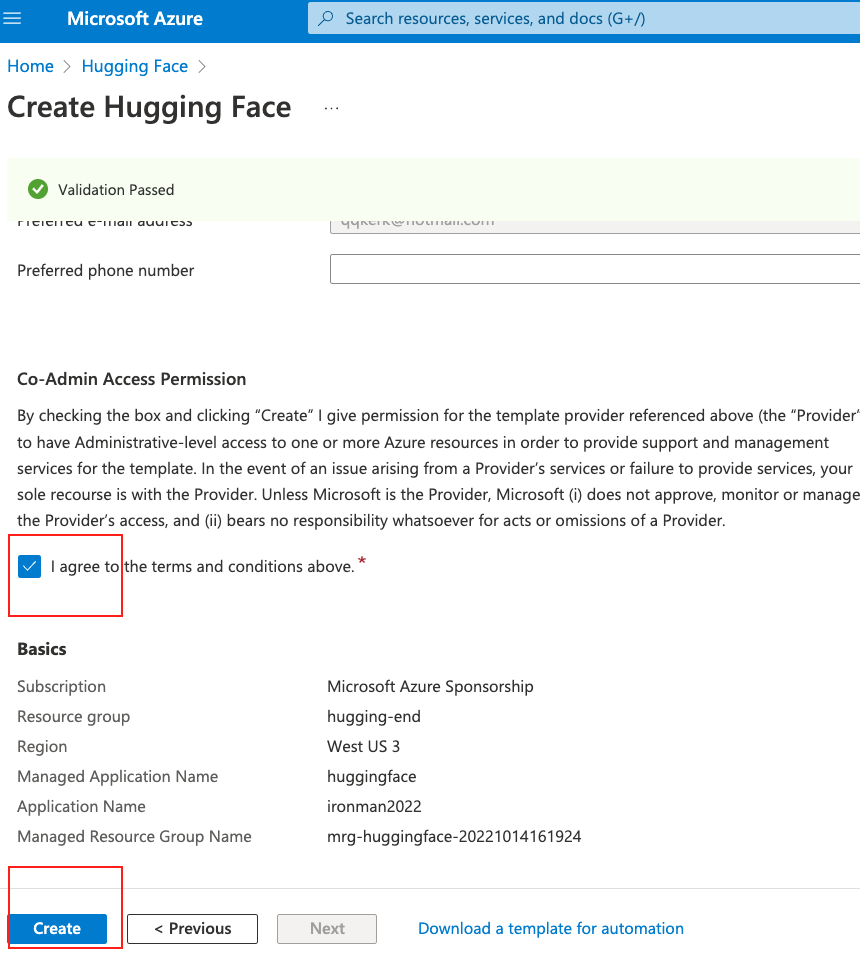
等待一段時間後,這個 resource 就會建立完成了。我們進到這個 resource 裡面,會看到左邊 Blade 選單有個 HuggingFace Endpoint,點進去後,我們點上面的 Add。如下圖。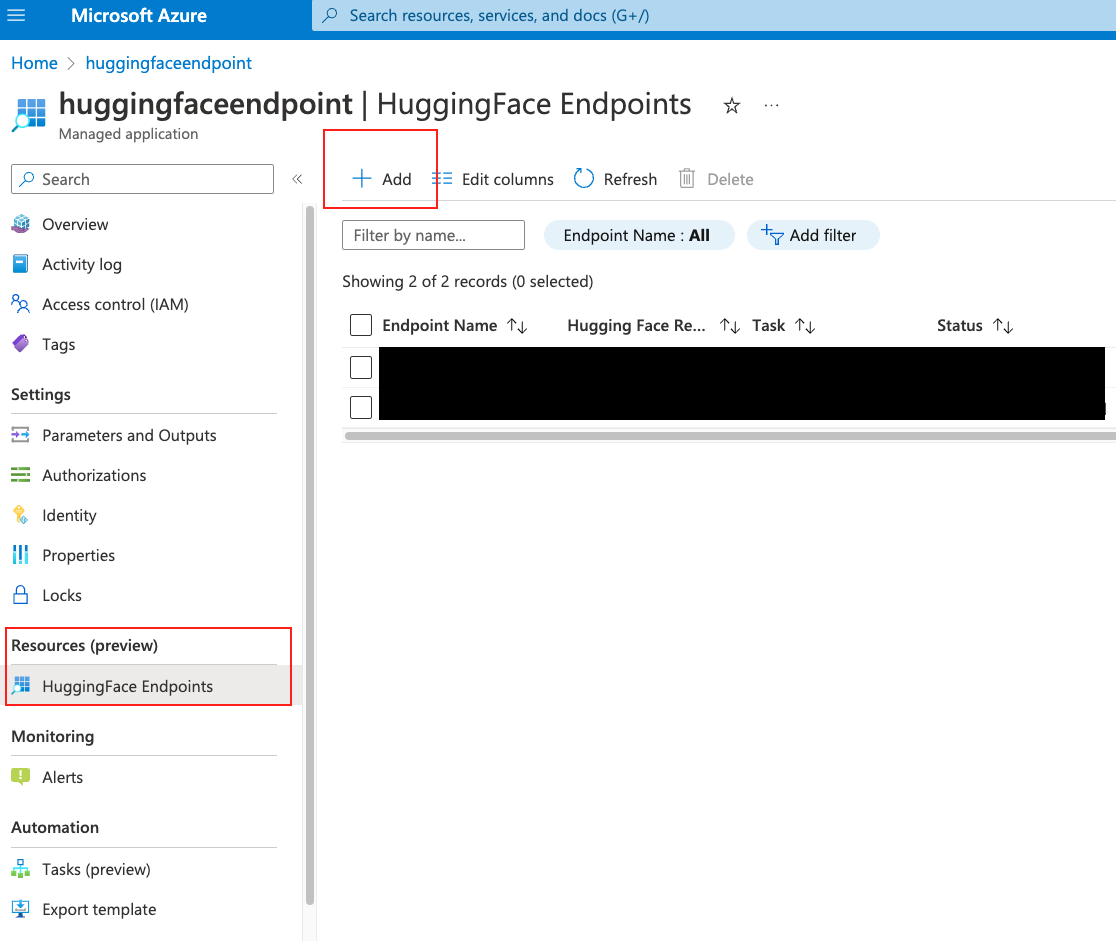
接著我們去 Hugging Face Hub,點擊上面的 Model,然後左邊任務我們選 Text Generation,然後我們選 distilgpt 這個比較小一點的模型。把模型名稱複製起來。這邊你也可以複製自己推送的模型。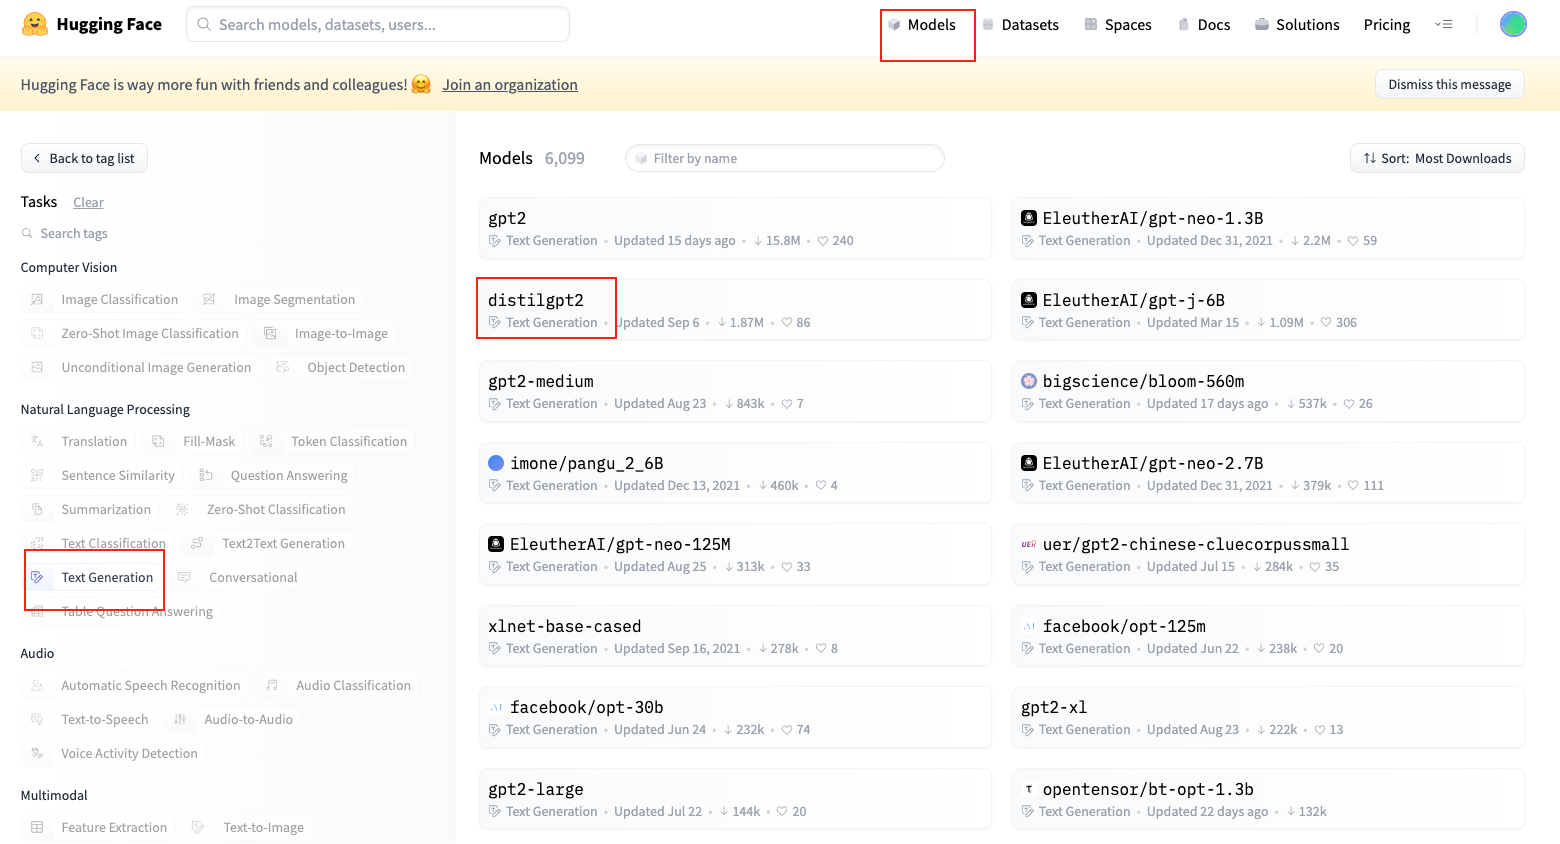
回到 Azure,我在把 Model ID 那個選項,把剛剛複製的名稱給貼上,接著選取下面的運算資源。這邊就是要收費的部份,用 Azure Hugging Face 本身是不收費的,但是運算資源就要收費。選完運算資源後,我們點 Review+Create,就直接 Create。如下圖。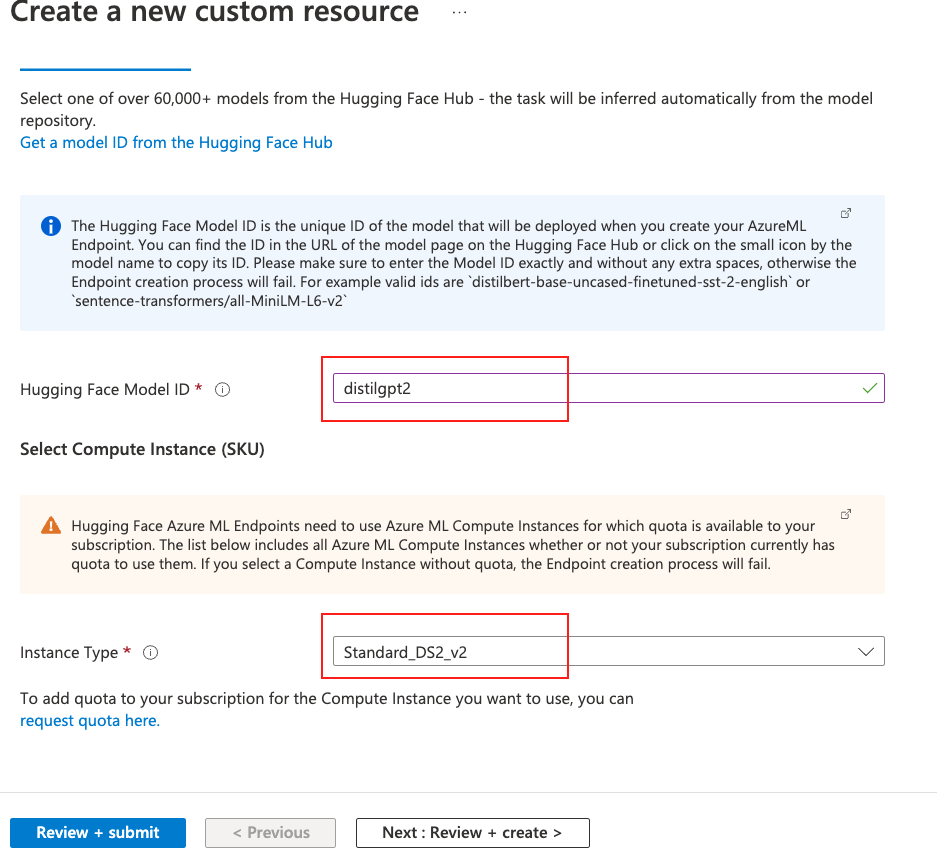
你沒看錯,就是這麼簡單就可以部署起來了。這時候要等待滿長的一段時間,因為 Azure 後面會去 Hugging Face Hub 把模型抓下來,然後部署在 Azure Machine Learning 裡。
等待部署完成後,這時候我們不要直接點進去那個新建立的 endpoint,因為會報錯。我們直接進到 Azure Machine Learning 的 Workspace,看看會發現多出一個新的 Workspace 了,如下圖。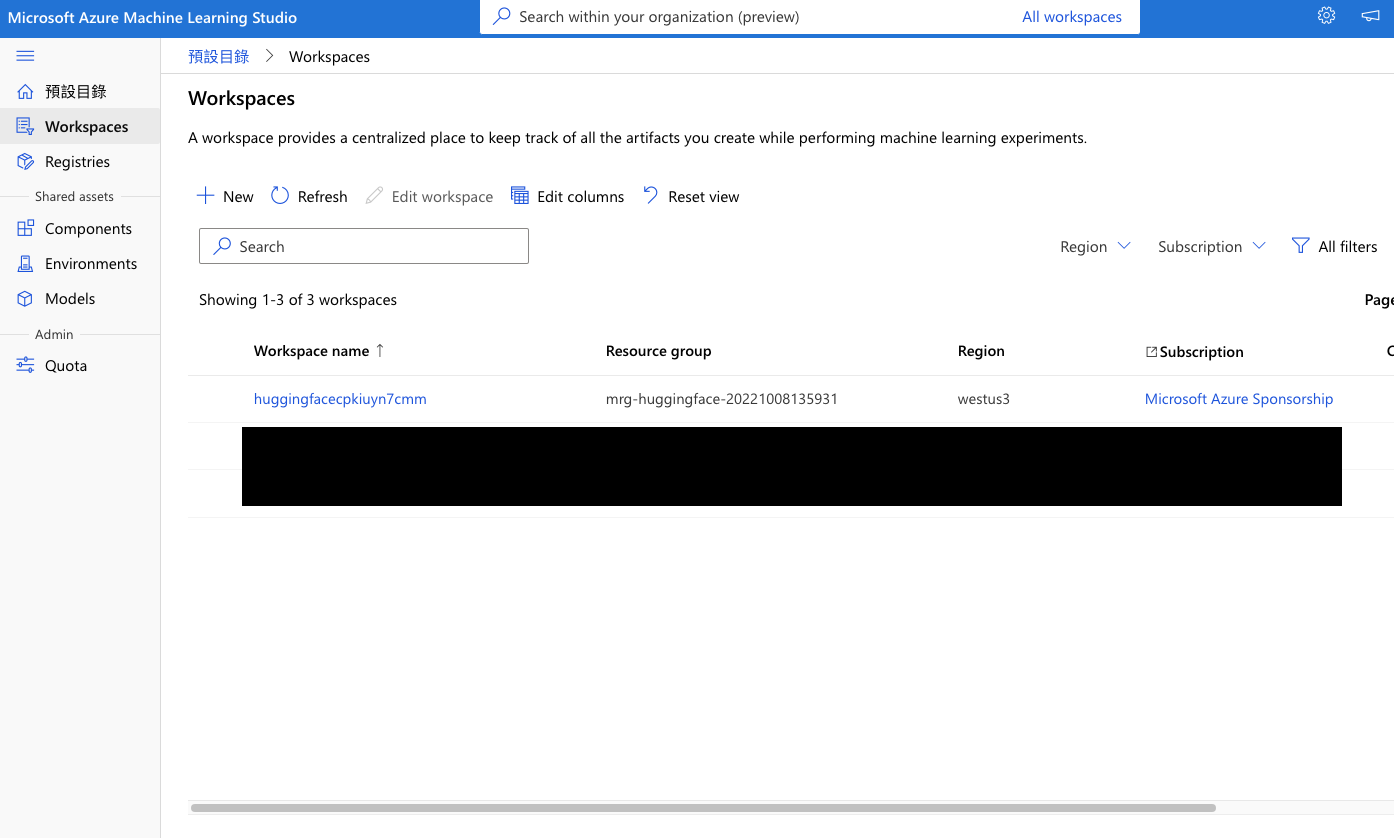
接著我們點左方選單的 Endpoints,就會看到我們剛剛新部署好的 gpt2 了。如下圖。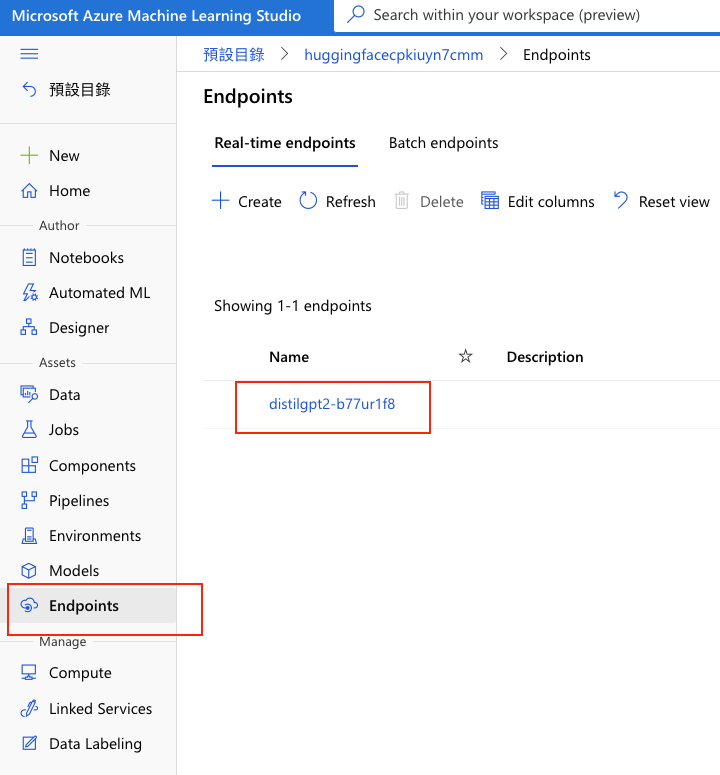
接著點進去那個 endpoint,然後上方的 tab 切換到 comsume,我們可以看到 Azure Machine Learning 居然還幫你寫好程式碼了。如下圖。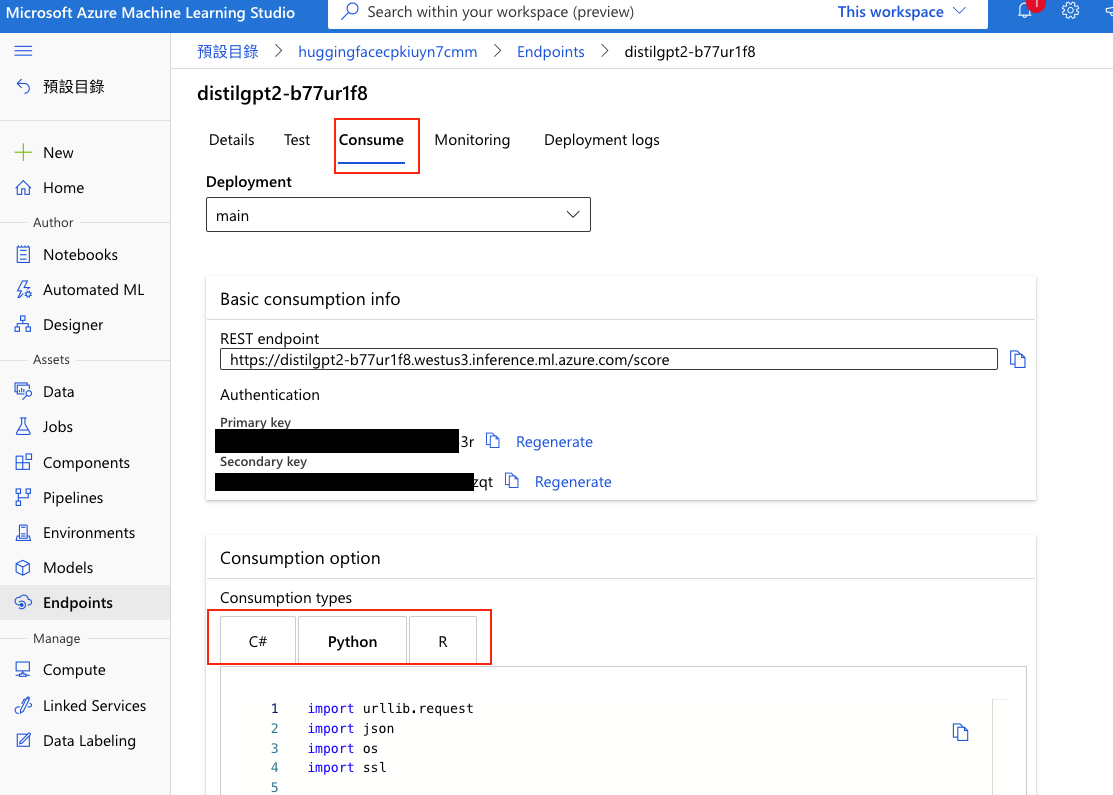
我們馬上來用看這個程式碼吧,我們把程式碼改寫如下,我們在 data 那個 json 放一些參數進去。
from operator import truediv
import urllib.request
import json
import os
import ssl

def allowSelfSignedHttps(allowed):

    if allowed and not os.environ.get('PYTHONHTTPSVERIFY', '') and getattr(ssl, '_create_unverified_context', None):
        ssl._create_default_https_context = ssl._create_unverified_context

allowSelfSignedHttps(True)

data = {"inputs": "Alistair Darling has been forced to consider a second bailout for banks as"
	, "parameters": {"max_length": 32, "top_k": 50, "do_sample": True, "num_beams":1}
	}

body = str.encode(json.dumps(data))

url = 'your-url'

api_key = 'your-key'


headers = {'Content-Type': 'application/json',
           'Authorization': ('Bearer ' + api_key), 'azureml-model-deployment': 'main'}

req = urllib.request.Request(url, body, headers)

try:
    response = urllib.request.urlopen(req)

    result = response.read()
    print(result)
except urllib.error.HTTPError as error:
    print("The request failed with status code: " + str(error.code))

    print(error.info())
    print(error.read().decode("utf8", 'ignore'))
會得到類似下面的結果,覺得不佳有一堆換行符號,再自己調調參數吧:
b'[{"generated_text":"Alistair Darling has been forced to consider a second bailout for banks as the EU and Federal Reserve have been forced to rethink their lending policy in the wake of their failed bailout plans.\\n\\n\\n\\n\\n\\n\\n\\n\\n\\n\\n\\n\\n\\n\\n\\n\\n\\n\\n\\n\\n\\n\\n\\n\\n\\n\\n"}]'
以上就是今天的部署了,有 Azure 真的很容易呢!
明天我們就來用 API 製作聊天機器人吧!
