iThome 鐵人賽 30天來到第29天啦!今天寫完剩下最後一天,沒想到居然可以撐到要玩賽了~先來快速帶過把所有的基礎功能給完整做完,之後就來先介紹一下Saga。沒錯,最後一天不只完賽感言,還要教學到滿~
那就開始今天的還債時間。
利用Dialog彈跳視窗來填寫表單新增影片,.\src\components\elements\AddVideoForm.jsx:
import React, { useState } from 'react'
import {
  Button, TextField, Dialog, DialogActions, DialogContent, DialogContentText, DialogTitle
} from '@mui/material';


export default function AddVideoForm(props) {
  const { handleClose, open, handleSummit } = props

  const [form, setForm] = useState({ v: null, title: null })

  const onChangeForm = (name, value) => {
    setForm({ ...form, [name]: value })
  }

  return (
    <Dialog open={open} onClose={handleClose}>
      <DialogTitle>新增影片</DialogTitle>
      <DialogContent>
        <DialogContentText>
          請輸入YouTube影片的ID與影片標題
        </DialogContentText>
        <TextField
          autoFocus
          margin="dense"
          id="v"
          label="YouTube ID (v)"
          type="text"
          fullWidth
          variant="standard"
          onChange={event => onChangeForm('v', event.target.value)}
        />
        <TextField
          autoFocus
          margin="dense"
          id="title"
          label="標題"
          type="text"
          fullWidth
          variant="standard"
          onChange={event => onChangeForm('title', event.target.value)}
        />
      </DialogContent>
      <DialogActions>
        <Button onClick={handleClose}>取消</Button>
        <Button onClick={() => handleSummit(form)} disabled={!form.v || !form.title}>確認</Button>
      </DialogActions>
    </Dialog>
  )
}
Header來呼叫視窗,.\src\components\Header.jsx:
const Header = (props) => {

  const [open, setOpen] = React.useState(false);

  const handleClickOpen = () => {
    setOpen(true);
  };

  const handleClose = () => {
    setOpen(false);
  };

  const addVideo = async (form) => {
    const { v, title } = form
    const data = await fetch(`http://localhost:5000/api/Note`, {
      body: JSON.stringify({ v, title }),
      method: "POST",
      headers: {
        'Accept': 'application/json',
        'Content-Type': 'application/json'
      },
    }).then(res => res.json())
    handleClose()
  }

  return (
    <Box color="inherit">
      <AppBar position="static" sx={{ backgroundColor: "#000" }}>
        <Toolbar>
          <Typography
            variant="h6"
            noWrap
            component="div"
            sx={{ flexGrow: 1 }}
          >
            <Link className="reset white" to="/">
              {props.title}
            </Link>
          </Typography>
          <Search>
            <SearchIconWrapper>
              <SearchIcon />
            </SearchIconWrapper>
            <StyledInputBase
              placeholder="Search…"
              inputProps={{ 'aria-label': 'search' }}
            />
          </Search>
          <Box sx={{ flexGrow: 1 }} />
          <Button variant="contained" color="success" startIcon={<AddIcon />} onClick={handleClickOpen}>
            新增影片
          </Button>
        </Toolbar>
      </AppBar>
      <AddVideoForm open={open} handleClose={handleClose} handleSummit={addVideo} />
    </Box >
  )
}

export default Header

新增後目前還不會即時更新,因為如果要有即時更新效果要在Header再寫一次呼叫API,所以之後介紹的Saga可以讓呼叫API的動作共用,不用重複寫程式碼,先以重新整理看資料有無成功匯入。

其實昨天就偷偷把這幾個功能給完工了,改動主要是在.\src\components\Main\WatchPage.jsx與.\src\components\Main\MarkPage.jsx,稍微看一下下改動甚麼,有不懂的地方也都歡迎下方留言討論。
.\src\components\Main\MarkPage.jsx:
import React, { useState, useEffect, useRef } from 'react'
import MarkView from '../elements/MarkView'
import MDEditor from '@uiw/react-md-editor'
import { Button, Box } from '@mui/material'
import AddIcon from '@mui/icons-material/Add'

export default function MarkPage(props) {
  const { v, mark, setMark, getCurrentTime, seekTo } = props
  const [isEdit, setEdit] = useState(false)
  const [mdInfo, setMdInfo] = useState({ content: null, id: null, sec: null })

  // 當按下esc離開編輯器
  const handleKeydown = (e) => {
    if (e.keyCode == 27) {
      setEdit(false)
      editMark(v, mdInfo.id, mdInfo.sec, mdInfo.content)
    }
  }

  useEventListener('keydown', handleKeydown)

  useEffect(() => {
    getMark(v)
  }, [v])

  const getMark = async (v) => {
    const data = await fetch(`http://localhost:5000/api/Note/${v}`).then(res => res.json())
    setMark(data)
  }

  const editMark = async (v, id, sec, content) => {
    const data = await fetch(`http://localhost:5000/api/Note/${v}`, {
      body: JSON.stringify({ id, sec, content }),
      method: "PUT",
      headers: {
        'Accept': 'application/json',
        'Content-Type': 'application/json'
      },
    }).then(res => res.json())
    getMark(v)
  }

  const addMark = async (v, sec, content = null) => {
    if (!!v && !!sec) {
      const data = await fetch(`http://localhost:5000/api/Note/${v}`, {
        body: JSON.stringify({ sec, content }),
        method: "POST",
        headers: {
          'Accept': 'application/json',
          'Content-Type': 'application/json'
        },
      }).then(res => res.json())
      getMark(v)
    }
  }

  const delMark = async (v, id) => {
    const data = await fetch(`http://localhost:5000/api/Note/${v}`, {
      body: JSON.stringify({ id }),
      method: "DELETE",
      headers: {
        'Accept': 'application/json',
        'Content-Type': 'application/json'
      },
    }).then(res => res.json())
    getMark(v)
  }

  return (
    <>
      {!!isEdit &&
        <MDEditor
          value={mdInfo.content || undefined}
          onChange={value => setMdInfo({ ...mdInfo, content: value })}
          style={{ position: "absolute", zIndex: "1" }}
          height="100%"
          width="100%"
          className='md_editor'
          autoFocus
        />
      }
      {
        !!mark.mark && mark.mark.map((m, idx) =>
          <MarkView
            key={idx}
            sec={m.sec}
            content={m.content}
            onDoubleClick={e => (setEdit(!isEdit), setMdInfo({ content: m.content, id: m.id, sec: m.sec }))}
            handleDel={() => delMark(v, m.id)}
            seekTo={seekTo}
          />
        )
      }
      <Box className="flex jcc" sx={{ p: 1, mt: 1 }}>
        <Button variant="contained" color="success" startIcon={<AddIcon />} onClick={() => addMark(v, getCurrentTime())}>
          新增標記
        </Button>
      </Box>
    </>
  )
}

function useEventListener(eventName, handler, element = window) {
  const savedHandler = useRef();

  useEffect(() => {
    savedHandler.current = handler;
  }, [handler]);
  useEffect(() => {
    const isSupported = element && element.addEventListener;
    if (!isSupported) return;
    const eventListener = (event) => savedHandler.current(event);
    element.addEventListener(eventName, eventListener);
    return () => {
      element.removeEventListener(eventName, eventListener);
    };
  }, [eventName, element]);
}
.\src\components\Main\WatchPage.jsx:
import React, { useState } from 'react'
import YouTubeIframe from '../elements/YouTubeIframe'
import { Box } from '@mui/material'
import MarkPage from '../../containers/Main/MarkPage'
import { useLocation } from 'react-router-dom'
const queryString = require('query-string')

export default function WatchPage(props) {
  const [player, setPlayer] = useState(null)
  const location = useLocation()
  const { v } = queryString.parse(location.search)

  const getCurrentTime = () => {
    let sec = 0;
    if (!!player)
      sec = player.getCurrentTime()
    return sec;
  }

  const onPlayerReady = (event) => {
    event.target.playVideo()
  }

  const seekTo = (sec) => {
    if (!!player) {
      player.seekTo(sec)
      player.playVideo()
    }
  }

  return (
    <Box sx={{ display: "flex", height: '100%', overflow: "auto" }} >
      <Box sx={{ width: "70%" }} className="watch_wrapper">
        <div className='video_wrapper'>
          <div className='video_container'>
            <div id="player" width="100%"></div>
          </div>
        </div>
        <YouTubeIframe
          v={v}
          t={0}
          playerid="player"
          player={player}
          setPlayer={pl => setPlayer(pl)}
          onPlayerReady={onPlayerReady}
        />
      </Box>
      <Box sx={{ width: "30%", position: "relative" }} className="mark_container">
        <MarkPage v={v} getCurrentTime={getCurrentTime} seekTo={seekTo} />
      </Box>
    </Box>
  )
}
功能補齊的差不多了,接下來就是進入最後的重頭戲,Saga!
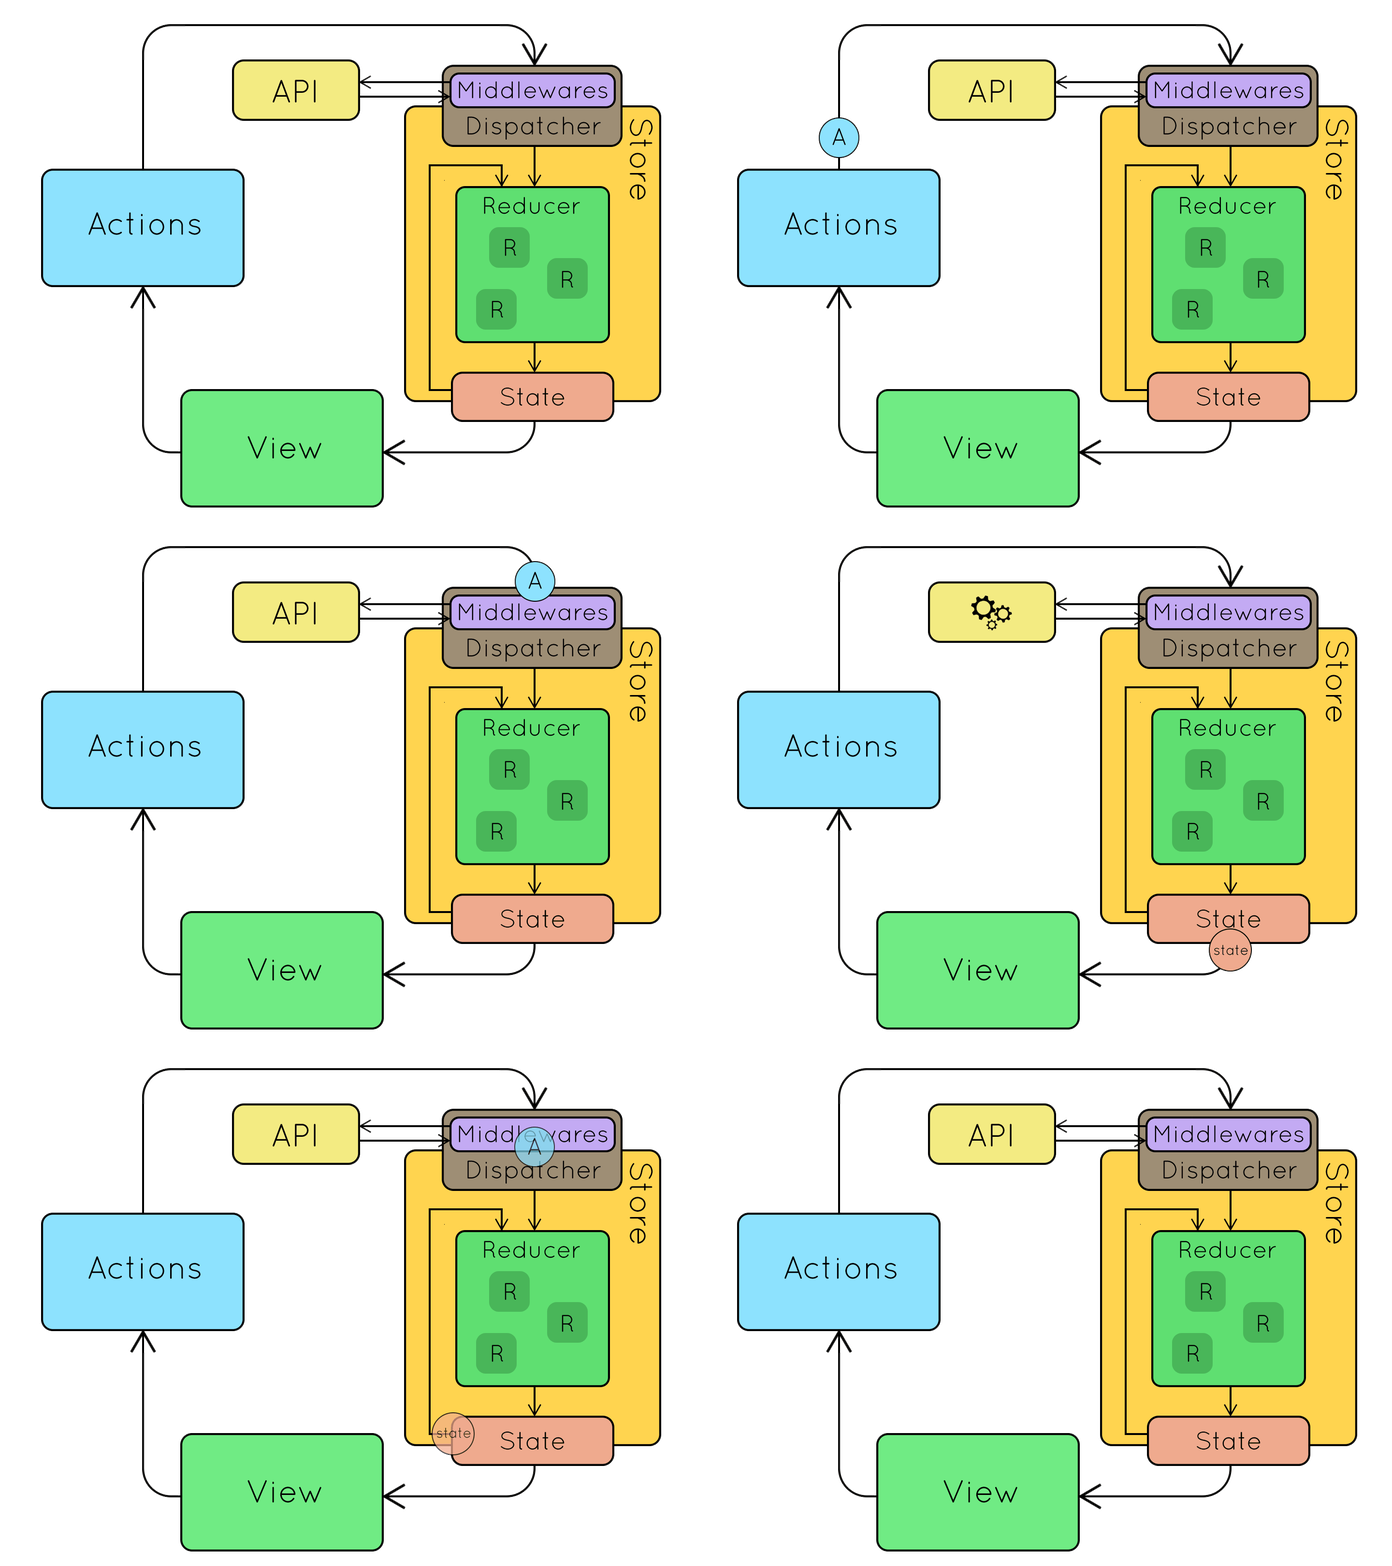
雖然React Redux可以讓UI Component共用Redux取得資料並設定資料,但是UI Component還是需要負責呼叫API取得資料。這時候Saga就可以來解決這個問題了,透過Saga來呼叫API可以讓Component專心負責呈現資料,而不需要把除了渲染資料的工作放在一起,讓Component更加專一!
不免俗地也要來安裝一下環境redux-saga套件:
npm i redux-saga

原本Reducer中是透過connect把store的資料與action傳遞給component再去呼叫,而Redux-Saga也是一樣,但會在做動作action時先觸發saga對應的事件,才到reducer去設定資料。
也就是說可以把saga當成是一個middleware,每個action都會先經過saga去處理,而saga是進行非同步的呼叫,所以不需要考慮async/await。
yield*的範例
function* anotherGenerator(i) {
  yield i + 1;
  yield i + 2;
  yield i + 3;
}

function* generator(i) {
  yield i;
  yield anotherGenerator(i);
  yield i + 10;
}

var gen = generator(10);

console.log(gen.next().value); // 10
console.log(gen.next().value); // 11
console.log(gen.next().value); // 12
console.log(gen.next().value); // 13
console.log(gen.next().value); // 20
effect是一個JavaScript物件,用來描述Redux-saga要如何執行的說明
yield select(store => store.object)
每次dispatch的action符合 pattern時,產生一個saga,(pattern, saga)


明天就是最後一個篇章了,會把大致saga的建置流程寫出來,並把一些資料流API呼叫都套用在saga上,來完成這次30天鐵人賽的專案。
附上專案:
對資安或Mapbox有興趣的話也可以觀看我們團隊的鐵人發文喔~
