Day4~7 我們將深度學習的流程快速跑過一遍,其中有很多細節省略了,接下來幾天詳細介紹比較重要的元素,若是有我未提及的歡迎在留言區提問。
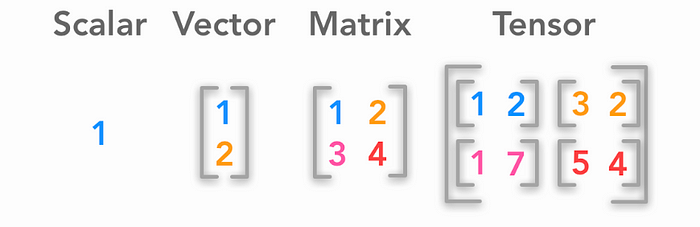
國高中數學或許有聽過,一個數值為純數或純量、二維的為向量、三維稱為矩陣,在深度學習中常用幾維張量來表示,以下圖來說分別為零維張量、一為張量、二為張量、三為張量:
張量的英文為 tensor ,在 Python 中常用來處理矩陣運算的另一個函式庫為 NumPy,Tensors與 numpy 中的 ndarray 很像,差別在於 tensors 可以在 GPU 中運算。
接下來我們來學習如何在 pytorch 中使用張量,因為等等會用到 numpy和 pytorch,使用以下程式碼來引入這兩個函式庫:
import torch
import numpy as np
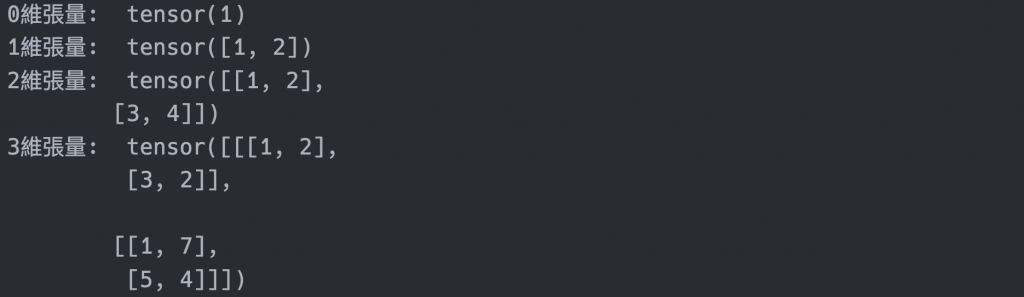
使用python內建的資料結構實作上圖的張量:
# 零維張量
scalar = 1
tensor_0d = torch.tensor(scalar)
print("0維張量: ", tensor_0d )
# 一維張量
vector = [1, 2]
tensor_1d = torch.tensor(vector)
print("1維張量: ", tensor_1d)
# 二維張量
matrix = [[1, 2], [3, 4]]
tensor_2d = torch.tensor(matrix)
print("2維張量: ", tensor_2d)
# 二維張量
tensors = [[[1, 2], [3, 2]], [[1, 7], [5, 4]]]
tensor_3d = torch.tensor(tensors)
print("3維張量: ", tensor_3d)
張量也可以直接從 numpy 產生:
vector = [1, 2]
np_array = np.array(vector)
x_np = torch.from_numpy(np_array)
print(x_np)

張量有形狀、資料的型態、和儲存在哪個設備中的屬性
tensor  = torch.tensor([[1, 2], [3, 4]])
print(f"Shape of tensor: {tensor.shape}")
print(f"Datatype of tensor: {tensor.dtype}")
print(f"Device tensor is stored on: {tensor.device}")

這次介紹了 pytorch 中最基本的運算單元,其中也有介紹到 numpy 轉換成 tensor,因為 numpy是 python 中使用很久的套件,所以需要用到矩陣運算第三方套件,很長使用 numpy 來存放,因此熟悉 numpy 和 tensor 會使你在處理資料更為快速。