今天來講講對話框,如果想要藉由彈出視窗來告訴使用者資訊,或是讓使用者做出選擇,那麼對話框這個元件很適合使用。
先看看成品: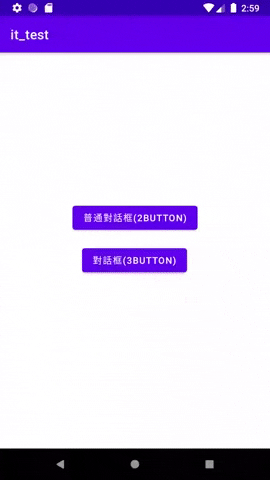
附上主程式碼:
MainActivity:
public class MainActivity extends AppCompatActivity {

    //定義變數btn1,btn2
    Button btn1;
    Button btn2;

    @Override
    protected void onCreate(Bundle savedInstanceState) {
        super.onCreate(savedInstanceState);
        setContentView(R.layout.activity_main);

        //綁定元件和變數
        btn1=findViewById(R.id.button);
        btn2=findViewById(R.id.button2);

        //設置按鈕監聽,當按下btn1時執行
        btn1.setOnClickListener(new View.OnClickListener() {
            @Override
            public void onClick(View view) {

                //當按下按鈕時新增對話框,並設置標題和內文
                AlertDialog.Builder dialog = new AlertDialog.Builder(MainActivity.this);
                dialog.setTitle("標題");
                dialog.setMessage("內文1");

                //設置左邊按鈕文字和點擊事件
                dialog.setNegativeButton("關閉", new DialogInterface.OnClickListener()
                {
                    @Override
                    public void onClick(DialogInterface dialogInterface, int i) {
                        //Toast為彈出式訊息
                        Toast.makeText(MainActivity.this, "關閉", Toast.LENGTH_SHORT).show();
                    }
                });

                //設置右邊按鈕文字和點擊事件
                dialog.setPositiveButton("確定", new DialogInterface.OnClickListener()
                {
                    @Override
                    public void onClick(DialogInterface dialogInterface, int i) {
                        Toast.makeText(MainActivity.this, "確定", Toast.LENGTH_SHORT).show();
                    }
                });

                //顯示出Dialog
                dialog.show();
            }
        });

        //設置按鈕監聽,當按下btn2時執行
        btn2.setOnClickListener(new View.OnClickListener() {
            public void onClick(View view) {

                //當按下按鈕時新增對話框,並設置標題和內文
                AlertDialog.Builder dialog= new AlertDialog.Builder(MainActivity.this);
                dialog.setTitle("標題");
                dialog.setMessage("內文2");

                //設置左邊按鈕文字和點擊事件
                dialog.setNeutralButton("按鈕1", new DialogInterface.OnClickListener() {
                    @Override
                    public void onClick(DialogInterface dialogInterface, int i) {
                        Toast.makeText(MainActivity.this, "你按下了按鈕1", Toast.LENGTH_SHORT).show();
                    }
                });

                //設置偏右邊按鈕文字和點擊事件
                dialog.setNegativeButton("按鈕2", new DialogInterface.OnClickListener() {
                    @Override
                    public void onClick(DialogInterface dialogInterface, int i) {
                        Toast.makeText(MainActivity.this, "你按下了按鈕2", Toast.LENGTH_SHORT).show();
                    }
                });

                //設置最右邊按鈕文字和點擊事件
                dialog.setPositiveButton("按鈕3", new DialogInterface.OnClickListener() {
                    @Override
                    public void onClick(DialogInterface dialogInterface, int i) {
                        Toast.makeText(MainActivity.this, "你按下了按鈕3", Toast.LENGTH_SHORT).show();
                    }
                });

                // 顯示dialog
                dialog.show();
            }
        });
    }
}
分為兩部分,第一部分為只有兩個按鈕的對話框,而第二部分則是多個按鈕的對話框。
layout也十分簡單
activity_main:
<?xml version="1.0" encoding="utf-8"?>
<androidx.constraintlayout.widget.ConstraintLayout xmlns:android="http://schemas.android.com/apk/res/android"
    xmlns:app="http://schemas.android.com/apk/res-auto"
    xmlns:tools="http://schemas.android.com/tools"
    android:layout_width="match_parent"
    android:layout_height="match_parent"
    tools:context=".MainActivity">

    <Button
        android:id="@+id/button2"
        android:layout_width="wrap_content"
        android:layout_height="wrap_content"
        android:text="對話框(3button)"
        app:layout_constraintBottom_toBottomOf="parent"
        app:layout_constraintEnd_toEndOf="parent"
        app:layout_constraintHorizontal_bias="0.497"
        app:layout_constraintStart_toStartOf="parent"
        app:layout_constraintTop_toTopOf="parent"
        app:layout_constraintVertical_bias="0.527" />

    <Button
        android:id="@+id/button"
        android:layout_width="wrap_content"
        android:layout_height="wrap_content"
        android:text="普通對話框(2button)"
        app:layout_constraintBottom_toBottomOf="parent"
        app:layout_constraintEnd_toEndOf="parent"
        app:layout_constraintStart_toStartOf="parent"
        app:layout_constraintTop_toTopOf="parent"
        app:layout_constraintVertical_bias="0.41" />
</androidx.constraintlayout.widget.ConstraintLayout>
這應該算是最簡單的兩個對話框了,下一篇我們再看看更多類型的對話框~~


 iThome鐵人賽