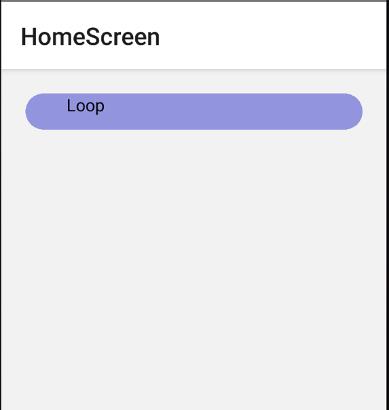
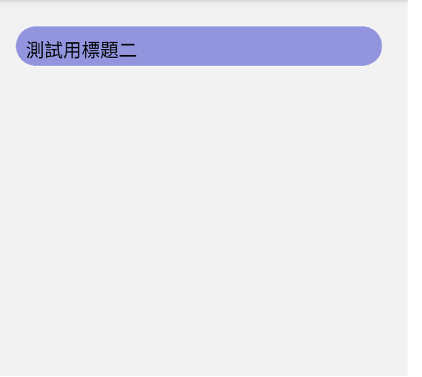
在 React Native 中,可以透過 Animations 達成動畫效果,而 Animations 又包括 Animated 和 LayoutAnimation 兩隻 API 。 Animated 著重在各種小動畫實踐,例如本節將會製作的跑馬燈; LayoutAnimation 則允許開發者在全域建立與更新轉場動畫,例如點擊「觀看更多」按鈕後,到載入實際內容前的轉場。在本節中我們將著重在 Animated 介紹與實作。
一個簡單的 Animated 架構如下:
import {Animated, View, Text, StyleSheet} from 'react-native';

function Marquee() {
  const [startValue, setStartValue] = useState(new Animated.Value(-30));
  const [endValue, setEndValue] = useState(0);

  useEffect(() => {
    Animated.timing(startValue, {
      toValue: endValue,
      duration: 1000,
      useNativeDriver: true,
    }).start();
  }, [startValue, endValue]);

  return (
    <View>
      <Animated.View style={{transform: [{translateY: startValue}]}}>
        <View style={styles.box}>
          <Text style={styles.text}>文字</Text>
        </View>
      </Animated.View>
    </View>
  );
}

const styles = StyleSheet.create({
  container: {
    alignItems: 'center',
    padding: 20,
  },
  box: {
    backgroundColor: '#666',
    width: 100,
    padding: 5,
  },
  text: {
    color: '#fff',
    textAlign: 'center',
  },
});
開發者須以 new Animated.Value() 初始化,設定動畫第一個狀態值,並提供一個結束值。其他能提供的值還有動畫長度 duration ,及是否以 Native OS 處理動畫,使動畫跑起來較順暢的 useNativeDriver 。最後,以 Animated 接上要渲染的元件,透過 style 來賦予剛剛初始值意義。
Animated 內建六種動畫元件: View 、 Text 、 Image 、 ScrollView 、 FlatList 和 SectionList ,開發者也可透過 Animated.createAnimatedComponent() 創建自己所需要的元件。
Animated.timing 只會跑一次動畫,如果要讓動畫不間斷,需搭配 Animated.loop 與 Animated.sequence 。寫法如下:
useEffect(() => {
    Animated.loop(
      Animated.sequence([
        Animated.timing(startValue, {
          toValue: endValue,
          duration: 1000,
          useNativeDriver: true,
        }),
      ]),
    ).start();
}, [startValue, endValue]);
Animated.delay(2000)
最後,透過 Animated.delay 可以延遲動畫,參數 1000 為一秒。
Animated.delay(1000)
運用上面學習到的知識點,我們其實就已經可以做出一個簡單的跑馬燈。在 <Animated.View> 外包一個框框,設 overflow:hidden ,再把本來文字的背景拿掉;稍微美化一下,一個雛形就出來了。
import React, {useState, useEffect} from 'react';
import {Animated, StyleSheet, Text, View} from 'react-native';

const Marquee = () => {
  const [startValue, setStartValue] = useState(new Animated.Value(-30));
  const [endValue, setEndValue] = useState(30);

  useEffect(() => {
    Animated.loop(
      Animated.sequence([
        Animated.timing(startValue, {
          toValue: endValue,
          duration: 3000,
          useNativeDriver: true,
        }),
      ]),
    ).start();
  }, [startValue, endValue]);

  return (
    <View style={styles.container}>
      <Animated.View style={{transform: [{translateY: startValue}]}}>
        <View style={styles.box}>
          <Text style={styles.text}>Loop</Text>
        </View>
      </Animated.View>
    </View>
  );
};

const styles = StyleSheet.create({
  container: {
    backgroundColor: '#121db76e',
    height: 30,
    margin: 20,
    paddingVertical: 1,
    borderRadius: 25,
    overflow: 'hidden',
  },
  box: {
    width: 100,
    padding: 5,
  },
  text: {
    color: '#000',
    textAlign: 'center',
  },
});

export default Marquee;

到此為止,我們已經能讓文字動起來,不過垂直跑馬燈讓文字這樣呼嘯而過似乎不太好。應該讓他跑到中間後,停一下,再繼續跑動。為了解決這個問題,讓我們把動畫拆成兩組:第一組為初始值 startValue 和中間值 midValue ,第二組為中間值和結束值 endValue 。而 midValue 因為也要擺在 Animated.timing 第一個參數,所以記得要使用 new Animated ,再在 Animated.sequence 設定需要的動畫即可。
const [startValue, setStartValue] = useState(new Animated.Value(-30));
const [midValue, setMidValue] = useState(new Animated.Value(0));
const [endValue, setEndValue] = useState(30);

useEffect(() => {
  Animated.loop(
    Animated.sequence([
      Animated.timing(startValue, {
        toValue: midValue,
        duration: 3000,
        useNativeDriver: true,
      }),
      Animated.delay(2000),
      Animated.timing(midValue, {
        toValue: endValue,
        duration: 3000,
        useNativeDriver: true,
      }),
      Animated.delay(2000),
    ]),
  ).start();
}, [startValue, midValue, endValue]);
接下來又遇到第三個問題。我們前面的資料只有一筆,叫 Loop 的文字。不過跑馬燈當然是好幾筆資料在那裡跑,不會只有一筆。又為增加元件重用性,跑馬燈的資料往往會從父元件傳入。
function HomeScreen() {
  return (
    <View>
      <Marquee
        data={[
          {id: 1, title: '測試用標題一'},
          {id: 2, title: '測試用標題二'},
          {id: 3, title: '測試用標題三'},
        ]}
      />
    </View>
  );
}
對此,我們可以在 Marquee.js 內另設一個 Content 物件,然後用 useEffect 搭配 setInterval ,每隔幾秒就更新一次 Content 的值,而 Content 的值必須依序從 props 來取。最後,在 return 裡移除 map ,只渲染 Content 內的內容。
const Marquee = ({data}) => {
  const [content, setContent] = useState({});
  useEffect(() => {
    let index = 0;
    const maxLength = data.length - 1;
    // 讓跑馬燈一開始就會先秀第一筆
    setContent(data[0]);
    setInterval(() => {
      index = index < maxLength ? index + 1 : 0;
      setContent(data[index]);
    }, 10000); // 此為整個動畫的時間長度(3000+2000+3000+2000 = 10000)
    return () => clearInterval();
  }, [data]);

為了讓跑馬燈一開始就會先印出第一筆,必須在 setInterval 外先 setContent(props.data[0]) 。假設我的跑馬燈只有三項資料,那他應該依序載入 props.data[0] 、 props.data[1] 、 props.data[2] 之後,再次回到 props.data[0] 。因此我們可以宣告一個 index ,當 index<2 時,讓他印下一筆的資料;當 index=2 時,他的下一筆應該要是 0 ,所以把 index 設為 0 。
不過,不一定每次跑馬燈都固定只跑三筆資料,應該視傳進來幾筆資料而定。所以為了增加元件重用性,可以接著把 index<2 改成 index<maxLength ,而 maxLength 則設為 props.data.length-1 。
最後, setInterval 的秒數是用前面 animated 裡所有的秒數加總,在我們的例子裡是 3000+2000+3000+2000 = 10000 。這個秒數不能多不能少,否則動畫會跑到一半被咖掉,或是跑完後因為秒數還沒到而再閃跳一次資料。
