在上一節中,我們已經認識 React Native Firebase 的 API ,也完成基本前置作業。在這節中我們會繼續用上一節的 RemoteNotification 串接 Notifee ,讓訊息能實際被傳送到模擬器和實體手機裡。
先回顧一下目前的半成品:
import React, {useEffect} from 'react';
import {View , Text} from 'react-native';
import messaging from '@react-native-firebase/messaging';
import AsyncStorage from '@react-native-async-storage/async-storage';

function RemoteNotification() {
  useEffect(() => {
    // iOS permission
    async function requestPermission() {
      const authStatus = await messaging().requestPermission();
      const enabled =
        authStatus === messaging.AuthorizationStatus.AUTHORIZED ||
        authStatus === messaging.AuthorizationStatus.PROVISIONAL;
      if (enabled) {
        getFcmToken();
      }
    }
    requestPermission();
  }, []);
  useEffect(() => {
    const unsubscribe = messaging().onMessage(async remoteMessage => {
      const notification = remoteMessage.notification;
    });
    return unsubscribe;
  }, []);
  useEffect(() => {
    messaging().onNotificationOpenedApp(remoteMessage => {
      // do something
    });
    messaging()
      .getInitialNotification()
      .then(remoteMessage => {
        // 只有點擊推播開啟 app 時會 return 物件,否則 return null
        if (remoteMessage) {
          // do something
        }
      });
  }, []);

  async function getFcmToken() {
    let checkToken = await AsyncStorage.getItem('fcmToken');
    if (!checkToken) {
      try {
        const fcmToken = await messaging().getToken();
        if (!!fcmToken) {
          await AsyncStorage.setItem('fcmToken', fcmToken);
        }
      } catch (error) {
        console.log('error in fcmtoken', error);
      }
    }
  }

  return (
    <View>
      <Text>遠端推播</Text>
    </View>
  );
}

export default RemoteNotification;
要用 Notifee 將收到的訊息顯示出來,就須先建立 channel ,並用 displayNotification 顯示。
async function displayRemoteNotification() {
  const channelId = await notifee.createChannel({
    id: 'remoteNotice',
    name: 'remoteNotice channel',
  });
  await notifee.displayNotification({
    title: 'remote title',
    body: 'remote body',
    android: {
      channelId,
      pressAction: {
        id: 'remoteNotice',
      },
    },
  });
}
不過標題和內文應該從寫死文字,改成以 React Native Firebase 取得。在 onMessage 的函式中,傳入 remoteMessage 下的 notification :
useEffect(() => {
  const unsubscribe = messaging().onMessage(async remoteMessage => {
    const notification = remoteMessage.notification;
    displayRemoteNotification(notification);
  });
  return unsubscribe;
}, []);
async function displayRemoteNotification(notification) {
  … 省略
  await notifee.displayNotification({
    title: notification.title,
    body: notification.body,
    … 省略
  });
}
打開前兩節已建立好的 Firebase 專案,選擇互動交流 / Messaging / 建立第一個廣告活動: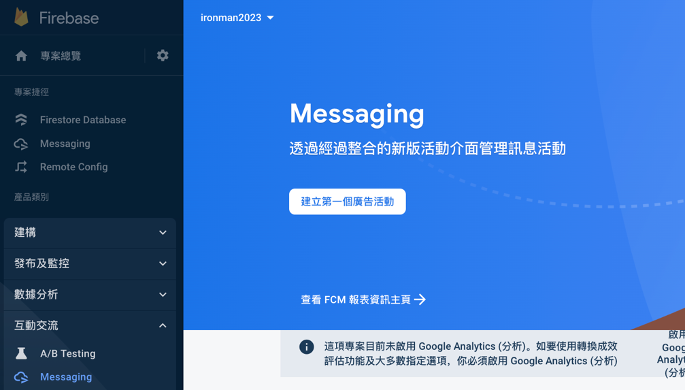
填寫推播標題和內文,圖片可以隨需求加上。 Firebase 提供開發者測試功能,可以按下右側的傳送測試訊息來檢查程式碼是否成功串接。不過遠端推播只有 Android 可以使用模擬器測試, iOS 必須透過實體手機安裝 App 。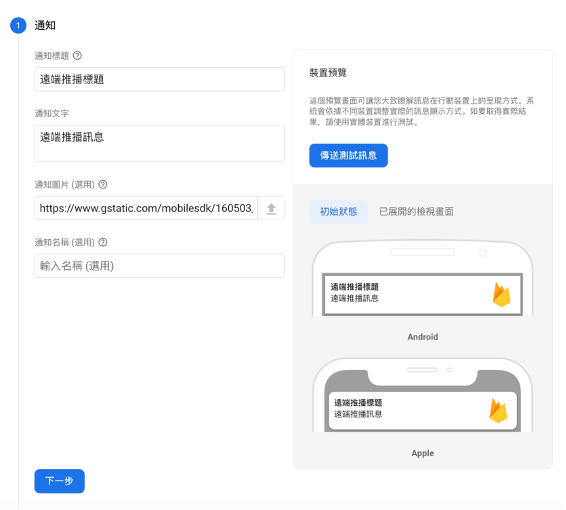
第一次點擊進行測試時會需要新增 FCM Token 。這串 Token 就是在上一節中,用 getToken 取得的資料。用 console.log() 取得 Token 後,貼上並點選測試。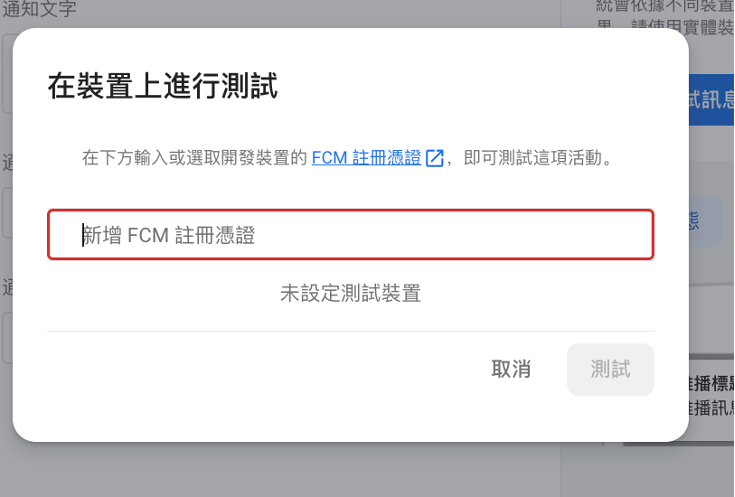
async function getFcmToken() {
  let checkToken = await AsyncStorage.getItem('fcmToken');
  // 已存到本機的話可以在這裡取得
  console.log(checkToken);
  if (!checkToken) {
    try {
      const fcmToken = await messaging().getToken();
      // 還沒的話可以在這裡取得
      console.log(fcmToken);
      … 省略
    }
  }
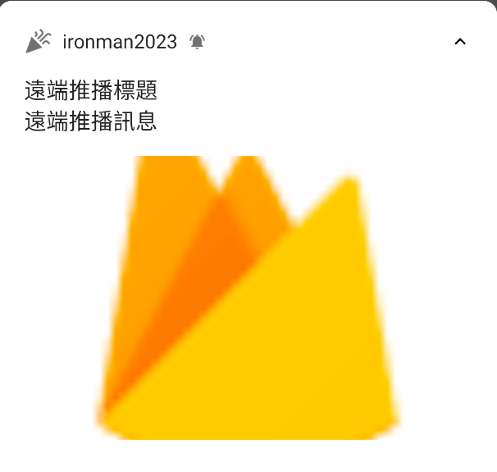
按下測試後就會收到訊息了: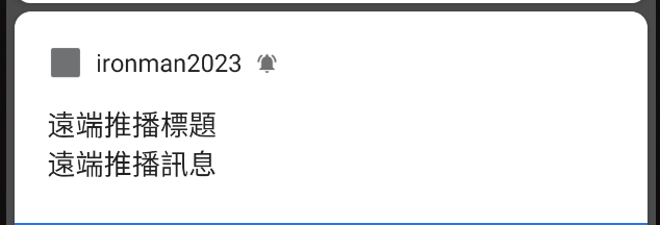
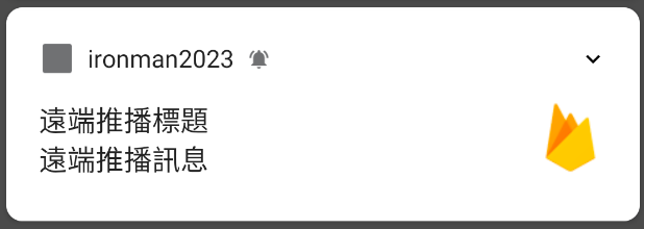
若要讓後台設定的圖片正確顯示出來,則需要再改一下程式碼。
import notifee, {AndroidStyle} from '@notifee/react-native';
async function displayRemoteNotification(notification) {
  … 省略
  await notifee.displayNotification({
    … 省略
    android: {
      … 省略
      largeIcon:
        (notification.android && notification.android.imageUrl) ||
        'ic_small_icon',
      style: {
        type: AndroidStyle.BIGPICTURE,
        picture:
          (notification.android && notification.android.imageUrl) || {},
      },
    },
  });
}
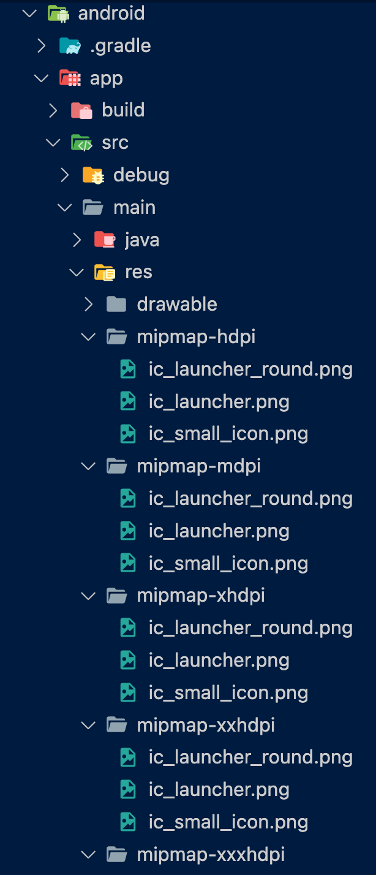
若要改動的是左上角小方塊,則用 smallIcon 來更改。首先到這個網站生成預設 icon ,若後台沒有設定 icon 時則顯示預設此圖片。
下載後會在 res 資料夾裡找到五個資料夾,裡頭各有一個檔案,代表不同尺寸大小。打開 android / app / src / main / res ,分別貼到對應資料夾中。
接著改寫:
import notifee, {AndroidStyle} from '@notifee/react-native';
async function displayRemoteNotification(notification) {
  … 省略
  await notifee.displayNotification({
    … 省略
    android: {
      … 省略
      smallIcon: 'ic_small_icon',
    },
  });
}
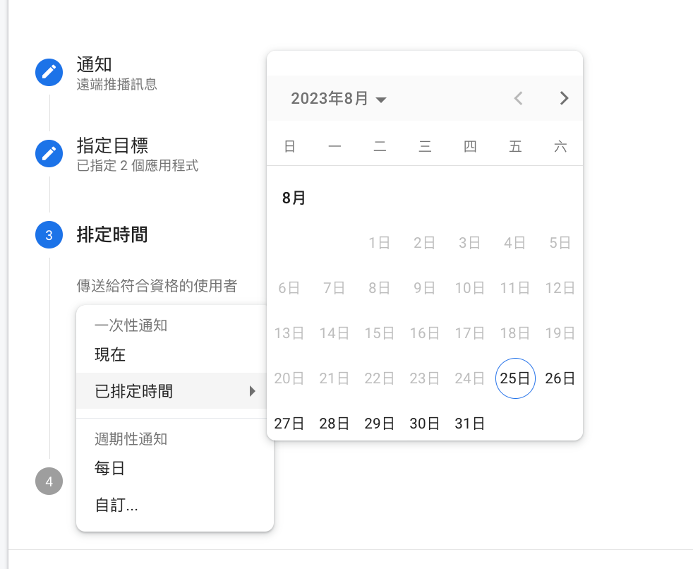
測試完畢後,到下一步選擇傳送對象,接著指定發送時間。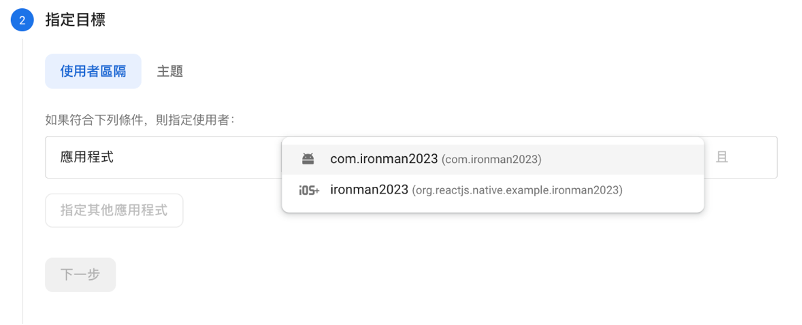
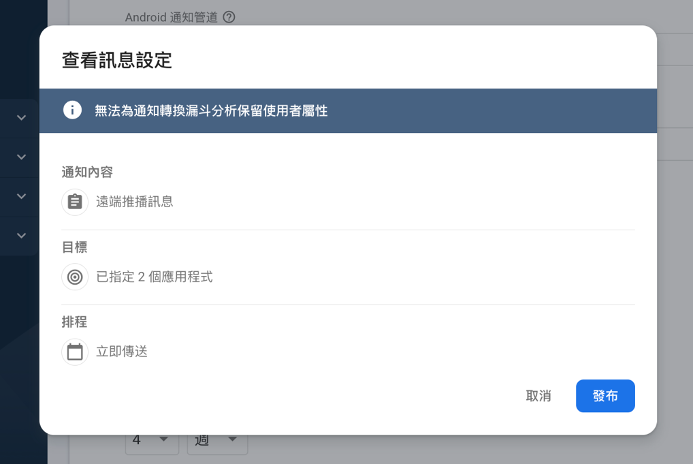
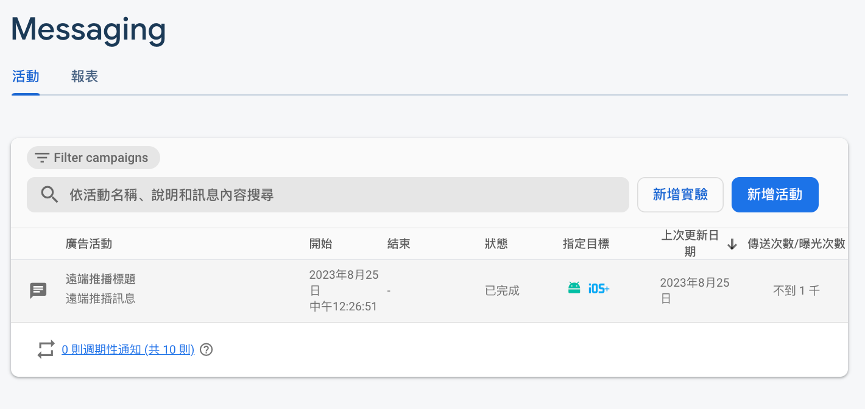
最後能在 Messaging 控制台看到推播發送情況。