TabLayout是一種選單,裡面會放入TabItem,使用TabLayout的好處是預設狀態下的樣式就已經十分好看了,而我還可以再去做更多的客製化設計,像是TabLayout本身會自帶一條底線在選到的選項下面,而我也可以針對這個底線去做更改,看是要更改顏色、大小,或是讓它消失也可以,除此之外也可以結合Drawble資源去改變TabItem的樣式。

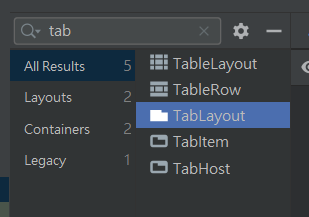
這次的TabLayout要結合ViewPager2做出更加美觀的介面,這邊我們就先找到TabLayout
接著就可以把它拉到畫面上,TabLayout預設會有三個TabItem,如果有需要增加TabItem的數量,也可以搜尋TabItem再把它拉進TabLayout就可以新增更多選項了。
下面附上我這次的布局
<?xml version="1.0" encoding="utf-8"?>
<LinearLayout xmlns:android="http://schemas.android.com/apk/res/android"
    xmlns:app="http://schemas.android.com/apk/res-auto"
    xmlns:tools="http://schemas.android.com/tools"
    android:layout_width="match_parent"
    android:layout_height="match_parent"
    tools:context=".MainActivity"
    android:orientation="vertical">

    <com.google.android.material.tabs.TabLayout
        android:id="@+id/tabLayout"
        android:layout_width="match_parent"
        android:layout_height="0dp"
        android:layout_weight="0.1">

        <com.google.android.material.tabs.TabItem
            android:layout_width="wrap_content"
            android:layout_height="wrap_content"
            android:text="Monday" />

        <com.google.android.material.tabs.TabItem
            android:layout_width="wrap_content"
            android:layout_height="wrap_content"
            android:text="Tuesday" />

        <com.google.android.material.tabs.TabItem
            android:layout_width="wrap_content"
            android:layout_height="wrap_content"
            android:text="Wednesday" />

    </com.google.android.material.tabs.TabLayout>

    <androidx.viewpager2.widget.ViewPager2
        android:id="@+id/viewPager"
        android:layout_width="match_parent"
        android:layout_height="0dp"
        android:layout_weight="0.9" />

</LinearLayout>
這邊介紹一些可以使用在TabLayout的屬性:
tabGravity,這個是在設定TabItem再TabLayout要怎麼顯示,有center、fill、start這三種參數可以使用tabIndicatorColor,這個可以設定底線的顏色。tabIndicatorFullWidth,這個可以設定底線是否要擴展到整個TabItem,就是決定底下的線是否要全滿,true的話就會填滿。tabMaxWidth,這個是在設定TabItem的最大寬度,如果是直立看通常是不會用到,但如果是橫看就可能會用到了,參數通常會設定0dp(填滿)。tabMode,這個會用在當你的TabItem有很多要設計的時候,fixed會設定將所有TabItem都塞進TabLayout,預設狀態下也是使用fixed,另外一個scrollable,這個會將TabLayout設定成可滑動的,因此多出來的TabItem就可以用滑動的方式找到。tabSelectedTextColor,這個會設定TabItem被選取時文字的顏色。tabTextColor,這個會設定TabItem的文字顏色,跟上面那個相比就相當於預設狀態下的顏色。tabBackground,這個就是將drawble資源引入的方法,使用方法跟前面文章講過的一樣,這裡我就不贅述了。tabIndicatorHeight,這個可以設定底線的高度,當底線設定到0dp時,底線就會消失。import androidx.annotation.NonNull;
import androidx.appcompat.app.AppCompatActivity;
import androidx.fragment.app.Fragment;
import androidx.fragment.app.FragmentManager;
import androidx.viewpager2.widget.ViewPager2;
import android.annotation.SuppressLint;
import android.os.Bundle;
import android.widget.Button;
import com.google.android.material.tabs.TabLayout;
import com.google.android.material.tabs.TabLayoutMediator;
public class MainActivity extends AppCompatActivity {
private ViewPager2 viewPager;
private TabLayout tabLayout;
private String[] title= {"Fragment1","Fragment2","Fragment3"};
@Override
protected void onCreate(Bundle savedInstanceState) {
super.onCreate(savedInstanceState);
setContentView(R.layout.activity_main);
viewPager = findViewById(R.id.viewPager);
tabLayout = findViewById(R.id.tabLayout);
viewPager.setAdapter(new ViewPagerAdapter(this));
new TabLayoutMediator(tabLayout, viewPager, true, new TabLayoutMediator.TabConfigurationStrategy() {
@Override
public void onConfigureTab(@NonNull TabLayout.Tab tab, int position) {
viewPager.setCurrentItem(tab.getPosition());
tab.setText(title[position]);
}
}).attach();
}
}
TabLayout跟ViewPager2結合要使用到TabLayoutMediator總共有三種方式可以使用
這邊我選擇使用第二種,先填入綁定好的TabLayout、ViewPager2;再來這個是問你是否要自動更新,就填入true就好;最後再new 出它要求的東西new TabLayoutMediator.TabConfigurationStrategy(),接著就會幫你生成所需的方法了
接著就開始設定,首先就是設定選到TabItem後會跳到哪個頁面
viewPager.setCurrentItem(tab.getPosition());
再來要設定TabItem顯示的文字,這邊因為TabLayout在啟動後會吃掉原本設定的文字,所以要重新將文字設定給TabItem,在上面我有建立了一個String的List,這裡就可以直接拿來使用
tab.setText(title[position]);
最後要記得attach(),才可以正常的啟用。
