App 時常會透過推播訊息,來告訴用戶資訊、提醒時間等。Notifee 是一款能透過簡單 API ,達成多元功能的推播函式庫。除了能設定推播何時發送,也能管理訊息呈現的樣式、允許點擊後觸發的行為,或能在推播訊息中透過輸入欄來互動等。他支援 v60.0 以上的 React Native 、 API 20 以上的 Android 版本,和 10 以上的 iOS 版本,並需 13 以上的 Xcode 來開發 iOS 。在本節中,將專注在使用 Notifee 實踐本地端推播的功能。
開始使用前,先透過 npm 安裝:
npm install --save @notifee/react-native
並移動到 ios 更新 Pods 。若正在跑模擬器,做完上述動作後,要再關掉重跑一次:
cd ios/ && pod install –repo-update
創建一個 Screen 元件,並載入 notifee :
import notifee from '@notifee/react-native';

function Screen() {
  return (
    <View>
      <Button
        title="Display Notification"
        onPress={() => onDisplayNotification()}
      />
    </View>
  );
}
我們的規劃是在按下按鈕後,會彈出本地端的推播通知。為此, iOS 需要用requestPermission 取得允許, Android 則需要先用 createChannel 來創建一個 channel 。
function Screen() {
  async function onDisplayNotification() {
    await notifee.requestPermission();

    const channelId = await notifee.createChannel({
      id: 'default',
      name: 'Default Channel',
    });
}
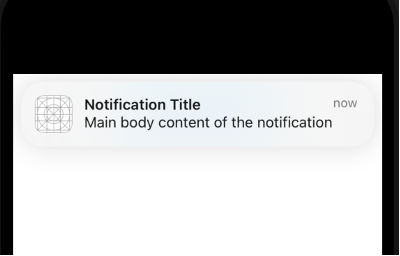
接著,則用 displayNotification 來設定要傳送的推播標題、訊息、 icon 圖示。也可以使用 pressAction 讓用戶點擊通知後,能開啟 App 。
async function onDisplayNotification() {
  … 省略
  await notifee.displayNotification({
    id: 'default',
    title: 'Notification Title',
    body: 'Main body content of the notification',
    android: {
      channelId,
      // smallIcon: 'name-of-a-small-icon', // optional, defaults to 'ic_launcher'.
      pressAction: {
        id: 'default',
      },
    },
  });
}
這樣,一個基本的本地端推播就完成了。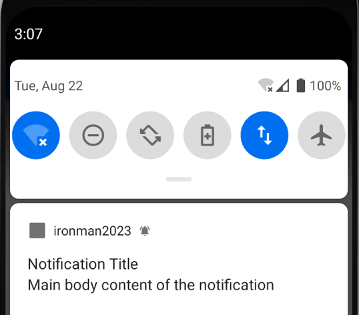
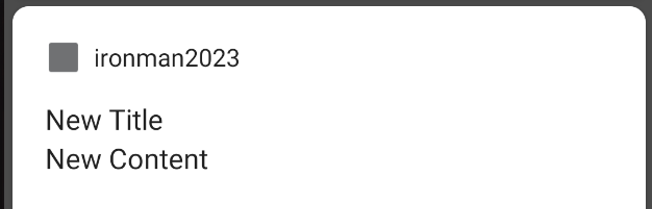
如果要更新推播,一樣使用 displayNotification 來設定,只要提供一樣的 id ,他就會更新推播的內容。
async function onDisplayNotification() {
  … 省略
  await notifee.displayNotification({
    id: 'default',
    … 省略
  });
  await notifee.displayNotification({
    id: 'default',
    title: 'New Title',
    body: 'New Content',
    android: {
      channelId,
    },
  });
}
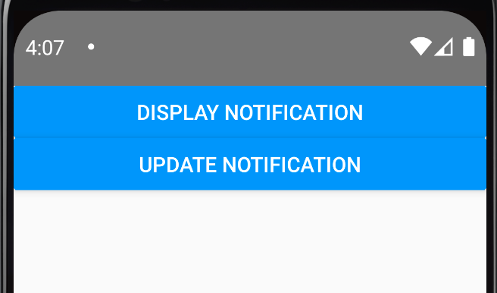
若要拆成兩個不同的函式,例如點擊一個按鈕時顯示推播、另一個則更新推播通知,則仍必須確保 channelId 已經建立。
async function createChannel() {
  await notifee.requestPermission();
  return await notifee.createChannel({
    id: 'default',
    name: 'Default Channel',
  });
}
async function updateNotification() {
  const channelId = await createChannel();

  await notifee.displayNotification({
    id: 'default',
    title: 'New Title',
    body: 'New Content',
    android: {
      channelId,
    },
  });
}

return (
  <View>
    <Button
      title="Display Notification"
      onPress={() => onDisplayNotification()}
    />
    <Button
      title="Update Notification"
      onPress={() => updateNotification()}
    />
最後,透過 cancelNotification 並傳入 id ,我們可以取消特定推播。
async function cancelNotification(notificationId) {
  await notifee.cancelNotification(notificationId);
}
return (
  <View>
    <Button
      title="Cancel Notification"
      onPress={() => cancelNotification('default')}
    />