繼續我們昨天的 GPIO 輸入輸出控制,我們用 Thonny 輸入下面程式:
from machine import Pin
P0 = Pin(0, Pin.IN)
P1 = Pin(1, Pin.OUT)

while True:
    P1.value(P0.value())
然後存檔,存在本地電腦或者開發板上都可以,接着按一下執行按鈕,如下圖: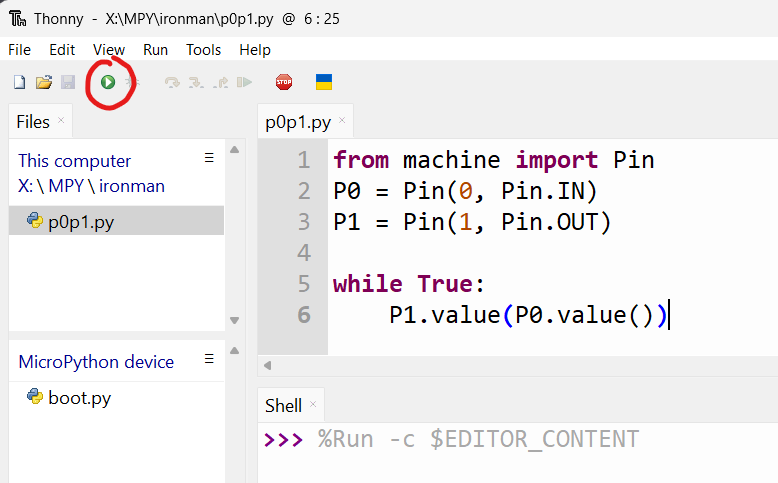
這時我們按下 BOOT 按鍵 ,LED 燈熄滅,放開 BOOT 按鍵, LED 燈亮起。
按下 BOOT 按鍵:(LED 滅)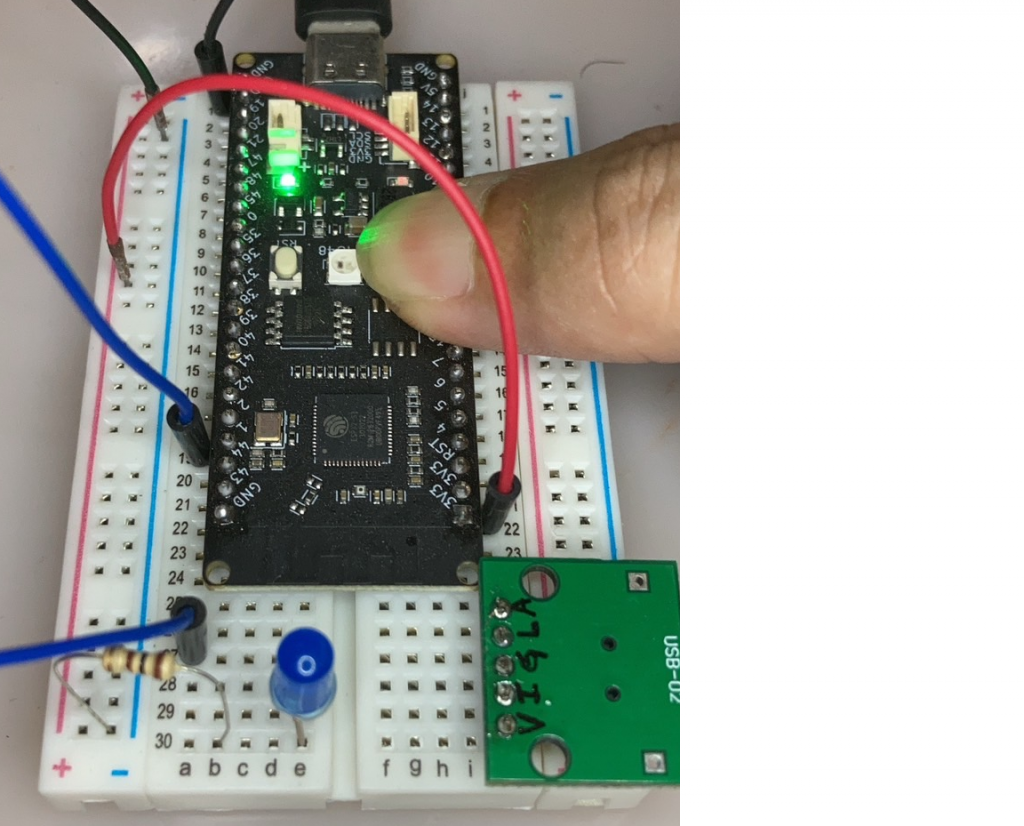
放開 BOOT 按鍵:(LED 亮)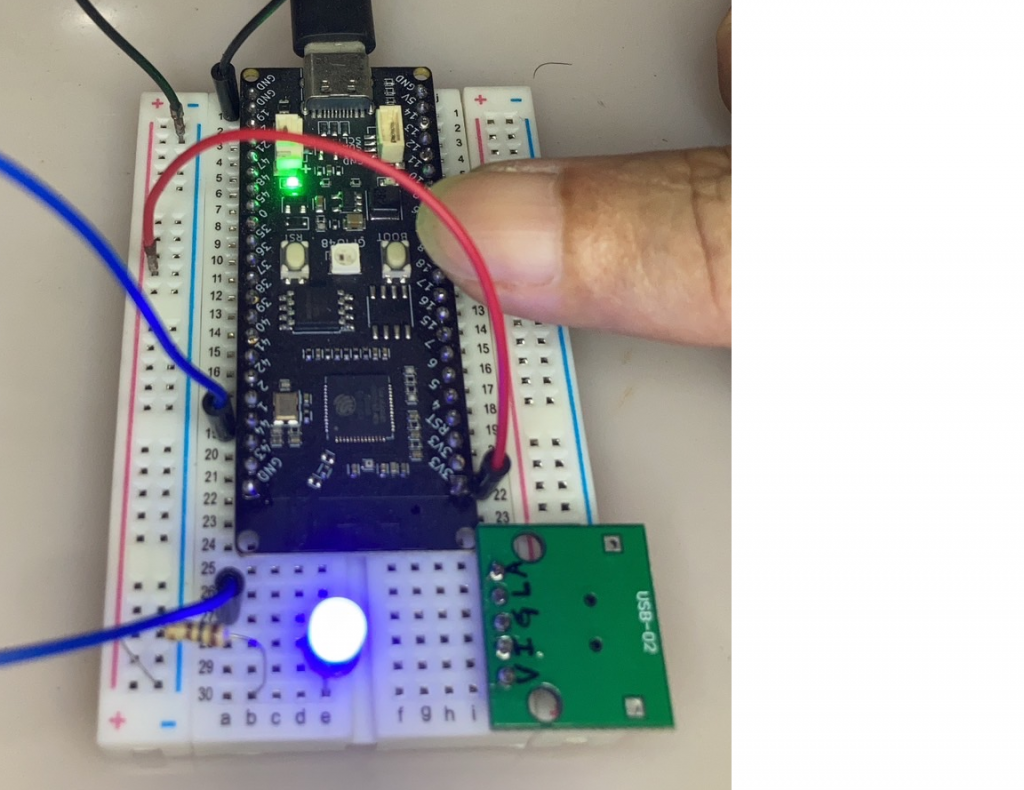
若是需要中斷執行,可以在 shell 終端視窗下 按 CTRL-C,如下: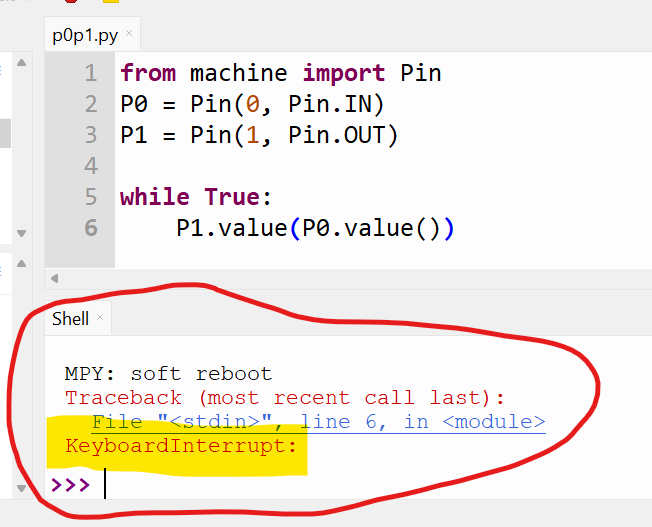
程式停止後,不管我們怎麼按 BOOT, LED 燈都不會變化了。
第八天接觸到的 “time module”,我們這裡再用起來:
import time
from machine import Pin
P1 = Pin(1, Pin.OUT)

while True:
    P1.value(not P1.value())
    time.sleep(1)
這個程式 LED 亮 1 秒,滅 1 秒,如此無限循環下去,您可以改成 time.sleep(0.5) 試試看,是不是閃爍變快了呢?
time.sleep(0.5) 也可以用 time.sleep_ms(500)來取代, 1 秒鐘等於 1000 ms
試試看,當數值低到所少,您的眼睛就看不到閃爍。
而且雖然看不到閃爍,亮度好像變暗了呢!這些現象,我們以後會解釋。