昨天我們在開發板上實驗,使用 MQTT 來收與發訊息,今天我們將這樣的機制整合到我們 DIY 的變頻風扇。
我想,最方便控制變頻風扇的方式,除了紅外線遙控器外,當屬幾乎不離手的手機了。其實設計一個具有 MQTT 收發功能的 app ,應該也不是太難!而且還有圖形化的開發環境 App inventor 可以用,但這些都超出我們今天要探討的範圍。而最簡單的方式,應該是找一個現成的 MQTT client 的 app 來使用。
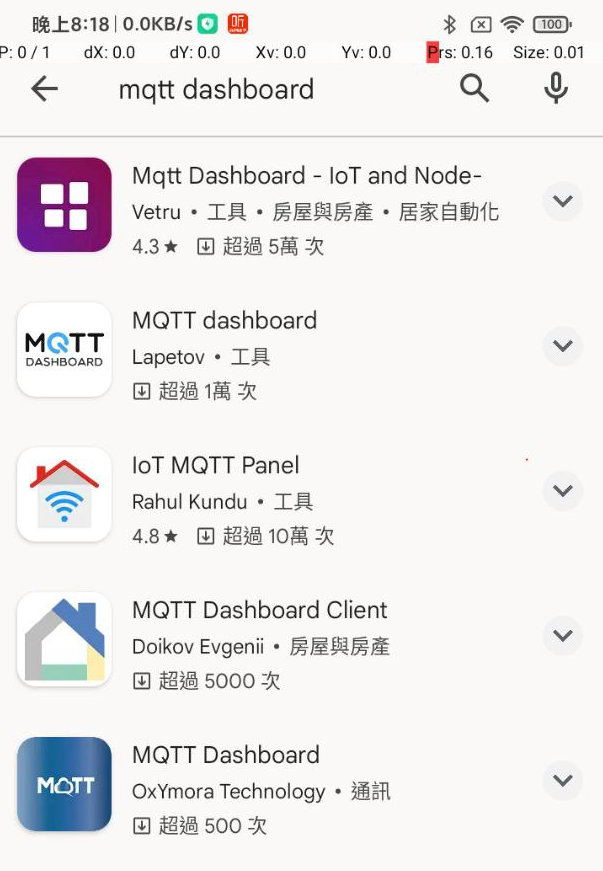
我們以安卓手機爲例,在 google play 中查找 "MQTT dashboard" (MQTT 儀表板):

就選 google 挑的一個來安裝吧!
在這裡可以看到這個應用軟體完整的使用說明:https://vetru-apps.github.io/mqtt-dashboard-documentation/
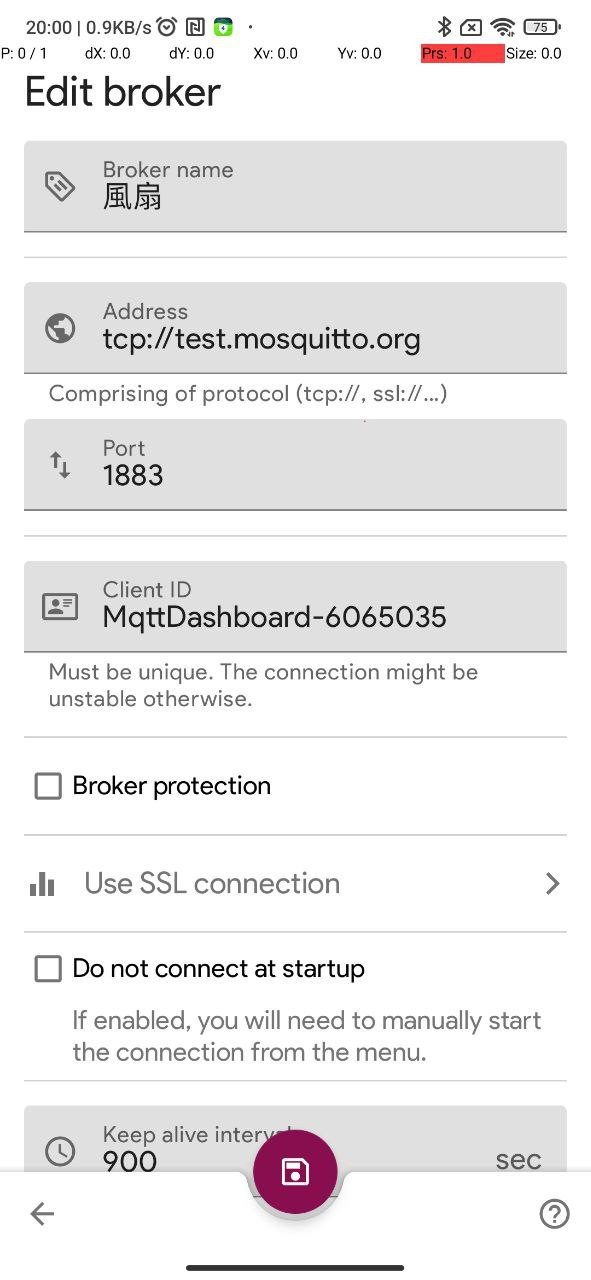
執行 app 之後,我們可以按畫面最下面中間的 “+” 圖示,來增加一個 MQTT 伺服器(Broker):
Broker name: 最後顯示在軟體上面的名稱,可以是中文,注意:免費版本只能連上一個 Broker,可以加入其它的 Broker 服務器,但是必須升級爲 pro 版本才能啓用。
Address: 就填入我們測試用的 MQTT broker 地址, “test.mosquitto.org" 即可
其它欄位就使用默認值即可。

底部中間有一個磁碟片圖示,按下即可儲存設定
進入到 ”風扇“ 這個 Broker 裡再做設定動作,點選底部的 ”+“ 進入設定:
我們風扇在 MQTT 訂閱的主題是”Fan/Control",因此我們在 publish 中發送的主題也需要是同一個。
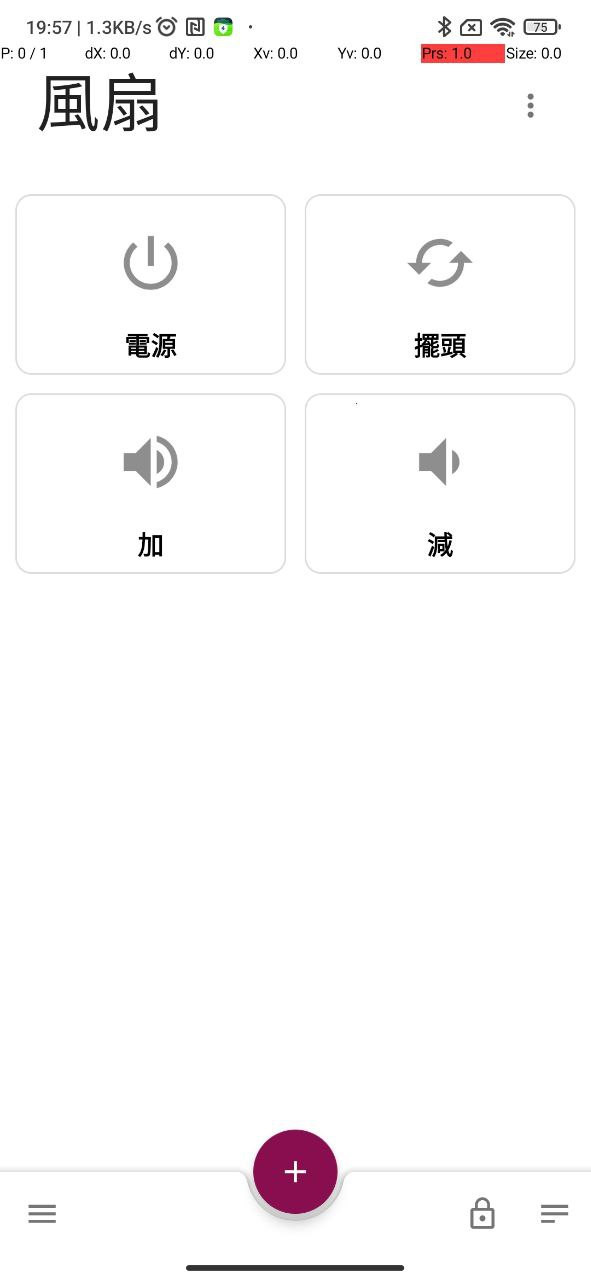
由於我們要產生四個按鈕:
電源:電源開關,送出 "power" 訊息
擺頭:擺頭開關,送出 “swing” 訊息
加: 風扇風速增加一檔,送出 “up” 訊息
減: 風扇風速降低一檔,送出 “down” 訊息

這樣在手機上操作,還真像是定製的應用軟體 !
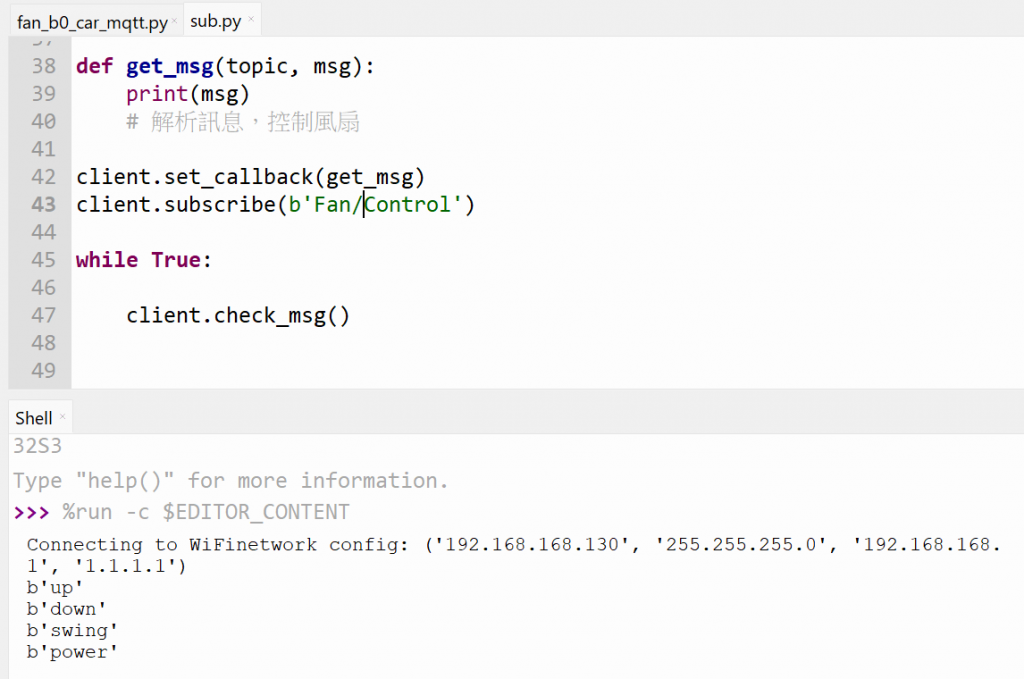
我們可以用昨天在板子上訂閱 MQTT 的例子來試試,看看手機按下的按鈕發送訊息,板子能不能收到。若一切正常,接下來可以修改第27天所展示的變頻電風扇主控制程式。
可以看出,驗證 OK,開發板可以正確收到手機發送出來的訊息
我們將這些訊息轉化成控制指令,修改之前的控制程式,整合之後的程式碼如下:
from machine import Timer, Pin, SoftI2C
import FourDigitDisplay as FDD
import time
from umqtt.robust import MQTTClient
import ubinascii
import machine
from micropython import const
from ir_rx.nec import NEC_8  # NEC remote, 8 bit addresses

IR = Pin(2, Pin.IN)
buzz = Pin(7, Pin.OUT, value=0)
speed_ctl = Pin(6, Pin.OUT)
swing = Pin(3, Pin.OUT, value=0)

# IR code
ADDR = const(0)
PWR_ON = const(0x43)
SPD_UP = const(0x47)
SPD_DN = const(0x45)
SWING = const(0x46)
TMR_UP = const(0x15)
TMR_DN = const(0x7)

i2c = SoftI2C(scl=Pin(5), sda=Pin(4), freq=10000)
fdd = FDD.FourDigitDisplay(i2c)
#i2c.scan()
fdd.clear()

ir_code_old = 0
ir_code_new = 0

speed = 0 # Hz
fan_on = False
swing_on = False
t0 = Timer(0)

def toogle_speed(t):
    speed_ctl.value(not speed_ctl.value())

def change_speed(speed):
    global t0
    global fdd
    if (speed):
        t0.init(freq=speed*2*50, mode=Timer.PERIODIC, callback=toogle_speed)
    else:
        t0.deinit()
    fdd.showbit(int(speed),3)

def beep():
    buzz.value(1)
    time.sleep_ms(100)
    buzz.value(0)

def ir_cb(data, addr, ctrl):
    global ir_code_new
    global ir_code_old
    global ADDR
    if data < 0:  # NEC protocol sends repeat codes.
        print('Repeat code.')
    else:
        print('Data {:02x} Addr {:04x}'.format(data, addr))
        if (addr == ADDR):
            ir_code_new = data
            ir_code_old = 0

ir = NEC_8(IR, ir_cb)


client = MQTTClient(
    #client_id="client_test_fan_sub",
    client_id=ubinascii.hexlify(machine.unique_id()),
    keepalive=60,
    server="test.mosquitto.org",
    ssl=False)

client.connect(False) # robust 模組,這裡填 False

def get_msg(topic, msg):
    global ir_code_new
    global ir_code_old
    print("MQTT: ",msg)
    # 解析訊息,控制風扇
    # 以下借用 紅外線的控制碼來控制風扇,所以讓主流程都不需要更改!
    m = msg.decode("utf-8")
    if (m == 'power'):
        ir_code_new = PWR_ON
        ir_code_old = 0
    elif (m == 'swing'):
        ir_code_new = SWING
        ir_code_old = 0
    elif (m == 'up'):
        ir_code_new = SPD_UP
        ir_code_old = 0
    elif (m == 'down'):
        ir_code_new = SPD_DN
        ir_code_old = 0

client.set_callback(get_msg)
client.subscribe(b'Fan/Control')


# power on beep()
beep()
beep()
beep()
beep()

while True:
    time.sleep_ms(100)
    client.check_msg()
    if (ir_code_new == ir_code_old):
        continue
    print('Cheking...')
    beep()
    ir_code_old = ir_code_new
    if (ir_code_new == PWR_ON):
        if (fan_on == True):
            speed = 0
            fan_on = False
            swing_on = False
            swing.value(swing_on)
            change_speed(speed)
            fdd.clear()
            beep()
            time.sleep_ms(200)
            beep()
            print('Off')
        else:
            fan_on = True
            speed = 1
            change_speed(speed)
            print('On')
            continue

    if (fan_on == True):
        if (ir_code_new == SPD_UP): # increase speed
            speed += 1
            if (speed > 8): speed = 8
            change_speed(speed)
        elif (ir_code_new == SPD_DN): #decrease speed
            speed -= 1
            if (speed < 0): speed = 0
            change_speed(speed)
        elif (ir_code_new == SWING): #swing
            swing_on = not swing_on
            swing.value(swing_on)

    print('Done...')
