嗨我是k66,今天是系列文Day22,截至目前為止我們已完成:Logo、時間顯示、按ESC關機、kernel。接下來我們來實作按B進入Boot Menu。我們把「按B進入Boot Menu」拆成幾項:「按B」、「進入Boot Menu」及「選擇Kernel」。
放碼上來!程式碼連結
#include <Uefi.h>
#include <Library/UefiLib.h>
#include <Library/UefiBootServicesTableLib.h>
#include <Library/MemoryAllocationLib.h>
static void BootMenu();
EFI_STATUS EFIAPI UefiMain(EFI_HANDLE ImageHandle, EFI_SYSTEM_TABLE *SystemTable) {
// Initial
EFI_STATUS Status = EFI_SUCCESS;
ImageHandle=NULL;
SystemTable=NULL;
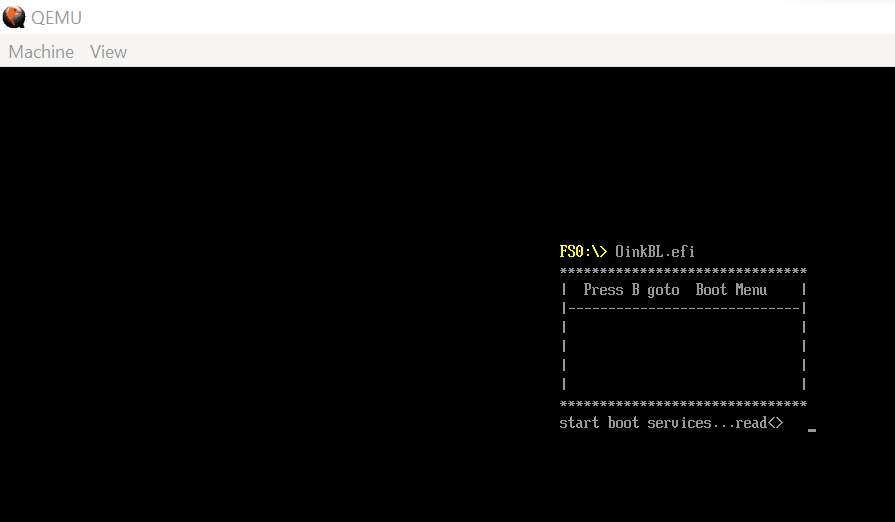
Print(L"*******************************\n");
Print(L"| Press B goto Boot Menu |\n");
Print(L"|-----------------------------|\n");
Print(L"| |\n");
Print(L"| |\n");
Print(L"| |\n");
Print(L"| |\n");
Print(L"*******************************\n");
// 取key鍵值
// UINTN Index;
EFI_INPUT_KEY key;
Print(L"start boot services...");
// SystemTable->BootServices->WaitForEvent(1,&(SystemTable->ConIn->WaitForKey),&Index);
// SystemTable->ConIn->ReadKeyStroke(SystemTable->ConIn,&key);
Status = gST->ConIn->ReadKeyStroke(gST->ConIn, &key);
Print(L"read<> %c ", key.UnicodeChar);
// 若輸入B,則進入Boot Menu
while(1)
{
Status = gST->ConIn->ReadKeyStroke(gST->ConIn, &key);
if(key.UnicodeChar == L'B')
{
BootMenu();
break;
}
}
return Status;
}
static void BootMenu()
{
    // 設定字為紅色,並且清除畫面
    gST -> ConOut -> SetAttribute(gST->ConOut,0x4);//0x01:Blue; 0x02:Green; 0x04:Red
    gST -> ConOut -> ClearScreen(gST->ConOut); // 清除畫面
    Print(L"*******************************\n");
    Print(L"|          Boot Menu          |\n");
    Print(L"|-----------------------------|\n");
    Print(L"|                             |\n");
    Print(L"|                             |\n");
    Print(L"|                             |\n");
    Print(L"|                             |\n");
    Print(L"*******************************\n");

    // int (*KernelEntry)();
    // KernelEntry = (int (*)() )KernelEntryPoint;
    // Print(L"Jump to Kernel Entry Point");
    // int KN = KernelEntry();
    // Print(L"Kernel Entry Value = %d \n", KN);

}

本篇介紹按B進入Boot Menu,下篇介紹與前篇完成的kernel連結,我們明天見!