上一篇我們提到如何使用 IP Discovery 功能進行清點或檢索在 IP 網段上應答的網路連接設備,用來識別無法安裝代理程式的網路連接設備,透過不斷 TAG 的方式來分類已識別的合法裝置。
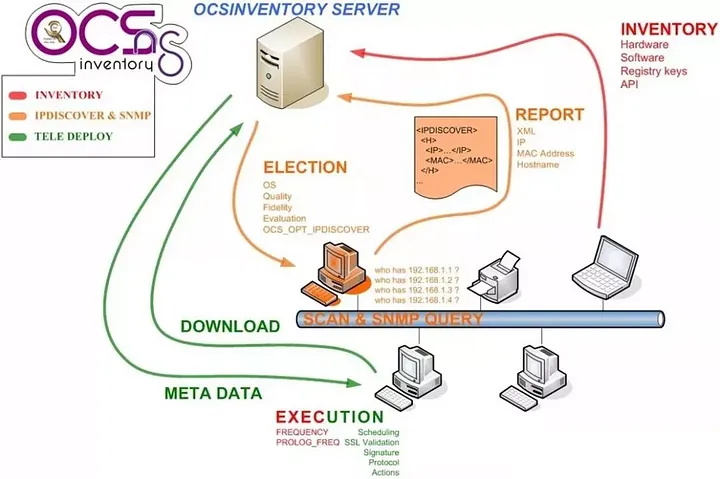
如此一來,我們只需要把注意力集中在 Non-inventoried 到底還有哪些是未經過辨識而連上企業網路的設備。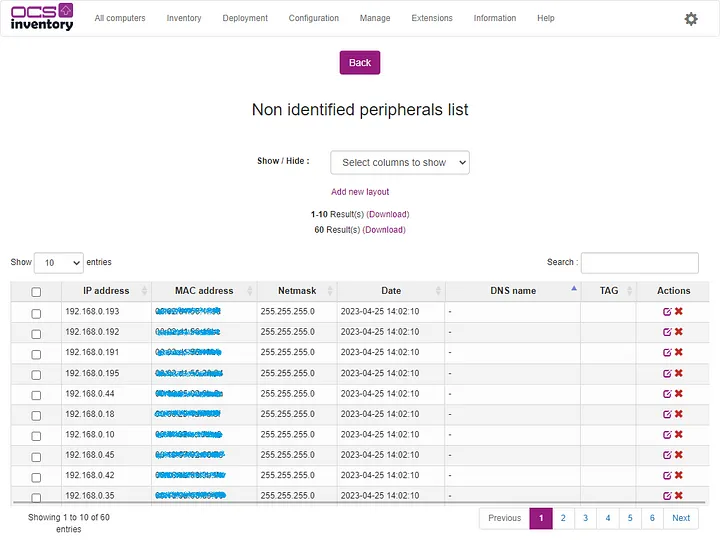
但是 IP Discovery 僅提供 IP Address、MAC Address 與 DNS Name 的訊息,管理人員很難透過以上資訊識別該裝置屬於哪種類型的設備。
因此 SNMP 掃描的主要目標就是增強 Ipdiscover 收集的資訊,使用 SNMP 掃描,我們將能夠獲得更多網絡設備的詳細資訊。
系統配置
到 Configuration 點選 General Configuration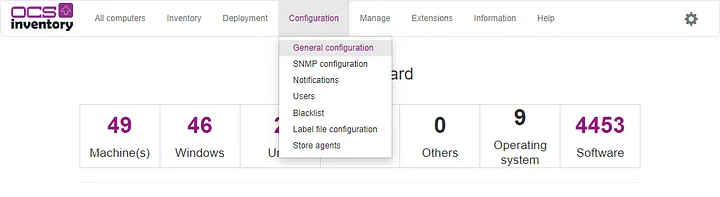
點選 SNMP 頁籤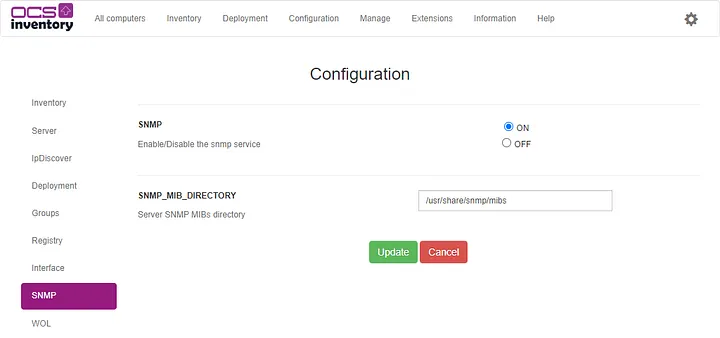
可配置選項
若沒有 /usr/share/snmp/mibs 路徑,可以透過下列指令安裝 SNMP 套件。
sudo apt-get install snmp
設定 SNMP 社群
要能夠掃描 SNMP 設備,您必須使用 SNMP 社群。SNMP 社群可以看作是允許掃描 SNMP 設備的認證訊息。
到 Manage 點選 Network Scan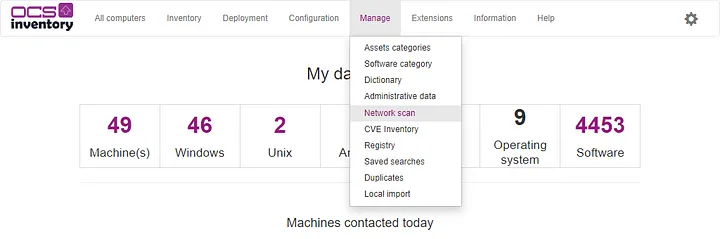
點選 Manage SNMP Communites 頁籤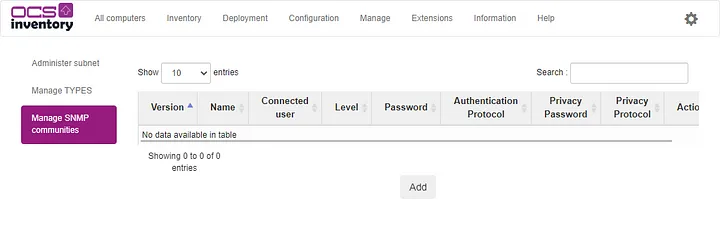
SNMPv2 配置參數:
對於許多 SNMP 設備,預設的 SNMP 為 public。
SNMPv3 配置參數:

若您有配置 SNMPv3,記得安裝以下套件。
# Required libraries on Unix Agent to use SNMPv3
sudo apt-get install libdigest-hmac-perl

# DES Privacy protocol
sudo apt-get install libcrypt-des-perl

# AES Privacy protocol
sudo apt-get install libcrypt-rijndael-perl
設定 SNMP 資料模型
SNMP 類型將用於識別特定設備並將此設備鏈接到資料模型,如果沒有數據模型配置,則 SNMP 掃描功能將無法使用。
到 Configuration 點選 SNMP Configuration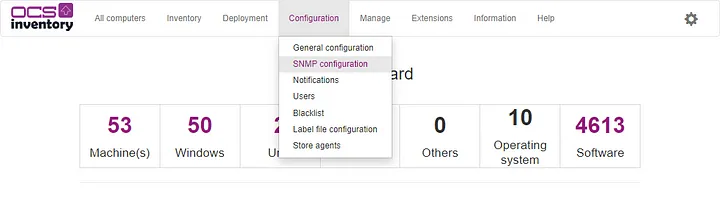
點選 Type Conditions 頁籤,預設已經有建立一組 Default 類型。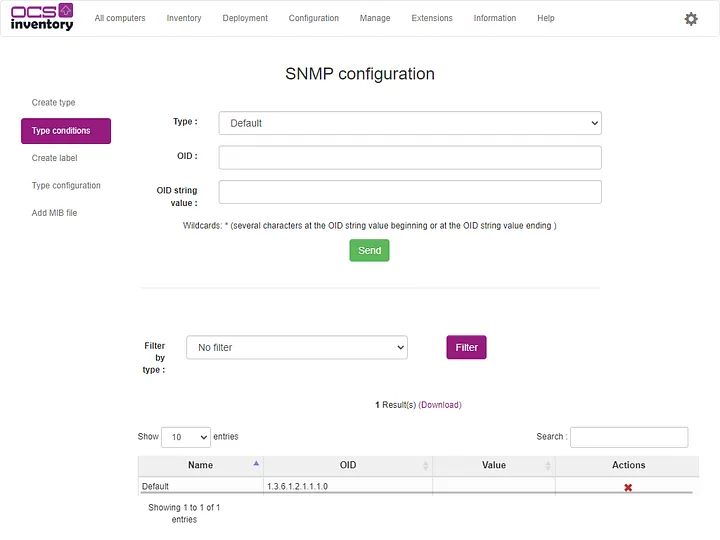
點選 Type Configuration 頁籤
當 OCS Inventory 代理將掃描網絡時,它將使用此類型配置來確定相應的數據模型以及掃描期間要使用的 OID。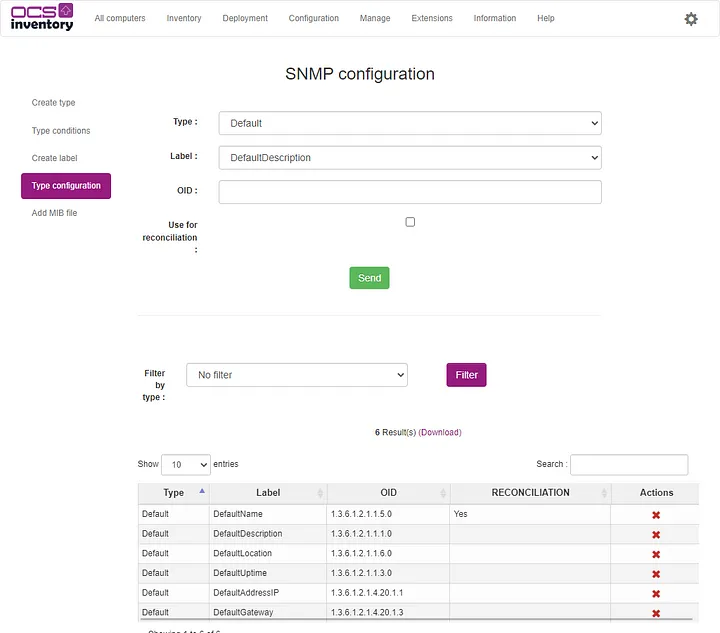
Default 類型已經有維護一些常見的 SNMP OID,對我們來說已經夠用了,若有需要請自行添加或刪除。
常見的 SNMP OID 可參考如下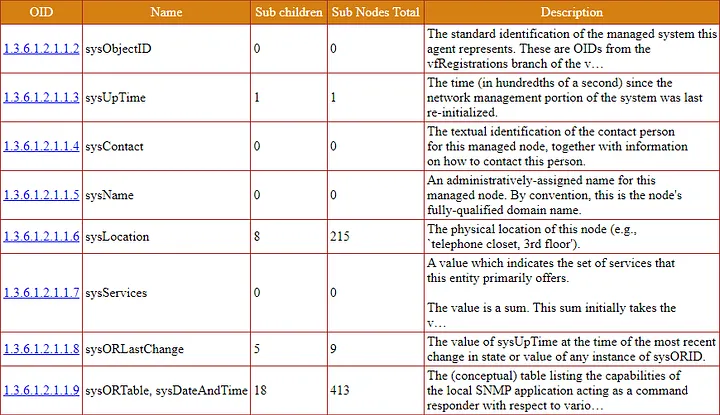
https://oidref.com/1.3.6.1.2.1.1.1
選擇能夠進行 SNMP 掃描的計算機
為了使代理程式能夠使用 SNMP 掃描其網絡,無需等待 Ipdiscover 自動選擇,我打算強制指定 IP Discovery 計算機。
挑選一台你覺得最靠譜的計算機,到 Configuration 點選 Edit。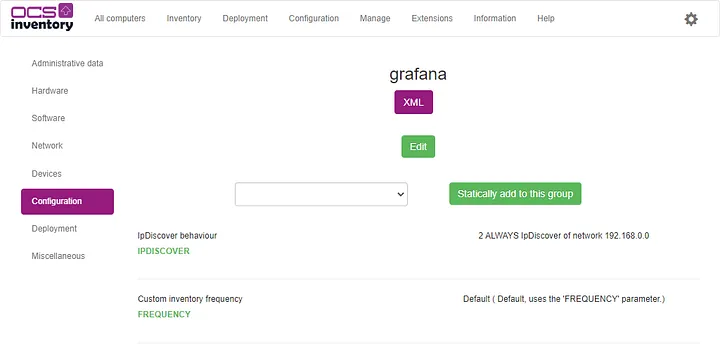
切換到 Network Scans 頁面
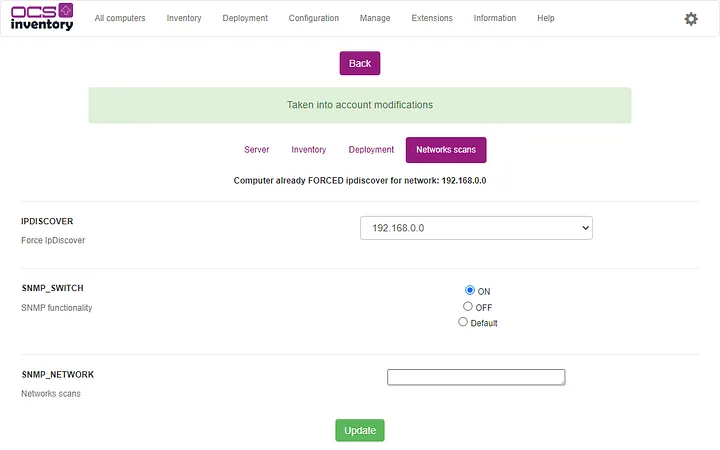
記得保存您的修改
配置 Unix 代理程式
請參考之前寫的文章,建議使用 Source 來安裝代理程式。
經筆者測試,使用 APT 安裝的代理程式會發生無法載入 modules.conf,進而無法使用 SNMP 掃描功能。
代理程式的組態設定如下
sudo cat /etc/ocsinventory/ocsinventory-agent.cfg
注意,必須使用 https 才能使用 SNMP 掃描功能。
debug=1
server=https://your_ocs_inventory_fqdn/ocsinventory
snmptimeout=3
basevardir=/var/lib/ocsinventory-agent
nosoftware=0
logfile=/var/log/ocsinventory-agent.log
snmpretry=2
ca=/etc/ocsinventory/cacert.pem
snmp=1
接下來我們手動執行代理程式,使其執行 SNMP 掃描。
sudo ocsinventory-agent
查看代理程式日誌
cat /var/log/ocsinventory-agent.log
可以看到掃描了三個設備以及與 SNMP 資料模型配置相關的OID 數據
[Wed Apr 26 16:07:24 2023][debug] =END=SERVER RET======
[Wed Apr 26 16:07:24 2023][debug] Calling handlers : `end_handler'
[Wed Apr 26 16:07:24 2023][debug] [snmpscan] Calling snmp_end_handler
[Wed Apr 26 16:07:24 2023][debug] [snmpscan] Snmp: Scanning network
[Wed Apr 26 16:07:24 2023][debug] [snmpscan] Snmp: Ending Scanning network
[Wed Apr 26 16:17:18 2023][debug] [snmpscan] Scanning 192.168.0.10 device
[Wed Apr 26 16:23:38 2023][debug] [snmpscan] Scanning 192.168.0.200 device
[Wed Apr 26 16:29:02 2023][debug] [snmpscan] Scanning 192.168.0.8 device
...(略)...
[Wed Apr 26 17:05:06 2023][info] [snmpscan] No more SNMP device to scan
[Wed Apr 26 17:05:06 2023][debug] checking XML
[Wed Apr 26 17:05:06 2023][debug] sending XML
[Wed Apr 26 17:05:06 2023][debug] sending: <?xml version="1.0" encoding="UTF-8"?>
<REQUEST>
  <CONTENT>
    <snmp_default>
      <DefaultAddressIP>127.0.0.1 - 192.168.0.10 - 169.254.122.210 - 192.168.1.48</DefaultAddressIP>
      <DefaultDescription>Linux DS1618 4.4.180+ #42962 SMP Tue Oct 18 15:02:07 CST 2022 x86_64</DefaultDescription>
      <DefaultGateway>255.255.0.0 - 255.255.255.0 - 255.255.255.0 - 255.0.0.0</DefaultGateway>
      <DefaultLocation>Unknown</DefaultLocation>
      <DefaultName>DS1618</DefaultName>
      <DefaultUptime>84 days, 17:16:37.88</DefaultUptime>
    </snmp_default>
    <snmp_default>
      <DefaultAddressIP>192.168.0.200 - 127.0.0.1</DefaultAddressIP>
      <DefaultDescription>SHARP MX-2651</DefaultDescription>
      <DefaultGateway>255.0.0.0 - 255.255.255.0</DefaultGateway>
      <DefaultLocation></DefaultLocation>
      <DefaultName>75:AB:7E</DefaultName>
      <DefaultUptime>8 days, 04:56:29.74</DefaultUptime>
    </snmp_default>
    <snmp_default>
      <DefaultAddressIP></DefaultAddressIP>
      <DefaultDescription>VMware ESXi 5.5.0 build-3116895 VMware, Inc. x86_64</DefaultDescription>
      <DefaultGateway></DefaultGateway>
      <DefaultLocation></DefaultLocation>
      <DefaultName>localhost</DefaultName>
      <DefaultUptime>226 days, 07:24:35.00</DefaultUptime>
    </snmp_default>
    ...(略)...
  </CONTENT>
  <DEVICEID>grafana-2023-04-26-14-53-01</DEVICEID>
  <QUERY>SNMP</QUERY>
</REQUEST>

[Wed Apr 26 17:05:06 2023][debug] [snmpscan] End snmp_end_handler :)
[Wed Apr 26 17:05:06 2023][debug] [download] Calling download_end_handler
[Wed Apr 26 17:05:06 2023][info] [download] Beginning work. I am 1993.
[Wed Apr 26 17:05:06 2023][info] [download] No more package to download.
[Wed Apr 26 17:05:06 2023][debug] [download] End of work...
根據筆者的經驗,執行一段 Class C 的 SNMP 掃描大概需要花一小時。若想要縮短時間可以嘗試修改 snmptimeout 與 snmpretry 參數
因此,您在設定排程的執行週期必須大於 SNMP 的掃描時間。
cat /etc/cron.d/ocsinventory-agent
PATH=/usr/local/sbin:/usr/local/bin:/usr/sbin:/usr/bin:/sbin:/bin:/snap/bin
00 8 * * * root /usr/local/bin/ocsinventory-agent --lazy > /dev/null 2>&1
不然就會造成 SNMP 的掃描還沒執行完,就被下一次的排程給中斷,變成掃描結果永遠無法回傳到 OCS Inventory 伺服器。
SNMP Inventory
到 Inventory 點選 SNMP。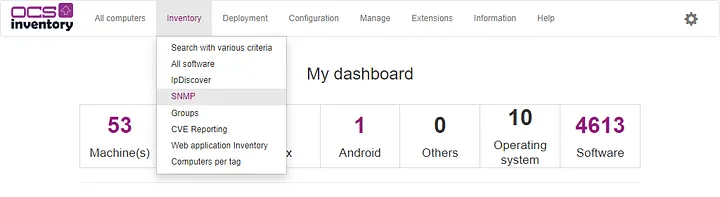
SNMP 掃描在 192.168.0.0/24 找到 16 個網路連接設備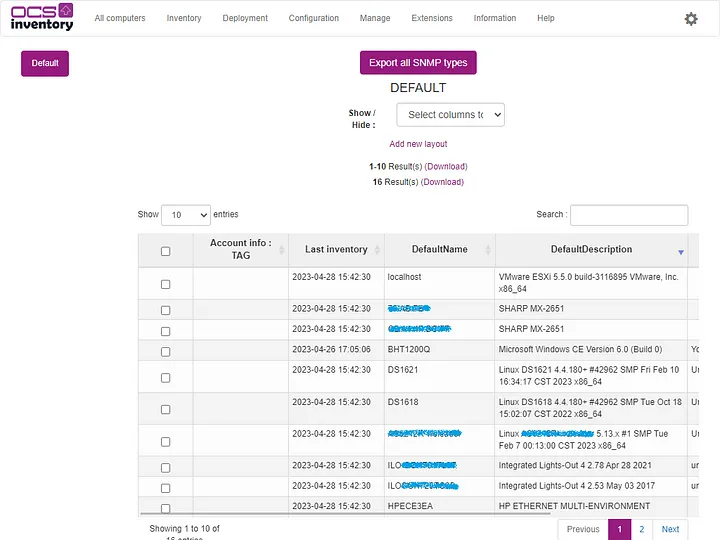
若您發現 Export All SNMP Types 有中文亂碼的問題
主要是 csv 匯出程式的問題
cd /usr/share/ocsinventory-reports/ocsreports/plugins/main_sections/ms_export
sudo vi ms_csv_snmp.php
找到 Generate output page 程式碼區段,在 121 行的地方插入下段程式碼。
$toBeWritten = mb_convert_encoding($toBeWritten , “Big5” , “UTF-8”);
// Generate output page
if ($toBeWritten != "" || (isset($Directory) && file_exists($Directory . $protectedGet['log'])) ) {

    // Work around iexplorer problem
    if (ini_get("zlib.output-compression")) {
        ini_set("zlib.output-compression", "Off");
    }

    // Static headers
    header("Pragma: public");
    header("Expires: 0");
    header("Cache-control: must-revalidate, post-check=0, pre-check=0");
    header("Cache-control: private", false);
    header("Content-type: application/force-download");
    header("Content-Transfer-Encoding: binary");

    if ($toBeWritten != "") {
        // Generate output page for DB data export
        $toBeWritten = mb_convert_encoding($toBeWritten , "Big5" , "UTF-8");
        header("Content-Disposition: attachment; filename=\"export.csv\"");
        header("Content-Length: " . strlen($toBeWritten));
        echo $toBeWritten;
    } else {
            // Generate output page for log export
                $filename = $Directory . $protectedGet['log'];
        header("Content-Disposition: attachment; filename=\"" . $protectedGet['log'] . "\"");
        header("Content-Length: " . filesize($filename));
        readfile($filename);
    }

} else {

    // Nothing to export
    require_once (HEADER_HTML);
    msg_error($l->g(920));
    require_once(FOOTER_HTML);

}
不需要重啟伺服器,重新下載一次即可正常顯示中文了。
下一篇我們來教大家如何在 OCS Inventory 使用郵件通知功能,敬請期待。
參考文件
請問代理程式的組態設定中ca的值要填什麼呢
照著如文中所述去設定會在log檔案出現no such file or directory的錯誤
我的網站已經從let's encrypt取得ssl憑證了
是不是要將let's encrypt的cert.pem所在的路徑填入呢?
是的,上一篇文章有寫喔
https://ithelp.ithome.com.tw/articles/10317523
去您的 OCS Inventory Server 將 cacert.pem 取出
使用公鑰基礎設施 PKI,例如 Let’s Encrypt。
sudo cp /etc/letsencrypt/live/your_domain/cert.pem ~/cacert.pem
sudo chown $USER:$USER ~/cacert.pem
就看您 cacert.pem 要放在哪裡都可以
如果您執行 SNMP Scan 的主機剛好是 OCS Inventory Server 的話
就直接修改如下
ca=/etc/letsencrypt/live/your_domain/cert.pem

