昨天我們使用了自製訓練集來做模型訓練,今天讓我們來實際運用!
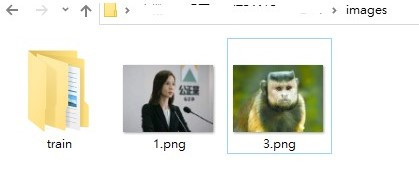
先另外下載好要分類的圖片,以我的例子我讓模型學習分辨人或猴子,因此我下載人與猴子圖片來讓模型分辨。
我們昨天有將訓練好模型權重儲存,而今天我們要使用則需要先定義模型,下面我們一步一步來。
import torch
import torch.nn as nn
from PIL import Image
import torchvision.transforms as transforms
import numpy as np
import torch.nn.functional as F
import matplotlib.pyplot as plt
import os#系統相關操作
因為我們是要用昨天模型的權重來辨別,因此我們這邊神經網路定義與昨天一樣。
class CNN(nn.Module):
    def __init__(self):
        #呼叫nn.Module裡面init的資料
        super().__init__()
        #定義神經網路
        self.conv1 = nn.Conv2d(3, 16, 3)
        self.pool = nn.MaxPool2d(2, 2)
        self.conv2 = nn.Conv2d(16, 32, 3)
        self.fc1 = nn.Linear(32 * 30 * 30, 120)
        self.fc2 = nn.Linear(120, 84)
        self.fc3 = nn.Linear(84, 2)

    def forward(self, x):
        #定義操作
        x = self.pool(F.relu(self.conv1(x)))  # 第一個卷積層和池化層
        x = self.pool(F.relu(self.conv2(x)))  # 第二個卷積層和池化層
        x = x.view(x.size(0), -1)  # 展平特徵圖  x.size(0) 來獲取批次大小,然 -1 來自動計算展平後的尺寸
        x = F.relu(self.fc1(x))  # 第一個全連接層
        x = F.relu(self.fc2(x))  # 第二個全連接層
        x = self.fc3(x)  # 最後一個全連接層(輸出層)
        return x
model = CNN()  # 創建未訓練的模型
model.load_state_dict(torch.load('model_weights.pth'))  # 載入訓練好的模型權重
model.eval()  # 切換模型到驗證模式
這裡一樣要model.eval()才不會改到訓練好的權重
transform = transforms.Compose([
    transforms.Resize((128,128)),
    transforms.ToTensor(), #轉換成張量
    transforms.Normalize((0.5, 0.5, 0.5), (0.5, 0.5, 0.5)) # 正規化
    ])
x_valid = transform(Image.open('images/1.png').convert("RGB"))
label_encoding = {i:cnt for cnt, i in enumerate(os.listdir('images/train'))}
label_decoding = {v:k for k, v in label_encoding.items()}
print(np.shape(x_valid))
img = x_valid.unsqueeze(0).to("cpu")
output = model(img)
_, pred = torch.max(output, dim = 1)         # 找到最大機率的位子

label = pred.tolist()[0]                     # 取得Label
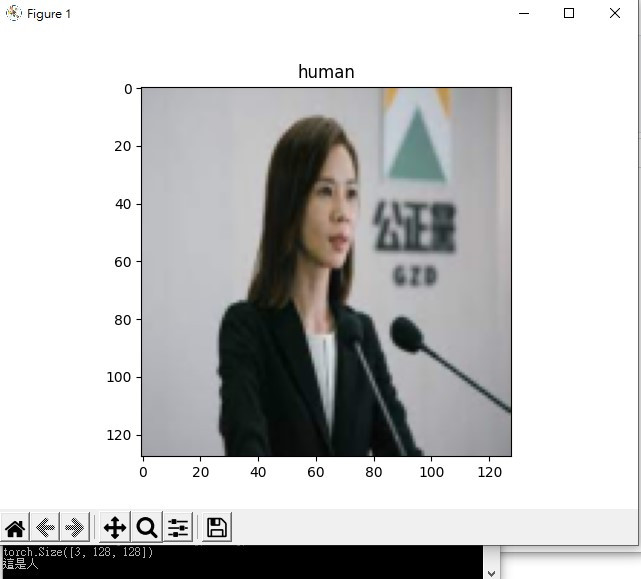
前面圖片經過一系列操作,這裡我們要反向操作一次把圖片顯示出來。
npimg = (x_valid/2+0.5).numpy()          # 還原正規化
npimg = np.transpose(npimg, (1, 2, 0))       # 維度還原

if int(label_decoding[label]) == 0 :
    plt.title('monkey')
    print('這是猴子')
elif int(label_decoding[label]) == 1:
    plt.title('human')
    print('這是人')

plt.imshow(npimg)                            # 顯示圖片
plt.show()
print('Label:',label_decoding[label])
最後我們依照標籤列出對應文字,下面我們來看看結果

我們還可以把分辨過的圖片移動到指定資料夾,完整程式碼如下
這裡我們多使用了import shutil 用於檔案操作
檔案位置我們也另外在上面宣告img_path = 'images/3.png'
因此這段程式碼x_valid = transform(Image.open(img_path).convert("RGB"))也有更改
最後就是if判斷有新增
import torch
import torch.nn as nn
from PIL import Image
import torchvision.transforms as transforms
import numpy as np
import torch.nn.functional as F
import matplotlib.pyplot as plt
import os#系統相關操作
import shutil  # 用於檔案操作


img_path = 'images/3.png'

class CNN(nn.Module):
    def __init__(self):
        #呼叫nn.Module裡面init的資料
        super().__init__()
        #定義神經網路
        self.conv1 = nn.Conv2d(3, 16, 3)
        self.pool = nn.MaxPool2d(2, 2)
        self.conv2 = nn.Conv2d(16, 32, 3)
        self.fc1 = nn.Linear(32 * 30 * 30, 120)
        self.fc2 = nn.Linear(120, 84)
        self.fc3 = nn.Linear(84, 2)

    def forward(self, x):
        #定義操作
        x = self.pool(F.relu(self.conv1(x)))  # 第一個卷積層和池化層
        x = self.pool(F.relu(self.conv2(x)))  # 第二個卷積層和池化層
        x = x.view(x.size(0), -1)  # 展平特徵圖  x.size(0) 來獲取批次大小,然 -1 來自動計算展平後的尺寸
        x = F.relu(self.fc1(x))  # 第一個全連接層
        x = F.relu(self.fc2(x))  # 第二個全連接層
        x = self.fc3(x)  # 最後一個全連接層(輸出層)
        return x

model = CNN() # we do not specify ``weights``, i.e. create untrained model
model.load_state_dict(torch.load('model_weights.pth'))
model.eval()

transform = transforms.Compose([
    transforms.Resize((128,128)),
    transforms.ToTensor(), #轉換成張量
    transforms.Normalize((0.5, 0.5, 0.5), (0.5, 0.5, 0.5)) # 正規化
    ])
x_valid = transform(Image.open(img_path).convert("RGB"))
label_encoding = {i:cnt for cnt, i in enumerate(os.listdir('images/train'))}
label_decoding = {v:k for k, v in label_encoding.items()}
print(np.shape(x_valid))
img = x_valid.unsqueeze(0).to("cpu")
output = model(img)
_, pred = torch.max(output, dim = 1)         # 找到最大機率的位子

label = pred.tolist()[0]                     # 取得Label
npimg = (x_valid/2+0.5).numpy()          # 還原正規化
npimg = np.transpose(npimg, (1, 2, 0))       # 維度還原
這裡會先看指定資料夾在不在,若不再則新增
# 判別後儲存的資料夾路徑
monkey_dir = 'images/Classification/monkey'
human_dir = 'images/Classification/human'

# 確認資料夾存在或創建新資料夾
if not os.path.exists(monkey_dir):
    os.makedirs(monkey_dir)

if not os.path.exists(human_dir):
    os.makedirs(human_dir)
if邏輯判斷中增加了 shutil.move 來把判別好的圖片移動到指定資料夾
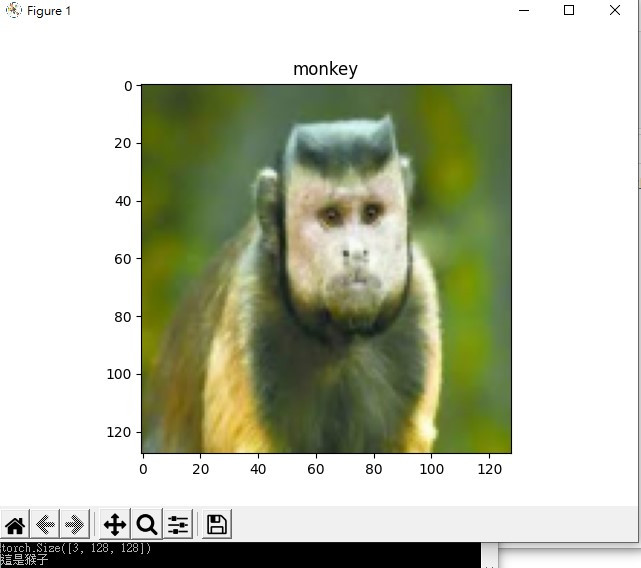
if int(label_decoding[label]) == 0 :
    plt.title('monkey')
    print('這是猴子')
    shutil.move(img_path, os.path.join(monkey_dir, '3.png'))
elif int(label_decoding[label]) == 1:
    plt.title('human')
    print('這是人')
    shutil.move(img_path, os.path.join(human_dir, '3.png'))

plt.imshow(npimg)                            # 顯示圖片
plt.show()
print('Label:',label_decoding[label])
下面我們來看看結果

以上就是今天內容,主要還是讓結果實際展示出來,比較有模型實際運作的感覺,把訓練好的模型拿來使用,辨別圖片後面還能讓模型判別完移動到指定資料夾,後續則可以加上爬蟲與for迴圈,把大量圖片進行分類,就可以達到自動分類下載下來的資料,剩下我們明天說,明天見!
